
goobay 64900
goobay Digital Timer 64900 User Manual
Model: 64900
1. Introduction
Thank you for choosing the goobay Digital Timer 64900. This programmable timer socket is designed to automate the switching of electrical appliances, enhancing convenience and security in your home or office. With its precise minute-by-minute programming, random mode for burglary protection, and a reliable battery backup, this device offers flexible control over your connected devices. Please read this manual carefully before use to ensure proper operation and to maximize the benefits of your new digital timer.
2. Safety Instructions
- This device is designed for indoor use only (IP20 protection class). Do not expose it to moisture or extreme temperatures.
- Ensure the total load of connected appliances does not exceed the maximum capacity of 3680 W (230 V AC, 16 A). Overloading can cause damage to the device and pose a fire hazard.
- Do not disassemble or modify the timer. Repairs should only be performed by qualified personnel.
- Keep out of reach of children.
- Always unplug the timer from the wall socket before cleaning. Clean only with a dry, soft cloth.
- If the device is damaged, discontinue use immediately and contact customer support.
3. Package Contents
Please check the package contents upon unpacking.
- goobay Digital Timer 64900
- User Manual (this document)
4. Product Features
- Digital timer with earthing contact connection (Type F).
- Up to 10 different programs per day and 16 total settings.
- Individual program execution on pre-defined days of the week.
- Large, easy-to-read LCD screen (4.8 x 3.8 cm).
- 8 control buttons for easy operation.
- Status LED indicator.
- 24-hour time format.
- Random mode for simulating presence and burglary protection.
- Fixed emergency NiMH battery for over 100 days of program backup during power outages.
- Maximum load capacity: 3680 W at 230 V (AC) and 16 A.
- Reduces power consumption by interrupting standby mode.
5. Product Overview

Figure 1: Front view of the goobay Digital Timer, showing the LCD display, control buttons, and power socket. The display shows "7:05" and "AUTO".
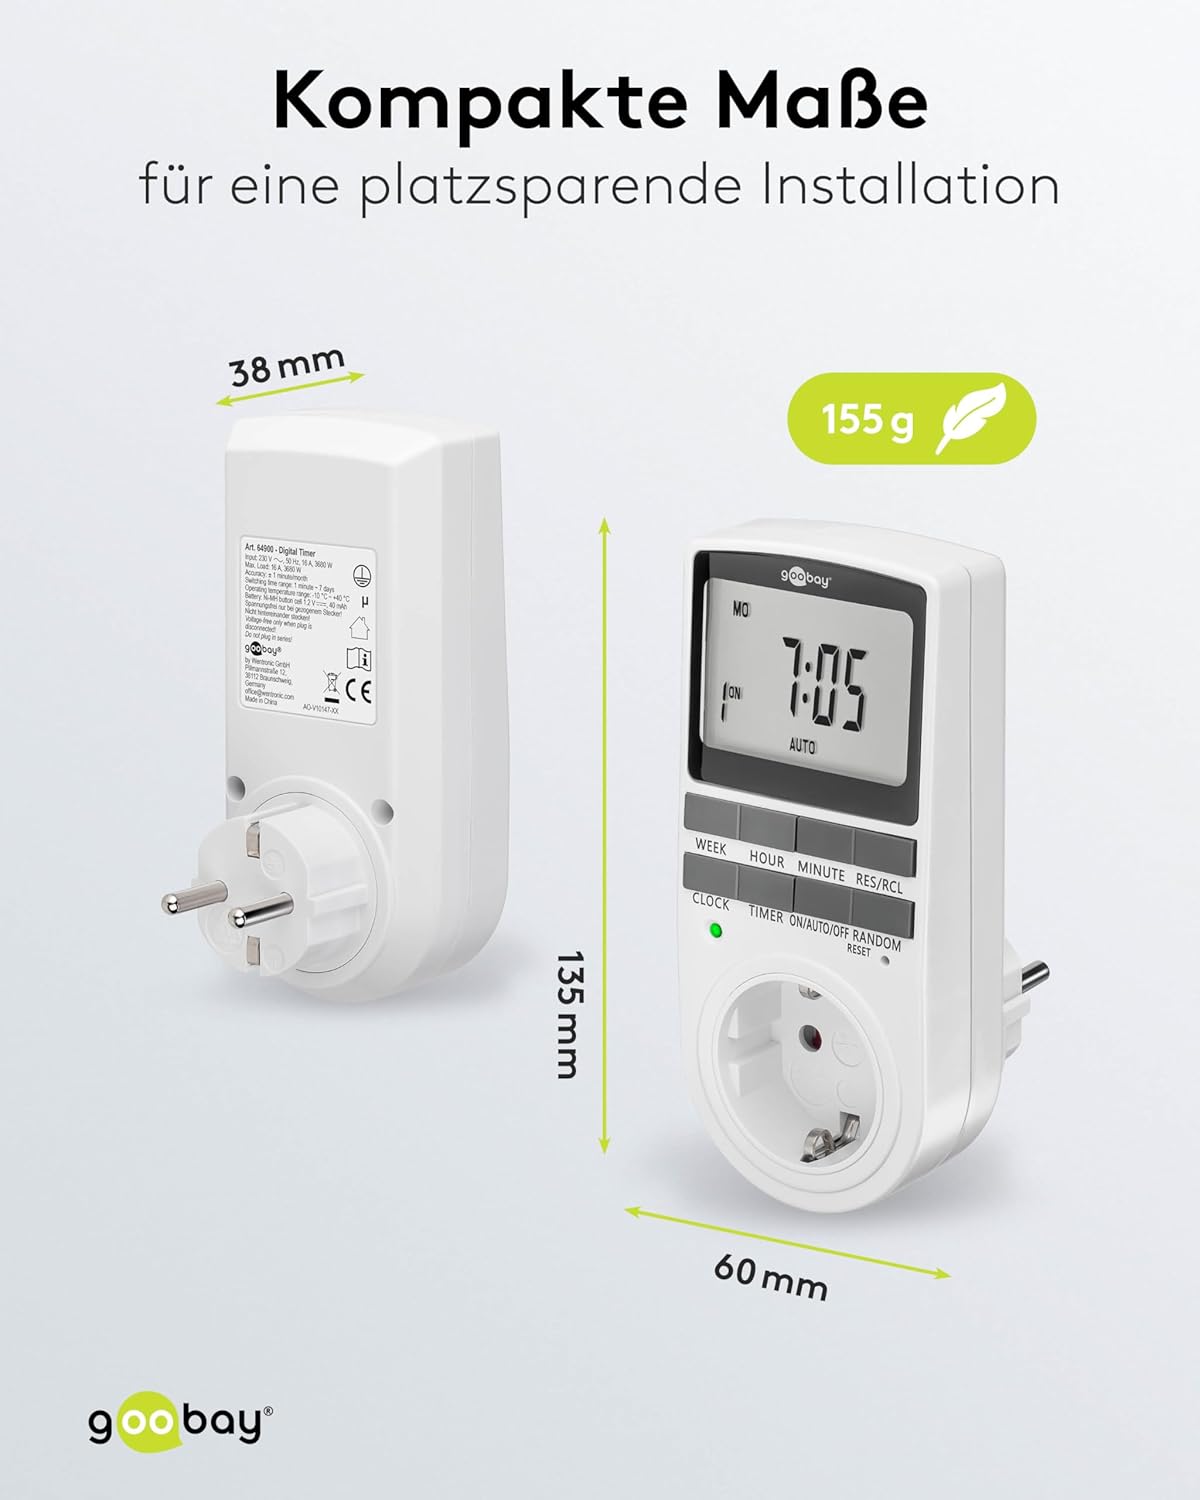
Figure 2: Side and front view of the goobay Digital Timer illustrating its compact dimensions: 135 mm height, 60 mm width, and 38 mm depth. The weight is 155g.
6. Setup
6.1 Initial Charging
Before first use, plug the timer into a live wall socket for at least 4 hours to charge the internal NiMH battery. This battery retains your programmed settings for over 100 days in case of a power outage or when the timer is unplugged.
6.2 Resetting the Timer
To clear all previous settings and reset the timer to its default state, locate the small "RESET" button (usually a recessed pinhole) on the front panel. Use a pointed object (like a pen tip) to press and hold the button for a few seconds until the display clears.
6.3 Setting Current Time
- Press the CLOCK button. The display will show the current time.
- While holding the CLOCK button, press the WEEK button to select the current day of the week (MO, TU, WE, TH, FR, SA, SU).
- While holding the CLOCK button, press the HOUR button to set the current hour (0-23).
- While holding the CLOCK button, press the MINUTE button to set the current minute (0-59).
- Release the CLOCK button. The time is now set.
7. Operating Instructions
7.1 Programming ON/OFF Times
The timer allows for up to 10 ON/OFF programs. Each program consists of an ON time and an OFF time.
- Press the TIMER button once. The display will show "1 ON". This is for the first ON time setting.
- Press WEEK to select the day(s) for this program. Options include:
- MO, TU, WE, TH, FR, SA, SU (all days)
- MO TU WE TH FR SA SU (individual days)
- MO TU WE TH FR (weekdays)
- SA SU (weekend)
- MO TU WE TH FR SA
- MO WE FR
- TU TH SA
- MO TU WE
- TH FR SA
- And other combinations.
- Press HOUR to set the desired ON hour.
- Press MINUTE to set the desired ON minute.
- Press the TIMER button again. The display will show "1 OFF". This is for the first OFF time setting.
- Repeat steps 2-4 to set the desired OFF day(s), hour, and minute.
- Press the TIMER button to cycle through "2 ON", "2 OFF", and so on, up to "10 ON" and "10 OFF". Repeat the setting process for each program.
- After setting all desired programs, press the CLOCK button to return to the current time display.
Note: If you do not need all 10 programs, simply press the CLOCK button to exit programming mode after setting your last required program.
7.2 Manual Override (ON/AUTO/OFF)
The ON/AUTO/OFF button allows you to manually control the timer's output.
- Press ON/AUTO/OFF repeatedly to cycle through the modes:
- ON: The connected appliance is continuously ON, overriding all programs.
- OFF: The connected appliance is continuously OFF, overriding all programs.
- AUTO: The timer operates according to the programmed ON/OFF times. This is the standard operating mode for automated control.
7.3 Random Mode (Burglary Protection)
The random mode is designed to simulate presence by randomly switching connected lighting or other appliances ON and OFF, deterring potential intruders.
- Press the RANDOM button. The display will show "RANDOM".
- In this mode, the timer will randomly turn the connected appliance ON and OFF within a certain time window (e.g., 10-31 minutes ON, 26-42 minutes OFF).
- To deactivate random mode, press the RANDOM button again. The "RANDOM" indicator will disappear from the display.
Note: Random mode typically overrides programmed settings while active. Ensure the timer is in AUTO mode before activating RANDOM mode for optimal effect.
7.4 Clearing Programs
To clear a specific program:
- Press the TIMER button repeatedly until the desired program number (e.g., "3 ON") appears on the display.
- Press the RES/RCL button. The program will be cleared.
- Press CLOCK to exit.
8. Maintenance
- Clean the timer regularly with a dry, soft cloth. Do not use abrasive cleaners or solvents.
- Do not immerse the device in water or any other liquid.
- The internal battery is designed for long-term use and does not require replacement under normal conditions. If the battery backup fails to hold settings, the unit may need servicing.
9. Troubleshooting
| Problem | Possible Cause | Solution |
|---|---|---|
| Display is blank or unresponsive. | Battery not charged or completely drained. | Plug the timer into a live wall socket for at least 4 hours to charge the internal battery. Press the RESET button. |
| Appliance does not turn ON/OFF at programmed times. | Timer is not in AUTO mode. Incorrect program settings. | Press ON/AUTO/OFF until "AUTO" is displayed. Review and correct program settings (Section 7.1). Ensure the appliance is properly connected and functional. |
| Random mode not working. | Random mode not activated. | Press the RANDOM button until "RANDOM" appears on the display. |
| Timer loses settings after unplugging. | Internal battery not sufficiently charged or faulty. | Ensure the timer is plugged in for at least 4 hours to fully charge the battery. If the issue persists, the battery may be faulty; contact customer support. |
10. Specifications
- Model: 64900
- Operating Voltage: 230 V (AC)
- Max. Switching Capacity: 3680 W / 16 A
- Power Consumption (Zero Load): 1 W max.
- Protection Class: IP20 (Indoor use only)
- Battery Backup: NiMH, >100 days
- Product Dimensions: 7.6 x 6 x 13.5 cm (D x W x H)
- Item Weight: 155 g
- Color: White
- Material: Resin
11. Warranty and Support
goobay products are manufactured with quality and reliability in mind. For information regarding warranty terms and conditions, please refer to the warranty card included with your purchase or visit the official goobay website.
For technical support, troubleshooting assistance, or spare parts, please contact your local goobay dealer or visit the goobay support portal. When contacting support, please have your product model number (64900) and purchase details ready.
Website: www.goobay.de (This is a general link, specific support links may vary by region.)
Related documents64900


Ask a question about this manual
Ask about setup, troubleshooting, compatibility, parts, safety, or missing instructions. Manuals+ will review the question and use this page’s manual context to help answer it.