
1. Introduction
Thank you for purchasing the Snakebyte GAMEPAD RGB S Wireless Controller. This controller is designed to enhance your gaming experience on Nintendo Switch, Switch 2, Switch OLED, and Switch Lite consoles. It features Hall Effect sticks for precision, customizable RGB lighting, programmable back buttons, and a turbo function. Please read this manual carefully to ensure proper use and maintenance of your device.
2. Safety Information
For detailed safety instructions, please refer to the official safety document provided by Snakebyte. A PDF document titled "Informations de sécurité (PDF)" is available for download. Always follow basic safety precautions when using electronic devices.
- Do not expose the controller to extreme temperatures or humidity.
- Avoid dropping or subjecting the controller to strong impacts.
- Keep out of reach of small children.
- Do not attempt to disassemble or modify the controller.
- Use only the provided or recommended charging cable.
3. Package Contents
Ensure all items are present in the package:
- Snakebyte GAMEPAD RGB S Wireless Controller
- USB-C Charging Cable
- Instruction Manual (this document)
4. Product Overview
The Snakebyte GAMEPAD RGB S features a transparent design with integrated RGB lighting and ergonomic grips. Key components include:
- Hall Effect Analog Sticks: For precise control and extended durability, preventing stick drift.
- D-Pad: Standard directional input.
- Action Buttons (A, B, X, Y): Standard gaming input.
- Shoulder Buttons (L, R) & Triggers (ZL, ZR): For various in-game actions.
- Programmable Back Buttons (M1, M2): Two additional buttons on the rear for custom macros or remapping.
- Turbo Button: Enables rapid fire functionality.
- Home Button: Returns to the console's home screen.
- Screenshot Button: Captures screenshots.
- Plus (+) and Minus (-) Buttons: Standard menu navigation.
- RGB Lighting Strips: Integrated into the controller's transparent casing.
- USB-C Port: For charging the internal battery.
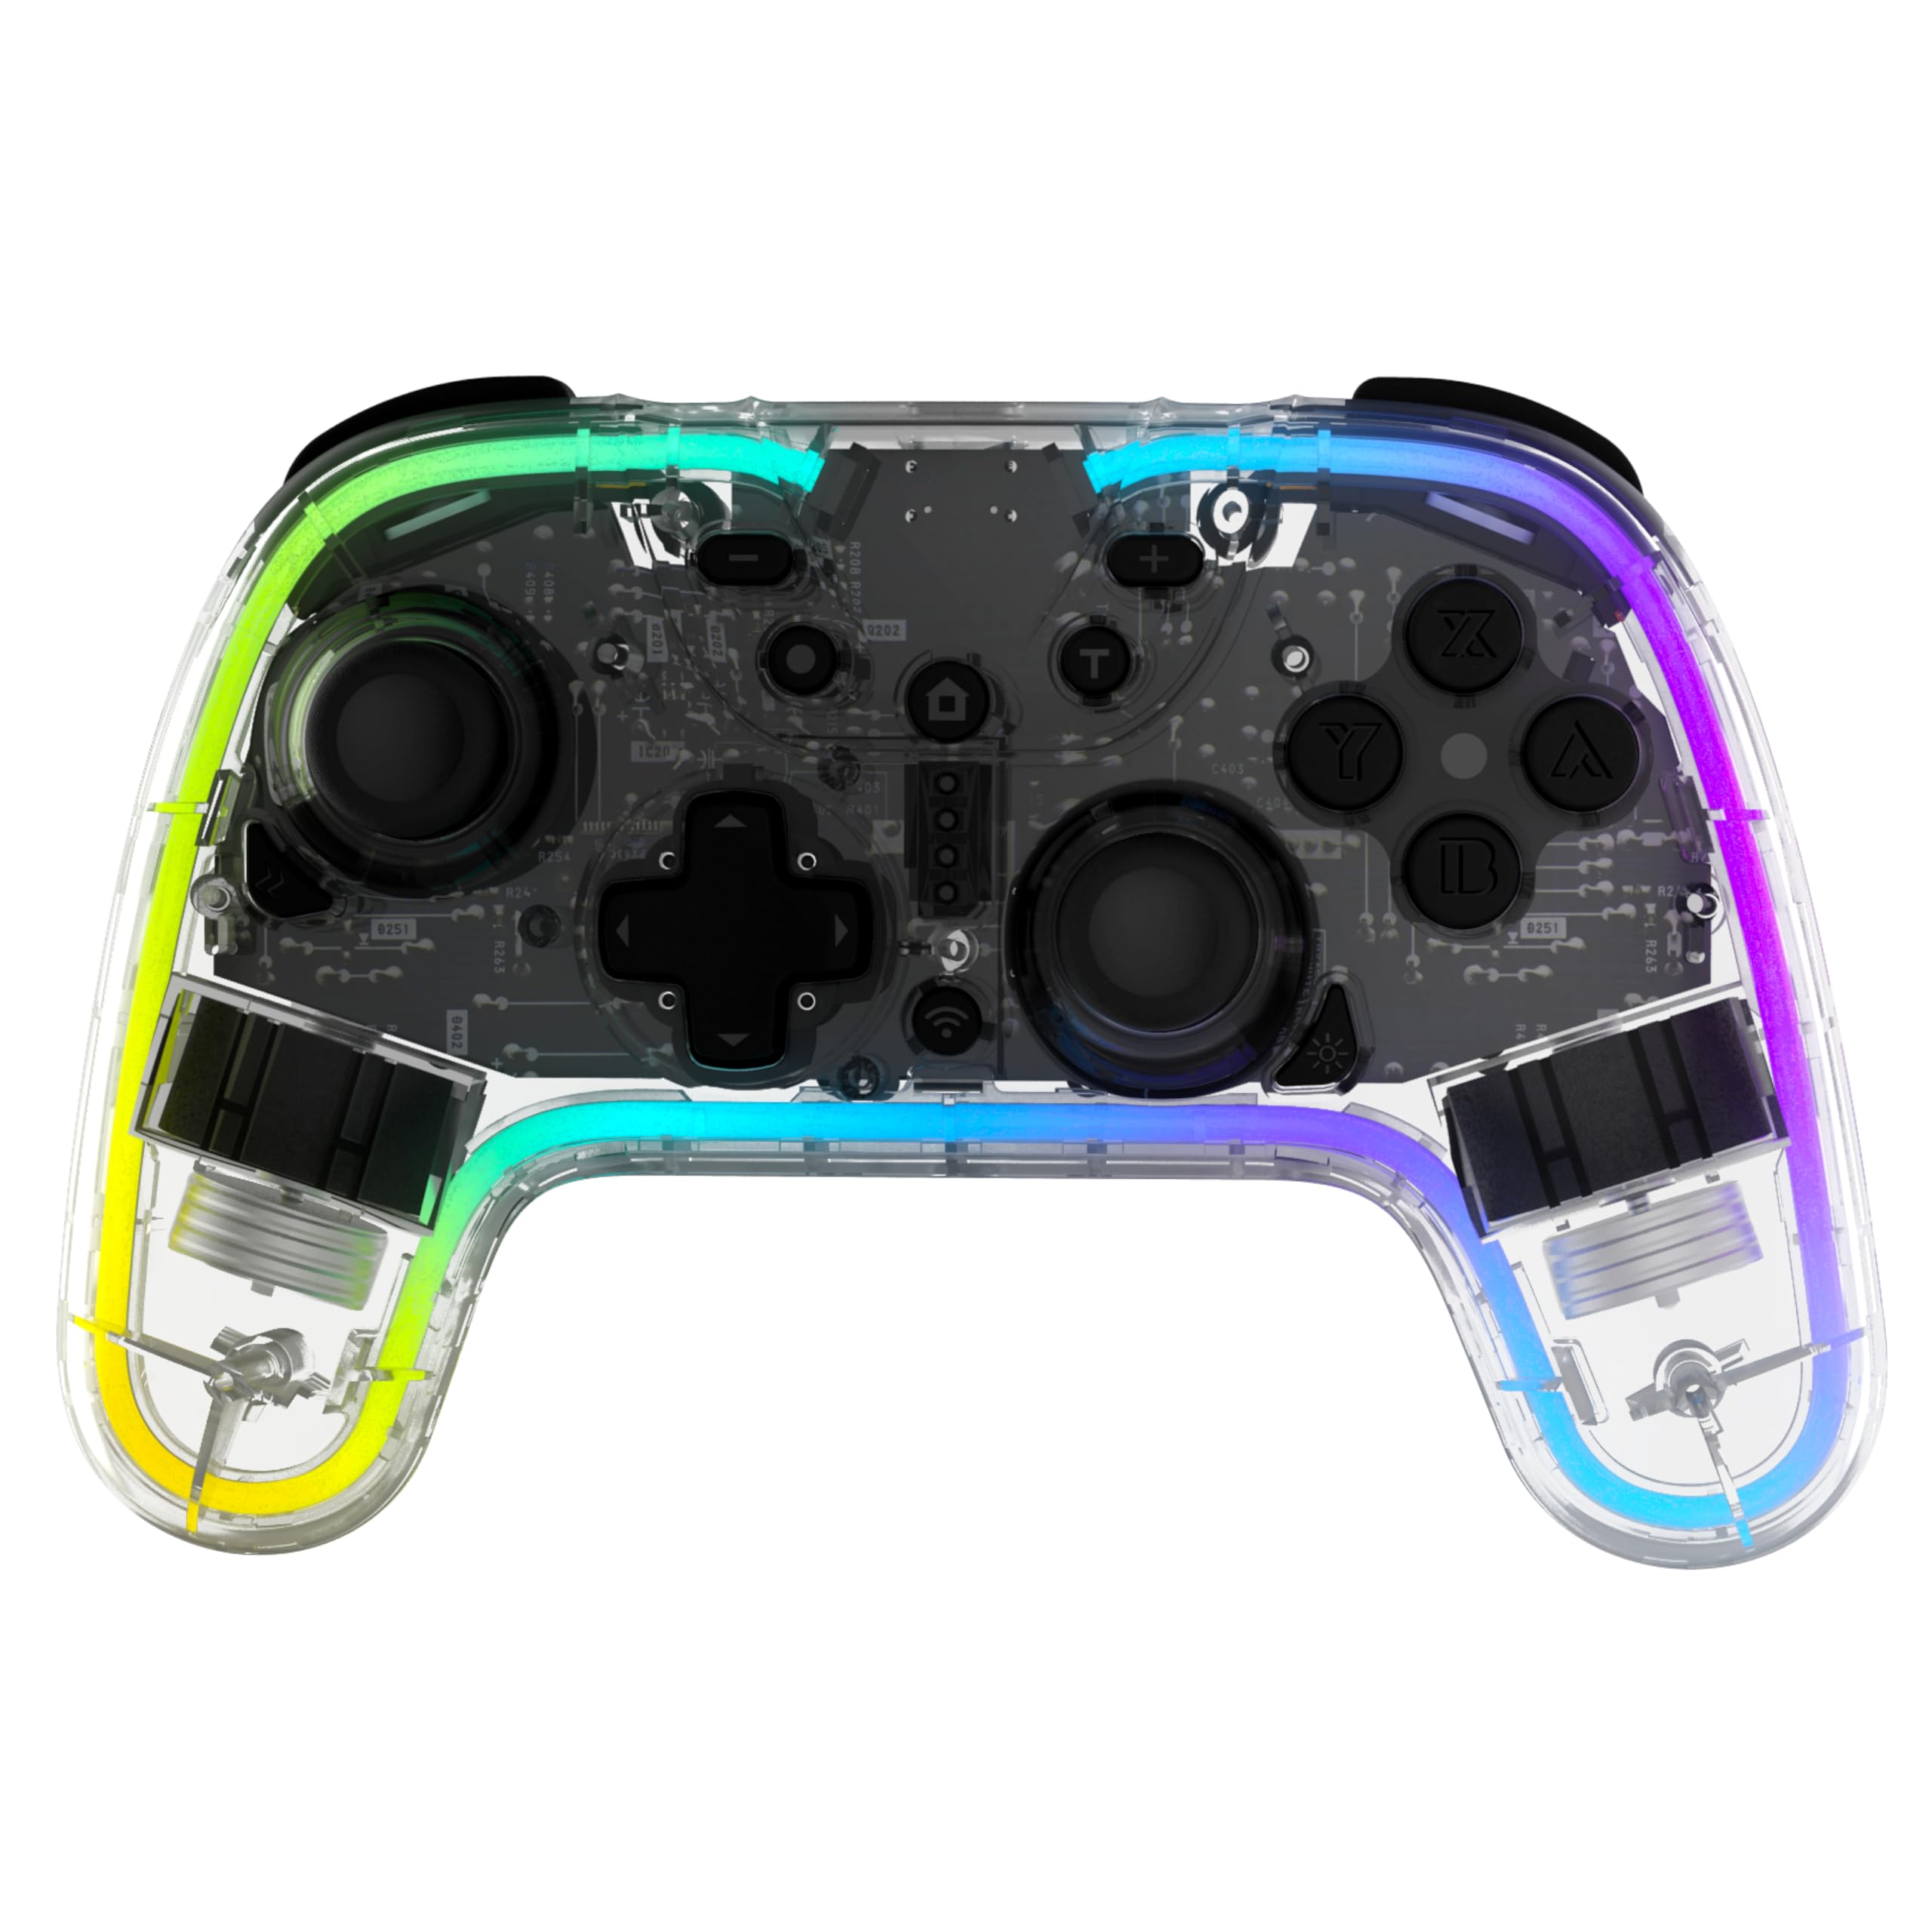
Image: Front view of the Snakebyte GAMEPAD RGB S Wireless Controller, showcasing its transparent design and button layout.

Image: A collection of Snakebyte GAMEPAD RGB S controllers rendered in vibrant neon colors on a black background, showing multiple transparent, layered designs in yellow, purple, and blue.
5. Setup
5.1 Charging the Controller
- Connect the supplied USB-C cable to the charging port on the top of the controller.
- Connect the other end of the USB-C cable to a USB power source (e.g., Nintendo Switch dock, USB wall adapter, or computer USB port).
- The controller's indicator lights will show charging status. A full charge typically takes 2-3 hours.
- Once fully charged, the indicator lights will change or turn off. The controller offers 6-10 hours of gameplay on a full charge.
5.2 Pairing with Nintendo Switch
The controller is compatible with Nintendo Switch, Switch 2, Switch OLED, and Switch Lite.
- On your Nintendo Switch console, go to the HOME Menu.
- Select "Controllers", then "Change Grip/Order".
- Press and hold the Connect button (usually a small button on the top or back of the controller) for 3 seconds until the indicator lights begin to flash rapidly.
- Once the controller is detected by the Switch, press the L and R buttons simultaneously on the controller as prompted by the console.
- The controller will vibrate briefly, and one or more player indicator lights will remain solid, indicating successful pairing.
- You can also wake up the console using the Home button on the controller once it's paired.
6. Operation
6.1 RGB Lighting Control
The controller features customizable RGB lighting with 6 fixed colors and 3 dynamic modes, each with 4 brightness levels.
- Changing Colors/Modes: Refer to the specific button combination in your controller's quick start guide (often a dedicated button or a combination with the Turbo button).
- Adjusting Brightness: Use the designated button combination to cycle through the 4 brightness levels.

Image: Light painting photography with rainbow colors showing motion trails of illuminated objects on a dark background, creating curved streaks of vivid colors across the frame, representing the RGB lighting.
6.2 Programmable Back Buttons (M1, M2)
The two back buttons (M1 and M2) can be configured for macros or remapping. Note: GR/GL buttons on Switch 2 are not assignable.
- To Remap a Button:
- Press and hold the Program button (usually a small button on the back or bottom) until the indicator light flashes.
- Press the back button (M1 or M2) you wish to program.
- Press the button on the front of the controller you want to assign to the back button.
- Press the Program button again to save. The indicator light will stop flashing.
- To Create a Macro: (If supported, specific instructions may vary)
- Press and hold the Program button until the indicator light flashes.
- Press the back button (M1 or M2) you wish to program.
- Input the sequence of buttons you want to record as a macro.
- Press the Program button again to save. The indicator light will stop flashing.
6.3 Vibration Function
The controller features dual vibration intensity. The vibration level can be adjusted to suit your preference.
- Adjusting Vibration: Refer to the specific button combination in your controller's quick start guide (often a combination with the Turbo button or a dedicated button).
6.4 Turbo Button
The Turbo button allows for rapid, repeated input of a chosen button. The speed is adjustable across 3 levels.
- Activating Turbo:
- Press and hold the Turbo button.
- While holding Turbo, press the action button (e.g., A, B, X, Y, L, R, ZL, ZR) you wish to apply turbo to.
- Release both buttons. The selected action button will now activate turbo when pressed.
- Adjusting Turbo Speed:
- While holding the Turbo button, move the right analog stick up or down to cycle through the 3 speed levels.
- Deactivating Turbo:
- Press and hold the Turbo button.
- While holding Turbo, press the action button that has turbo activated.
- Release both buttons. Turbo will be deactivated for that specific button.
- To clear all turbo settings, press and hold the Turbo button for 5 seconds.

Image: Abstract digital art featuring a glowing red geometric shape on a dark background with smoke effects, highlighting the Turbo button area of the controller.
7. Maintenance
- Cleaning: Use a soft, dry cloth to clean the controller. Do not use harsh chemicals or abrasive materials.
- Storage: Store the controller in a cool, dry place away from direct sunlight when not in use.
- Software Updates: The controller's firmware can be updated via the Snakebyte website if necessary to ensure compatibility and optimal performance. Visit the official Snakebyte support page for instructions and update files.
8. Troubleshooting
| Problem | Solution |
|---|---|
| Controller does not turn on. | Ensure the controller is fully charged. Connect it to a power source using the USB-C cable. |
| Controller does not pair with Switch. |
|
| Input lag or disconnection. |
|
| Hall Effect sticks are not precise. |
|

Image: A detailed diagram illustrating the internal mechanism of Hall Effect analog sticks, emphasizing their anti-drift technology.
9. Specifications
| Model Number | SB922558 |
| Compatibility | Nintendo Switch, Switch 2, Switch OLED, Switch Lite |
| Connectivity | Wireless |
| Battery Type | 1 Lithium-ion (included) |
| Battery Life | Up to 6-10 hours |
| Charging Port | USB-C |
| Dimensions (L x W x H) | 13.7 x 6.3 x 16.5 cm |
| Weight | 308 grams |
| Special Features | RGB Lighting, Hall Effect Sticks, Programmable Back Buttons, Turbo Function, Vibration Function |
10. Warranty and Support
Snakebyte products are designed for quality and reliability. For warranty information, technical support, or service inquiries, please visit the official Snakebyte website or contact their customer support. Keep your proof of purchase for warranty claims.
Official Website: www.snakebyte.com (This is a placeholder, please verify the actual support URL if available)
