1. Introduction
This manual provides essential instructions for the safe and proper installation, operation, and maintenance of your INTERGREAT 53-inch Wall-Mount Gun Safe. Please read this manual thoroughly before using the product to ensure optimal performance and security.
2. Important Safety Information
- Always secure the safe to the wall and floor to prevent tipping. Reserved holes are provided at the bottom and back of the safe for this purpose.
- Be aware of the anti-theft alarm system. Follow the instructions for deactivating it before attempting to open the safe if the alarm has been triggered.
- Keep all keys and access codes in a secure location, away from unauthorized individuals, especially children.
- Ensure the safe is installed in a location that is dry and protected from extreme temperatures.
3. Product Features
The INTERGREAT 53-inch Wall-Mount Gun Safe is designed for secure storage of firearms and other valuables. Key features include:
- Hidden Design: Engineered for in-wall installation between standard 16-inch on-center studs, allowing for discreet placement.
- Multiple Unlocking Methods: Offers three access options: a digital keypad, a fingerprint sensor, and emergency keys.
- Adjustable Interior: Features three removable shelves and key hooks for organized storage. Shelves can be adjusted or removed to accommodate items of various sizes.
- Spacious Interior: Designed to store multiple rifles, pistols, ammunition, and other accessories.
- Anti-Theft Alarm System: Activates a 60-second warning beep after three consecutive incorrect password attempts or significant movement/bumping.
- Door Storage: Includes multiple textile bags on the inside of the door for additional storage of ammunition, pistols, or other small accessories.
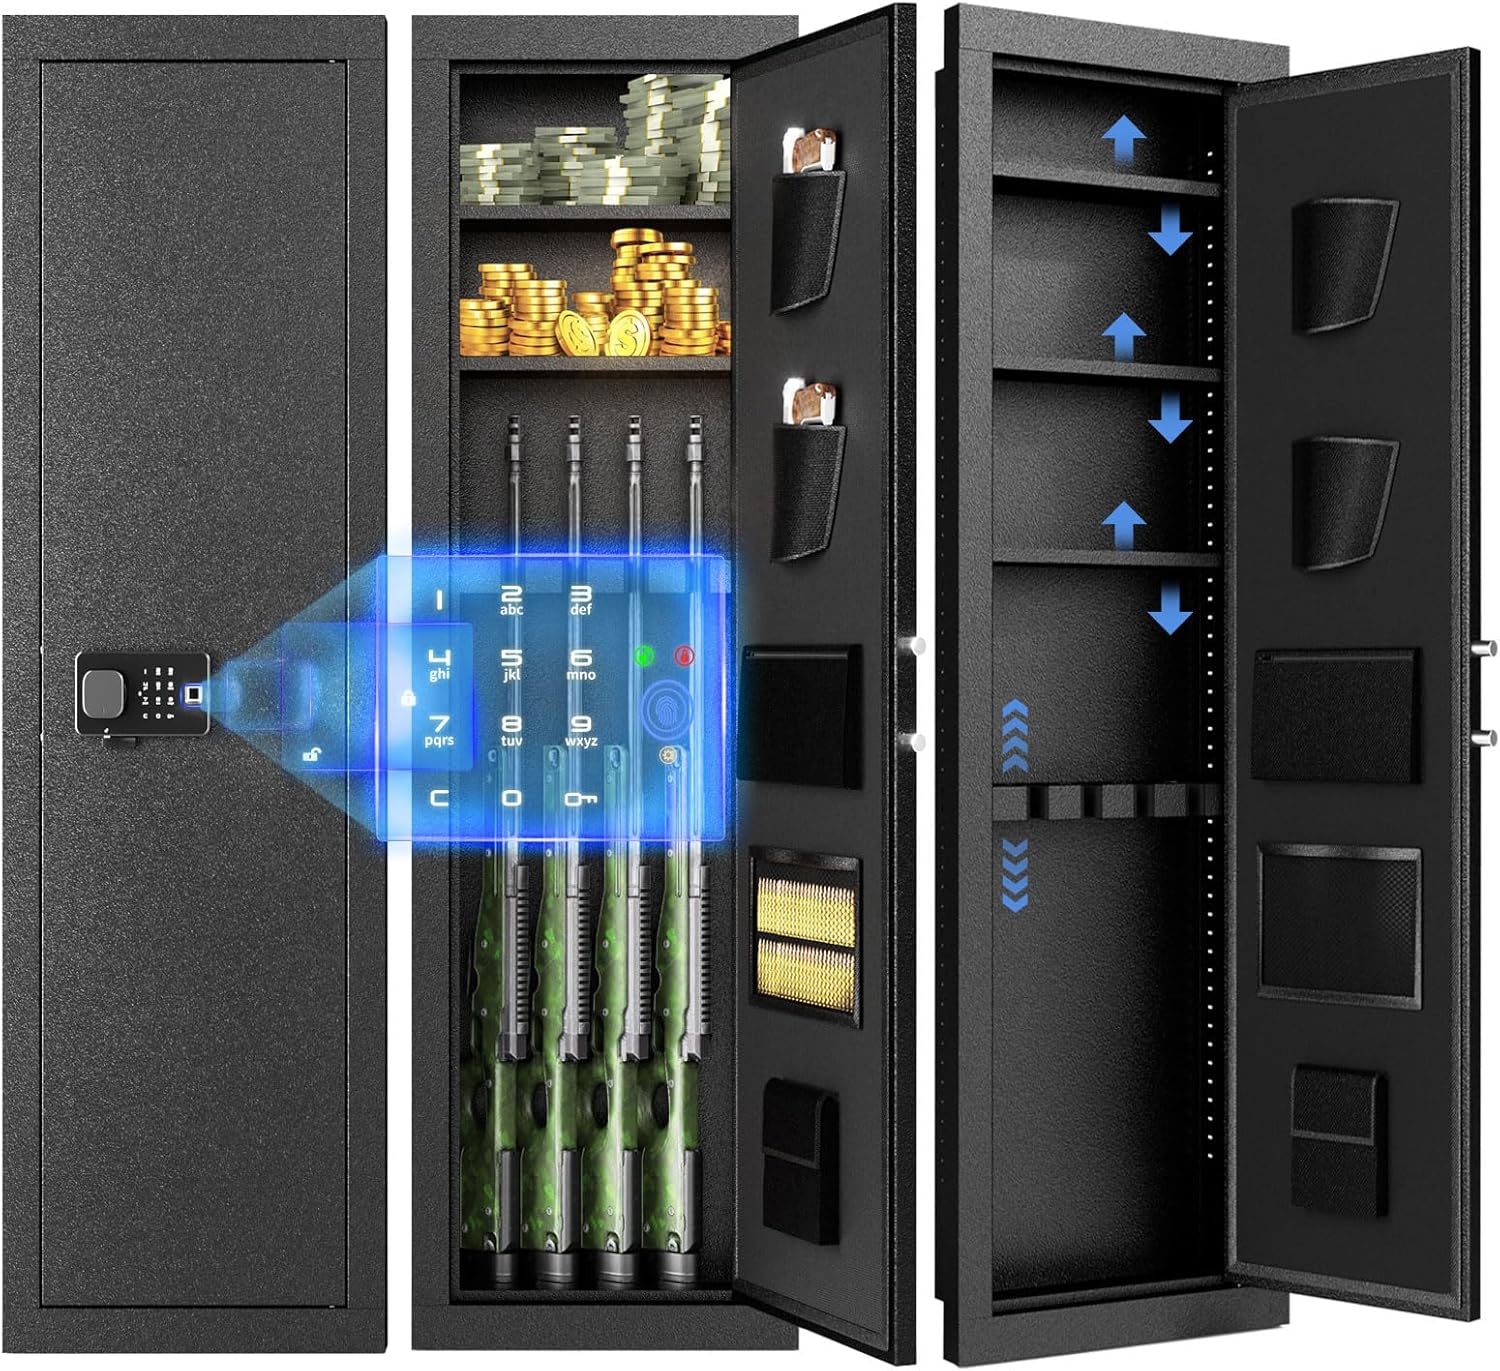
Figure 3.1: Overview of the INTERGREAT 53-inch Wall-Mount Gun Safe, illustrating its exterior and interior storage capabilities for firearms and other items.
4. Setup and Installation
The INTERGREAT 53-inch Wall-Mount Gun Safe is designed for installation between wall studs. Proper installation is crucial for security and stability.
4.1. Site Selection
Choose a location with standard 16-inch on-center wall studs. The exterior dimensions of the safe are approximately 18" (W) x 6" (D) x 53" (H).
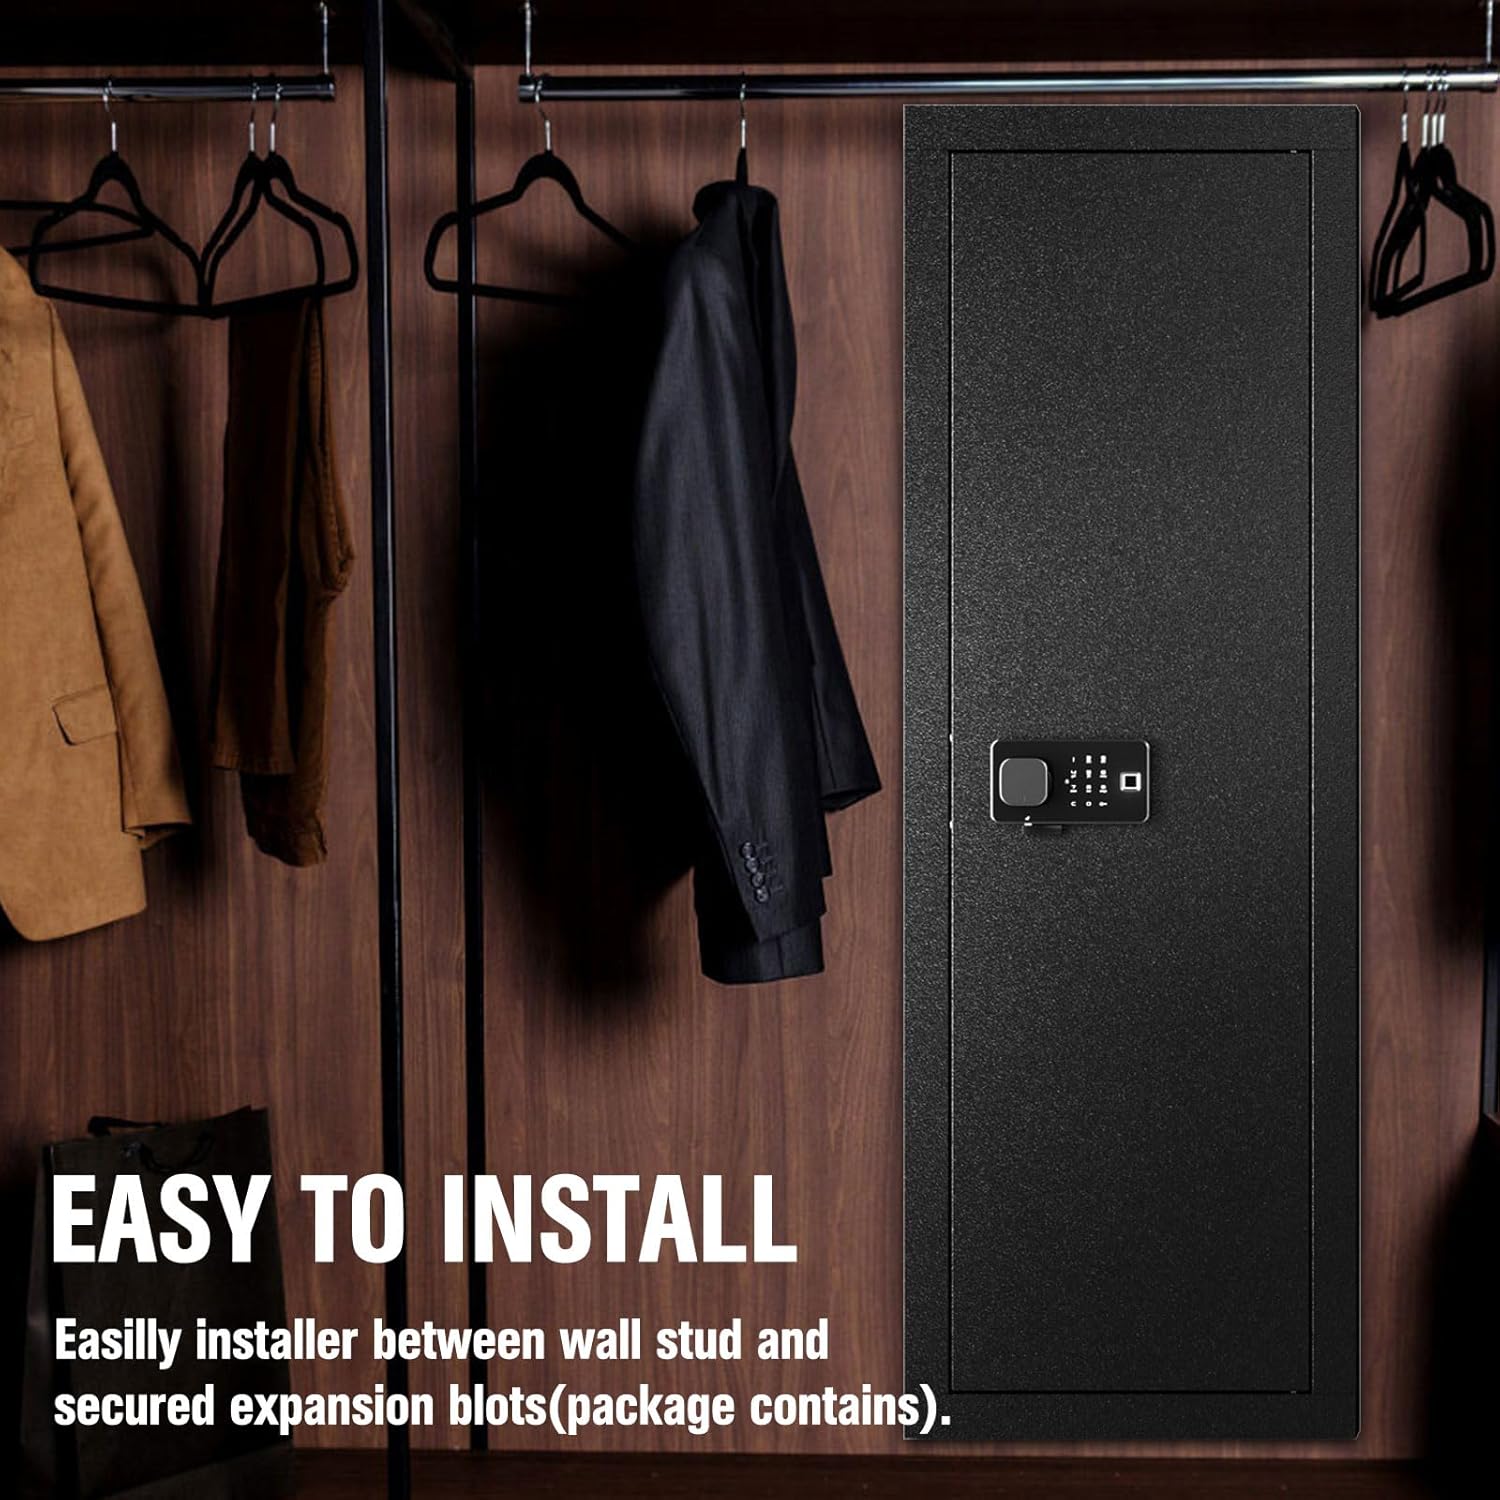
Figure 4.1: The safe installed within a wall, demonstrating its discreet placement in a home environment.
4.2. Installation Steps
- Prepare the Wall Opening: Carefully measure and cut an opening in the wall between two studs that are 16 inches on center. Ensure the opening matches the safe's dimensions (18" W x 53" H).
- Reinforce the Opening (Recommended): For enhanced stability, reinforce the wall opening with additional framing (e.g., 2x4s) as needed.
- Insert the Safe: Slide the safe into the prepared wall opening.
- Secure the Safe: Use the provided expansion bolts to firmly secure the safe to the wall studs through the pre-drilled holes at the back and bottom of the safe. This step is critical to prevent tipping and enhance security.
Note: Some users have reported that screw holes may not always align perfectly during assembly, and the quantity of screws provided might vary. Professional installation is recommended if you encounter difficulties. For assembly assistance, contact INTERGREAT customer support.
5. Operating Instructions
5.1. Powering the Safe
The digital keypad and fingerprint sensor are powered by 4 AA batteries (not included). Install fresh batteries into the designated battery compartment, typically located on the inside of the door or behind the keypad unit.
5.2. Unlocking Methods
Your safe offers three methods for access:
- Digital Keypad: Enter your pre-programmed numerical code on the keypad. The safe will indicate successful entry (e.g., a green light or beep), then turn the handle to open the door.
- Fingerprint Sensor: Place your registered finger on the fingerprint sensor. The safe will verify your fingerprint (e.g., a green light or beep), then turn the handle to open the door. The safe can store up to 10 fingerprints.
- Emergency Key: In case of battery failure or forgotten codes, use one of the provided emergency keys. Insert the key into the emergency keyhole (often concealed) and turn it to unlock the safe.

Figure 5.1: Illustration of the three primary methods to unlock the safe: using a numerical password on the keypad, scanning a registered fingerprint, or utilizing the physical emergency key.
5.3. Anti-Theft Alarm System
The safe is equipped with an alarm system to deter unauthorized access:
- If three incorrect password attempts are made consecutively, the alarm will activate and sound for 60 seconds.
- Any significant movement or bumping of the safe can also trigger the alarm.
- To stop the alarm, enter the correct user code and press "#" to confirm, or power off the system if applicable.

Figure 5.2: Explanation of the dual alarm system, which activates upon three incorrect password entries or detection of physical tampering.
5.4. Interior Organization
The safe's interior is designed for flexible storage:
- Adjustable Shelves: The three removable shelves can be adjusted to different heights or removed entirely to accommodate taller items like rifles.
- Key Hooks: Utilize the integrated key hooks for small items.
- Door Pockets: The door features multiple textile bags suitable for storing pistols, ammunition, or other small accessories.

Figure 5.3: The interior of the safe, highlighting the adjustable and removable shelves for customized storage configurations.
6. Maintenance
- Battery Replacement: Replace the 4 AA batteries when the low battery indicator appears or if the keypad/fingerprint sensor becomes unresponsive. Always use fresh, high-quality batteries.
- Cleaning: Clean the exterior and interior of the safe with a soft, damp cloth. Avoid abrasive cleaners or solvents that could damage the finish or electronic components.
- Lubrication: Periodically check the door hinges and locking mechanism for smooth operation. Apply a small amount of lubricant if necessary.
- Key Storage: Store emergency keys in a secure location separate from the safe and away from the primary user.
7. Troubleshooting
| Problem | Possible Cause | Solution |
|---|---|---|
| Safe does not open with digital code/fingerprint. | Low batteries, incorrect code/fingerprint, system error. | Replace batteries. Re-enter code carefully. Re-register fingerprint if needed. Use emergency key. |
| Alarm sounds unexpectedly. | Incorrect code attempts, physical impact/movement. | Enter correct code to disarm. Avoid bumping the safe. |
| Door is difficult to close or open. | Obstruction, misaligned door, worn hinges. | Check for obstructions. Lubricate hinges. Contact support if misalignment persists. |
| Missing or misaligned assembly parts. | Manufacturing variation, shipping damage. | Contact INTERGREAT customer support for replacement parts or assembly guidance. |
8. Specifications
| Feature | Detail |
|---|---|
| Brand | INTERGREAT |
| Model | 4 Wall gun safe Black |
| Exterior Dimensions (W x D x H) | 18" x 6" x 53" |
| Lock Type | Digital Keypad, Fingerprint Sensor, Key |
| Material | Alloy Steel |
| Mounting Type | Wall Mount (between 16" on-center studs) |
| Special Features | Alarm System, Fingerprint Sensor, Fireproof (as per product description, though reviews question fireproof claim) |
| Power Source | 4 AA Batteries (not included) |
| Included Components | Keys, Removable Shelves |
9. Warranty and Support
INTERGREAT is committed to customer satisfaction. If you encounter any assembly problems, product damage upon receipt, or require installation video assistance, please contact customer support via email. They aim to respond and resolve issues within 24 hours.
For specific contact information, please refer to the product packaging or the official INTERGREAT store page.
10. Product Video Overview
Video 10.1: An official product video from INTERGREAT demonstrating the features and in-wall installation of the gun safe.


