1. Introduction
This manual provides essential information for the safe and efficient installation, operation, and maintenance of your Tera W01-AM-32AH-B EV Smart APP 22kW Type 2 Wallbox Charger. Please read this manual thoroughly before using the product and retain it for future reference.
2. Safety Information
WARNING: Installation must be performed by a qualified professional electrician to ensure safety and compliance with local electrical codes.
- Do not attempt to open, disassemble, or modify the charger.
- Ensure the charging cable is free from damage before each use. Do not use if damaged.
- Keep children and pets away from the charging area during operation.
- Avoid contact with water or other liquids during charging, unless the product's IP rating explicitly allows it. This charger has an IP65 rating, making it suitable for outdoor use in various weather conditions.
- Always follow the instructions provided in this manual and any local regulations.
3. Package Contents
Verify that all items are present in the package:
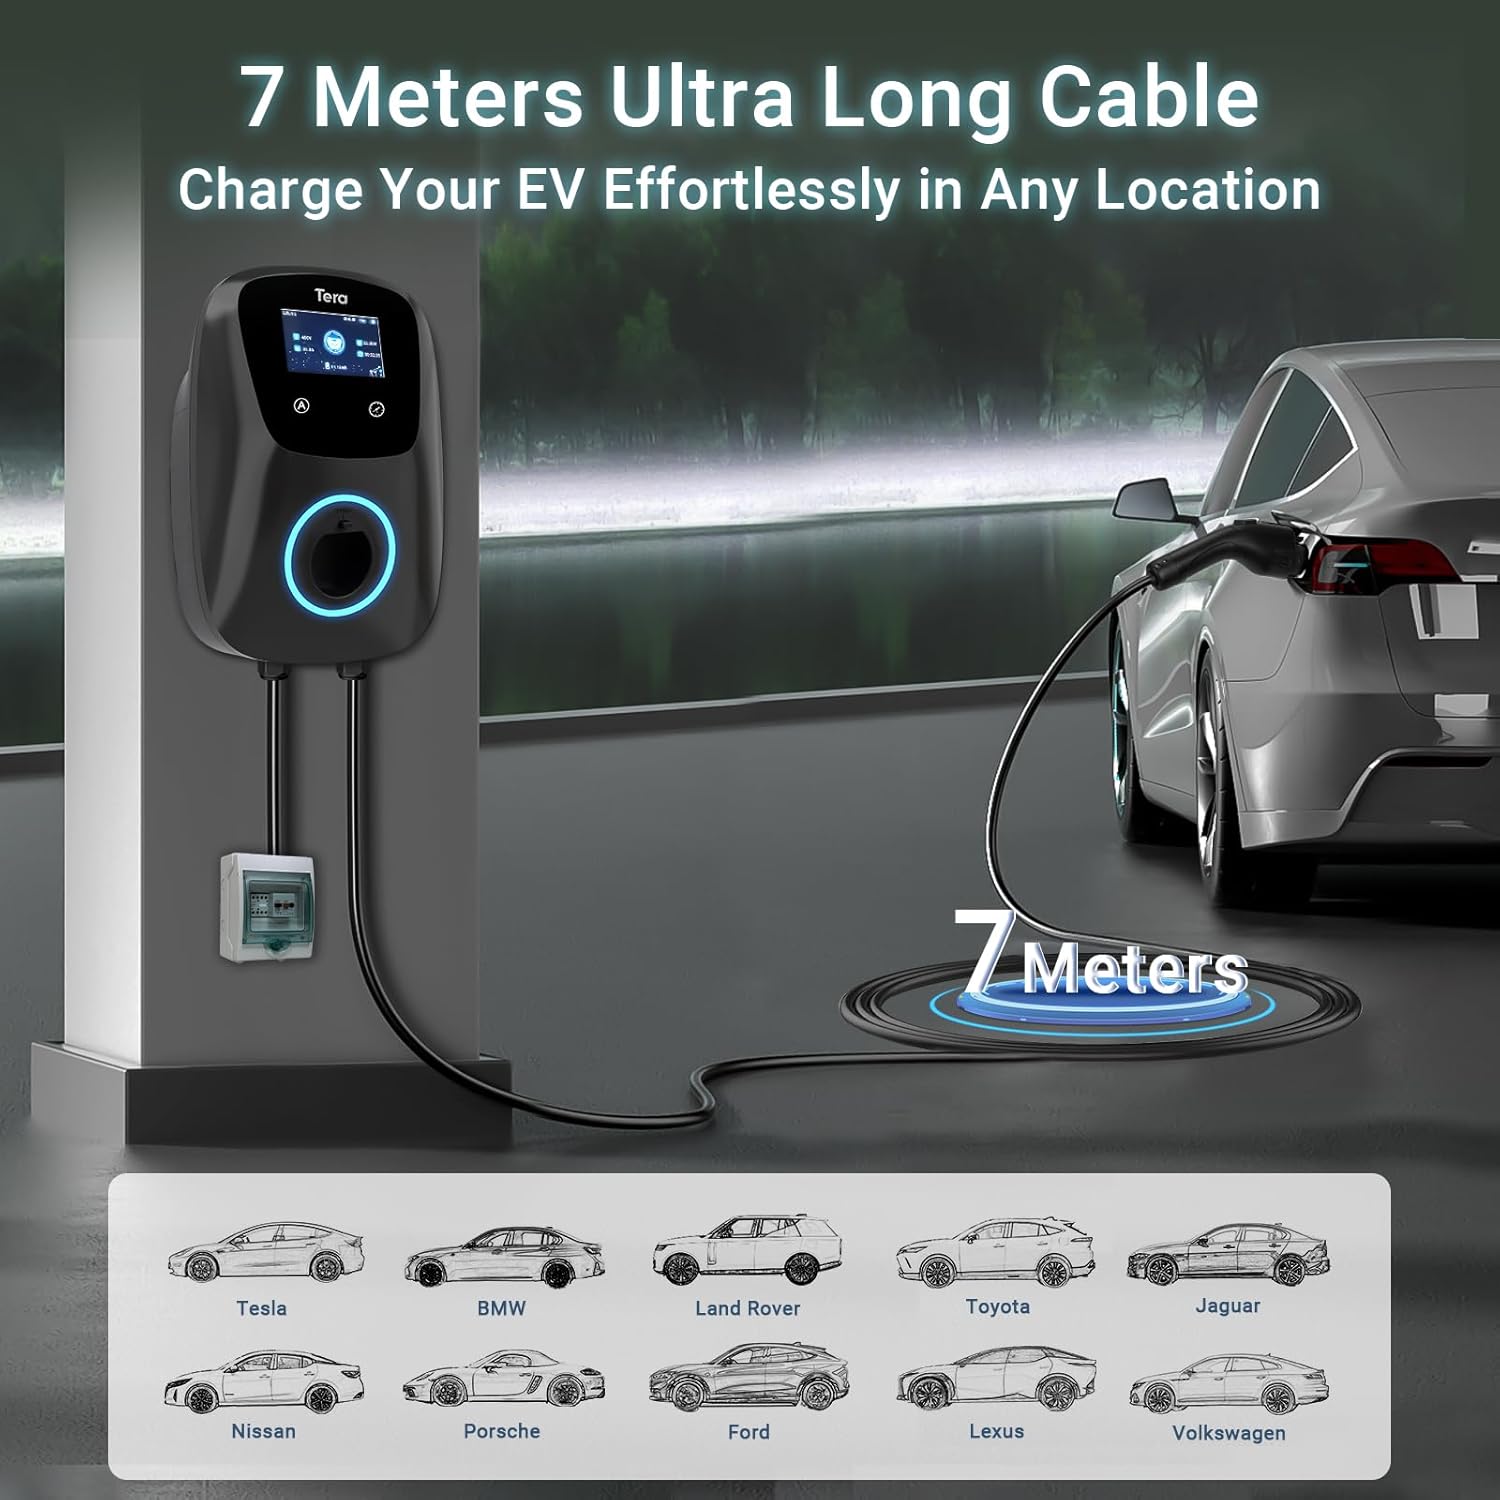
- 1x Tera W01 EV Charger (22 kW, 32 A, with 7m Type 2 cable)
- 1x Mounting Plate
- 1x Set of Mounting Screws
- 1x Tools (e.g., Allen key)
- 1x User Manual (German and English)

4. Setup and Installation
The Tera W01 EV Charger is designed for hardwired installation. Due to the high power output (22 kW), professional assistance is required for safe and correct connection.
4.1 Mounting the Charger
- Choose a suitable location for the wallbox, ensuring it is within reach of your vehicle's charging port and a dedicated electrical circuit.
- Use the provided mounting template to mark the drilling points on the wall.
- Drill holes and secure the mounting plate to the wall using the supplied screws.
- Attach the EV charger unit to the mounting plate.
4.2 Electrical Connection (Professional Installation Required)
The charger requires a 400V, 32A, 3-phase hardwired connection. A 1-meter power cable is integrated for direct connection to a circuit breaker. This connection method enhances safety.
- Ensure the main power supply is turned off before commencing any electrical work.
- Connect the charger's integrated power cable to a dedicated 3-phase circuit breaker, following local electrical codes and wiring diagrams.
- Verify all connections are secure and properly insulated.
- Once installation is complete, turn on the main power supply.
5. Operating Instructions
The Tera W01 charger offers both manual control via its touch screen and remote control via a dedicated mobile application.
5.1 Manual Charging
- Connect the Type 2 charging connector to your electric vehicle's charging port.
- The charger's integrated LED indicators will illuminate, showing the charging status.
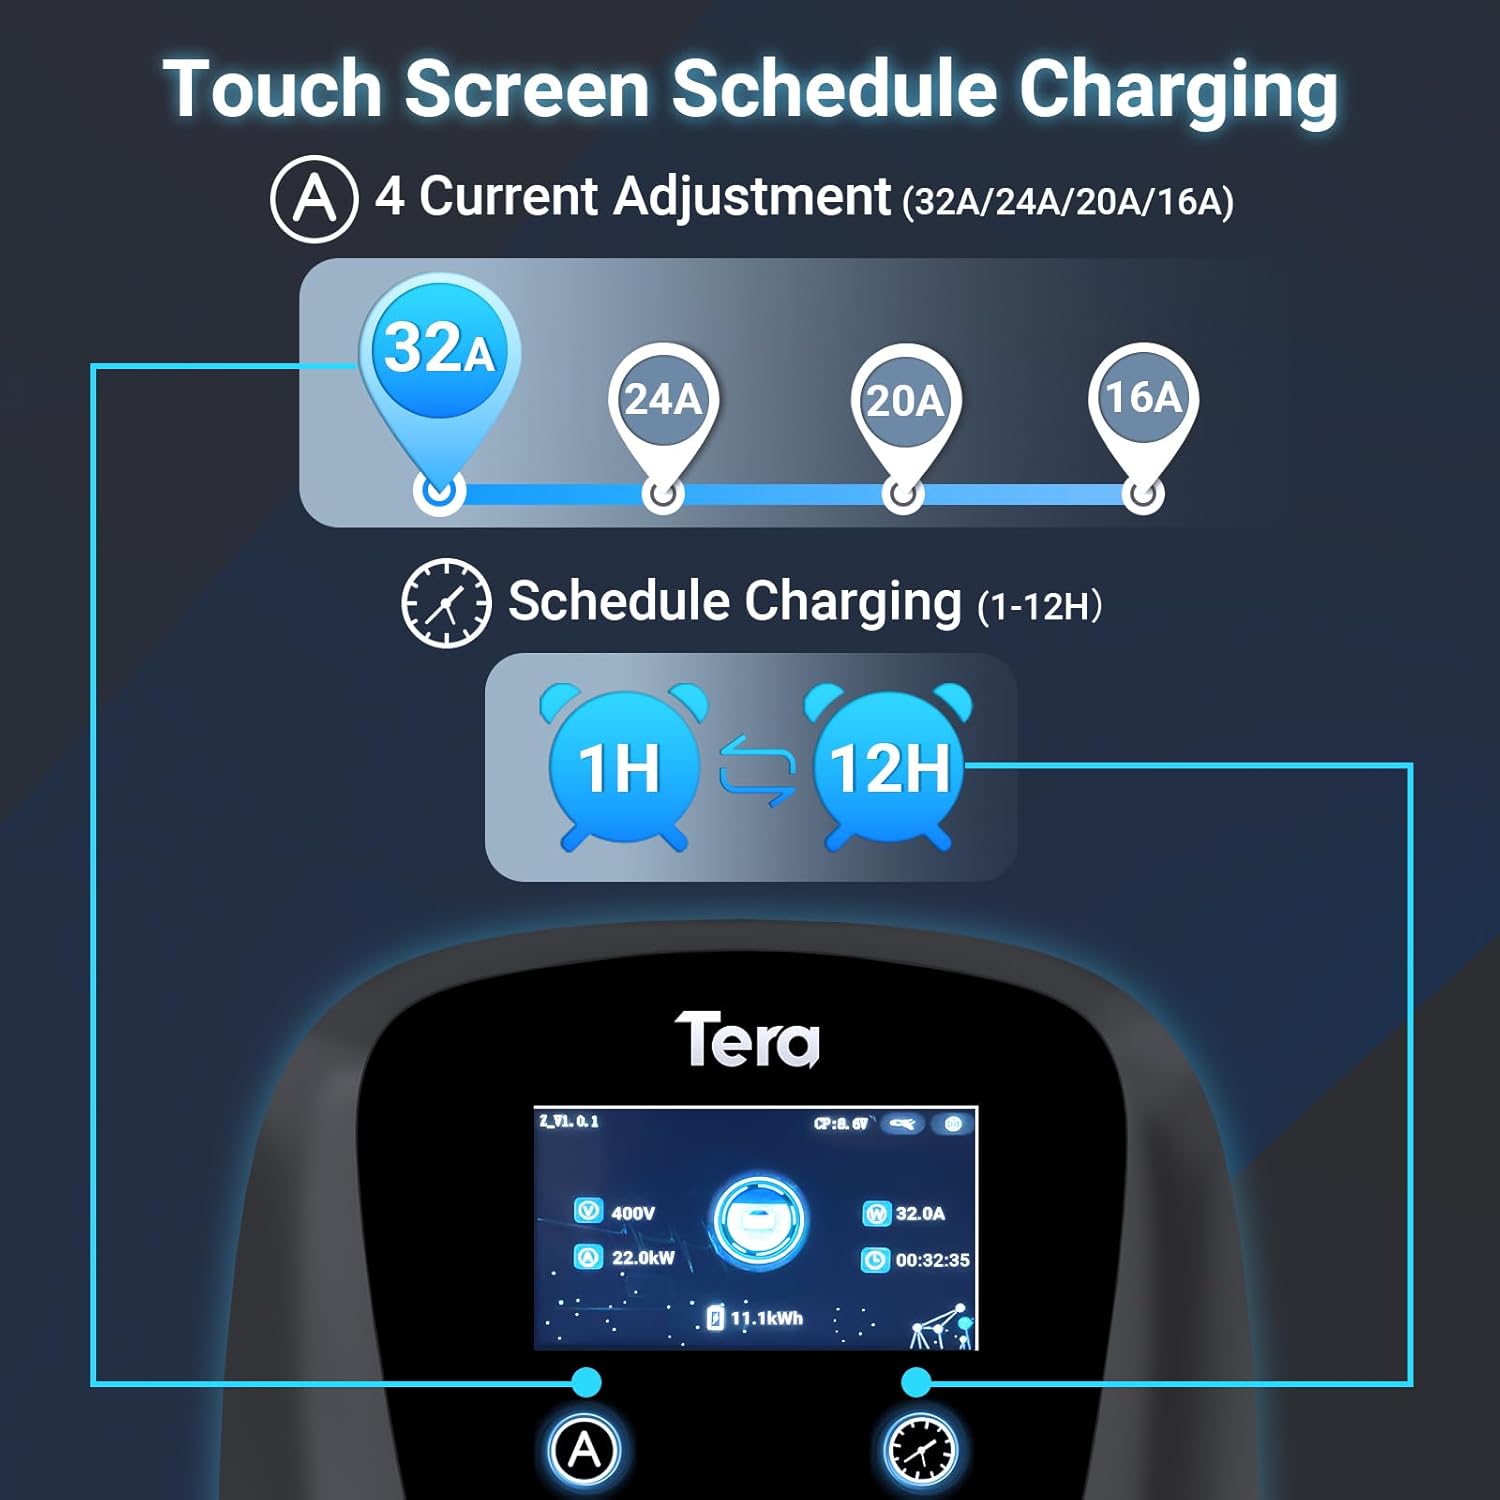
- On the charger's touch screen, you can adjust the charging current (32A, 24A, 20A, 16A) and set a scheduled charging time (1-12 hours).
- Charging will begin automatically or according to your schedule.
- To stop charging, disconnect the cable from your vehicle or use the charger's interface.
5.2 APP Controlled Charging
- Download the Tera Smart APP from your device's app store.
- Follow the in-app instructions to pair your charger with the application.
- Through the app, you can:
- Start/Stop charging remotely.
- Adjust the charging current.
- Schedule charging sessions.
- Monitor charging progress and statistics.
- The app provides flexibility to adapt charging sessions to your preferences and needs, including dynamic load balancing to prevent overloads.

5.3 LED Indicators
The integrated LED lights provide clear visual feedback on the charger's operational status and any potential errors.
- Solid Blue: Ready to charge.
- Pulsing Green: Charging in progress.
- Solid Green: Charging complete.
- Red: Error or fault detected. Refer to the troubleshooting section.
6. Maintenance
Regular maintenance ensures the longevity and optimal performance of your Tera EV charger.
- Cleaning: Wipe the charger's exterior with a soft, damp cloth. Do not use abrasive cleaners or solvents. Ensure the charging connector is clean and free of debris.
- Cable Inspection: Periodically inspect the charging cable and connector for any signs of wear, cuts, or damage. Replace if necessary.
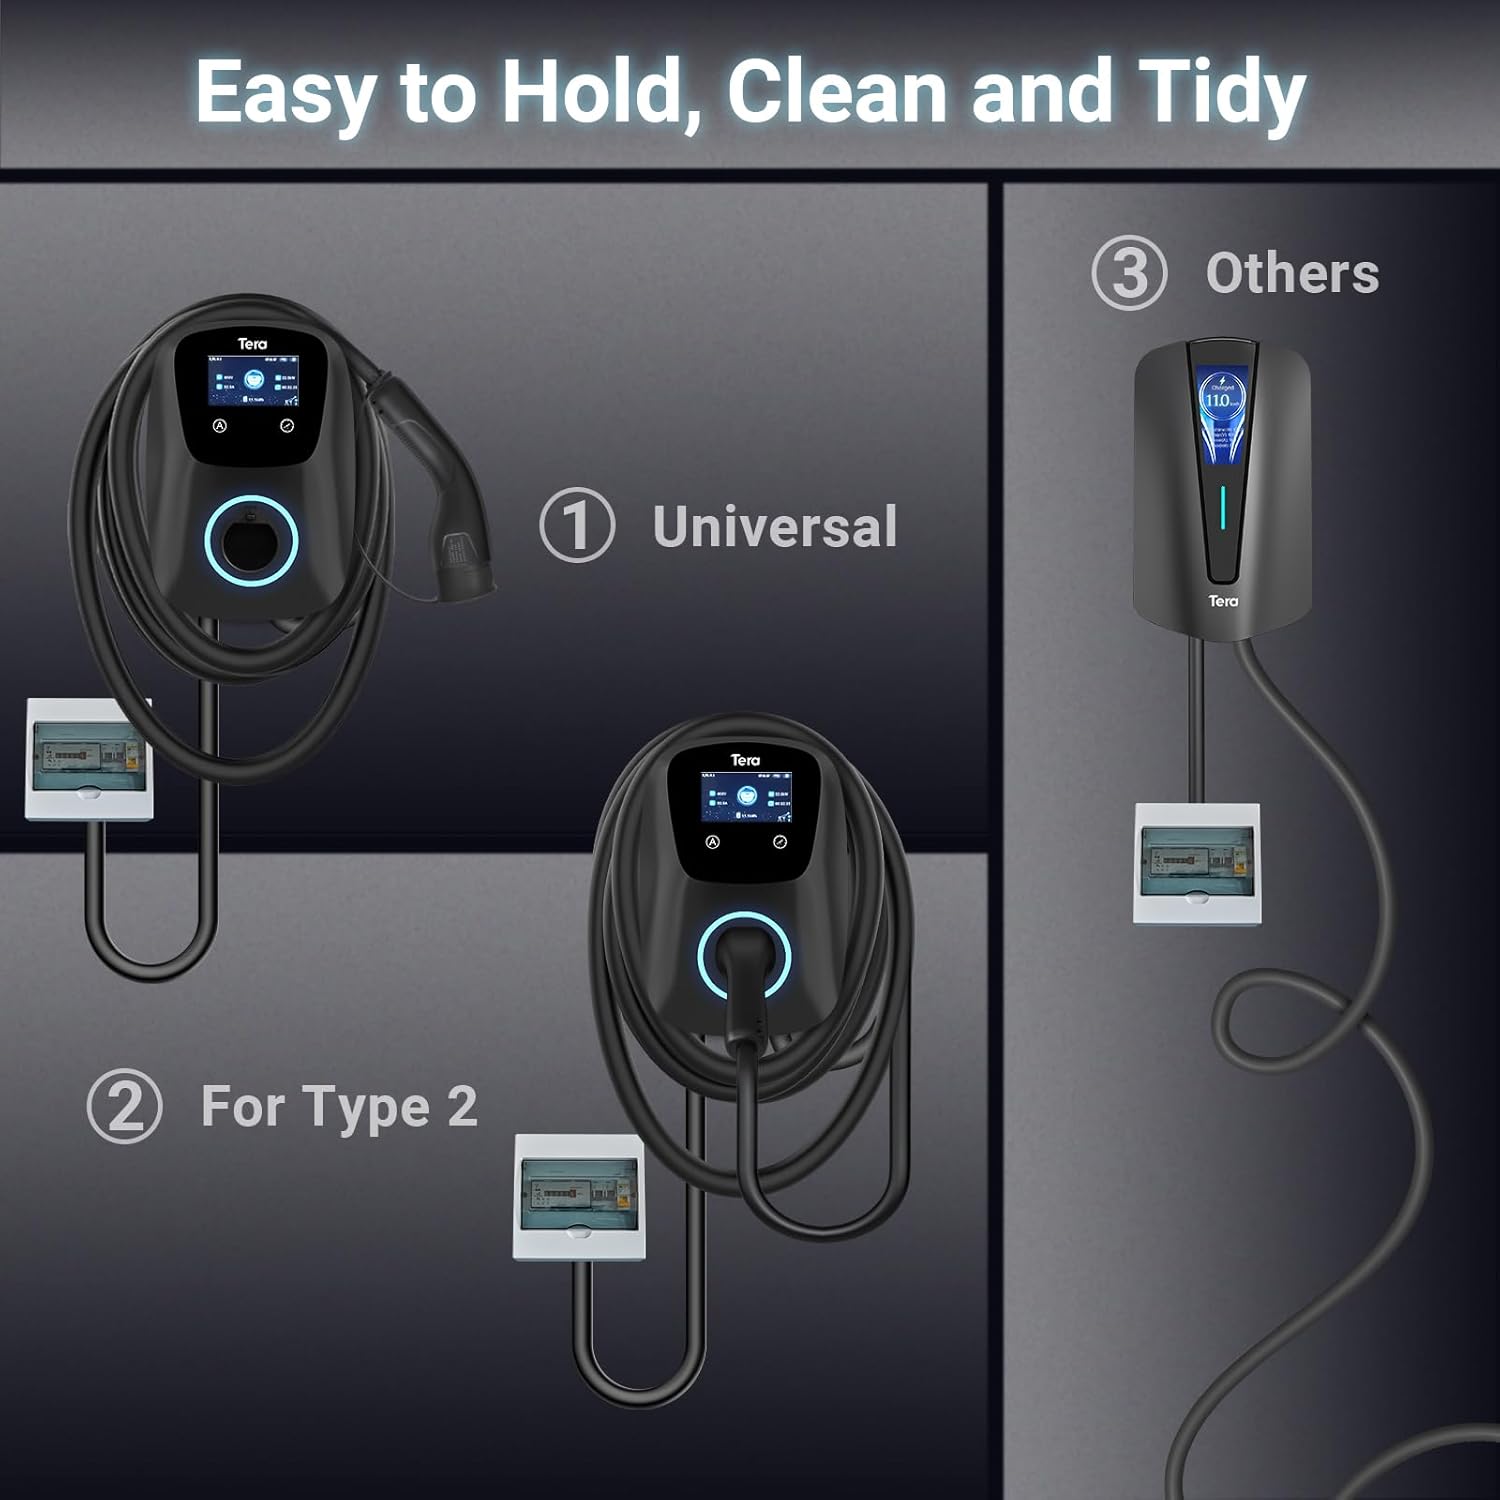
- Storage: When not in use, store the charging cable neatly using the integrated cable management features to prevent tangling and damage.
7. Troubleshooting
If you encounter issues with your Tera EV charger, refer to the following common problems and solutions:
| Problem | Possible Cause | Solution |
|---|---|---|
| Charger not powering on. | No power from the electrical supply; circuit breaker tripped. | Check the circuit breaker. Ensure the charger is properly connected to the power source. Consult a professional electrician if needed. |
| Charging not starting. | Cable not fully connected; vehicle not ready to charge; charging schedule active; error detected. | Ensure the Type 2 connector is securely plugged into the vehicle. Check vehicle settings. Verify no charging schedule is preventing immediate charge. Check LED indicators for error codes. |
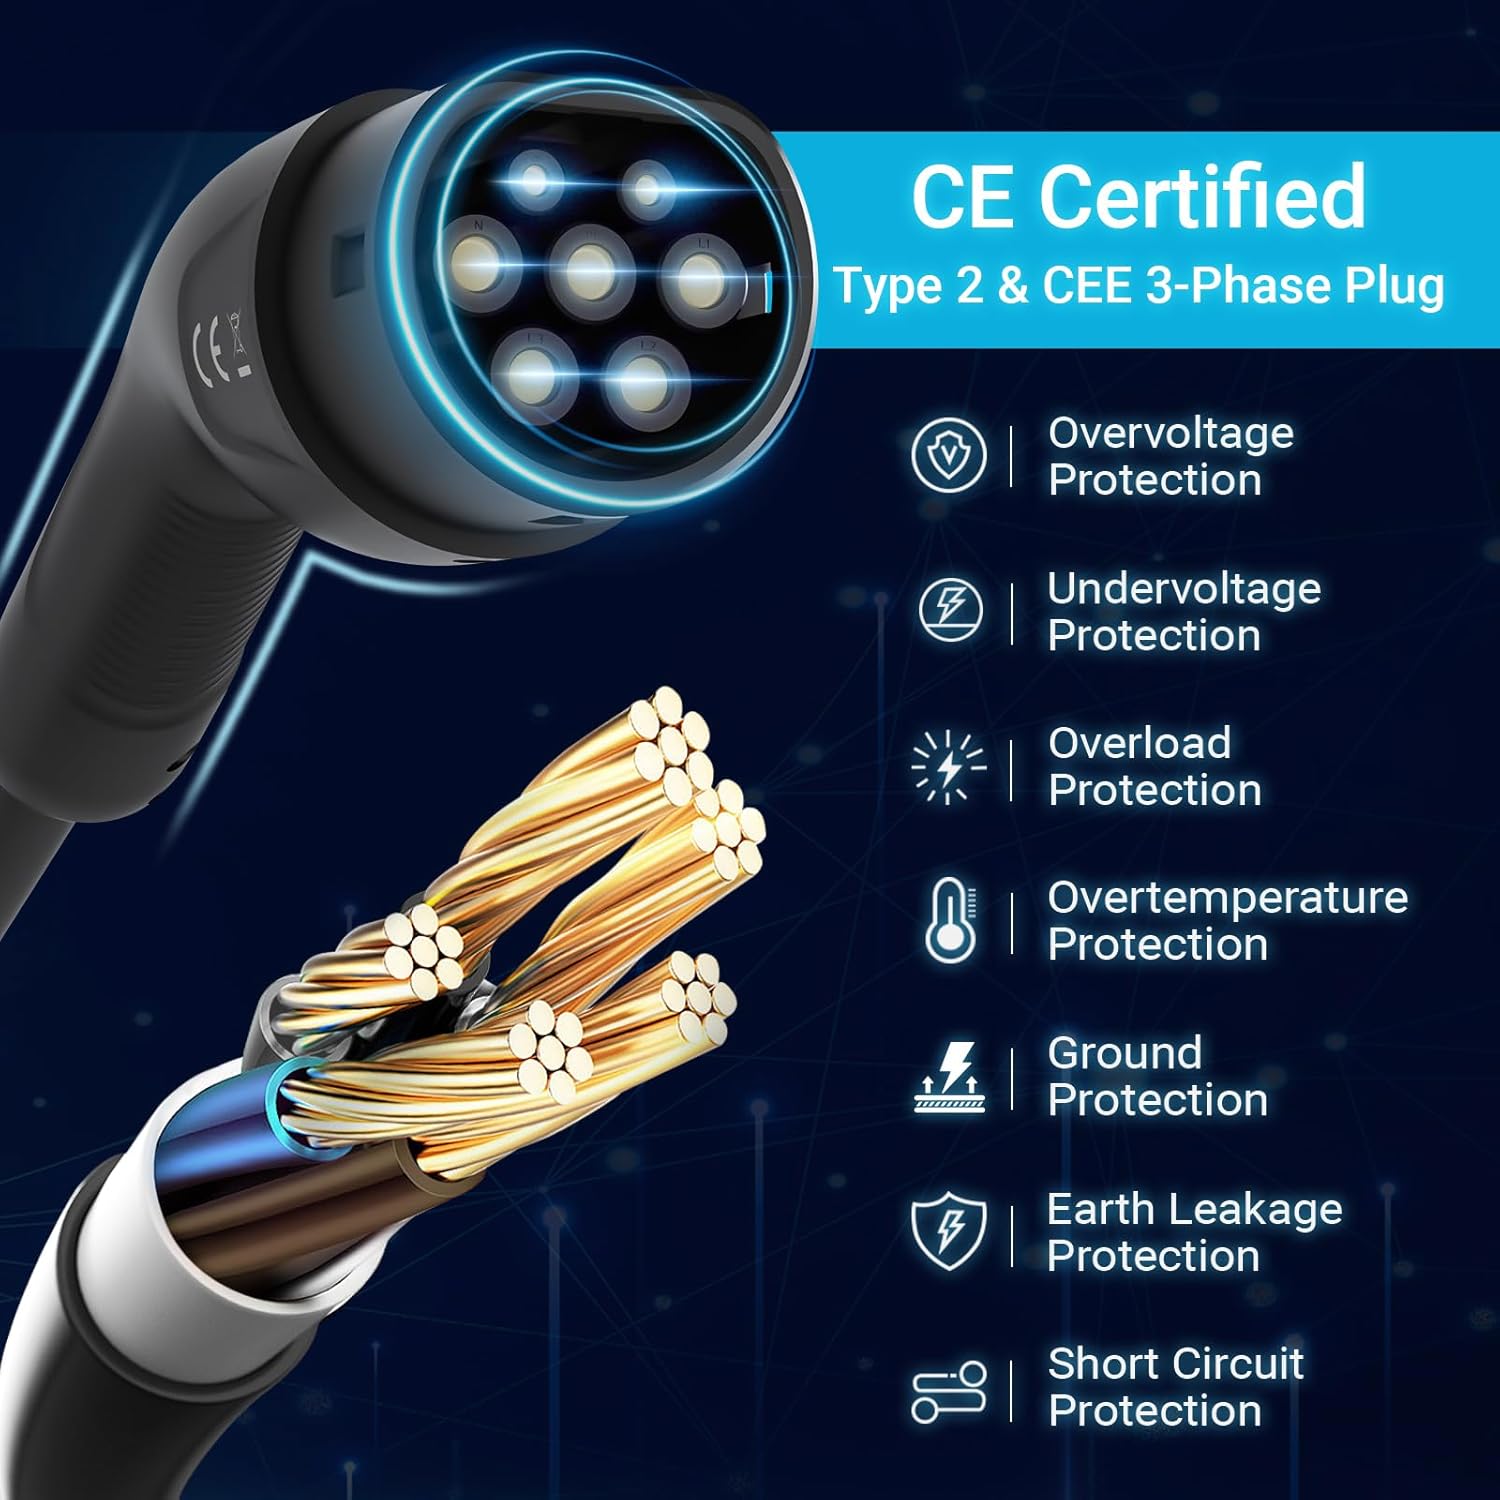
| Red LED indicator. | Internal fault; overvoltage/undervoltage; overload; overtemperature; ground fault; earth leakage; short circuit. | Disconnect the charger from the vehicle and power supply for 5 minutes, then reconnect. If the error persists, contact customer support. |
| Slow charging speed. | Current setting too low; vehicle limitation; power supply issue. | Adjust the current setting on the charger or via the app to a higher amperage (e.g., 32A). Check your vehicle's charging capabilities. Ensure the electrical supply is stable. |
8. Specifications
| Feature | Detail |
|---|---|
| Model Number | W01-AM-32AH-B |
| Brand | Tera |
| Connector Type | Type 2 |
| Maximum Power Output | 22 kW |
| Maximum Current | 32 A |
| Input/Output Voltage | 400 V |
| Cable Length | 7 meters |
| Color | Black |
| Dimensions (L x W x H) | 12 x 16 x 5 cm (approximate, based on product data) |
| Weight | 8 Kilograms |
| Ingress Protection (IP) Rating | IP65 (Waterproof and Dustproof) |
| Operating Temperature | -30 °C to 50 °C |
| Certifications | CE, TÜV (IEC 62196-2 compliant) |
| Compatible Vehicles | All electric vehicles with Type 2 charging port |
| Special Features | Fast charging, Smart APP control, Adjustable current, Scheduled charging, Dynamic load balancing, Multiple safety protections. |

9. Warranty and Support
Tera products are designed for reliability and performance. While specific warranty details are not provided in this document, please retain your proof of purchase for any warranty claims.
For technical assistance, troubleshooting beyond this manual, or any inquiries, please contact Tera customer support. The product includes a user manual in German and English for additional guidance.
Contact Support: Refer to the contact information provided with your product packaging or visit the official Tera website for support options.


