1. Introduction
Thank you for purchasing the SHARP DR-P520(GY) Portable Digital Radio. This device offers a comprehensive listening experience with DAB, DAB+, and FM radio capabilities, along with Bluetooth 5.3 for wireless audio streaming. It features a memory for 120 stations, a 3.5mm headphone jack, and an alarm function, making it a versatile companion for your daily audio needs.
2. Safety Information
Please read these safety instructions carefully before using the device and keep them for future reference. Incorrect use may result in electric shock, fire, or other hazards.
- Water and Moisture: Do not expose the device to rain, moisture, or any liquids. Do not place objects filled with liquids, such as vases, on the device.
- Heat Sources: Keep the device away from heat sources such as radiators, heat registers, stoves, or other apparatus (including amplifiers) that produce heat.
- Ventilation: Ensure proper ventilation. Do not block any ventilation openings.
- Power Supply: Use only the power supply specified by the manufacturer. Ensure the power cable is not walked on or pinched.
- Cleaning: Unplug the device from the power source before cleaning. Use a soft, dry cloth for cleaning. Do not use liquid cleaners or aerosol cleaners.
- Servicing: Do not attempt to service this product yourself. Refer all servicing to qualified service personnel.
- Batteries: The device contains a built-in rechargeable battery. Do not expose the battery to excessive heat such as sunshine, fire, or the like.
3. Package Contents
Carefully unpack the box and ensure all the following items are present:
- SHARP DR-P520(GY) Portable Digital Radio
- USB-A to USB-C Charging Cable
- USB-C to USB-A Adapter
- Wrist Strap
- User Documentation (Quick Start Guide, Instruction Manual)
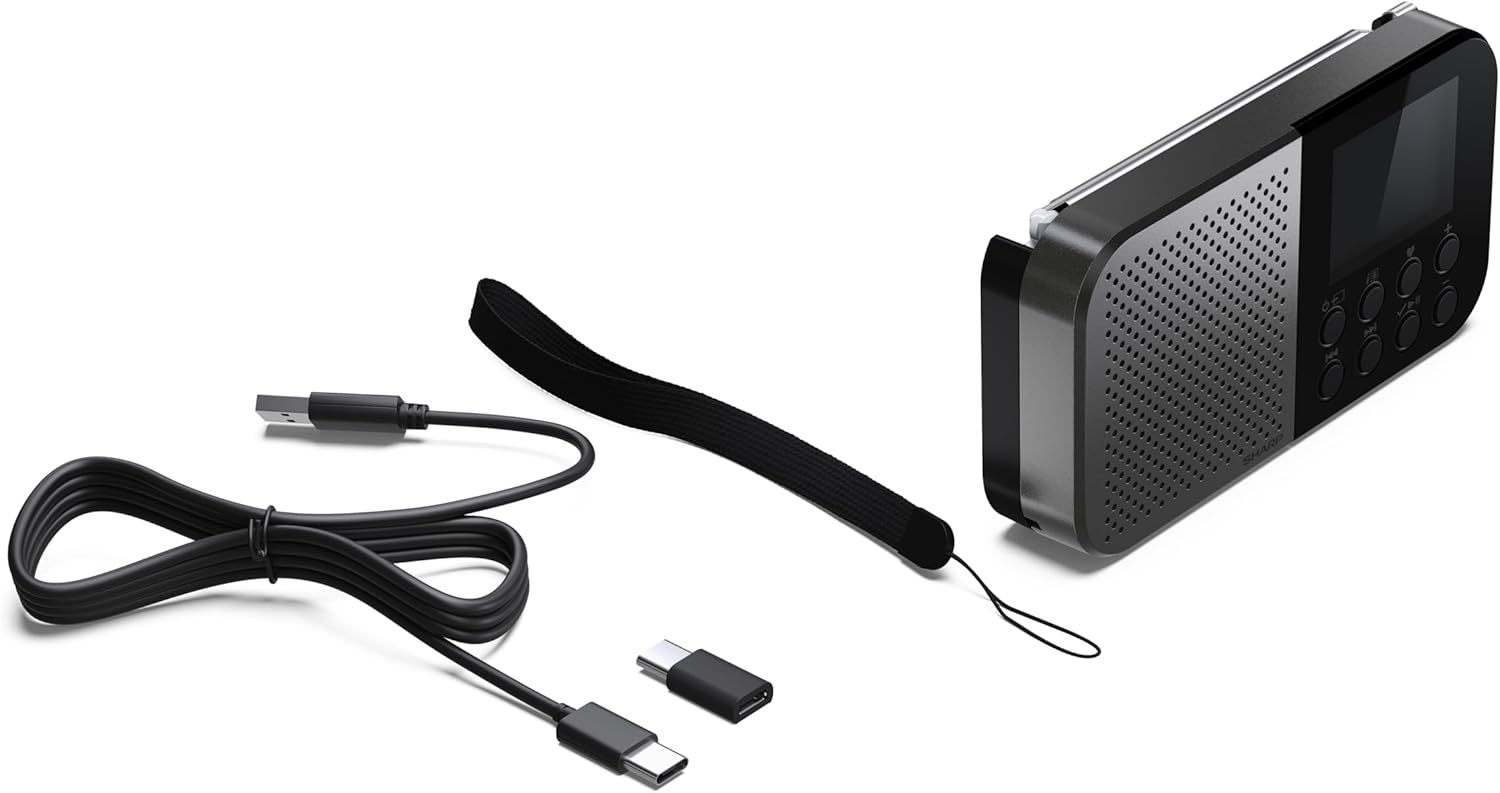
Image: The SHARP DR-P520(GY) radio with its included USB-A to USB-C charging cable, USB-C to USB-A adapter, and wrist strap.
4. Product Overview
The SHARP DR-P520(GY) is a compact and portable digital radio designed for ease of use and excellent audio quality. It features a clear display and intuitive controls.
4.1 Front View

Image: Front view of the SHARP DR-P520(GY) showing the speaker grille, display, and control buttons.
The front panel features a speaker grille on the left, a color display on the right, and a set of control buttons below the display. The telescopic antenna is located on the top right.
4.2 Side and Back Views


Image: Side view (left) showing the USB-C charging port and 3.5mm headphone jack. Back view (right) showing the smooth casing.
The right side of the radio houses the USB-C charging port and the 3.5mm headphone jack. The back is a smooth plastic casing.
5. Setup
5.1 Charging the Device
Before first use, fully charge the radio. Connect the supplied USB-A to USB-C cable to the USB-C port on the side of the radio and the USB-A end to a compatible USB power adapter (not included) or a computer USB port. The charging indicator on the display will show the charging status.
5.2 Powering On/Off
Press and hold the Power button (usually marked with a power symbol) on the front panel to turn the radio on or off.
5.3 Initial Scan (DAB/FM)
Upon first power-on, the radio will automatically perform a full scan for available DAB and FM stations. This process may take a few minutes. Ensure the telescopic antenna is fully extended for optimal reception.
5.4 Setting Time and Date
The time and date are typically synchronized automatically via DAB or FM RDS signals after the initial scan. If manual adjustment is needed, refer to the 'System Settings' section in the operating instructions.
6. Operating
6.1 Radio Modes (DAB/DAB+/FM)
The DR-P520(GY) supports DAB, DAB+, and FM radio reception. Use the Mode button to switch between these modes.
6.1.1 Tuning Stations
- DAB/DAB+: In DAB mode, use the navigation buttons to browse the list of available stations. Press Select to tune into a station.
- FM: In FM mode, use the navigation buttons to manually tune or press and hold to auto-scan for the next available station.
6.1.2 Saving Presets
The radio allows you to save up to 120 stations (40 BestTune, 40 DAB, 40 FM) as presets for quick access. To save a station, tune to the desired station, then press and hold the Preset button until the display prompts you to save. Use navigation buttons to select a preset number and confirm.
6.1.3 BestTune™ Feature
The BestTune™ feature intelligently manages your station list, combining DAB, DAB+, and FM stations for seamless listening. If a DAB signal becomes weak, the radio may automatically switch to the corresponding FM frequency if available, ensuring continuous playback.

Image: The SHARP DR-P520(GY) highlighting the BestTune™ feature for optimized radio reception.
6.1.4 RDS and Slideshow Functionality
In FM mode, RDS (Radio Data System) provides additional information such as station name and program type. In DAB/DAB+ mode, some stations may transmit slideshows, displaying images or text on the screen, enhancing your listening experience.
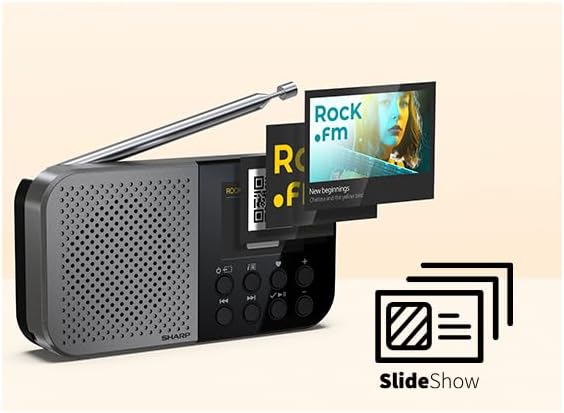
Image: The radio display showing a 'Slideshow' feature, indicating visual content from a broadcast.
6.2 Bluetooth Mode
The DR-P520(GY) can receive audio wirelessly from your Bluetooth-enabled devices (e.g., smartphone, tablet).
6.2.1 Pairing with a Bluetooth Device
- Press the Mode button to switch to Bluetooth mode. The display will show "Bluetooth Connected" or "Pairing".
- On your Bluetooth device, enable Bluetooth and search for available devices.
- Select "DR-P520" from the list of devices.
- Once paired, the radio will confirm the connection, and you can start streaming audio.

Image: The SHARP DR-P520(GY) radio displaying a Bluetooth connection, with a smartphone nearby.
6.3 Alarm Function
The radio includes an alarm clock function. You can set one or more alarms to wake up to a buzzer or your favorite radio station.
- Setting Alarm: Access the alarm settings through the menu. Set the desired time, alarm source (buzzer/radio), and frequency (daily, once, weekdays, weekends).
- Snooze: When the alarm sounds, press the Snooze button to temporarily silence it. The alarm will sound again after a set interval.
6.4 Headphone Jack
For private listening, connect 3.5mm headphones to the headphone jack located on the side of the radio.
6.5 System Languages
The device supports 7 system languages: English (EN), German (DE), Spanish (ES), French (FR), Italian (IT), Dutch (NL), and Polish (PL). You can change the language in the system settings menu.
7. Maintenance
- Cleaning: Use a soft, dry, lint-free cloth to clean the radio's surface. Do not use abrasive cleaners, waxes, or solvents.
- Antenna Care: Handle the telescopic antenna gently to prevent damage.
- Battery Care: To prolong battery life, avoid fully discharging the battery frequently and store the device in a cool, dry place if not used for extended periods.
8. Troubleshooting
| Problem | Possible Cause | Solution |
|---|---|---|
| No power / Device does not turn on | Battery is depleted. | Connect the radio to a power source using the USB-C cable and allow it to charge. |
| Poor radio reception (DAB/FM) | Antenna not extended or poor signal area. | Fully extend the telescopic antenna. Try repositioning the radio or moving to an area with better signal. |
| Bluetooth device cannot connect | Radio not in pairing mode or device too far. | Ensure the radio is in Bluetooth mode and visible. Move the Bluetooth device closer to the radio (within 10 meters). Ensure no other devices are connected. |
| No sound | Volume too low or muted. | Increase the volume. Check if headphones are connected. |
9. Specifications
- Model: DR-P520(GY)
- Dimensions (W x H x D): 130 x 70 x 26 mm (5.12 x 2.76 x 1.02 inches)
- Weight: 160 grams (0.35 lbs)
- Tuner: DAB, DAB+, FM with RDS
- Station Presets: 120 (40 BestTune, 40 DAB, 40 FM)
- Bluetooth: Version 5.3 (Receiver only)
- Connectivity: USB-C for power, 3.5mm Headphone Jack
- Power: Internal Rechargeable Battery
- Material: Plastic housing
- Color: Grey/Black
- System Languages: EN, DE, ES, FR, IT, NL, PL
10. Warranty and Support
For warranty information and technical support, please refer to the specific warranty card or user documentation included with your product. You may also visit the official SHARP website for further assistance and contact details.


