1. Introduction
Thank you for choosing the Antusi Smart Bike Tail Light Q3. This intelligent rear light is designed to enhance your cycling safety and visibility with its advanced features, including smart sensors, multiple lighting modes, and durable construction. Please read this manual carefully before use to ensure proper installation and operation.
2. Product Overview
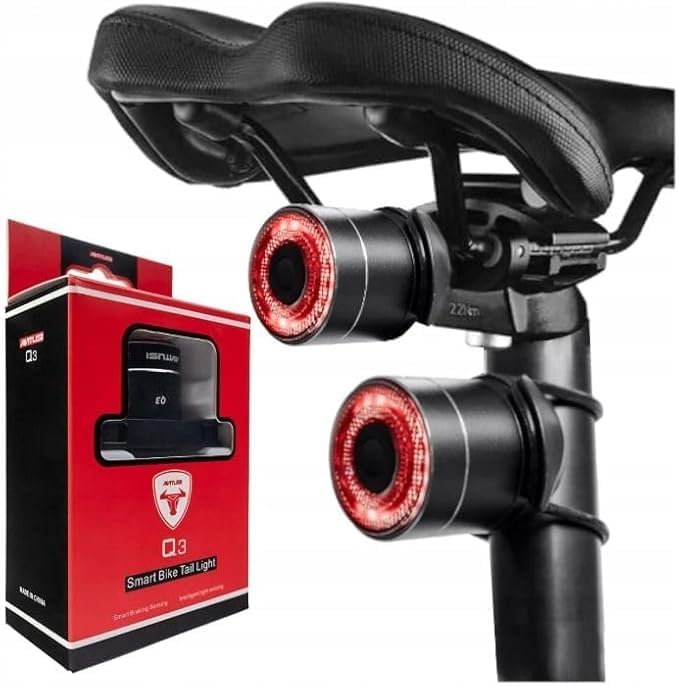
Figure 2.1: Antusi Smart Bike Tail Light Q3 with its retail packaging.
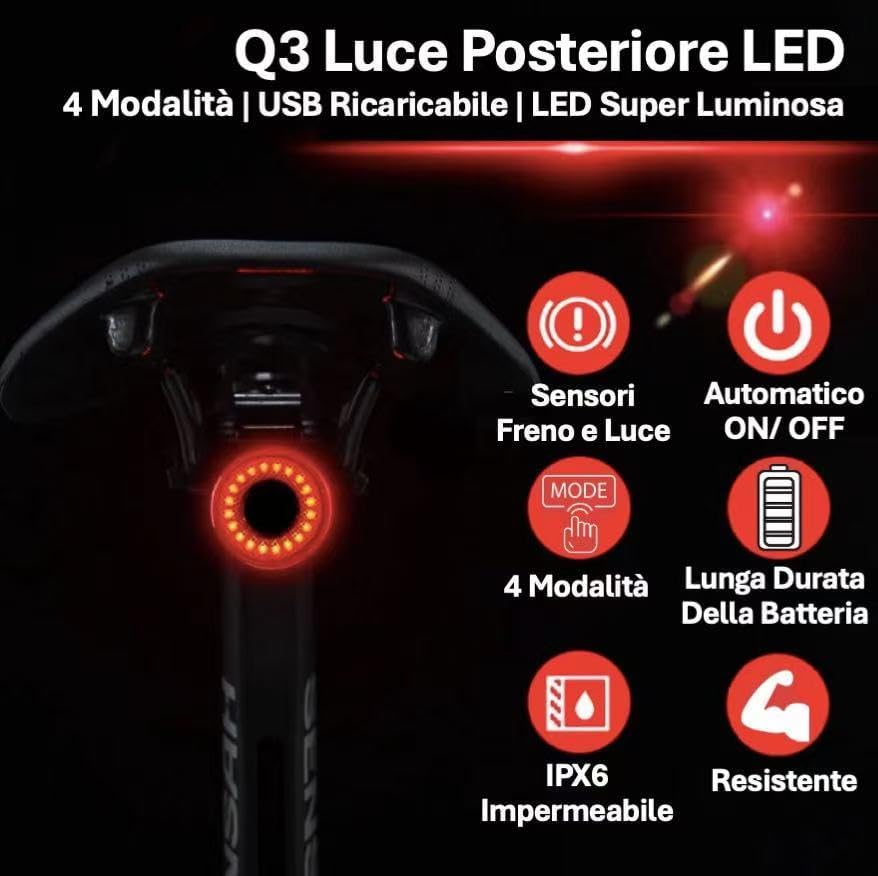
Figure 2.2: Overview of Antusi Q3 Tail Light's main features.
The Antusi Smart Bike Tail Light Q3 is a compact and lightweight (30 grams) device designed for enhanced cycling safety. It features:
- Four Lighting Modes: Brake, Turn Signal, Pulsing, and Always On, to suit various riding conditions.
- Smart Sensors: Integrated braking and light sensors for automatic operation and increased safety.
- Easy Installation: Designed for tool-free mounting on saddle rails or seatposts.
- Long Battery Life: Up to 65 hours of operation on a single charge, with convenient USB recharging.
- IPX6 Waterproof: Ensures reliable performance even in rainy conditions.
- High Brightness: Special LED and optical lens provide excellent visibility without blinding others.
- Durable Construction: Made with an aluminum alloy body for resistance to drops and wear.
3. What's in the Box

Figure 3.1: All components included in the Antusi Q3 package.
Upon opening the package, please verify that all the following components are present:
- Antusi Smart Bike Tail Light (Q3)
- Type-C Charging Cable
- Saddle Rail Bracket
- Seatpost Mount
- Rubber Strap (x2)
- Cable Tie (x4)
4. Specifications
| Feature | Specification |
|---|---|
| Model | Q3 |
| Brand | Antusi |
| Color | Black |
| Material | Aluminum Alloy |
| Weight | 30 Grams |
| Power Source | Battery Powered |
| Water Resistance Level | IPX6 (Waterproof) |
| Number of Settings | 4 Lighting Modes |
| Mounting Type | Saddle Rail Mount, Seatpost Mount |
| Battery Life (Max) | Up to 65 hours (mode dependent) |
| Charging Port | Type-C USB |
5. Setup and Installation
The Antusi Q3 Tail Light offers two primary installation methods to fit most bicycles: saddle rail mounting and seatpost mounting. No special tools are required for installation.
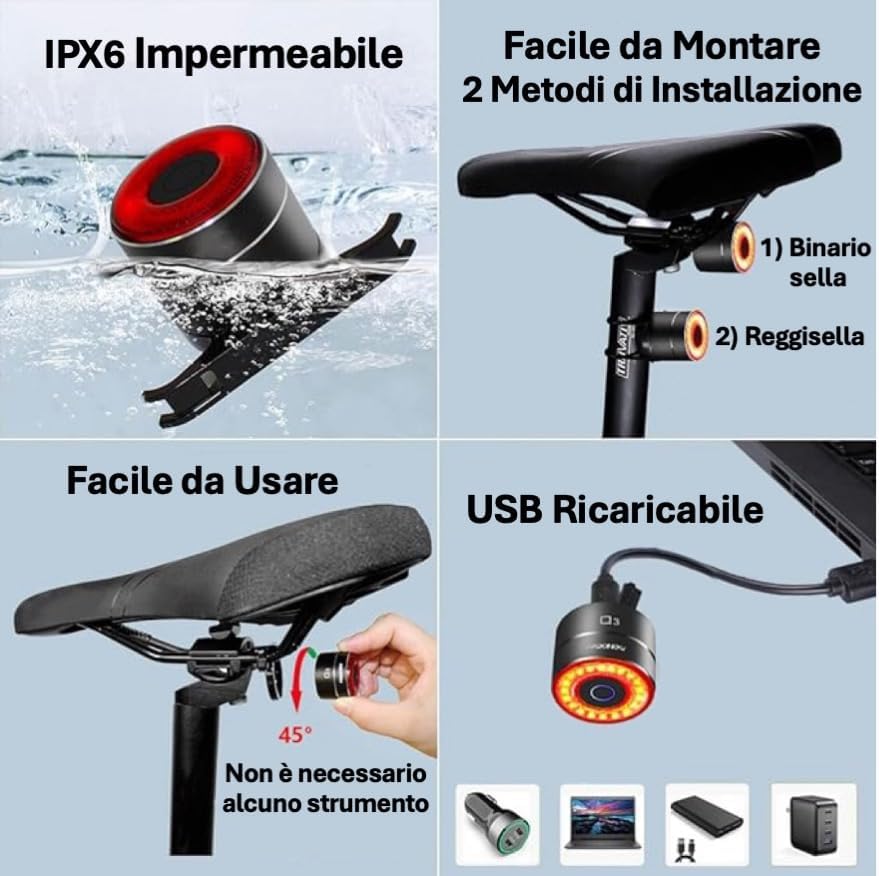
Figure 5.1: Two common installation methods for the Q3 Tail Light.
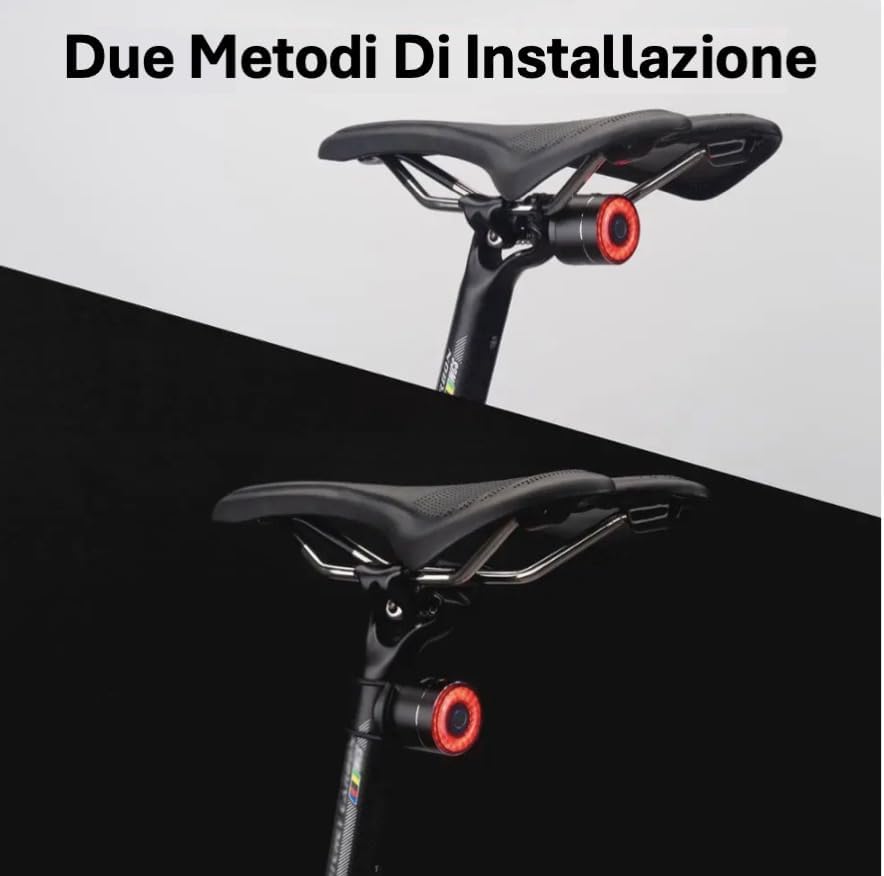
Figure 5.2: Visual representation of the two mounting options.
5.1. Saddle Rail Installation
- Select the saddle rail bracket from the package.
- Attach the bracket securely to the rails under your bicycle saddle. Ensure it is firmly in place.
- Slide the Antusi Q3 Tail Light onto the bracket until it clicks into position.
- Adjust the angle of the light for optimal visibility.
5.2. Seatpost Installation
- Select the seatpost mount and appropriate rubber straps or cable ties.
- Secure the seatpost mount to your bicycle's seatpost using the provided rubber straps or cable ties. Ensure it is tight and does not slip.
- Slide the Antusi Q3 Tail Light onto the mount until it clicks into position.
- Adjust the angle of the light for optimal visibility.
The light can be easily detached from either mount for charging or to prevent theft by simply unscrewing it from the fixation.

Figure 5.3: Easy detachment of the light for charging or security.
6. Operating Instructions
The Antusi Q3 Tail Light is equipped with intelligent features and multiple modes to enhance your riding experience and safety.
6.1. Power On/Off
- To turn on the light, press and hold the power button for approximately 2 seconds.
- To turn off the light, press and hold the power button again for approximately 2 seconds.
- The light also features an auto on/off function based on ambient light conditions (see Smart Sensors section).
6.2. Lighting Modes
The Q3 offers four distinct lighting modes. Press the power button briefly to cycle through the modes:

Figure 6.1: The four available lighting modes for enhanced visibility.
- Fast Flash: Rapid flashing for high attention.
- Breathing Flash: Slow, pulsating light for a distinct visual.
- Strobe: Consistent, quick flashes.
- Steady On: Constant illumination.
6.3. Smart Sensors
The Q3 is equipped with intelligent braking and light sensors for automatic safety enhancements.
Figure 6.2: Smart sensors for automatic safety features.
- Braking Sensor: When braking is detected, the Q3 will automatically switch to a bright brake light mode to alert following traffic.
- Light Sensor: The light will automatically turn on in low-light conditions and turn off in high-intensity light, conserving battery and ensuring visibility when needed.
7. Charging the Device
The Antusi Q3 Tail Light features a built-in rechargeable battery and is charged via a Type-C USB cable.
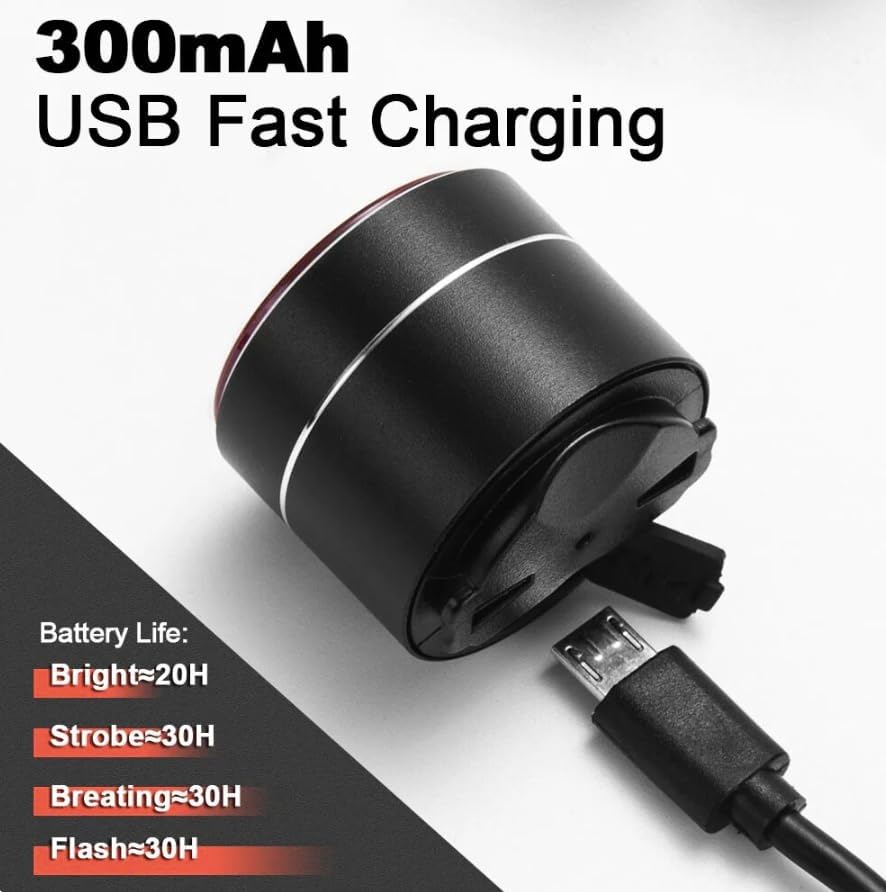
Figure 7.1: USB Type-C charging port and battery life indications.
- Locate the Type-C charging port on the light. It is usually covered by a rubber flap to protect against water and dust.
- Gently open the rubber flap.
- Connect the provided Type-C USB cable to the light and the other end to any standard USB power source (e.g., computer, wall adapter, power bank).
- The indicator light on the device will show charging status (e.g., red for charging, green for fully charged).
- A full charge can provide up to 65 hours of operation, depending on the selected mode. Typical battery life estimates are:
- Bright Mode: ~20 hours
- Strobe Mode: ~30 hours
- Breathing Mode: ~30 hours
- Flash Mode: ~30 hours
- Once fully charged, disconnect the cable and ensure the rubber flap is securely closed to maintain water resistance.
8. Maintenance
Proper maintenance will ensure the longevity and optimal performance of your Antusi Q3 Tail Light.
8.1. Waterproofing (IPX6)

Figure 8.1: The Q3 Tail Light is designed to withstand water splashes and rain.
The Antusi Q3 Tail Light has an IPX6 waterproof rating, meaning it is protected against powerful water jets. This makes it suitable for use in rainy conditions. To maintain its waterproof integrity:
- Always ensure the rubber cover for the charging port is securely closed when not charging.
- Avoid submerging the light in water for extended periods.
- Do not use high-pressure water jets directly on the light.
8.2. Cleaning and Storage
- Clean the light with a soft, damp cloth. Do not use abrasive cleaners or solvents.
- Store the light in a cool, dry place when not in use, away from direct sunlight and extreme temperatures.
- If storing for a long period, charge the battery to about 50% every few months to prolong its lifespan.
9. Troubleshooting
If you encounter issues with your Antusi Q3 Tail Light, please refer to the following common troubleshooting steps:
| Problem | Possible Cause | Solution |
|---|---|---|
| Light does not turn on. | Battery is depleted. | Charge the light using the provided Type-C USB cable. |
| Light turns off unexpectedly. | Low battery or smart light sensor activated. | Recharge the battery. If in a bright environment, the light sensor may have turned it off automatically. Move to a darker area to test. |
| Brake light function not working. | Light not securely mounted or sensor obstructed. | Ensure the light is firmly attached to the bike and its sensor area is clear of obstructions. Test by simulating a sudden stop. |
| Light is not charging. | Cable or power source issue. | Try a different Type-C USB cable or a different USB power source. Ensure the cable is fully inserted. |
If the problem persists after trying these steps, please contact Antusi customer support for further assistance.
10. Warranty and Support
Antusi stands behind the quality of its products.
- Warranty: The Antusi Smart Bike Tail Light Q3 comes with a 1-year warranty from the date of purchase. This warranty covers manufacturing defects and material flaws under normal use.
- Satisfaction Guarantee: We offer a 100% satisfaction guarantee.
- Customer Support: If you experience any issues or have questions regarding your product, please do not hesitate to contact our customer support team. Contact information can typically be found on the product packaging or our official website.
Please retain your proof of purchase for warranty claims.


