
Introduction
Thank you for choosing the AOGLLATI Queen Bed Frame. This manual provides detailed instructions for assembly, operation, maintenance, and troubleshooting to ensure safe and optimal use of your new bed frame. Please read all instructions carefully before beginning assembly and retain this manual for future reference.
Important Safety Information
WARNING:
- Be cautious when adjusting the headboard height.
- Handle with care around sharp edges during assembly.
- Follow assembly instructions closely to avoid injury.
- Do not exceed the maximum weight recommendation of 400 pounds.
- Ensure all connections are secure before use.
- Keep small parts away from children during assembly.
Package Contents
Before assembly, verify that all components listed below are present. If any parts are missing or damaged, please contact customer service.
| Component | Quantity |
|---|---|
| Headboard | 1 |
| Footboard | 1 |
| Side Rails | 2 |
| Wooden Slats | Set |
| Storage Drawers | 4 |
| Hardware Pack (screws, bolts, Allen wrench) | 1 |
| Installation Manual | 1 |
Setup and Assembly
Follow these steps carefully for proper assembly. It is recommended to assemble the bed frame with at least two people.
Assembly Video Guide
This video provides a visual guide for the assembly process of the AOGLLATI PU Bed Frame.
Step-by-Step Instructions
- Unpack and Identify Parts: Carefully unpack all components and lay them out on a clean, soft surface to prevent scratches. Refer to the parts list to identify each piece.

Image: All bed frame components, including headboard, footboard, side rails, and hardware, laid out for identification.
- Assemble Headboard and Footboard: Attach the side support bars to the headboard and footboard using the provided hardware. Ensure all bolts are tightened securely.
- Connect Side Rails: Attach the assembled headboard and footboard to the side rails. Make sure the connections are firm and stable.
- Install Center Support: Place the center support beam(s) and legs as indicated in the manual. These provide crucial support for the mattress.
- Place Wooden Slats: Lay the wooden slats across the bed frame. The plastic lock design helps secure the slats and reduce noise. Ensure all slats are evenly spaced and firmly seated.

Image: Detail of wooden slats with plastic locks for secure and noise-free installation.
- Assemble Storage Drawers: Assemble the four storage drawers according to the instructions. Attach the wheels and ensure they roll smoothly.

Image: An assembled storage drawer with its wheels and locking mechanism visible.
- Insert Drawers: Slide the assembled drawers into their designated positions under the bed frame. Ensure they align with the locking holes to prevent sliding.
- Adjust Headboard Height: The headboard has two height adjustments. Adjust to accommodate your mattress thickness (10-13 inches).
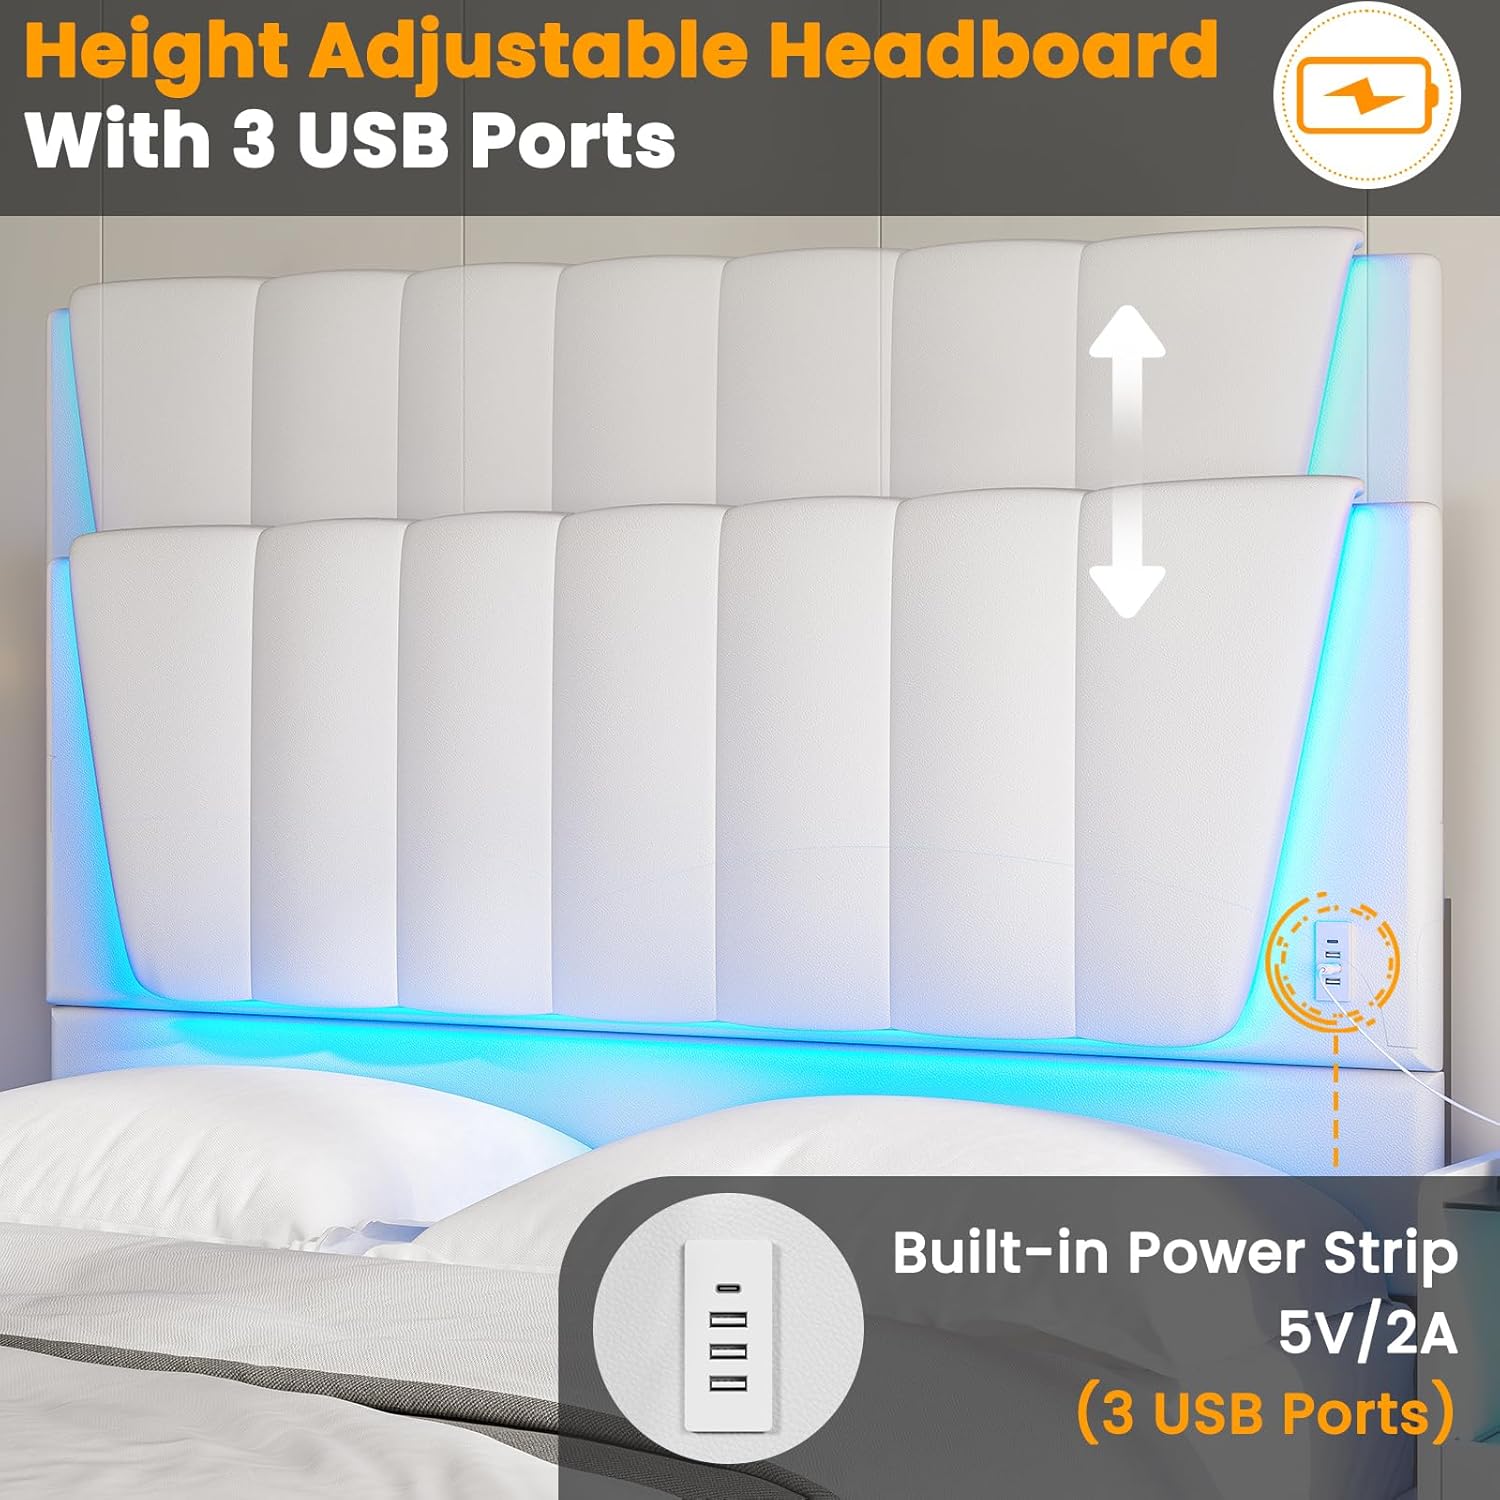
Image: The headboard showing its adjustable height feature and integrated USB ports.
Operating Instructions
LED Lighting System
The integrated RGB LED backlight in the headboard offers multiple colors and dynamic modes. Control the lighting via the dedicated mobile application.
- APP Control: Download the specified mobile application to your smartphone. Follow the app's instructions to connect to the bed frame's LED system.
- Color and Brightness Adjustment: Use the app to select from a wide range of colors and adjust the brightness to your preference.
- Dynamic Modes: Explore various dynamic lighting modes, including music mode and mic mode, which react to sound, and time mode for scheduled lighting changes.
This video demonstrates the multi-color LED lighting features of the AOGLLATI Queen Bed Frame, controlled via a mobile app.
USB Charging Ports
The headboard is equipped with 2 USB ports (5V/2A) for convenient charging of your electronic devices.
- Usage: Simply plug your mobile phone, tablet, or other USB-powered devices into the ports located on the side of the headboard.
- Power: Ensure the bed frame is connected to a power source for the USB ports to function.
Storage Drawers
The four large-capacity storage drawers provide ample space for linens, clothing, and other items.
- Access: Each drawer features smooth wheels for easy pulling out and pushing in.
- Security: Each drawer has a locking hole to prevent it from sliding out unintentionally. Align the drawer with the locking mechanism to secure it in place.
This video showcases the functionality of the four storage drawers integrated into the AOGLLATI Led Bed Frame.
Maintenance
- Cleaning: Wipe the bed frame surfaces with a damp cloth. Avoid harsh chemicals or abrasive cleaners that may damage the finish.
- Hardware Check: Periodically check all bolts and screws to ensure they remain tight. Re-tighten if necessary to maintain stability.
- Slat Inspection: Inspect wooden slats for any signs of wear or damage. Replace any broken slats immediately to ensure proper mattress support.
Troubleshooting
| Problem | Possible Cause | Solution |
|---|---|---|
| Bed frame is wobbly or noisy. | Loose bolts or improperly installed slats. | Ensure all bolts are tightened. Check that wooden slats are correctly seated in their plastic locks. |
| LED lights are not working. | Power connection issue, app not connected, or light strip damage. | Verify the bed frame is plugged into a working outlet. Check app connection. Contact customer service if lights remain unresponsive. |
| USB ports are not charging devices. | Bed frame not powered, or faulty cable/device. | Confirm the bed frame is plugged in. Try a different USB cable or device to rule out external issues. |
| Storage drawers slide out easily. | Drawers not properly aligned with locking holes. | Ensure the drawers are fully pushed in and aligned with the locking holes to engage the mechanism. |
Specifications
| Feature | Detail |
|---|---|
| Size | Queen |
| Product Dimensions (L x W x H) | 82.5" x 62.2" x 45.3" |
| Material | Metal, Polyurethane, Wood |
| Color | White |
| Maximum Weight Recommendation | 400 Pounds |
| Headboard Features | Adjustable Height, RGB LED Lights, 2 USB Ports (5V/2A) |
| Storage | 4 Under-bed Drawers with Wheels and Locking Holes |
| Box Spring Required | No |
| Assembly Required | Yes |
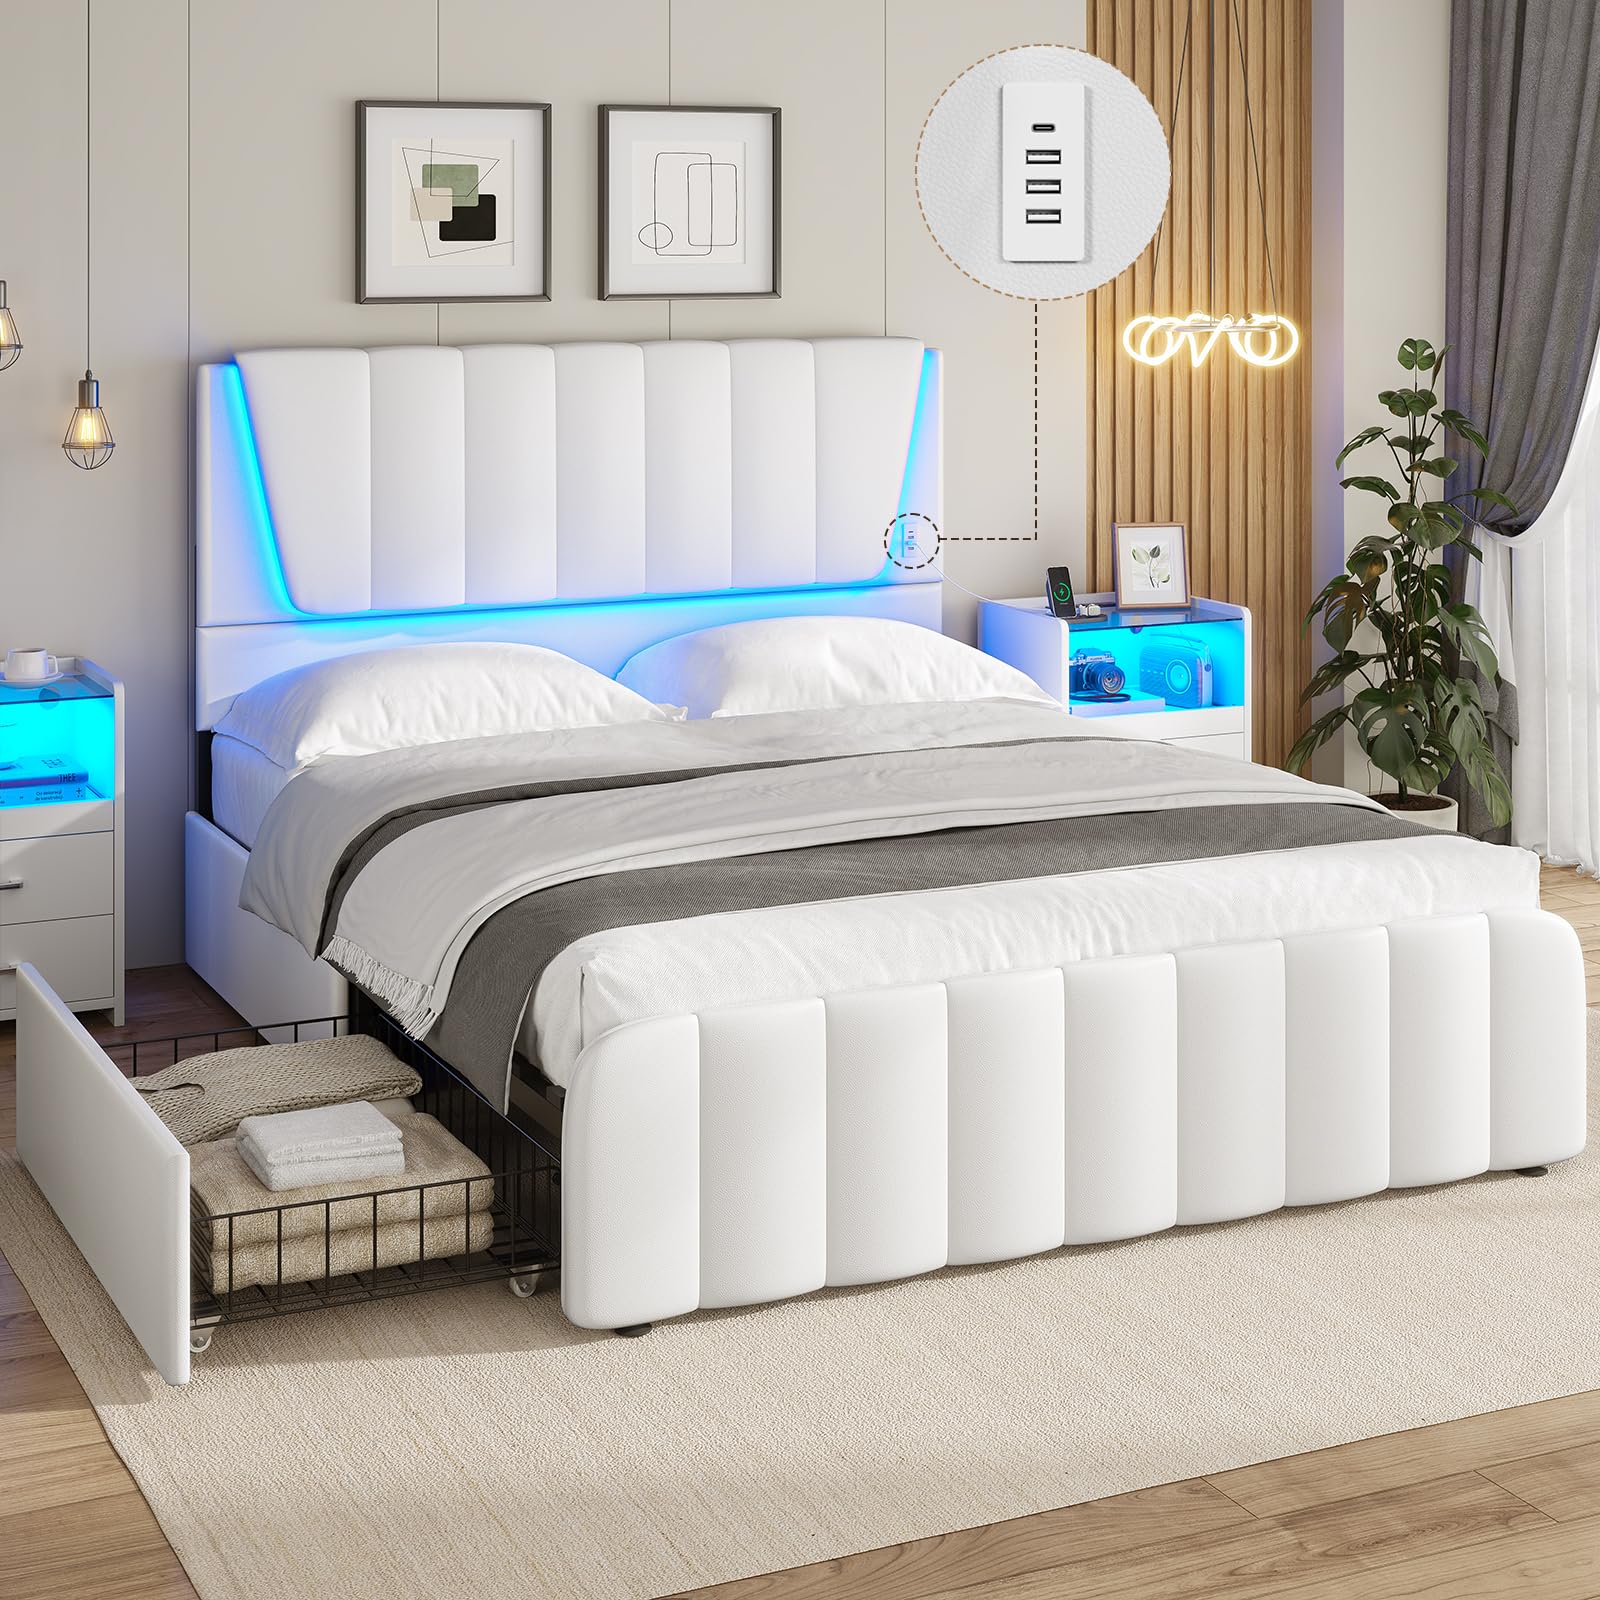
Image: Diagram showing the overall dimensions and key measurements of the Queen bed frame.
Warranty and Customer Support
For any questions, missing parts, or issues with your AOGLLATI Queen Bed Frame, please contact our customer service team. We are committed to providing excellent support and will assist you within 24 hours.
Please refer to your purchase documentation for specific warranty details.