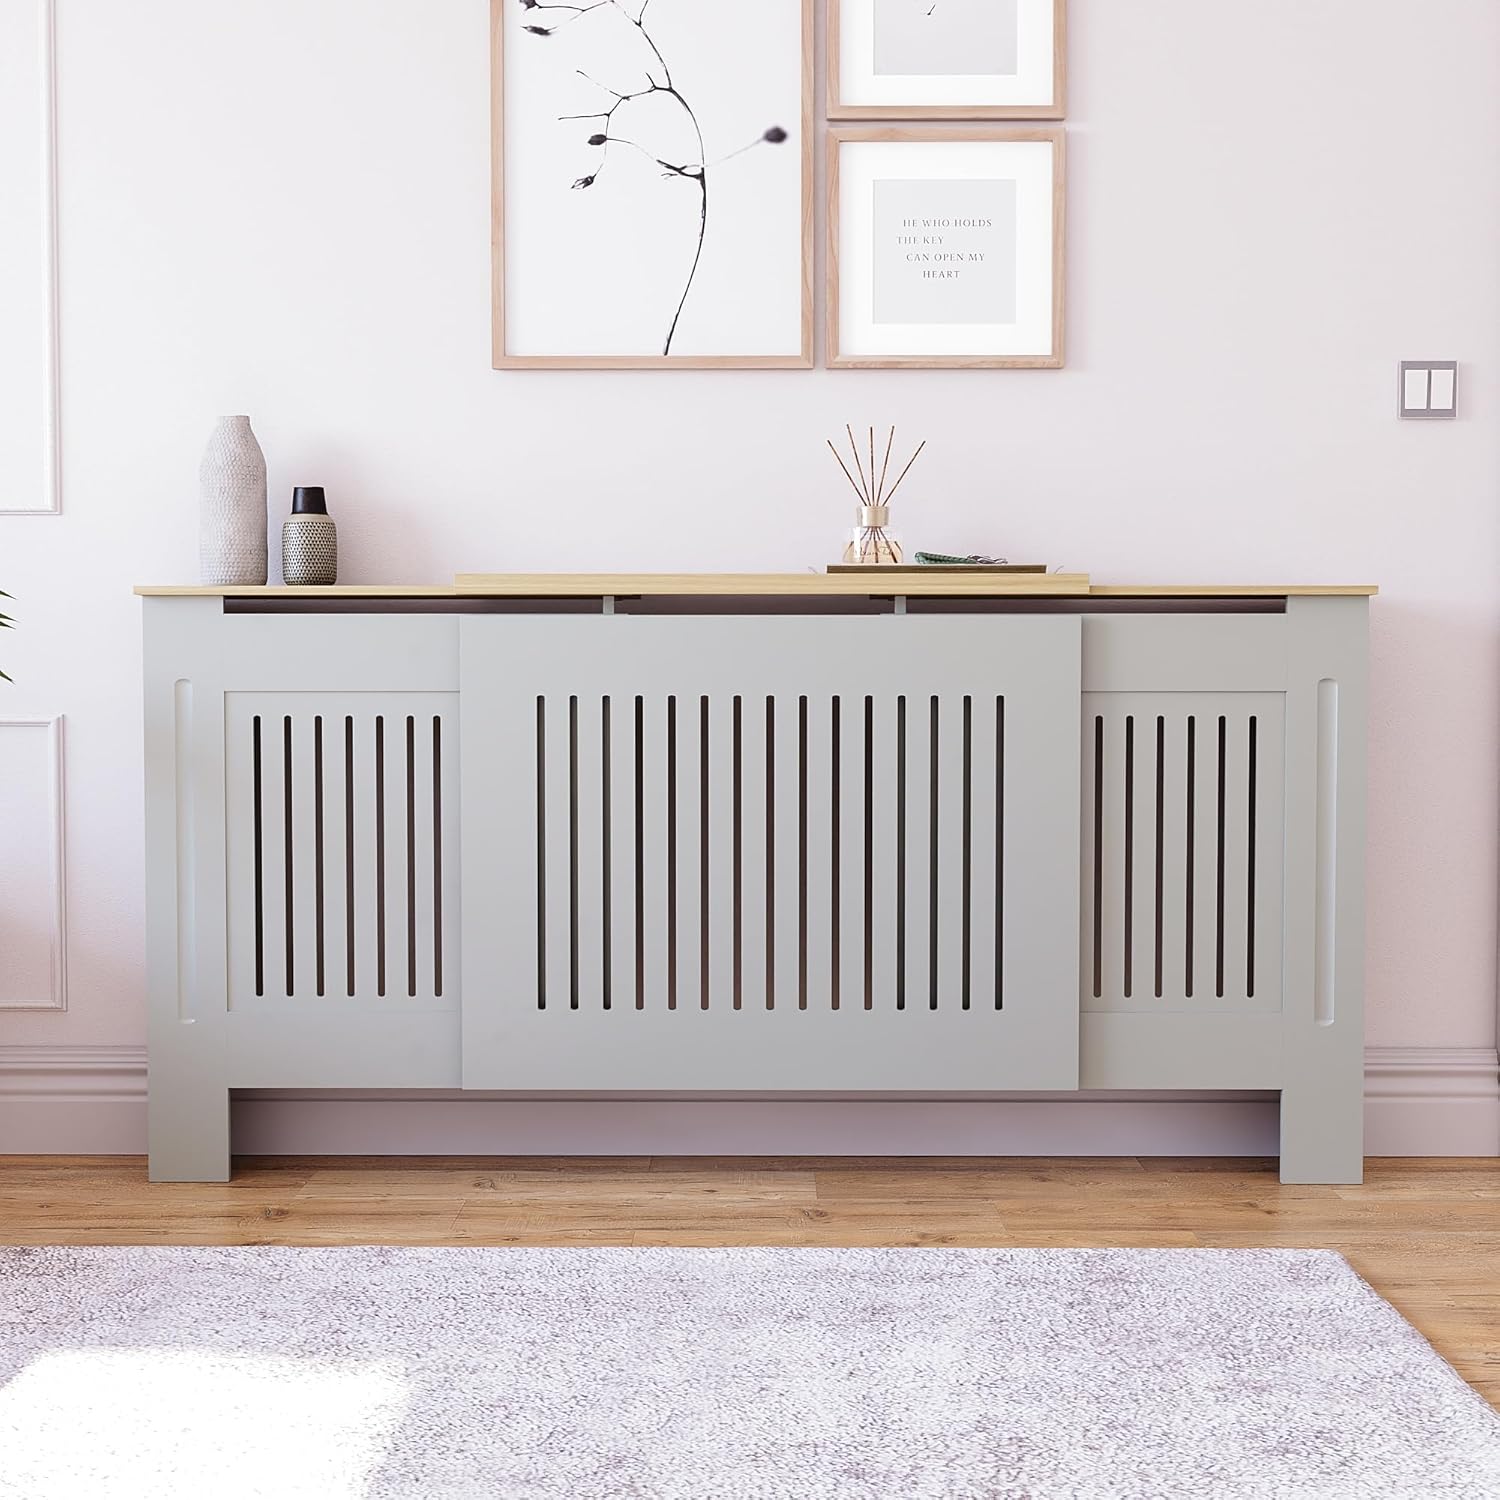
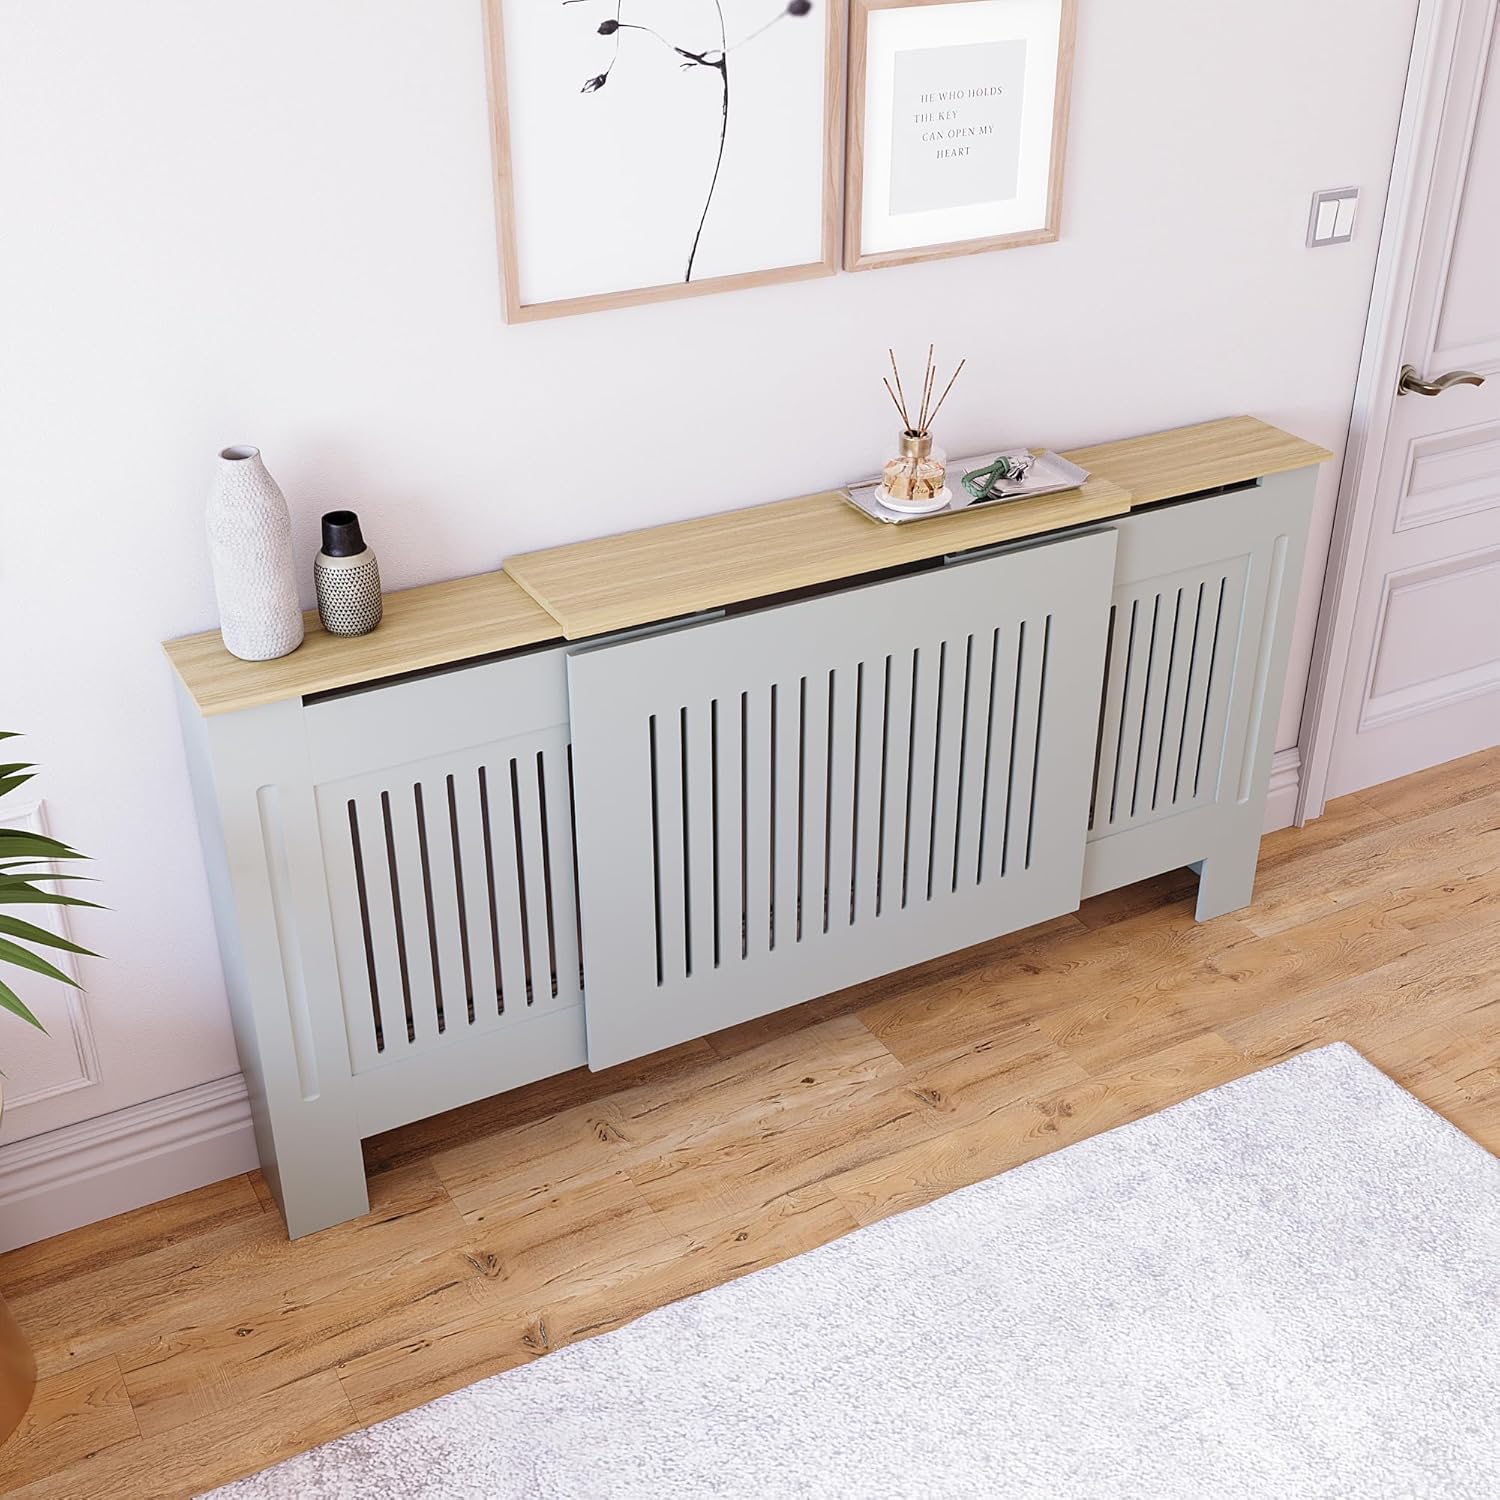
1. Introduction
This manual provides detailed instructions for the assembly, installation, operation, and maintenance of your Vida Designs Arlington Adjustable Radiator Cover. Please read these instructions carefully before beginning assembly and retain them for future reference. Proper assembly and care will ensure the longevity and safe use of your product.
2. Safety Information
- Keep all small parts and packaging materials away from children and pets during assembly to prevent choking hazards.
- Ensure the assembly area is clear and well-lit.
- Do not overtighten screws during assembly, as this may damage the wood.
- Always use appropriate tools for assembly.
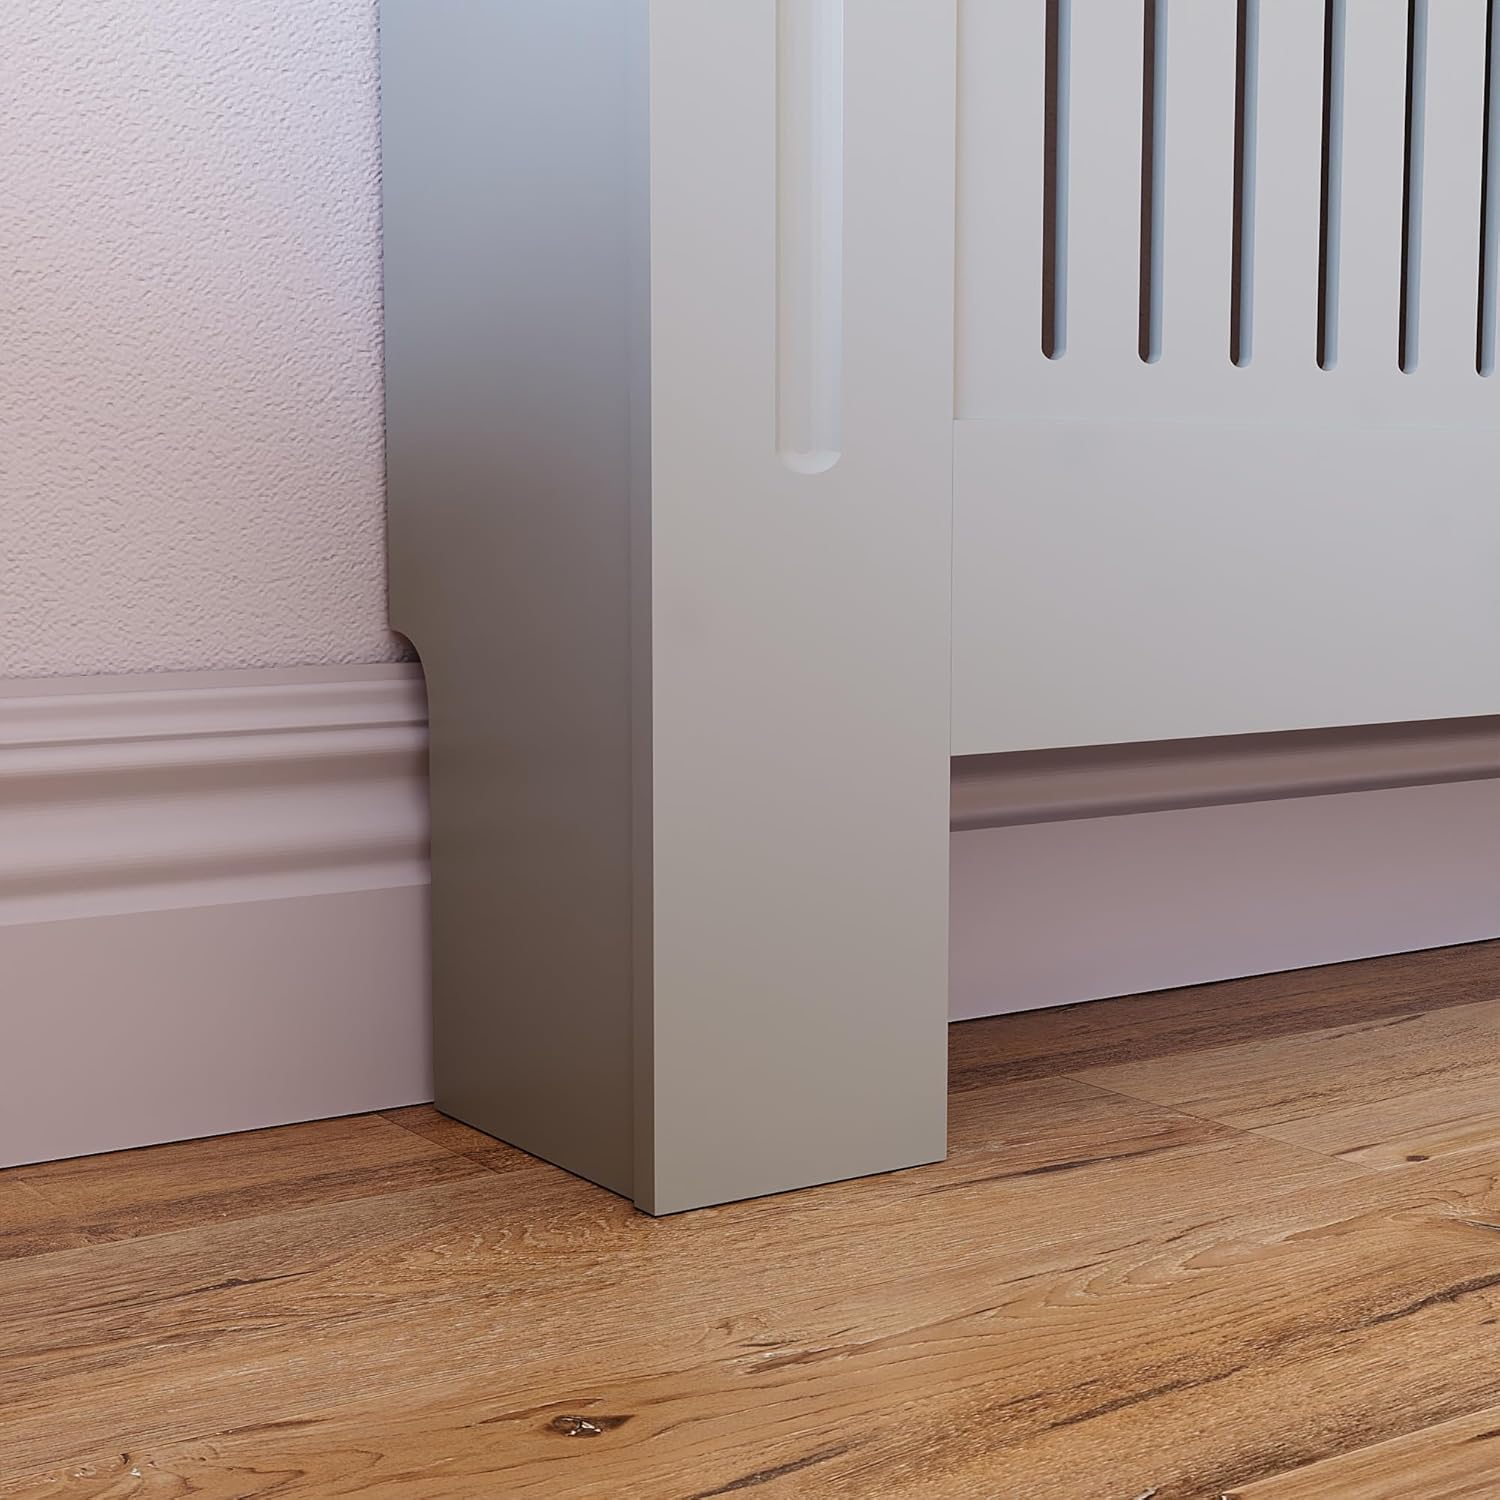
- Once installed, ensure the radiator cover is securely attached to the wall to prevent tipping.
- Do not place excessively heavy items on the top shelf.
- The radiator cover is designed to reduce direct contact with a hot radiator, but the surface may still become warm. Exercise caution.
3. Package Contents
Before starting assembly, verify that all components are present and undamaged. If any parts are missing or damaged, please contact customer support.
- Radiator cover panels (main sections, adjustable sliding panels)
- Top shelf panels
- Wall mounting brackets/clips
- Screws and other necessary fasteners
- Assembly instructions (this manual)
4. Assembly Instructions (Setup)
The Arlington radiator cover features a pre-cut design for easy assembly and integration with skirting boards. Follow these steps for a straightforward setup:
- Unpack Components: Carefully remove all parts from the packaging. Lay them out on a clean, soft surface to prevent scratches.
- Identify Panels: Distinguish between the main side panels, the central grille panels, and the adjustable sliding sections.
- Assemble Main Frame: Connect the side panels to the central grille sections using the provided fasteners. Ensure all connections are snug but do not fully tighten screws yet.
- Attach Adjustable Sections: Slide the adjustable panels into their designated grooves on the main frame. These panels allow you to customize the width of the cover.
- Secure Top Shelf: Place the top shelf panels onto the assembled frame. Ensure they are aligned correctly and secure them with the appropriate fasteners.
- Final Tightening: Once all parts are in place and aligned, carefully tighten all screws and fasteners.
- Attach Wall Mounting Clips: Secure the provided wall mounting clips to the back of the radiator cover as indicated in the diagram.
5. Installation (Operating)
Once assembled, install the radiator cover using the wall clips for stability and easy removal.
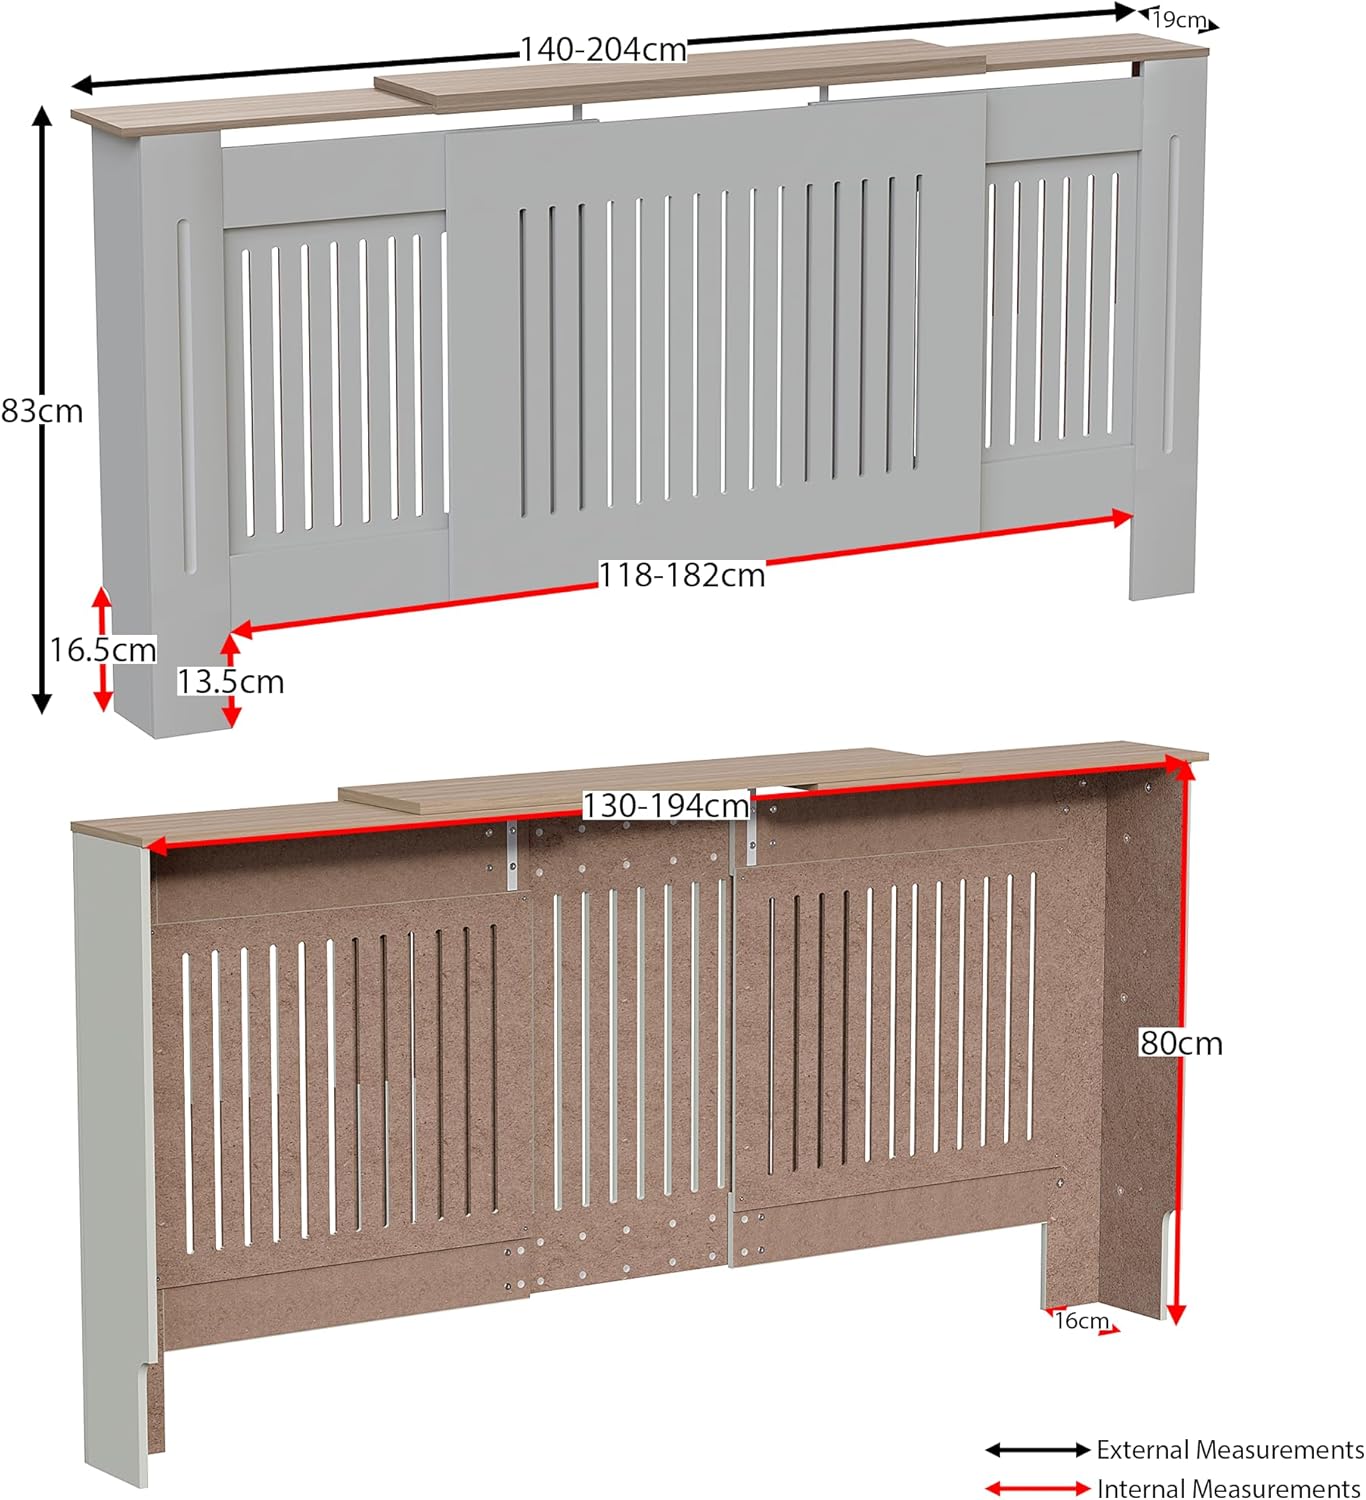
- Measure Radiator: Before positioning, measure your radiator's width, height, and depth to ensure the cover's adjustable range accommodates it. Allow for a small gap around the radiator for heat circulation.
- Mark Wall Positions: Hold the assembled radiator cover against the wall, centered over your radiator. Mark the positions where the wall mounting clips will attach.
- Secure Wall Clips: Using appropriate wall fixings (not always supplied, depending on wall type), securely fasten the wall mounting clips to the marked positions on the wall. Ensure they are level and strong enough to support the cover.
- Position Radiator Cover: Carefully lift the assembled radiator cover and align the clips on the cover with the wall-mounted clips.
- Clip into Place: Gently push the radiator cover towards the wall until it clips securely into the wall brackets. This clip-on design allows for easy removal when needed.
6. Maintenance
Regular maintenance will keep your radiator cover looking its best and ensure proper function.
- Dusting: Regularly dust the surface with a soft, dry cloth to prevent build-up.
- Cleaning: For more thorough cleaning, wipe the cover with a slightly damp cloth. Avoid using abrasive cleaners, harsh chemicals, or excessive moisture, as these can damage the finish.
- Radiator Cleaning: The clip-on design allows for easy removal of the cover from the wall. This facilitates cleaning of both the radiator cover and the radiator itself.
- Check Fasteners: Periodically check all screws and fasteners to ensure they remain tight. Retighten if necessary.
7. Troubleshooting
If you encounter any issues with your radiator cover, refer to the following common problems and solutions:
- Issue: Difficulty with Assembly.
Solution: Carefully review each step in the assembly instructions. Ensure all parts are oriented correctly before tightening screws. Do not fully tighten all screws until the entire unit is loosely assembled to allow for minor adjustments. - Issue: Radiator Cover Does Not Fit Over Radiator.
Solution: Double-check the external and internal dimensions of the radiator cover against your radiator's measurements. Ensure the adjustable sections are fully extended or retracted as needed to match your radiator's width. Remember to allow for a small clearance gap. - Issue: Radiator Cover Feels Unstable After Installation.
Solution: Verify that the wall mounting clips are securely fastened to a solid part of the wall (e.g., a stud or using appropriate wall anchors). Ensure all assembly screws within the cover itself are tight. The cover should not wobble once properly clipped to the wall.
8. Specifications
| Attribute | Detail |
|---|---|
| Brand | Vida Designs |
| Model Number | 3331916 |
| Item Model Number | Arlington |
| Color | Grey |
| Material | Wood |
| Product Dimensions (L x W x H) | 19 x 204 x 83 cm |
| Item Weight | 16.7 Kilograms |
| Special Feature | Adjustable |
| Mounting Type | Floor Mount |
| Style | Modern |
| Room Type | Entryway |
| Country of Origin | China |
9. Warranty and Support
For warranty information or customer support, please refer to the retailer's policy or contact Vida Designs directly through their official website or customer service channels. Please have your model number (Arlington Adjustable, 3331916) and purchase details ready when contacting support.


