
1. Introduction
This manual provides detailed instructions for the installation, operation, and maintenance of your Hipa XT675 Carburetor Kit. This kit is designed to replace the carburetor in various Kohler Courage XT-6, XT-7, XT650, XT6.5, and XT6.75 engines, restoring optimal performance to your lawn mower or other outdoor power equipment.
The kit includes all necessary components for installation, eliminating the need for separate purchases.

2. Compatibility Information
This Hipa carburetor kit is compatible with specific Kohler Courage XT-6, XT-7, XT650, XT149, XT173, and XT800 engines. Please verify your engine's model and part number before installation to ensure proper fitment.
2.1. Carburetor Compatibility
- Replaces Kohler Carburetor Part Numbers: 14 853 49-S, 14 853 36-S, 14 853 43-S, 14 853 47-S, 14 853 59-S.
- Note: This kit is not compatible with Kohler Carburetor Part Numbers 14 853 68-S or 14 853 55-S.

2.2. Air Filter Compatibility
- Replaces Kohler Air Filter Part Numbers: 14 083 15-S, 14 083 16-S.
- Note: This kit is not compatible with Kohler Air Filter Part Numbers 14 083 01-S or 14 083 22-S.

2.3. Engine Model Compatibility
- Compatible with Kohler XT675, XT650, XT149 20371, XT173, XT800 engines.
- Also fits older versions of Kohler Courage XT6 and XT7 Engines.
- Specific XT650 models: XT650-2013, XT650-2015, XT650-3014, XT650-3016.
- Specific XT675 models: XT675-0005, XT675-0013, XT675-0022, XT675-2011, XT675-2014, XT675-2015, XT675-2017, XT675-2019, XT675-3001, XT675-3012, XT675-3016, XT675-3018.
3. Product Features
The Hipa XT675 Carburetor Kit is engineered to provide reliable performance and efficient operation for your engine.
- Optimized Engine Performance: Designed to facilitate quick starts, fast acceleration, and stable RPMs.
- Pre-tuned for Convenience: The carburetor is factory-tuned and typically requires no further adjustments before installation.
- Quality Construction: Constructed with durable materials including brass components, composite rubber diaphragms, and an anodized aluminum body for resistance to heat, corrosion, and wear.
- Rigorous Testing: Each carburetor undergoes wet flow testing to ensure reliable engine performance under various conditions.


4. Product Dimensions
Refer to the following dimensions to ensure proper fitment for your engine.
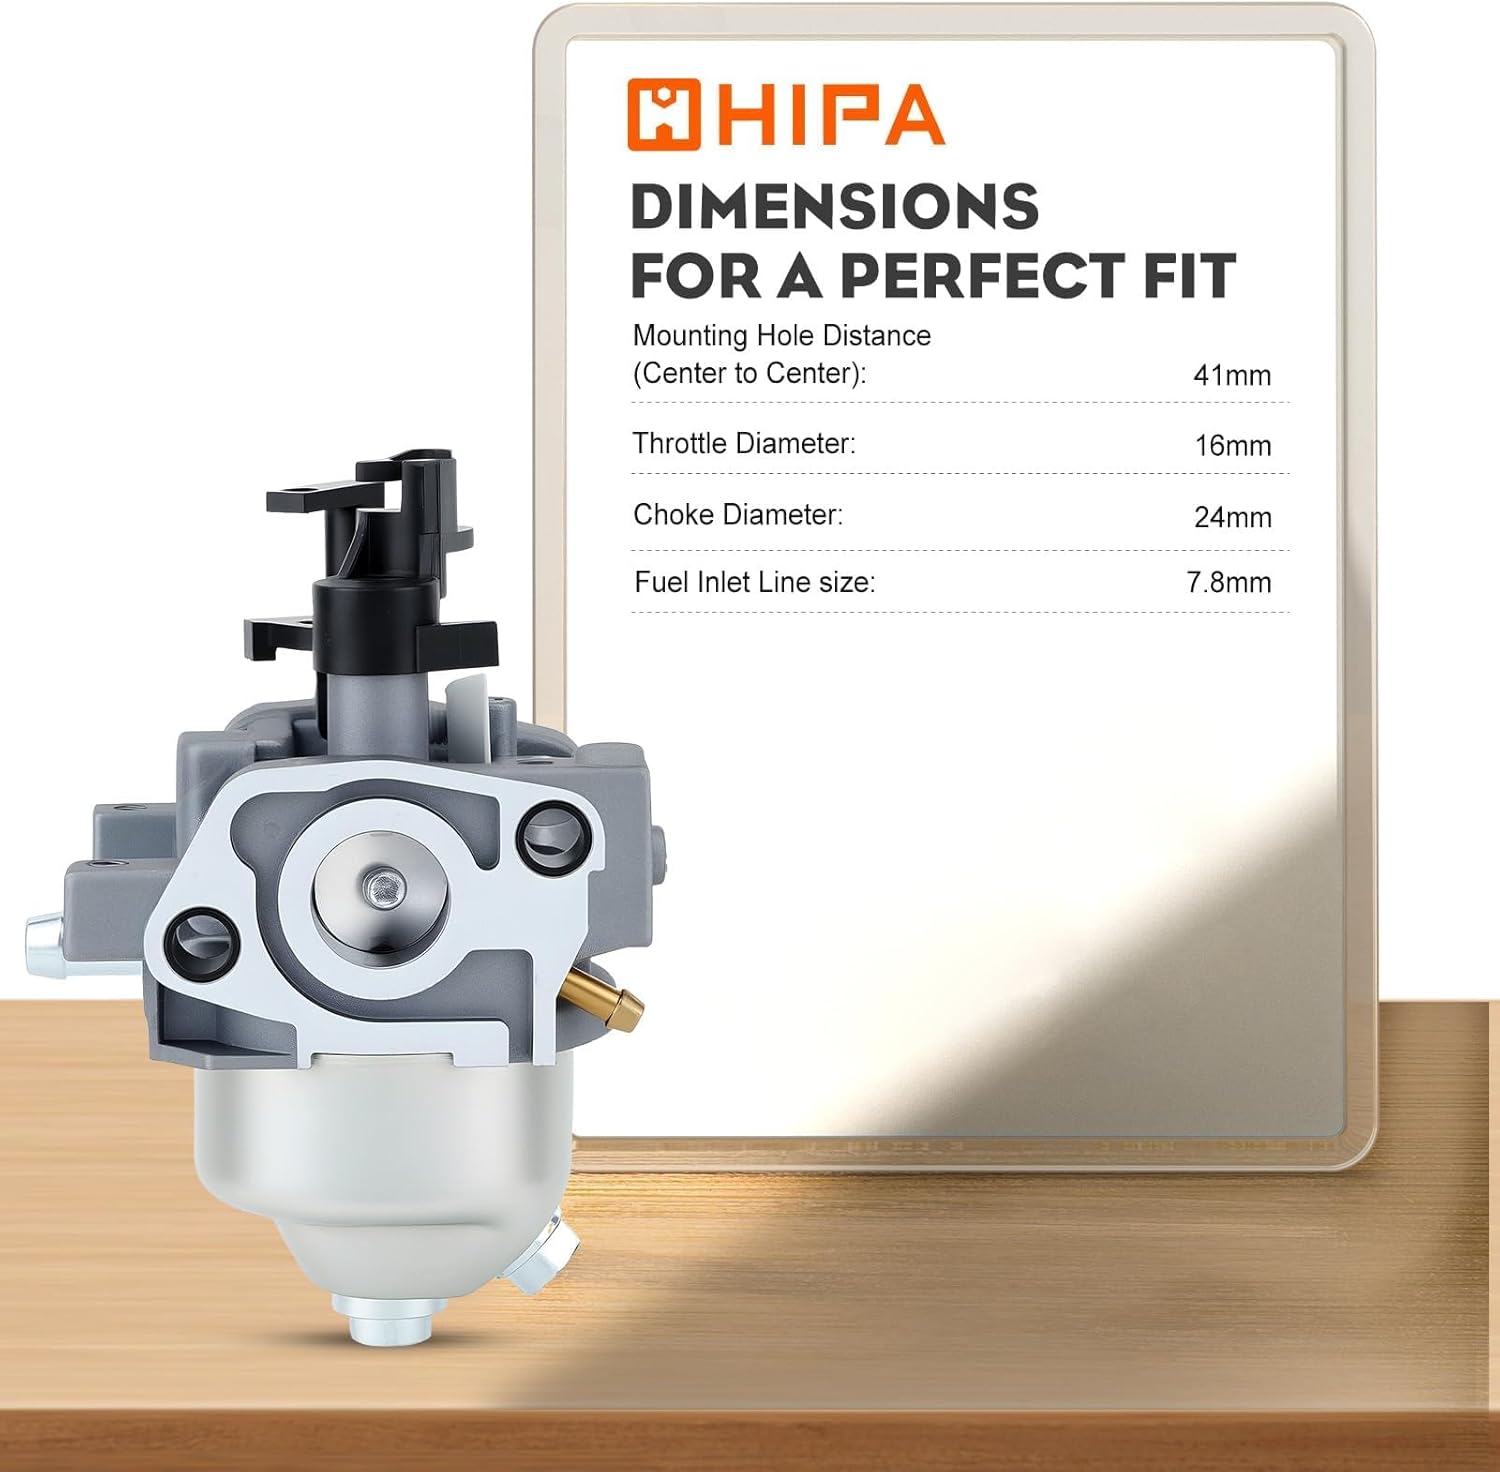
| Measurement | Value |
|---|---|
| Mounting Hole Distance (Center to Center) | 41 mm |
| Throttle Diameter | 16 mm |
| Choke Diameter | 24 mm |
| Fuel Inlet Line Size | 7.8 mm |
5. Setup and Installation
Proper installation is crucial for the correct function of the carburetor. If you are unsure about any steps, consult a qualified technician.
5.1. Safety Precautions
- Ensure the engine is cool and disconnected from the spark plug wire to prevent accidental starting.
- Work in a well-ventilated area.
- Wear appropriate personal protective equipment, such as gloves and eye protection.
- Have a fire extinguisher nearby when working with fuel.
5.2. Preparation
- Drain the fuel tank completely into an approved container.
- Clean the area around the carburetor to prevent debris from entering the engine.
- Gather necessary tools (wrenches, screwdrivers, pliers).
5.3. Removal of Old Carburetor
- Disconnect the fuel line from the old carburetor. Use the included shut-off valve to prevent fuel flow if not already drained.
- Carefully disconnect any linkages, springs, or wires attached to the carburetor. Take photos if needed for reassembly reference.
- Unbolt the old carburetor from the engine manifold. Note the position of any gaskets.
- Remove the old air filter and housing if necessary.
5.4. Installation of New Carburetor
- Install the new gaskets provided in the kit, ensuring they are correctly seated between the carburetor and the engine manifold.
- Mount the new Hipa carburetor onto the engine, aligning it with the mounting studs or bolt holes. Secure with bolts, tightening evenly.
- Reconnect all linkages, springs, and wires to their correct positions on the new carburetor.
- Install the new fuel line and fuel filter. Secure connections with the provided clamps.
- Install the new air filter into the air filter housing.
5.5. Final Checks
- Double-check all connections for tightness and proper routing.
- Ensure no tools or debris are left near moving engine parts.
- Reconnect the spark plug wire.
- Refill the fuel tank with fresh, appropriate fuel.

6. Operating Instructions
After successful installation, follow your engine manufacturer's guidelines for starting and operating your equipment. The Hipa carburetor is designed for optimal performance without requiring adjustments.
6.1. Starting the Engine
- Ensure the fuel shut-off valve is in the 'ON' position.
- Set the choke lever (if applicable) according to your engine's starting procedure (usually 'FULL CHOKE' for cold starts).
- Set the throttle to the appropriate starting position.
- Pull the starter rope firmly or engage the electric starter until the engine starts.
- Once the engine starts, gradually move the choke lever to the 'OFF' position as the engine warms up.
6.2. Running the Engine
- Allow the engine to warm up for a few minutes before engaging in work.
- Operate the engine at the recommended RPM for your equipment.
- Monitor engine sound and performance for any irregularities.
6.3. Shutting Down the Engine
- Reduce the engine speed to idle.
- Turn off the engine using the designated switch.
- For storage, turn the fuel shut-off valve to the 'OFF' position and run the engine until it runs out of fuel to prevent fuel system issues.
7. Maintenance
Regular maintenance of your engine and carburetor components will ensure longevity and consistent performance.
7.1. Air Filter Maintenance
- Inspect the air filter regularly, especially in dusty conditions.
- Clean or replace the air filter as recommended by your engine manufacturer or when it appears dirty. A clogged air filter can restrict airflow and affect carburetor performance.
7.2. Fuel Filter Maintenance
- Check the fuel filter periodically for debris or discoloration.
- Replace the fuel filter annually or if it appears clogged to ensure a clean fuel supply to the carburetor.
7.3. Fuel System Care
- Always use fresh, clean fuel.
- Consider using a fuel stabilizer if storing the equipment for extended periods.
- Drain the fuel system before long-term storage to prevent fuel degradation and carburetor issues.
8. Troubleshooting Common Issues
If you encounter problems with your engine after installing the Hipa carburetor, refer to the following table for common issues and potential solutions.

| Problem | Possible Cause | Solution |
|---|---|---|
| Engine Won't Start | No fuel, clogged fuel filter, spark plug issue, incorrect choke setting. | Check fuel level and shut-off valve. Replace fuel filter. Inspect/replace spark plug. Adjust choke. |
| Engine Starts Then Stalls | Clogged fuel filter, dirty air filter, improper choke adjustment, old fuel. | Replace fuel filter. Clean/replace air filter. Adjust choke. Use fresh fuel. |
| Fuel Leaks from Carburetor | Improperly seated gaskets, loose connections, damaged float. | Check gasket seating and tighten mounting bolts. Inspect fuel line connections. If leak persists, carburetor may need inspection by a professional. |
| Engine Runs Rough / Lacks Power | Dirty air filter, clogged fuel filter, old fuel, spark plug issue. | Clean/replace air filter. Replace fuel filter. Use fresh fuel. Inspect/replace spark plug. |
If these troubleshooting steps do not resolve the issue, it is recommended to consult a qualified small engine mechanic.
9. Technical Specifications
| Specification | Detail |
|---|---|
| Brand | Hipa |
| Model Number (Carburetor) | 14-853-36-S (Replaces 14-853-49-S and others) |
| Item Type | Carburetor Kit |
| Material | Brass components, composite rubber diaphragms, anodized aluminum body |
| Included Components | Carburetor, air filter, fuel filter, fuel line, shut-off valve, gaskets, clamps |
10. Warranty Information
Hipa products are manufactured to high-quality standards. For specific warranty details regarding your Hipa XT675 Carburetor Kit, please refer to the product packaging or contact Hipa customer support directly. Typically, replacement parts come with a limited warranty covering manufacturing defects.
11. Customer Support
If you have any questions, require assistance with installation, or need to report a product issue, please contact Hipa customer support through the retailer where the product was purchased or visit the official Hipa website for contact information.
For additional resources and product information, you may visit the Hipa Store on Amazon.