
Fexhull 60818
Fexhull Air Suspension Kit 60818 Instruction Manual
For Ram 1500 and 1500 Classic Pickups (2009-2022)
1. Overview
This manual provides detailed instructions for the installation, operation, and maintenance of the Fexhull Air Suspension Kit 60818. This kit is designed to enhance the load-carrying capability and ride quality of your vehicle.
1.1 Product Compatibility
- Vehicle: Ram 1500 and 1500 Classic Pickups
- Model Years: 2009, 2010, 2011, 2012, 2013, 2014, 2015, 2016, 2017, 2018, 2019, 2020, 2021, 2022
- OE Part Number: 60818

The Fexhull Air Suspension Kit 60818 is specifically engineered for the listed Ram 1500 and 1500 Classic models, ensuring proper fitment and performance. The kit integrates seamlessly into the existing suspension system to provide additional support when hauling or towing heavy loads.
2. Specifications
| Feature | Specification |
|---|---|
| Minimum PSI | 5 PSI |
| Maximum PSI | 35 PSI |
| Load Leveling Capacity | Up to 7500 lbs |
| Distance Between Brackets | 12.05 inches |
| Material | TPEE (Thermoplastic Polyester Elastomer) |
| Position | Rear |


3. Components List
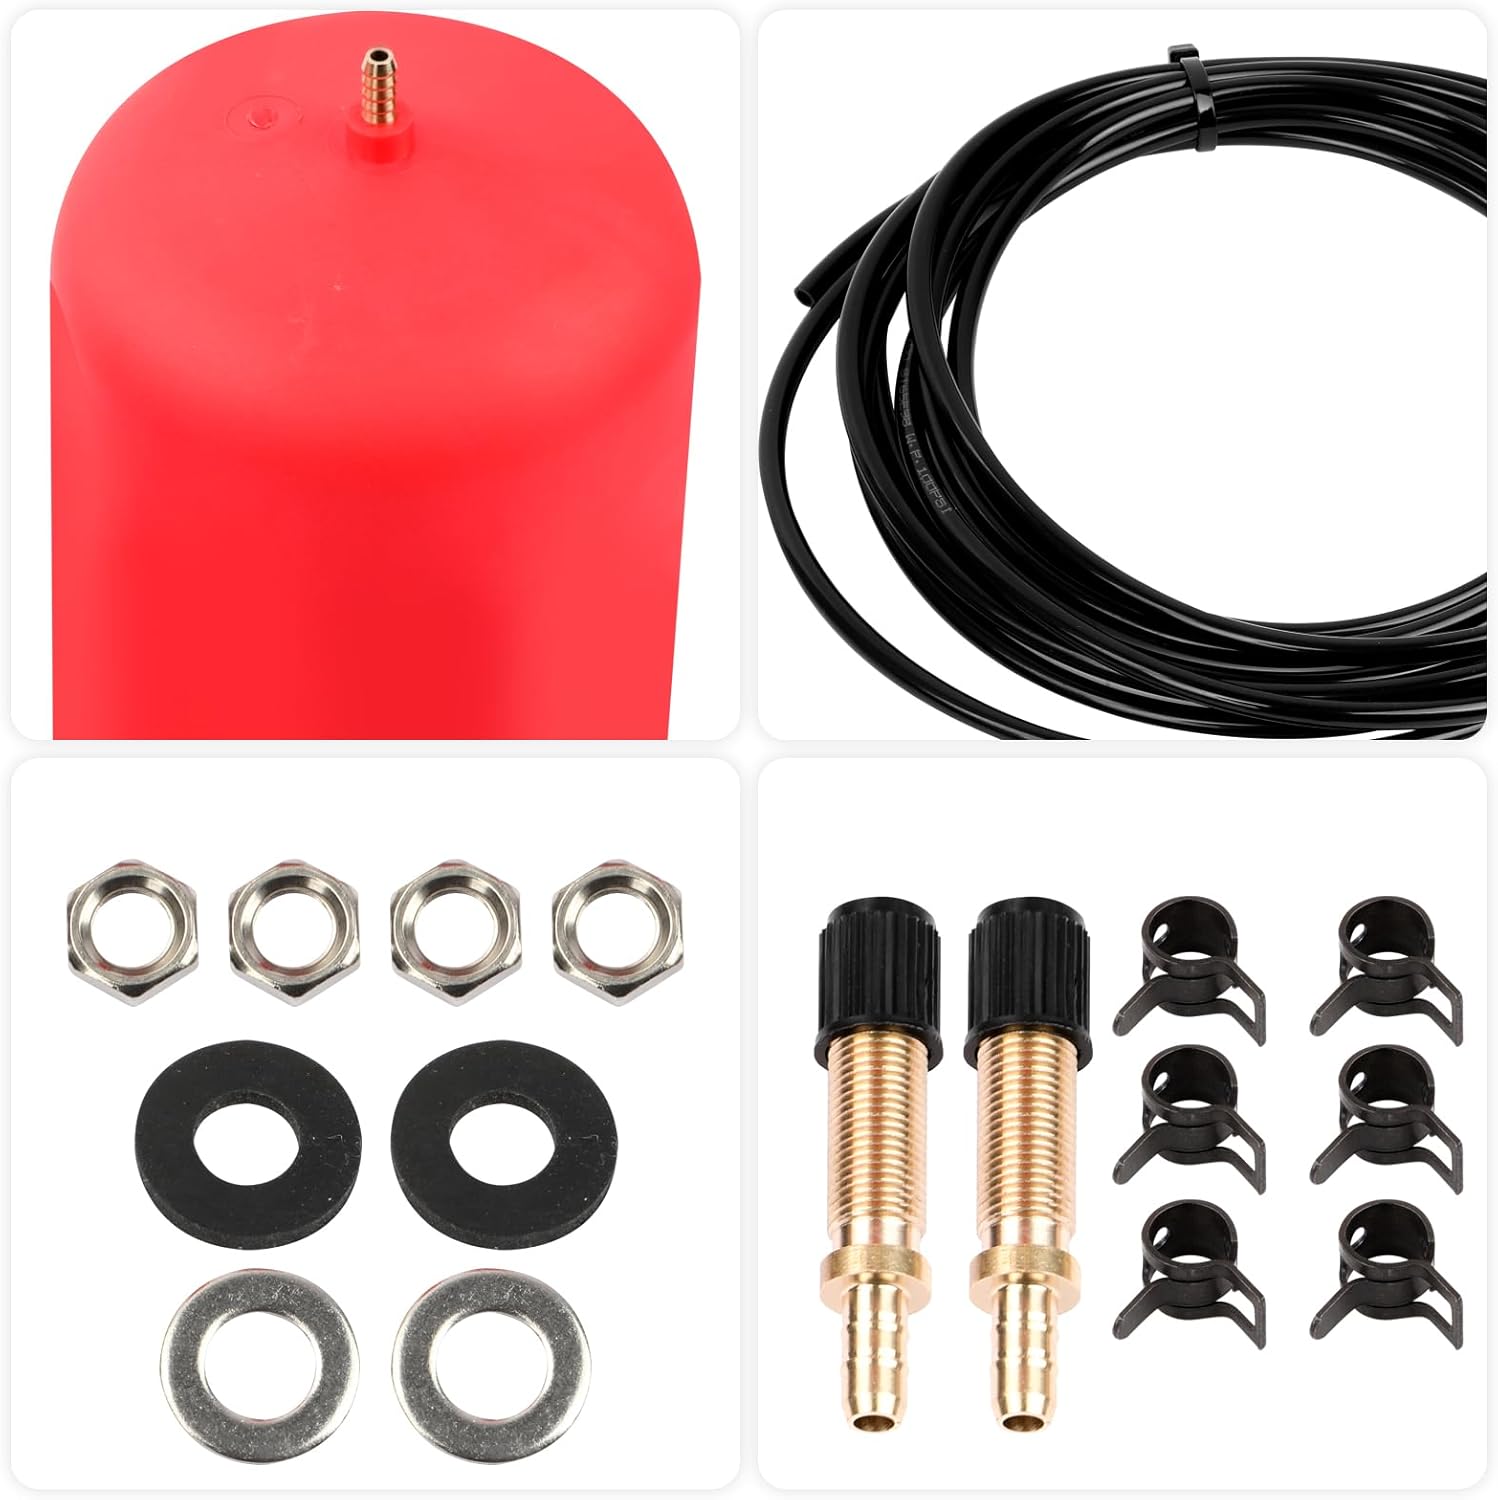
The Fexhull Air Suspension Kit 60818 includes the following components:
- Air springs (2)
- Air lines
- Brackets
- Roll plates
- Mounting hardware (nuts, washers, clamps, zip ties, air valves)

4. Safety Information
- Always wear appropriate personal protective equipment (PPE) during installation, including safety glasses and gloves.
- Ensure the vehicle is securely supported on jack stands before working underneath. Never rely solely on a jack.
- Do not exceed the Gross Vehicle Weight Rating (GVWR) of your vehicle. The air suspension kit increases load leveling capacity, not the vehicle's maximum weight capacity.
- Maintain air pressure within the specified range of 5 PSI (minimum) to 35 PSI (maximum). Over-inflation or under-inflation can damage the air springs and affect vehicle handling.
- Route air lines away from sharp edges, exhaust components, and moving parts to prevent damage.
- If you are unsure about any step of the installation process, consult a qualified mechanic.
5. Setup and Installation
Proper installation is crucial for the performance and longevity of your air suspension kit. Follow these steps carefully.
5.1 Pre-Installation Steps
- Park the vehicle on a level surface and engage the parking brake.
- Raise the rear of the vehicle using a jack and support it securely with jack stands, ensuring the rear axle is fully suspended and the coil springs are extended.
- Remove the rear wheels for easier access to the suspension components.
5.2 Air Spring Preparation
- Deflate the air springs completely. You may need to compress them manually or use a vacuum to remove all air.
- Carefully fold or roll the air springs to make them compact enough to fit inside the coil springs. You can use zip ties to temporarily hold them in a compressed state.
5.3 Installation into Coil Springs
- Insert the compressed air spring into the top of the existing coil spring. Ensure it is seated correctly within the coil.
- Once the air spring is in place, cut and remove any temporary zip ties. The air spring should expand to fill the coil.
- Repeat for the other side.

5.4 Air Line and Valve Installation
- Attach the air lines to the air springs. Ensure a secure, airtight connection.
- Route the air lines to a convenient location for the inflation valves, typically near the rear bumper or license plate. Avoid sharp bends, heat sources, and moving suspension components. Use the provided clamps and zip ties to secure the lines.
- Install the inflation valves in the chosen location. Drill a small hole if necessary, ensuring it is clean and free of burrs. Secure the valves with the provided nuts and washers.
- Connect the air lines to the inflation valves.
5.5 Post-Installation Checks
- Reinstall the wheels and lower the vehicle.
- Inflate the air springs to approximately 5-10 PSI.
- Check all connections for air leaks using a soapy water solution. Bubbles indicate a leak. Tighten connections or re-seat lines as needed.
- Ensure adequate clearance around the air springs and air lines throughout the full range of suspension travel.
6. Operating Instructions
The Fexhull Air Suspension Kit is designed to be adjustable to suit varying load conditions.
6.1 Inflation and Deflation
- Inflation: Use a standard air compressor to inflate the air springs through the installed inflation valves. Monitor the pressure with a gauge.
- Deflation: To reduce air pressure, press the center pin of the inflation valve.
6.2 Recommended Air Pressure
- Minimum Pressure: Always maintain a minimum of 5 PSI in the air springs, even when unloaded, to prevent damage.
- Maximum Pressure: Do not exceed 35 PSI. Over-inflation can lead to premature failure of the air springs.
- Load Adjustment: Adjust the air pressure based on the load being carried. Increase pressure for heavier loads to maintain a level ride height and improve stability. Decrease pressure when the load is removed to restore ride comfort.


7. Maintenance
Regular maintenance ensures optimal performance and extends the life of your Fexhull Air Suspension Kit.
- Periodic Inspection: Regularly inspect the air springs, air lines, and connections for signs of wear, damage, or leaks. Check for cracks, abrasions, or loose fittings.
- Cleanliness: Keep the air springs and surrounding areas free from dirt, debris, and corrosive materials.
- Pressure Check: Check air pressure periodically, especially before and after hauling or towing. Adjust as necessary to maintain the recommended PSI range.
- Roll Plates: The included roll plates protect the air springs from abrasion and enhance durability. Ensure they are properly positioned and free from damage.
8. Troubleshooting
This section addresses common issues you might encounter with your air suspension kit.
| Problem | Possible Cause | Solution |
|---|---|---|
| Air springs lose pressure | Air leak in lines, connections, or valve; damaged air spring | Check all connections with soapy water for bubbles. Tighten fittings or replace damaged components. Inspect air springs for punctures or tears. |
| Vehicle remains low after inflation | Insufficient air pressure; air springs not fully inflated; excessive load | Increase air pressure to recommended levels (up to 35 PSI). Ensure air springs are fully expanded. Reduce vehicle load if it exceeds the kit's capacity or GVWR. |
| Rough ride or harsh handling | Over-inflated air springs | Reduce air pressure to within the recommended range (5-35 PSI). Adjust pressure based on load for optimal comfort. |
| Air lines pinched or damaged | Improper routing during installation | Inspect air line routing. Reroute lines away from moving parts, sharp edges, or areas where they can be pinched. Replace damaged lines. |
9. Warranty and Support
Fexhull products are manufactured with over 20 years of professional experience, adhering to high standards of quality and efficiency.
- For specific warranty details, please refer to the product packaging or contact Fexhull customer service.
- For technical assistance or support, please reach out to the manufacturer directly.

Ask a question about this manual
Ask about setup, troubleshooting, compatibility, parts, safety, or missing instructions. Manuals+ will review the question and use this page’s manual context to help answer it.