1. Introduction
This manual provides comprehensive instructions for the safe and efficient operation of your Dioche Electronic Password Safe Deposit Box. Please read this manual thoroughly before installation and use to ensure proper functionality and to maximize the security features of your safe. Keep this manual for future reference.
2. Safety Information
- Do not store emergency keys inside the safe. Keep them in a secure, separate location.
- Ensure the safe is installed on a stable surface or securely mounted to a wall or floor to prevent unauthorized removal.
- Avoid exposing the safe to extreme temperatures or high humidity.
- Do not attempt to disassemble or modify the safe. This may compromise its security and void the warranty.
- Keep the safe and its components out of reach of children.
- The safe is designed to be fireproof but is not water-resistant. Avoid exposure to water.
3. Package Contents
Please check the package contents carefully. If any items are missing or damaged, contact customer support.
- Dioche Electronic Password Safe Deposit Box
- Emergency Keys (2)
- Mounting Hardware (bolts, washers)
- Floor Mat/Lining
- User Manual (this document)
- Batteries (4 x AA, typically included)

Image 3.1: The Dioche Electronic Password Safe Deposit Box shown with its included accessories, including emergency keys, mounting bolts, and batteries.
4. Product Overview
The Dioche Electronic Password Safe Deposit Box is constructed from heavy-duty cold-rolled alloy steel, offering robust security for your valuables. It features a dual unlocking mechanism: a digital keypad for password entry and a traditional key for emergency access.

Image 4.1: Front view of the electronic safe, highlighting its multi-protection password system designed to prevent deciphering attempts.

Image 4.2: Close-up of the safe's digital panel, showing the keypad for code entry and the concealed keyhole for manual unlocking.
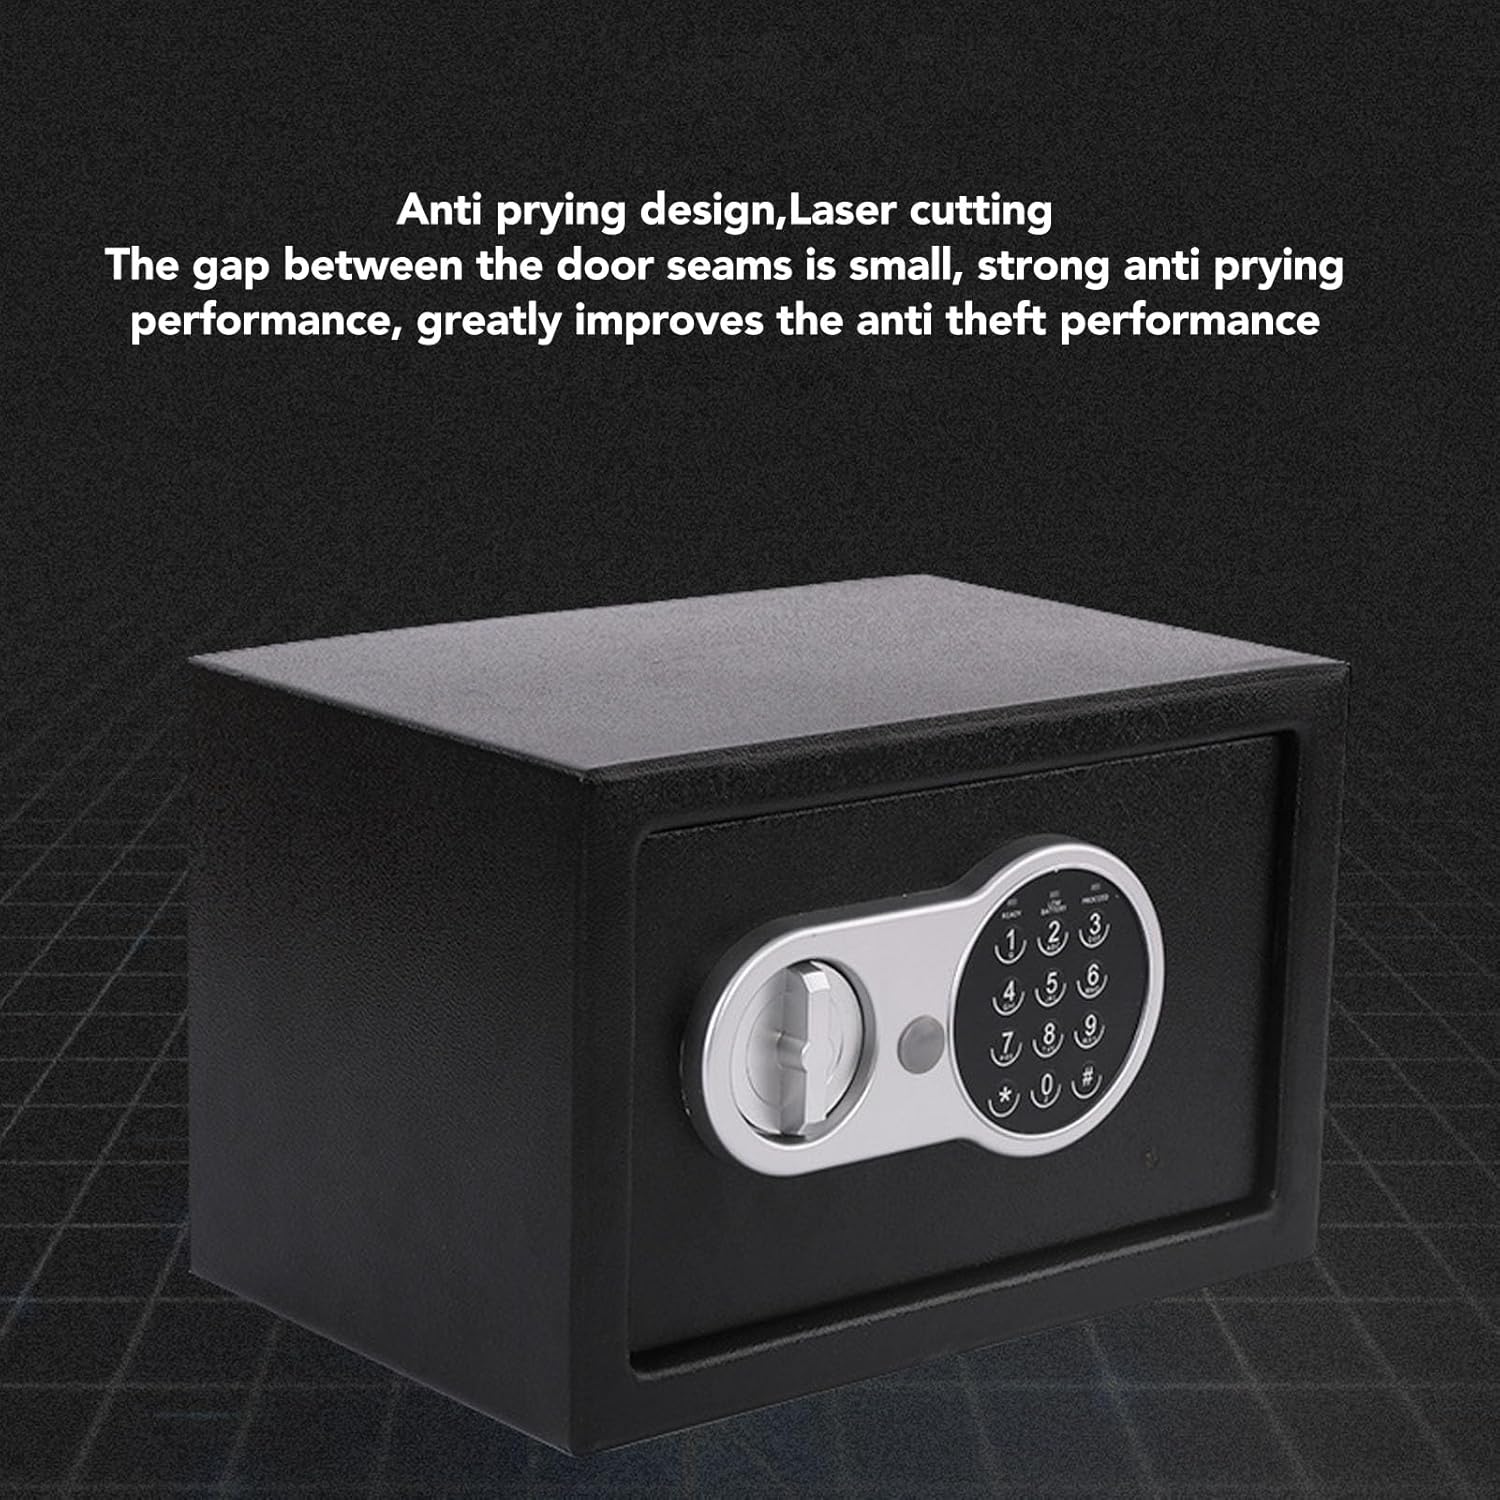
Image 4.3: View illustrating the safe's anti-prying design, featuring laser-cut seams that minimize gaps and enhance anti-theft performance.

Image 4.4: Interior view of the safe, demonstrating its multi-layer alloy steel plate construction for high strength and toughness.
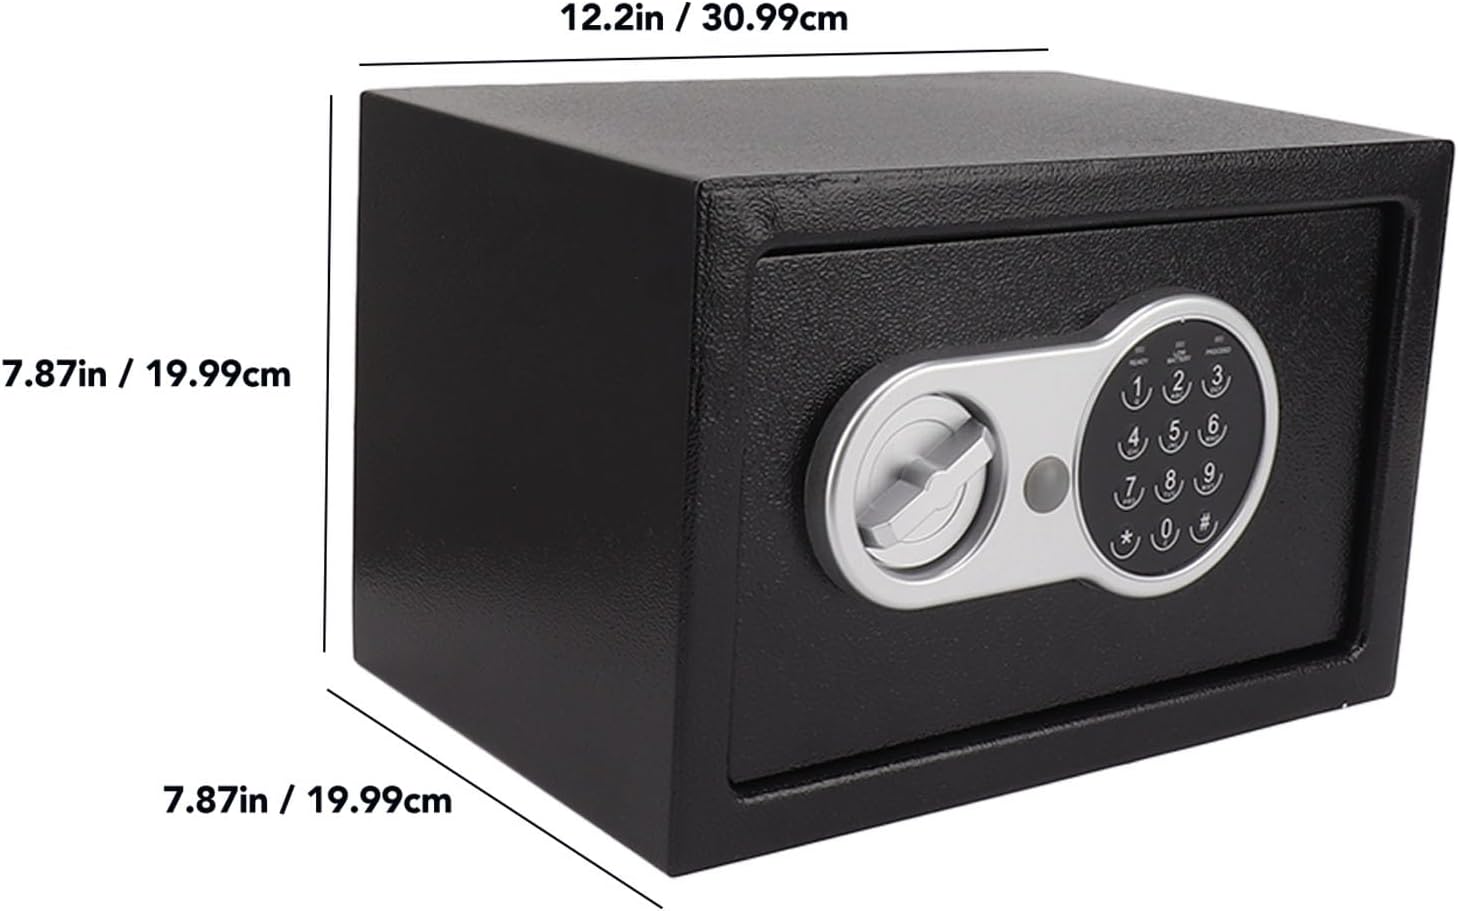
Image 4.5: Diagram showing the external dimensions of the safe: approximately 12.2 inches (30.99 cm) wide, 7.87 inches (19.99 cm) high, and 7.87 inches (19.99 cm) deep.
5. Setup
5.1 Battery Installation
- Locate the battery compartment, usually on the inside of the safe door.
- Insert 4 AA batteries (included) according to the polarity markings (+/-).
- Close the battery compartment cover securely.
- The safe will emit a beep, indicating successful battery installation.
5.2 Initial Code Setting
The safe comes with a factory default code (e.g., "159"). It is crucial to change this immediately for security.
- With the safe door open, press the red reset button located on the inside of the door (often near the hinge). The yellow light on the keypad will illuminate.
- Enter your desired new password (3-8 digits) on the keypad.
- Press the "#" button to confirm. The safe will beep twice, and the yellow light will turn off, indicating the new code is set.
- Test the new code with the door open before closing it. Enter your new code, then turn the knob clockwise to ensure it opens.
Important: If you forget your password, you will need to use the emergency key to open the safe.
5.3 Mounting the Safe (Optional)
For enhanced security, the safe can be mounted to a floor or wall using the provided hardware.
- Choose a suitable location. Ensure there are no electrical wires or plumbing in the wall/floor where you plan to drill.
- Open the safe door and remove the floor mat to expose the pre-drilled mounting holes.
- Mark the drilling points on the wall or floor through the holes in the safe.
- Drill pilot holes using an appropriate drill bit for your mounting surface.
- Position the safe and secure it using the provided expansion bolts and washers. Tighten firmly.
6. Operating the Safe
6.1 Opening with Digital Code
- Enter your 3-8 digit personal password on the keypad.
- Press the "#" button. The green light will illuminate, and the safe will beep.
- Within 5 seconds, turn the knob clockwise to open the door.
- If an incorrect code is entered three times, the system will lock for 20 seconds. Further incorrect attempts will increase the lockout time.
6.2 Opening with Emergency Key
The emergency key can be used if you forget your password or if the batteries are depleted.
- Locate the emergency keyhole, usually concealed behind a small cover on the keypad panel.
- Remove the cover.
- Insert the emergency key and turn it counter-clockwise.
- While holding the key turned, turn the main knob clockwise to open the safe door.
- Once open, you can replace the batteries or reset the password as needed.
6.3 Closing and Locking the Safe
- Close the safe door.
- Turn the knob counter-clockwise until it locks into place. The safe is now secured.
7. Maintenance
- Battery Replacement: Replace batteries annually or when the "LOW BATTERY" indicator lights up. Always use 4 new AA batteries.
- Cleaning: Wipe the safe's exterior with a soft, damp cloth. Avoid abrasive cleaners or solvents.
- Keypad Care: Keep the keypad clean and dry. Avoid pressing buttons with excessive force.
8. Troubleshooting
| Problem | Possible Cause | Solution |
|---|---|---|
| Safe does not open with code. | Incorrect password entered. Batteries are low or dead. | Re-enter the correct password carefully. Replace batteries. Use emergency key to open. |
| Keypad is unresponsive. | Batteries are dead or incorrectly installed. | Check battery polarity. Replace with new batteries. |
| Safe beeps continuously. | Low battery warning. | Replace all 4 AA batteries immediately. |
| Forgot password. | Password forgotten. | Use the emergency key to open the safe. Once open, reset the password using the reset button. |
9. Specifications
- Brand: Dioche
- Model: Electronic Password Safe Deposit Box
- Lock Type: Electronic, Key
- Color: Black
- Material: Alloy Steel (Cold Rolled Sheet)
- Special Feature: Fireproof
- Mounting Type: Floor Mount, Wall Mount
- Included Components: Safe, Keys, Mounting Hardware, Batteries
- Water Resistance Level: Not Water Resistant
- Dimensions (Approximate): 12.2 in (Width) x 7.87 in (Height) x 7.87 in (Depth)
10. Warranty and Support
For warranty information or technical support, please refer to the retailer's policy or contact Dioche customer service directly. Keep your purchase receipt as proof of purchase.
For further assistance, visit the Dioche Store on Amazon.


