
Introduction
This manual provides detailed instructions for the safe and efficient use of your DXOPHIEX 50FT Aquarium Gravel Vacuum and Water Changer. Please read all instructions carefully before assembly and operation to ensure proper function and longevity of the product. This device is designed to simplify aquarium maintenance by facilitating quick water changes and gravel cleaning.
Package Contents
Verify that all components listed below are present in your package:
- 50-foot Water Hose
- Gravel Cleaning Tube (19 inches)
- Water Flow Assembly with Integrated Valves
- Three Metal Faucet Adapters:
- 3/4-inch GHT Garden Hose Adapter
- 13/16-inch Threaded Faucet Adapter
- 55/64-inch and 15/16-inch Threaded Faucet Adapter (dual size)
- Waterproof Tape
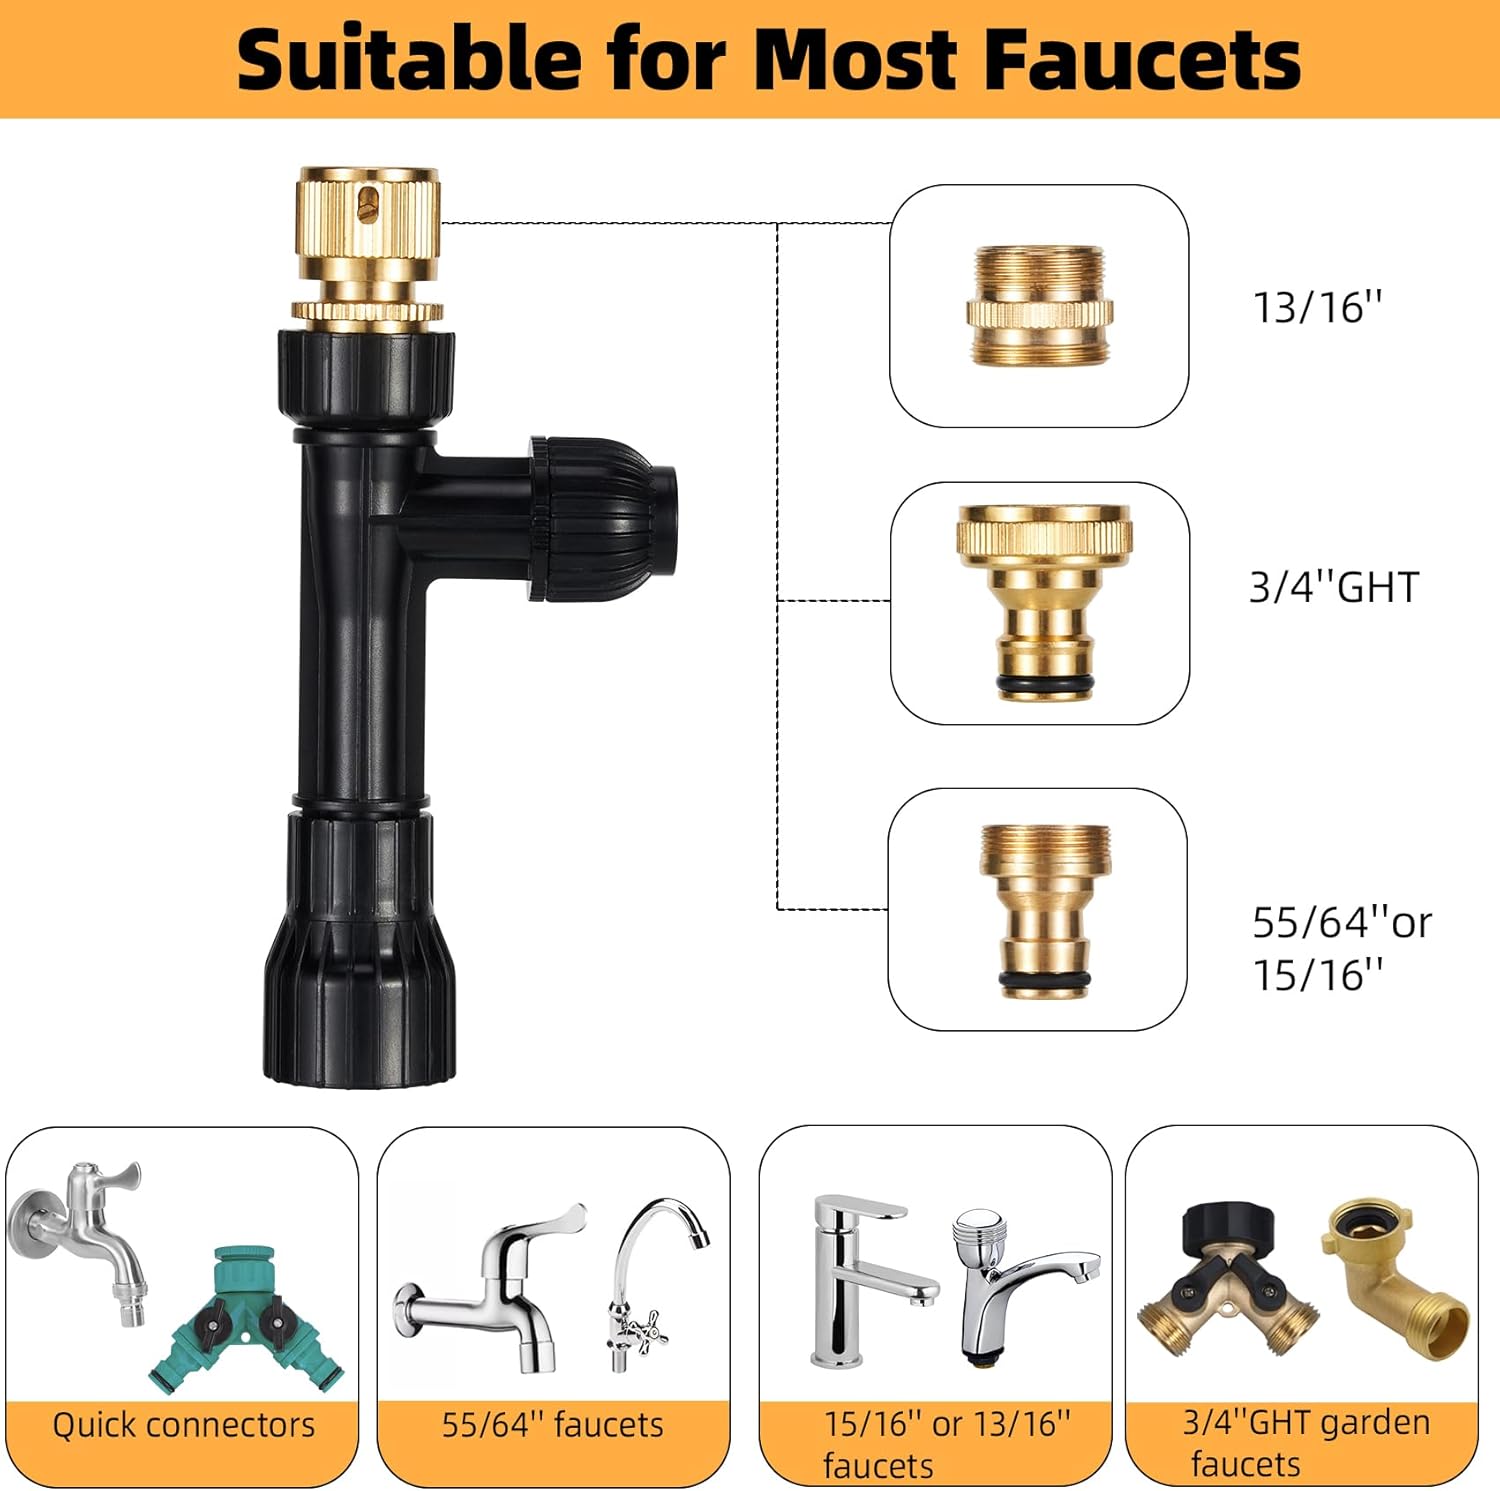
Image: All components included in the package.

Image: Detailed view of the three metal faucet adapters and their compatibility with various faucet types.
Key Features
- Quick Water Change & Easy Operation: Features a two-valve system for rapid draining or refilling of water, and efficient dirt removal and sand washing.
- 19-inch Gravel Cleaning Tube: Designed with a siphon principle, the long tube reaches the bottom of most aquariums, providing powerful suction for food residue and fish waste, improving water quality.
- Auto-Siphon & Quiet Operation: Operates without electricity, silently, and eliminates the need for buckets, preventing overflow. Simply open the faucet and valve for easy filling and draining.
- Versatile Faucet Compatibility: Includes three metal faucet adapters (3/4-inch GHT, 13/16-inch, and 55/64-inch/15/16-inch) to fit most standard faucets.
- Complete Accessories & Simple Assembly: Easy to assemble and disassemble without tools. Includes waterproof tape for secure connections.
Setup Instructions
- Connect Components: Attach the gravel cleaning tube to one end of the 50-foot water hose. Connect the water flow assembly to the other end of the water hose. Ensure all connections are secure.
- Select Faucet Adapter: Choose the appropriate metal faucet adapter that matches your faucet. If none of the included adapters fit, you may need to purchase a water bandit hose or a universal faucet connector separately.
- Attach to Faucet: Screw the selected faucet adapter onto your faucet. Then, connect the water flow assembly to the faucet adapter. Use the provided waterproof tape on threaded connections to prevent leaks.
- Position Hose: Place the gravel cleaning tube end into your aquarium. Ensure the water flow assembly is securely attached to the faucet and positioned over a sink or drain.

Image: Step-by-step guide for connecting the water changer to a faucet and preparing it for use.

Image: Solutions for connecting the water changer to non-standard faucets.
Video: Official DXOPHIEX guide demonstrating the assembly and connection of the aquarium water changer to a faucet.
Operating Instructions
Draining Water and Gravel Cleaning
- Ensure the water flow assembly is connected to your faucet and positioned over a drain.
- Submerge the gravel cleaning tube into the aquarium.
- Turn the valve on the gravel tube to the 'ON' position.
- Turn the valve on the water flow assembly to the 'DRAIN WATER' position (usually by pushing it down).
- Open your faucet. Water will begin to flow from the aquarium, through the hose, and out the faucet into the drain.
- Move the gravel cleaning tube across the bottom of the aquarium to vacuum debris from the gravel. The design allows debris to be siphoned out while leaving the gravel behind.
- Monitor the water level in your aquarium. When the desired amount of water has been removed, proceed to refill.

Image: Demonstrating drainage and gravel cleaning in an aquarium.

Image: Explanation of fine gravel cleaning functionality.
Adding Water (Refill)
- After draining, turn off your faucet.
- Turn the valve on the water flow assembly to the 'ADD WATER' position (usually by pushing it up and twisting).
- Slowly open your faucet to begin refilling the aquarium with fresh water.
- Monitor the water temperature and flow rate to avoid shocking your fish or disturbing the aquarium substrate.
- Once the aquarium is refilled to the desired level, turn off the faucet and then close the valve on the water flow assembly.
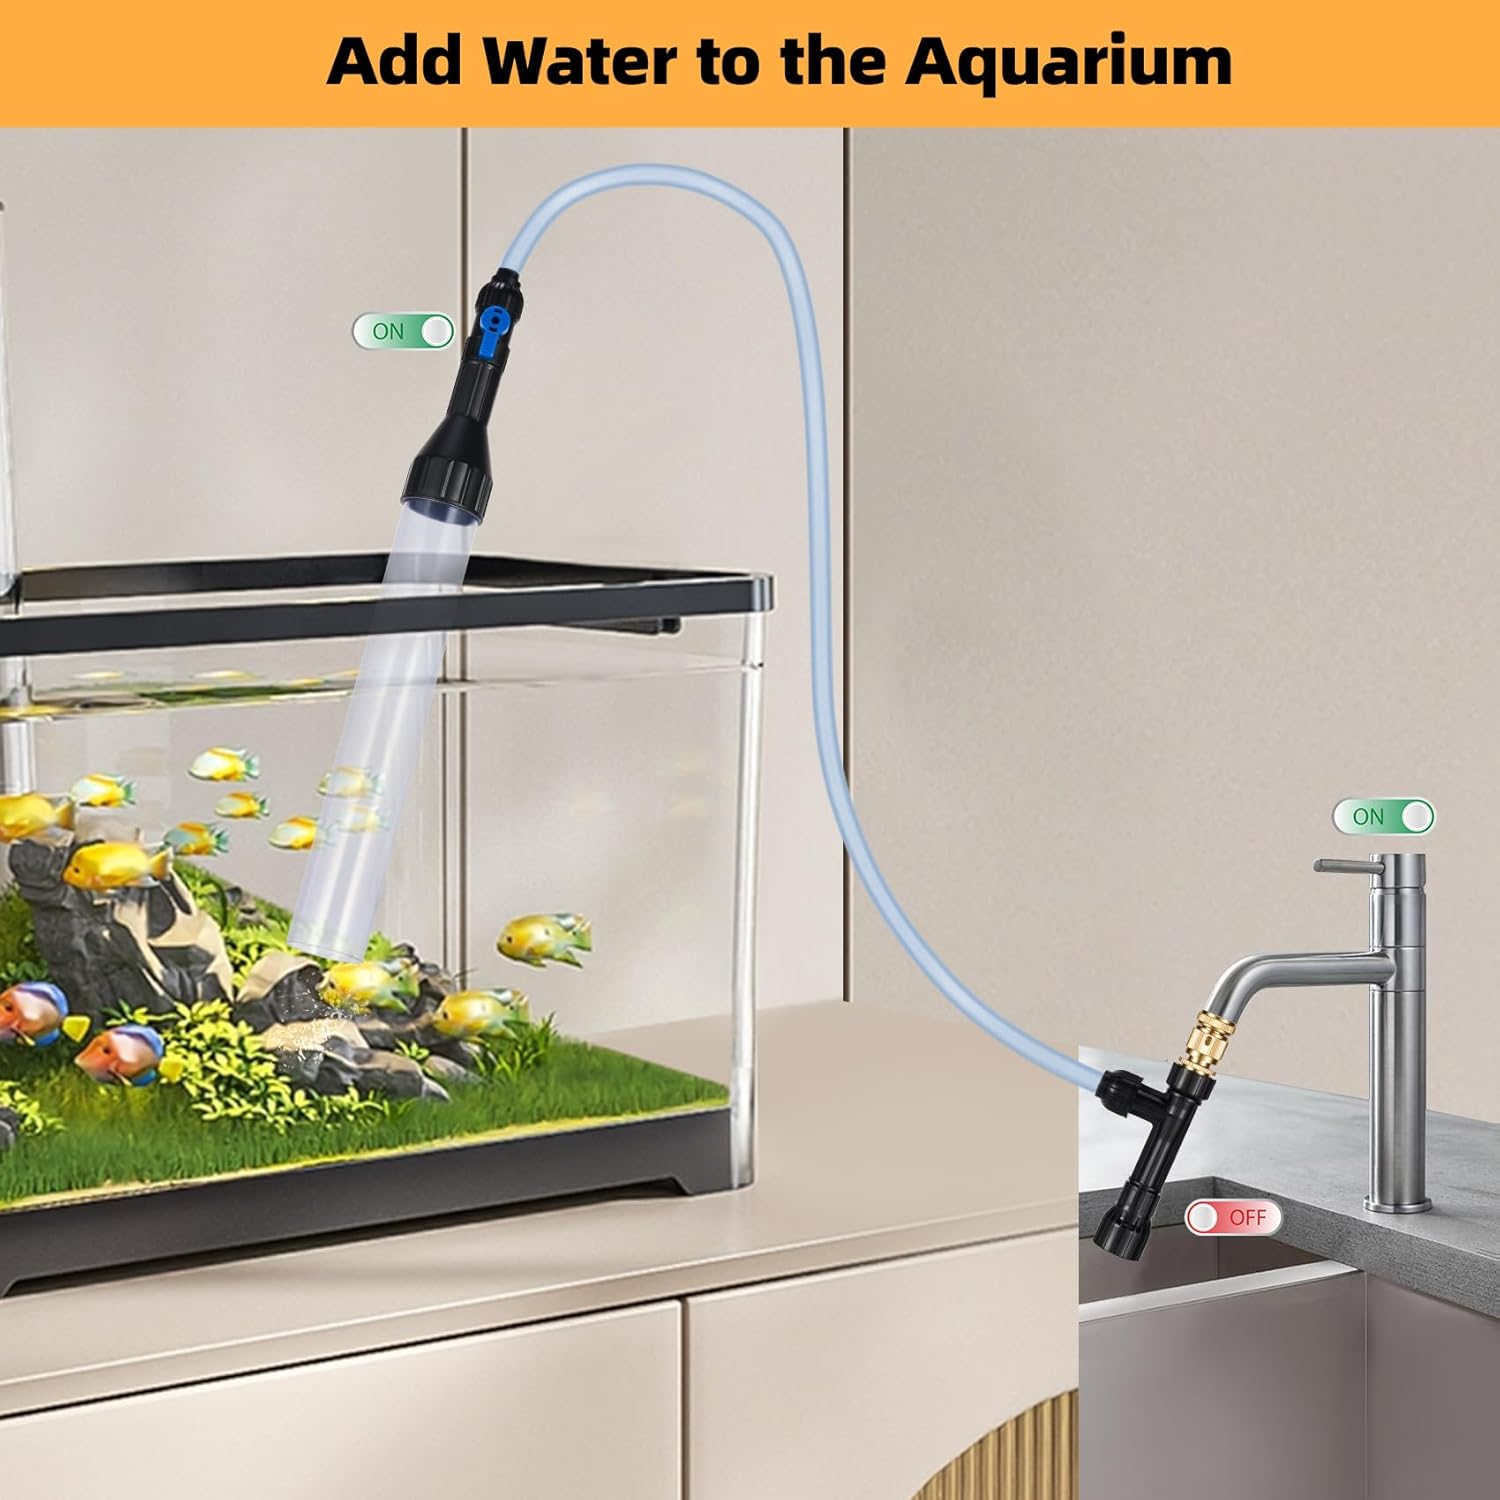
Image: Demonstrating how to add water to the aquarium.

Image: Visual comparison of water addition and drainage functions.
Maintenance
To ensure optimal performance and longevity of your DXOPHIEX Aquarium Gravel Vacuum and Water Changer, follow these maintenance guidelines:
- Rinse After Use: After each use, thoroughly rinse the entire hose and gravel tube with clean water to remove any remaining debris or residue.
- Check Connections: Regularly inspect all connections for wear and tear. Replace waterproof tape as needed to prevent leaks.
- Store Properly: Store the hose coiled neatly in a cool, dry place away from direct sunlight to prevent kinking or material degradation.
- Valve Inspection: Periodically check the functionality of the valves on the gravel tube and water flow assembly to ensure they operate smoothly.
Troubleshooting
| Problem | Possible Cause | Solution |
|---|---|---|
| No suction or slow water flow during draining. |
|
|
| Water leaks from connections. |
|
|
| Hose is too short to reach the drain/faucet. | Incorrect hose length selected for your setup. | Consider purchasing a longer hose or relocating your aquarium closer to a suitable water source/drain. |
Specifications
- Model: 50FT
- Hose Length: 50 Feet
- Gravel Tube Length: 19 inches
- Installation Type: Manual
- Power Source: Water Powered
- Assembly Required: Yes
- Efficiency: High Efficiency, Quick Cleaning, Energy Efficient
- Item Weight: 4.4 pounds
- Package Dimensions: 15.39 x 13.74 x 2.76 inches
- Brand: DXOPHIEX
- GTIN (UPC): 794414771082
Warranty and Support
For information regarding warranty coverage, technical support, or replacement parts, please refer to the contact information provided on the product packaging or visit the official DXOPHIEX website. Keep your purchase receipt as proof of purchase.