
1. Introduction
Thank you for choosing the cookwise AF2-40D06 Dual Zone 9L Air Fryer. This appliance is designed to provide a healthier alternative to traditional frying, using rapid hot air circulation to cook your favorite foods with significantly less oil. Its dual-zone functionality allows for simultaneous preparation of different dishes, making meal preparation efficient and convenient. Please read this manual thoroughly before first use to ensure safe operation and optimal performance.
2. Important Safety Instructions
- Always place the air fryer on a stable, heat-resistant surface, away from walls or other appliances to allow for proper ventilation.
- Do not immerse the main unit, cord, or plug in water or other liquids.
- Ensure the voltage indicated on the appliance matches your local power supply before connecting.
- Keep children and pets away from the appliance during operation.
- Do not block the air inlet or outlet vents.
- Always unplug the air fryer when not in use and before cleaning. Allow it to cool down completely before handling.
- Use oven mitts when handling hot components such as baskets and crisper trays.
- Do not overfill the baskets.
- Never operate the appliance if the power cord or plug is damaged, or if the appliance malfunctions.
3. Product Overview
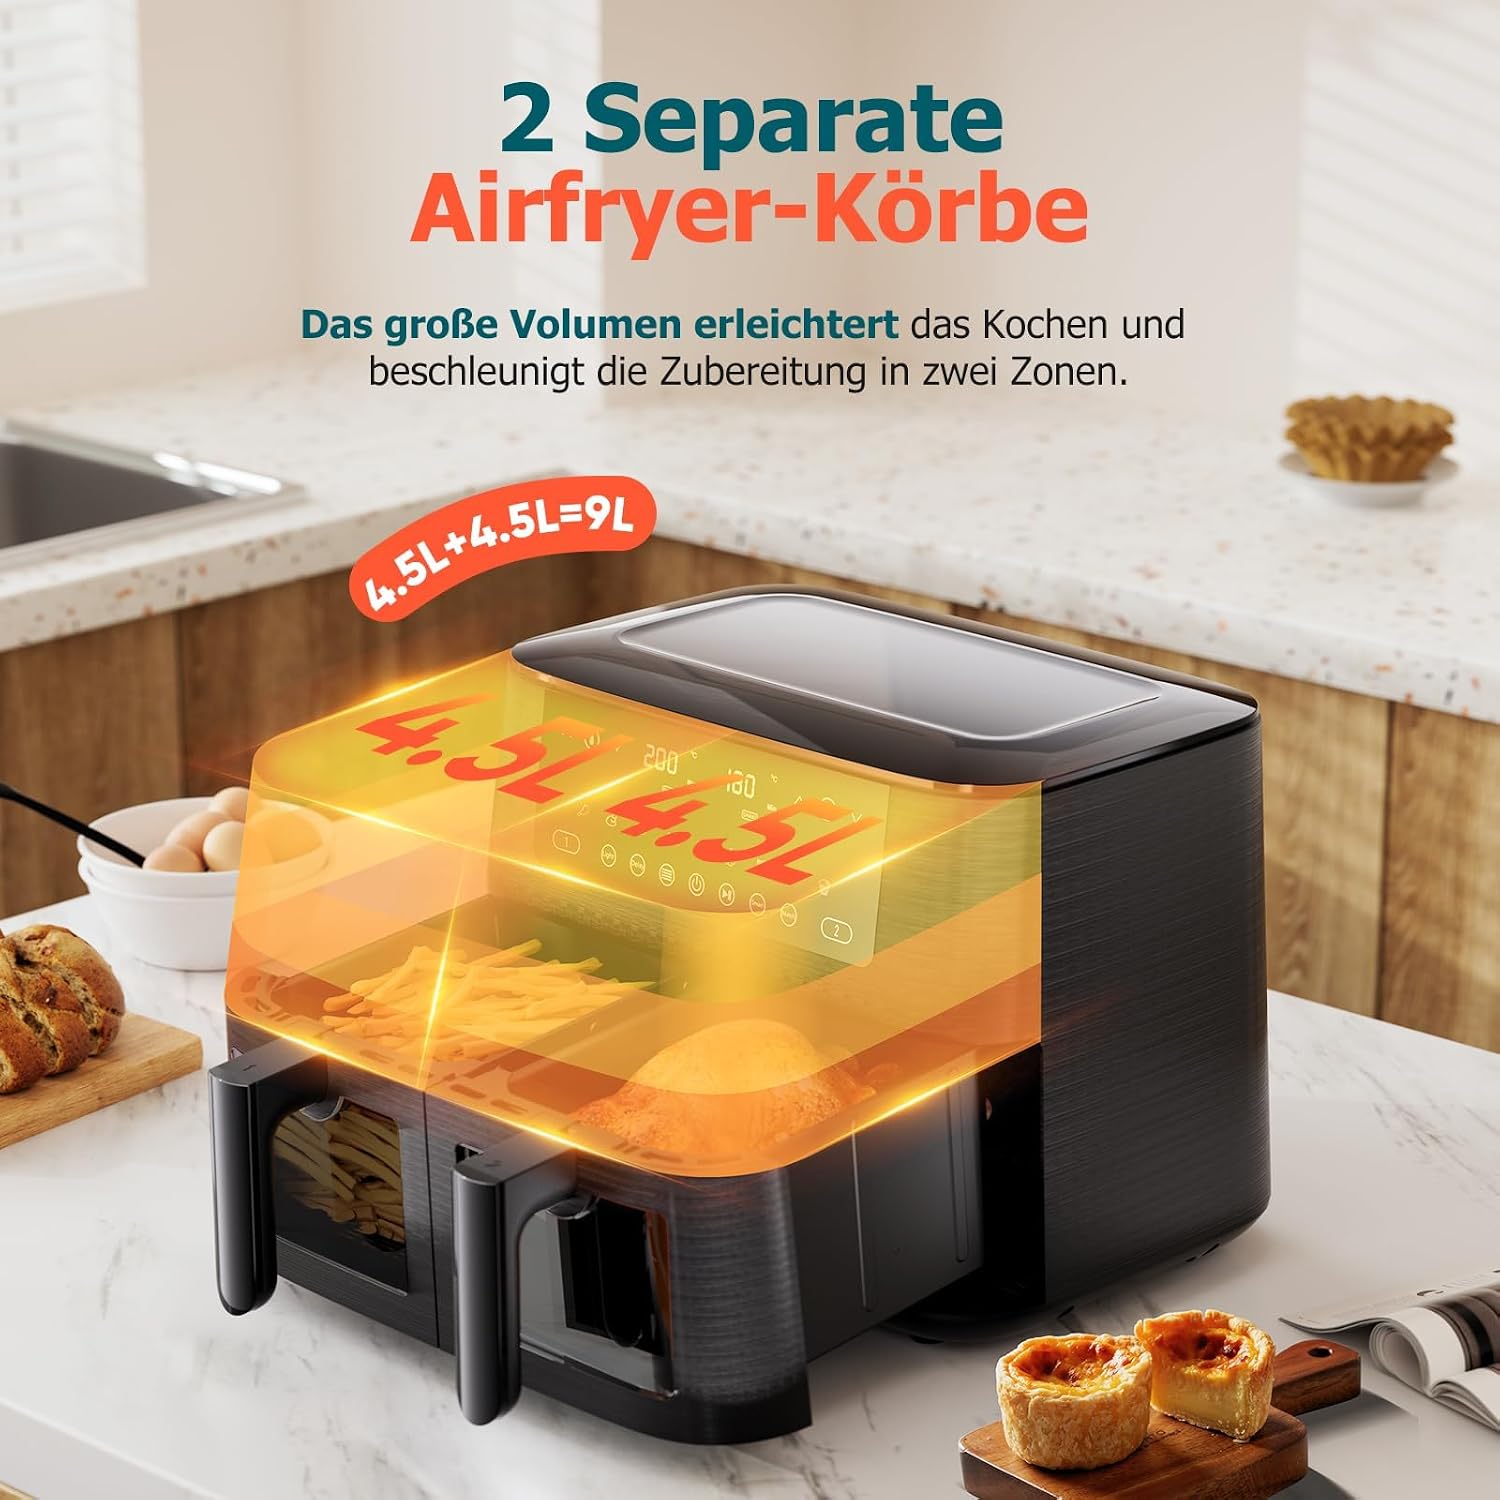
The cookwise AF2-40D06 features a sleek design with two independent cooking zones, each with its own basket and viewing window. The intuitive touchscreen control panel provides easy access to various cooking functions.
3.1 Components
- Main Unit with Control Panel
- Left Cooking Basket (4.5L capacity)
- Right Cooking Basket (4.5L capacity)
- 2 Crisper Trays (one for each basket)
3.2 Control Panel
The digital touchscreen allows for precise control over cooking settings. Key indicators and buttons include:
- Temperature/Time Display: Shows current temperature and remaining cooking time for each zone.
- Temperature Adjustment: Up/Down arrows to increase or decrease temperature.
- Time Adjustment: Up/Down arrows to increase or decrease cooking time.
- Preset Icons: 9 dedicated icons for common dishes (e.g., Fish, Fries, Chicken).
- Light Button: Activates the internal light for viewing food through the window.
- Delay Function: Sets a delayed start time for cooking.
- Power Button: Turns the appliance on/off.
- Sync Finish: Synchronizes the end time for both cooking zones.
- Match Cook: Copies settings from one zone to the other.
- Shake Reminder: An icon indicating when to shake the basket for even cooking.


4. Setup
- Unpack: Carefully remove all packaging materials and promotional labels from the air fryer.
- Clean: Wash the cooking baskets and crisper trays with warm, soapy water. Rinse thoroughly and dry completely. Wipe the main unit with a damp cloth.
- Placement: Place the air fryer on a flat, stable, heat-resistant surface. Ensure there is at least 15 cm (6 inches) of clear space around the back and sides for adequate air circulation.
- First Use: It is recommended to run the air fryer empty for about 10-15 minutes at 180°C (350°F) before cooking food for the first time. This helps to burn off any manufacturing residues and eliminate initial odors.
5. Operating Instructions
5.1 Basic Operation
- Plug the air fryer into a grounded electrical outlet. The display will illuminate.
- Press the Power button to turn on the appliance.
- Place food into the cooking baskets, ensuring not to overfill. Insert the crisper trays into the baskets before adding food.
- Slide the baskets back into the main unit until they click into place.
5.2 Using Preset Programs
The air fryer comes with 9 preset cooking programs for convenience:
- Fish
- Fries
- Bacon
- Baked Goods
- Chicken Thigh
- Steak
- Vegetables
- Shrimp
- Chicken
To use a preset:
- Select the desired cooking zone (1 or 2).
- Tap the corresponding preset icon on the control panel. The default time and temperature for that preset will display.
- You can adjust the time and temperature using the Up/Down arrows if needed.
- Press the Start/Pause button to begin cooking.
5.3 Manual Mode
For custom cooking, you can manually set the time and temperature:
- Select the desired cooking zone (1 or 2).
- Use the Temperature Up/Down arrows to set the desired temperature.
- Use the Time Up/Down arrows to set the desired cooking time.
- Press the Start/Pause button to begin cooking.
5.4 Dual Zone Functions
The dual zone feature allows for versatile cooking:
- Independent Cooking: Each zone can operate with different settings (time, temperature, preset) simultaneously.
- Sync Finish: This function ensures both zones complete cooking at the same time, even if they start with different cooking durations. Set the desired cooking parameters for each zone, then press the 'Sync Finish' button. The air fryer will automatically adjust the start times.
- Match Cook: If you want both zones to cook with identical settings, set the parameters for one zone, then press the 'Match Cook' button. The settings will be copied to the other zone.

5.5 Shake Reminder
For certain foods, the air fryer will emit a beep and display a 'SHAKE' icon to remind you to shake or flip the food for even cooking. Carefully remove the basket, shake or flip the food, and reinsert the basket to resume cooking.
5.6 Viewing Window and Light
Each cooking basket features a transparent viewing window. Press the 'Light' button on the control panel to illuminate the interior, allowing you to monitor cooking progress without opening the basket.

5.7 Delay Function (Appointment Function)
The delay function allows you to set a specific time for the air fryer to start cooking. This is useful for preparing meals in advance.
- Set your desired cooking program (preset or manual time/temperature).
- Press the 'Delay' button.
- Use the Up/Down arrows to set the delay time (e.g., how many hours until cooking starts).
- Press the Start/Pause button to confirm. The air fryer will begin cooking after the set delay time.
6. Cleaning and Maintenance
Regular cleaning ensures the longevity and optimal performance of your air fryer.
6.1 Cleaning the Baskets and Crisper Trays
- After each use, unplug the air fryer and allow it to cool completely.
- Remove the cooking baskets and crisper trays.
- These components are dishwasher safe. Alternatively, wash them with warm, soapy water and a non-abrasive sponge.
- For stubborn food residue, soak the baskets and trays in warm water for about 10-15 minutes before cleaning.
- Ensure all parts are thoroughly dry before reassembling or storing.
6.2 Cleaning the Main Unit
- Wipe the exterior of the air fryer with a damp cloth. Do not use abrasive cleaners or scouring pads.
- Clean the interior of the appliance, including the heating element, with a soft, damp cloth. Remove any food debris.
- Never immerse the main unit in water or any other liquid.
6.3 Storage
Store the air fryer in a cool, dry place once it is clean and completely dry. Ensure the power cord is neatly wrapped.
7. Troubleshooting
If you encounter any issues with your air fryer, please refer to the following common problems and solutions:
| Problem | Possible Cause | Solution |
|---|---|---|
| Air fryer does not turn on. | Not plugged in; power outlet malfunction; appliance fault. | Ensure the plug is securely inserted. Test the outlet with another appliance. If still not working, contact customer support. |
| Food is not cooked evenly. | Baskets overfilled; food not shaken/flipped; incorrect temperature/time. | Do not overfill baskets. Shake or flip food halfway through cooking. Adjust temperature and time as needed. |
| White smoke coming from the appliance. | Grease residue from previous use; high-fat food. | Clean the baskets and crisper trays thoroughly. For high-fat foods, drain excess fat during cooking. |
| Appliance smells during first use. | Manufacturing residues burning off. | This is normal for the first few uses. Ensure good ventilation. The smell will dissipate. |
8. Specifications
| Feature | Specification |
|---|---|
| Brand | cookwise |
| Model Number | AF2-40D06 |
| Capacity | 9 Liters (2 x 4.5L baskets) |
| Power | 2570 Watts |
| Dimensions (L x W x H) | 38 x 40 x 31 cm |
| Weight | 9.59 Kilograms |
| Material | Plastic, Metal |
| Control Method | Touchscreen |
| Special Features | Automatic shut-off, Temperature control, Dual zone functionality, Timer, Viewing window |

9. Warranty and Support
The cookwise AF2-40D06 Dual Zone 9L Air Fryer comes with a standard manufacturer's warranty. Please refer to the warranty card included in your product packaging for specific terms and conditions. For any questions, technical support, or warranty claims, please contact cookwise customer service through the retailer where you purchased the product or visit the official cookwise website for contact information.