Introduction
This manual provides detailed instructions for the setup, operation, and maintenance of your BUFFBEE RS11 Radio Alarm Clock. Please read this manual thoroughly before using the device to ensure proper function and to maximize your user experience. Keep this manual for future reference.
Package Contents
Upon unpacking, please verify that all items listed below are present and in good condition:
- 1 x BUFFBEE RS11 Radio Alarm Clock
- 1 x DC Power Adapter
- 1 x User Manual (this document)
- 1 x CR2032 Battery (pre-installed or included separately for backup)
Product Overview
The BUFFBEE RS11 is a compact device combining an alarm clock, FM radio, and a 7-color night light. It features a clear digital display and intuitive controls.

Figure 1: Front view of the BUFFBEE RS11 Radio Alarm Clock, displaying the digital time and accessible control buttons on top.

Figure 2: Internal structure highlighting the 5W Hi-Fi speaker, designed for clear and authentic sound reproduction.
Setup
1. Power Connection
- Connect the provided DC power adapter to the 'DC 5V' port on the back of the alarm clock.
- Plug the adapter into a standard wall outlet. The display will illuminate, and the clock will be ready for initial setup.
2. Backup Battery Installation
The BUFFBEE RS11 includes a CR2032 battery for backup, which preserves time and alarm settings during a power outage.
- Locate the battery compartment on the bottom of the unit.
- Insert the CR2032 battery with the positive (+) side facing up.
- Close the battery compartment securely.
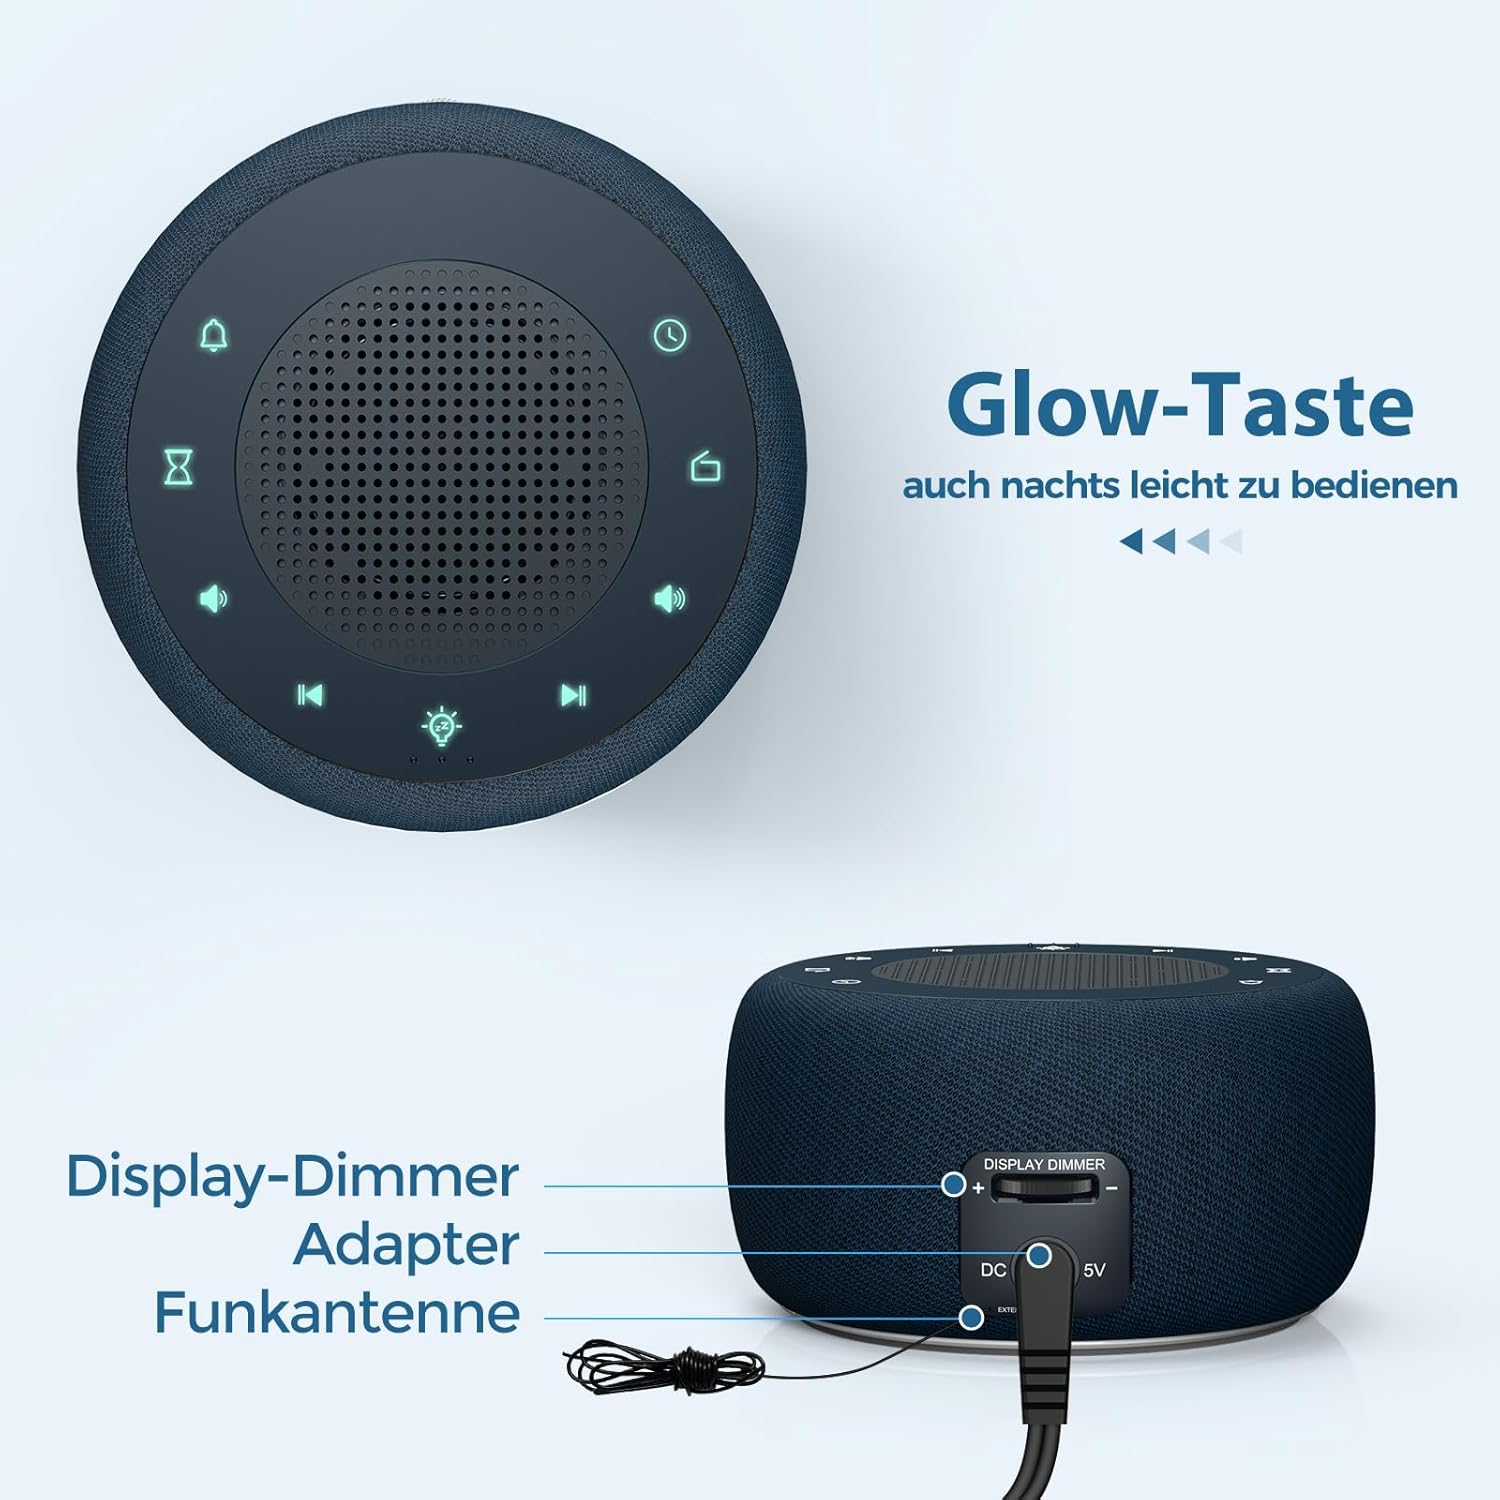
Figure 3: Rear panel connections, showing the display dimmer control, DC 5V power input, and FM antenna port.
Operating Instructions
1. Setting the Time
- Press and hold the 'Time Set' button (often indicated by a clock icon) until the hour digits begin to flash.
- Use the '+' and '-' buttons to adjust the hour.
- Press the 'Time Set' button again to switch to minute adjustment. Use '+' and '-' to set the minutes.
- Press 'Time Set' once more to confirm and exit time setting mode.
2. Setting the Alarm
- Press and hold the 'Alarm Set' button (often indicated by an alarm clock icon) until the alarm hour digits flash.
- Use the '+' and '-' buttons to adjust the alarm hour.
- Press 'Alarm Set' again to switch to alarm minute adjustment. Use '+' and '-' to set the alarm minutes.
- Press 'Alarm Set' to select the alarm tone. Options include: Bird sounds, Piano, Beep, or FM Radio.
- Press 'Alarm Set' once more to confirm and exit alarm setting mode.
- To activate/deactivate the alarm, briefly press the 'Alarm Set' button. An alarm icon will appear/disappear on the display.

Figure 4: Wake-up options with four distinct alarm tones, including the option to wake to your favorite radio station.
3. Radio Operation (FM)
- Press the 'Radio' button (often indicated by a radio icon) to turn the FM radio on or off.
- Use the 'Previous Track' and 'Next Track' buttons (often indicated by ◀◀ and ▶▶ icons) to tune to different FM stations.
- Press and hold the 'Previous Track' or 'Next Track' buttons to automatically scan for the next available station.
- Adjust the volume using the 'Volume Up' and 'Volume Down' buttons (often indicated by '+' and '-' speaker icons). The volume can be adjusted in 16 levels.

Figure 5: Enjoying the radio alarm clock, featuring a 0-120 minute sleep timer and 0-30 levels of adjustable volume.
4. Night Light Function
- Press the 'Night Light' button (often indicated by a light bulb icon) to turn the night light on or off.
- Press the 'Night Light' button repeatedly to cycle through the 7 available colors.
- To activate the sleep timer for the night light (or radio), press the 'Sleep Timer' button (often indicated by an hourglass icon).
- Use the '+' and '-' buttons to set the desired duration (0-120 minutes). The night light/radio will automatically turn off after the set time.

Figure 6: The 7-color night light feature, with options to turn on/off and change colors.
5. Display Brightness Adjustment (Dimmer)
The display brightness can be adjusted from 0% to 100% to suit your preference.
- Locate the 'Display Dimmer' control on the back of the unit (refer to Figure 3).
- Slide the control to increase or decrease the display brightness.
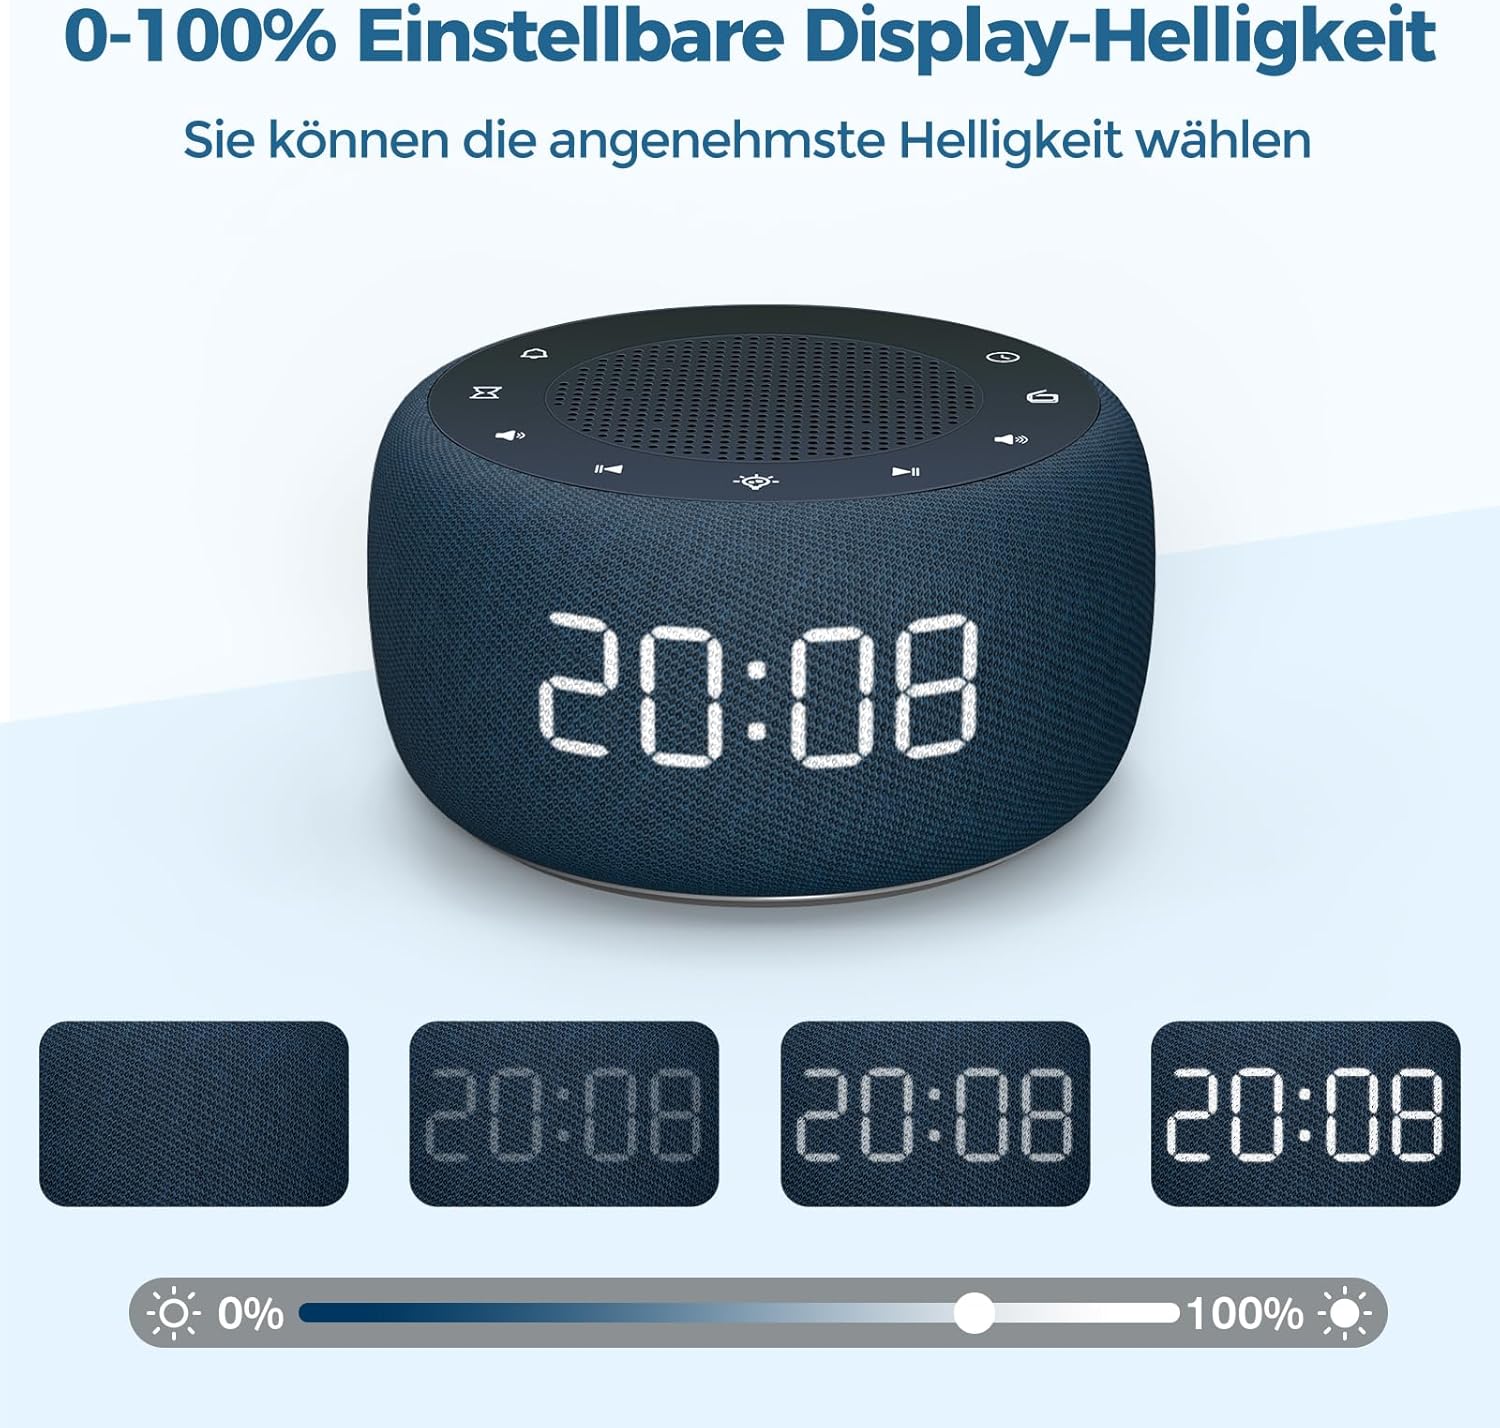
Figure 7: Demonstrating the 0-100% adjustable display brightness, allowing users to select their preferred comfort level.
6. Luminous Buttons
The control buttons on the top of the unit are designed to illuminate for 5 seconds when pressed, making operation easier in low-light conditions.
7. 12/24 Hour Format
To switch between 12-hour and 24-hour time formats, briefly press the '12/24H' button (if available, or often combined with the 'Time Set' button by a quick press after setting time).
Maintenance
- Cleaning: Use a soft, dry cloth to clean the surface of the alarm clock. Do not use liquid cleaners or abrasive materials.
- Storage: If storing the device for an extended period, disconnect it from power and remove the backup battery. Store in a cool, dry place.
- Battery Replacement: The CR2032 backup battery should be replaced periodically (e.g., every 1-2 years) to ensure settings are retained during power outages.
Troubleshooting
| Problem | Possible Cause | Solution |
|---|---|---|
| Display is blank. | No power connection. | Ensure the DC power adapter is securely plugged into the unit and a working wall outlet. |
| Alarm does not sound. | Alarm is not activated or volume is too low. | Check if the alarm icon is visible on the display. Increase alarm volume. |
| Poor radio reception. | FM antenna not extended or poor signal area. | Extend the FM antenna fully. Reposition the unit for better reception. |
| Time/settings lost after power outage. | Backup battery is dead or not installed. | Install or replace the CR2032 backup battery. |
Specifications
- Model: RS11
- Brand: BUFFBEE
- Dimensions (L x W x H): 9.5 x 3.81 x 6 cm (approximately 3.74 x 1.5 x 2.36 inches)
- Weight: 340 grams (approximately 0.75 lbs)
- Power Output: 5 Watts
- FM Frequency Range: 87.5-108 MHz
- Display Type: Digital
- Night Light Colors: 7
- Backup Battery: CR2032 (included)
- Power Source: Cable Electric (DC Adapter)
Warranty and Support
This product comes with a standard manufacturer's warranty. For specific warranty details, please refer to the documentation provided at the time of purchase or contact BUFFBEE customer support. If you encounter any issues not covered in this manual, please contact our customer service for assistance.


