Introduction
This user manual provides essential information for the installation, operation, and maintenance of your dcvbny String Trimmer Replacement Spools. Please read this manual thoroughly before use to ensure proper function and safety.
Product Overview and Compatibility
The dcvbny String Trimmer Replacement Spools are designed to provide a reliable and efficient replacement for your existing trimmer line. This package includes 8 pre-wound spools and 2 replacement caps.

Image: Overview of the dcvbny String Trimmer Replacement Spool kit, showing eight white spools with black bases and two red replacement caps.
Compatibility: These replacement spools are compatible with the following Hyper Tough string trimmer models:
- Hyper Tough 20V Max Cordless 13-inch Battery Powered String Trimmer, HT22-401-03-05
- Hyper Tough 20V MAX Cordless 12-Inch String Trimmer, HT19-401-003-06
- Hyper Tough 20V MAX Cordless Trimmer Sweeper Combo, HT19-401-003-07
- Hyper Tough 20V Max Cordless 12-Inch String Trimmer, HT21-401-003-02
- Hyper Tough 20V MAX Cordless 13-inch String Trimmer, HT21-401-003-03
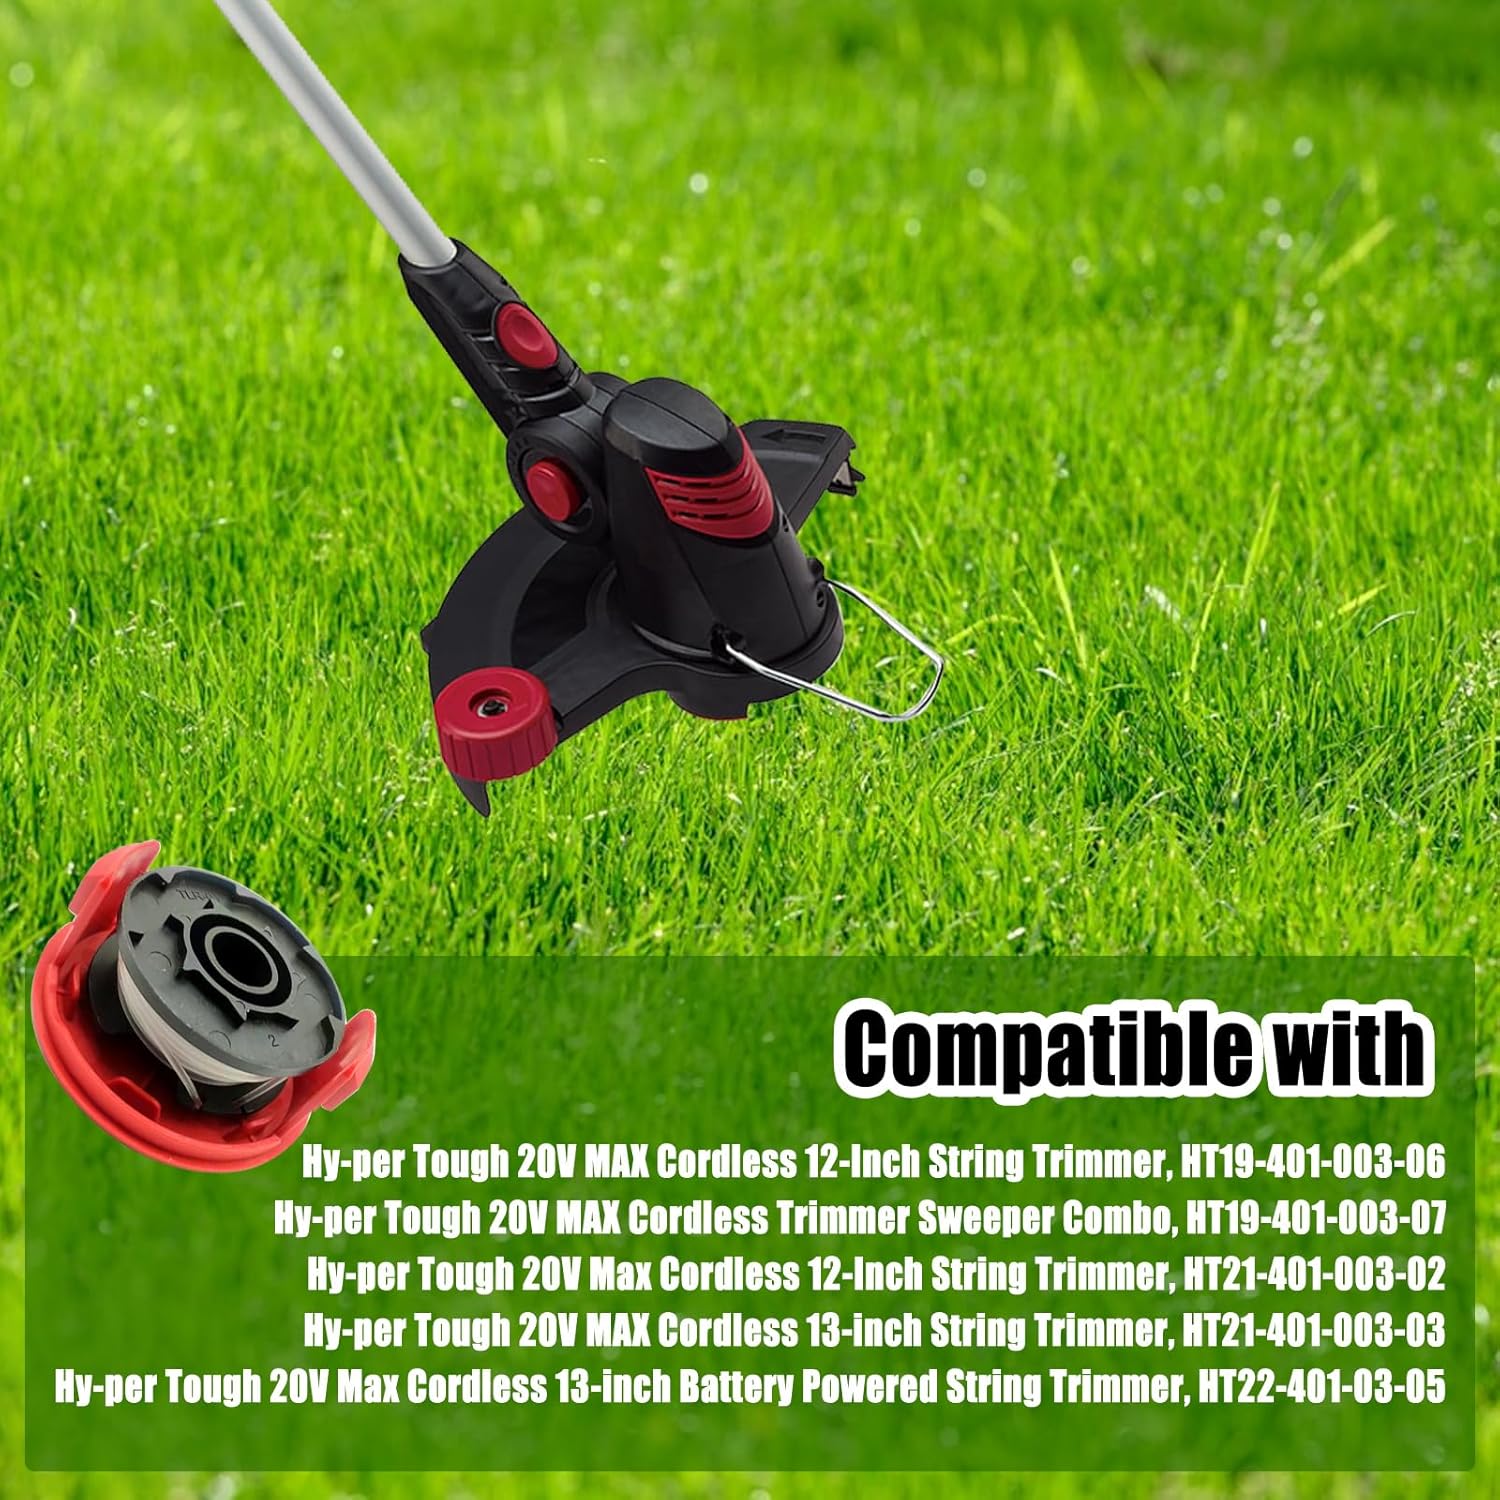
Image: A Hyper Tough string trimmer in a grassy area, with a text overlay listing the compatible models for the replacement spools.
The spools are designed for auto single-line feed cutting systems.
Product Specifications
| Feature | Specification |
|---|---|
| Spool Line Diameter | 0.065 inches (1.65mm) |
| Spool Line Length | 17 feet (5.2m) |
| Material | High quality ABS and Nylon |
| Package Contents | 8 x Replacement Spools, 2 x Replacement Caps |
| Item Weight | 8.3 ounces (approx. 235g for the package) |
| Package Dimensions | 6.85 x 6.81 x 1.54 inches |
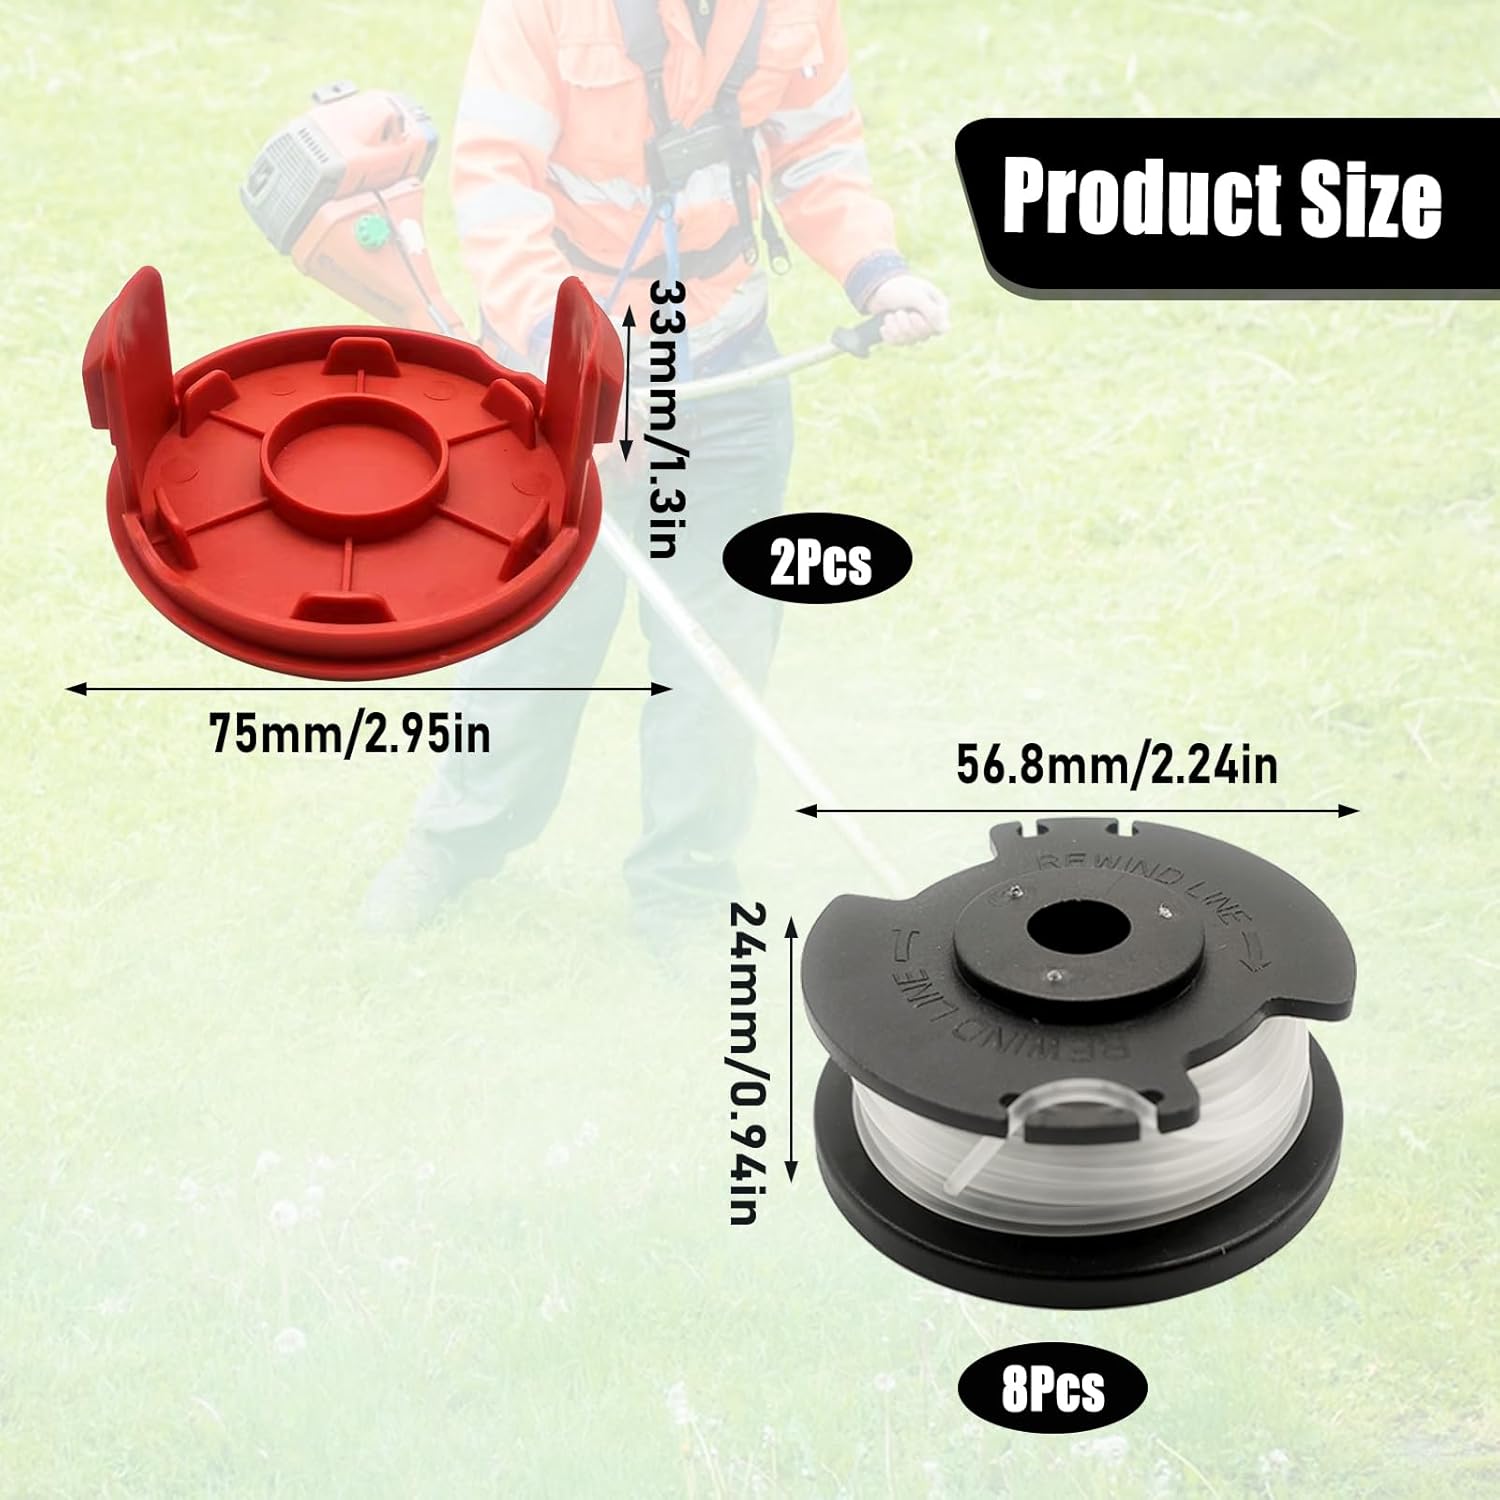
Image: A diagram illustrating the dimensions of both the replacement spool and the cap, with measurements in millimeters and inches.

Image: A close-up of the spool and line, with text indicating the line diameter of 0.06 inches (1.6mm) and a length of 17 feet (5.2m).
Installation and Setup
Replacing the string trimmer spool and cap is a tool-less process designed for ease of use. Follow these steps to install your new replacement spool:
- Power Off: Ensure your string trimmer is turned off and disconnected from any power source (battery removed for cordless models) before beginning installation.
- Remove Old Cap and Spool: Locate the spool housing on your trimmer head. Press any release tabs or twist the cap counter-clockwise to remove the old cap and spool assembly.
- Insert New Spool: Take a new pre-wound replacement spool. Align the spool with the housing, ensuring the line feeds correctly through the designated opening.
- Replace Cap: Place the new replacement cap over the spool and housing. Twist clockwise or press firmly until it clicks into place, securing the spool. Ensure the cap is fully seated to prevent issues during operation.
- Check Line Feed: Gently pull on the trimmer line to ensure it feeds smoothly from the spool.

Image: A collage of four close-up images displaying the replacement spool from different angles and the red replacement cap, highlighting their design.
The pre-wound design saves time and energy during replacement.
Operating Instructions and Precautions
Once the replacement spool is installed, you can resume using your string trimmer. Always observe the following precautions for safe and effective operation:
- Eye and Body Protection: Always wear eye protection (safety glasses or goggles) and long pants when operating the string trimmer to avoid injury from flying debris or spilled lines.
- Appropriate Use: This product and the trimmer are primarily suitable for trimming young grasses and light vegetation.
- Heavy Duty Weeds: For strong or thick weeds, use other appropriate tools such as blades or more powerful cutting equipment. Do not force the trimmer through dense growth, as this can damage the line, spool, or trimmer motor.
- Automatic Feed: The spools are designed for auto single-line feed systems. If the line does not feed automatically, ensure the cap is properly seated and the line is not tangled.

Image: A person operating a string trimmer in a grassy area, demonstrating typical use of the product.
Maintenance
Proper maintenance of your replacement spools and trimmer can extend their lifespan and ensure consistent performance:
- Storage: Store unused spools in a cool, dry place away from direct sunlight and extreme temperatures. This helps maintain the integrity and flexibility of the nylon line.
- Cleanliness: After each use, clean any grass clippings or debris from the trimmer head and spool housing. This prevents buildup that could impede line feeding.
- Inspect Caps: Regularly inspect the replacement caps for signs of wear, cracks, or damage, especially if they come into contact with hard surfaces. Replace them if they show significant wear to ensure proper spool retention and line feeding.
Troubleshooting
If you encounter issues with your replacement spools, consider the following common problems and solutions:
| Problem | Possible Cause | Solution |
|---|---|---|
| Line does not feed automatically. |
|
|
| Replacement cap is too tight or difficult to install/remove. |
|
|
| Line breaks frequently. |
|
|
Warranty and Support
Information regarding specific warranty terms for this product is not provided in the available documentation. For any product-related inquiries, support, or warranty claims, please contact the manufacturer or seller directly through your purchase platform.
For additional information or assistance, you may visit the dcvbny store on Amazon: dcvbny Amazon Store


