
Blogole CP1C2190US
Blogole LED Headlight Installation and Operation Manual
Model: CP1C2190US
1. Introduction
This manual provides detailed instructions for the installation, operation, and maintenance of your new Blogole LED Headlight. This product is designed as a replacement or upgrade for Club Car Precedent Gas & Electric golf cart models manufactured from 2004 onwards. It replaces OEM part numbers 102524801 and 1025248-01.
The Blogole LED Headlight offers enhanced brightness and energy efficiency compared to traditional halogen lamps, improving visibility and safety during operation.
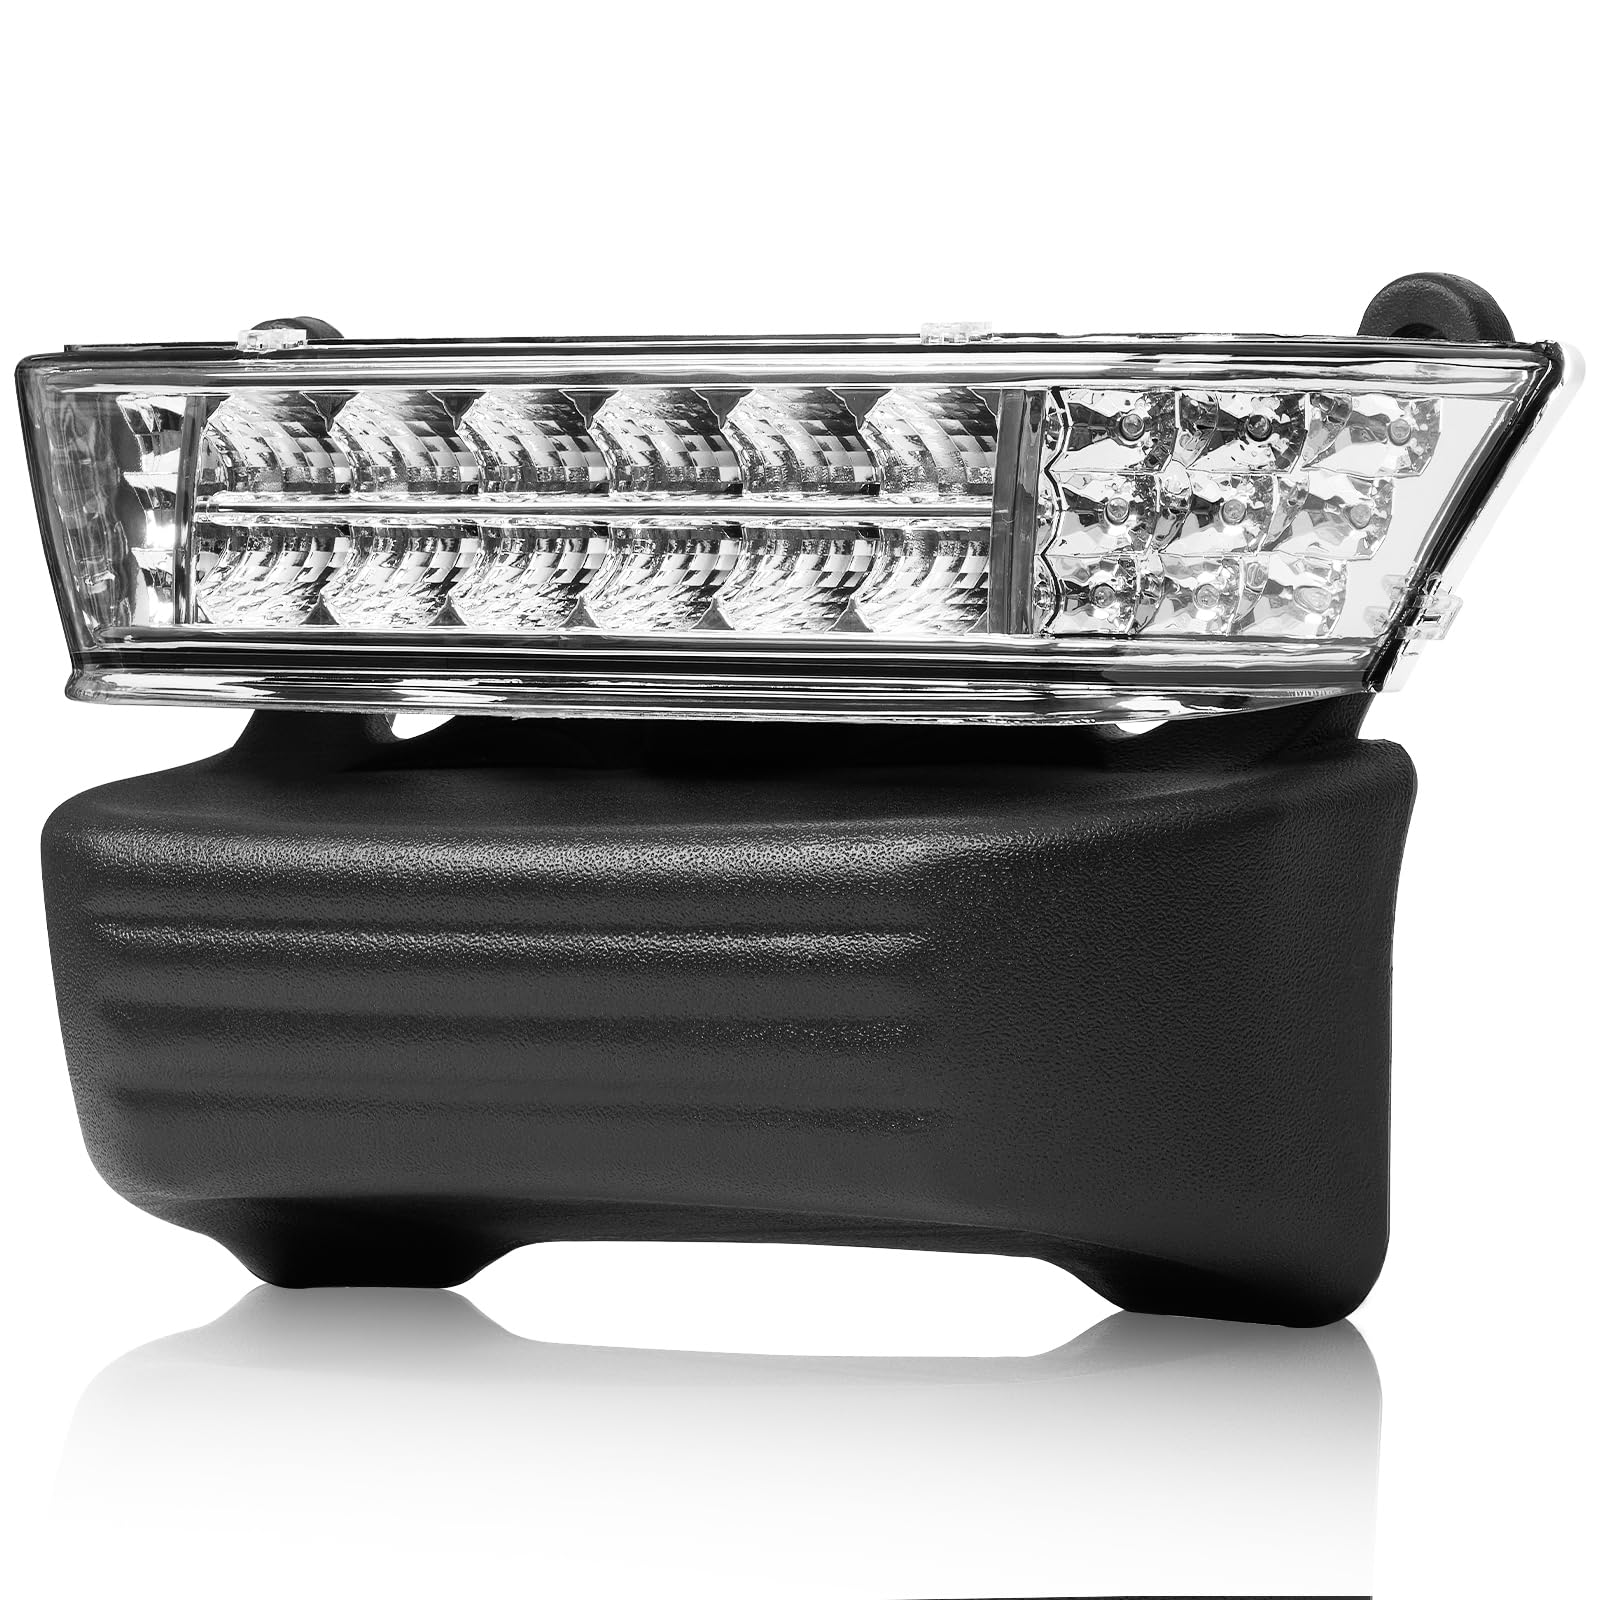
Figure 1: Blogole LED Headlight for Club Car Precedent Golf Cart. This image shows the complete LED headlight unit with its integrated bumper, ready for installation.
2. Safety Information
Please read and understand all safety instructions before attempting installation or operation. Failure to follow these instructions may result in injury or damage to the product or golf cart.
- Always disconnect the golf cart's battery before performing any electrical work to prevent electrical shock.
- Wear appropriate personal protective equipment, such as safety glasses and gloves, during installation.
- Ensure the golf cart is turned off and the parking brake is engaged before starting any work.
- If your golf cart operates at 36V or 48V, a 12V voltage reducer (not included) is required to prevent damage to the LED headlight. Operating the light directly on higher voltages will burn out the unit.
- If you are unsure about any step, consult a qualified technician.
3. Package Contents
Verify that all items are present in the package:
- 1 x Blogole LED Headlight with Bumper (Model: CP1C2190US)
Note: A golf cart wiring harness and voltage reducer (if needed for 36V/48V systems) are NOT included and must be purchased separately.
4. Installation Instructions
Follow these steps for proper installation of the Blogole LED Headlight:
- Prepare the Golf Cart: Ensure the golf cart is powered off and the battery is disconnected. Engage the parking brake.
- Remove Existing Headlight (if applicable): Carefully remove any existing headlight unit and its wiring.
- Voltage Check: Confirm your golf cart's voltage. If it is 36V or 48V, you must install a 36V-12V or 48V-12V voltage reducer (not included) before connecting the LED headlight. The Blogole LED Headlight operates at 12V.
- Position the New Headlight: Place the Blogole LED Headlight unit into the designated opening on the front of your Club Car Precedent golf cart.
- Secure the Headlight: Fasten the headlight unit securely using the appropriate mounting hardware (typically existing screws or new ones provided with a separate bumper kit, if applicable).
- Connect Wiring: The headlight features an original plug docking design for easy connection. Connect the headlight's wiring to your golf cart's 12V power source. Ensure correct polarity (positive to positive, negative to negative). Refer to Figure 2 for a typical wiring diagram.

Figure 2: Typical Wiring Diagram. This image illustrates the back of the LED headlight unit with its wiring connections, showing the main power connector and additional spade connectors for auxiliary functions if present.
- Reconnect Battery: Once all connections are secure, reconnect the golf cart's battery.
- Test Functionality: Turn on the golf cart and test the headlight to ensure it functions correctly.

Figure 3: Installed Blogole LED Headlight. This image displays the Blogole LED headlight seamlessly integrated into the front bumper of a white Club Car Precedent golf cart, showcasing its appearance after installation.
5. Operating the LED Headlight
The Blogole LED Headlight operates like your golf cart's original headlight system. Use the golf cart's existing light switch to turn the headlight on and off.
- Enhanced Visibility: The bright LED lights provide superior illumination, significantly improving visibility during low-light conditions or at night.
- Energy Efficiency: LED technology consumes less power than traditional halogen bulbs, extending your golf cart's battery life.

Figure 4: Headlight Day and Night Comparison. This image shows a split view of the Blogole LED headlight, demonstrating its appearance during the day (off) and its bright illumination at night (on).

Figure 5: Golf Cart with Lights On vs. Day Time. This image presents two views of a golf cart: one with the LED headlights illuminated at night, and another showing the same golf cart during the day with the lights off.

Figure 6: LED Golf Cart Light Kit vs. Halogen Lights. This image compares the superior brightness and wider lighting range of Blogole LED lights against traditional halogen lamps, shown illuminating a dark road.

Figure 7: Full LED Headlight. A close-up view of the Blogole LED headlight, highlighting its full LED array design for high brightness and clear visibility at night.
6. Maintenance
The Blogole LED Headlight is designed for durability and requires minimal maintenance.
- Cleaning: Clean the lens with a soft, damp cloth and mild soap. Avoid abrasive cleaners or solvents that could damage the lens.
- Inspection: Periodically check the wiring connections to ensure they remain secure and free from corrosion.
- Waterproof Design: The unit features a waterproof design, but avoid direct high-pressure water jets on the electrical connections.
7. Troubleshooting
If you encounter issues with your LED headlight, refer to the following table:
| Problem | Possible Cause | Solution |
|---|---|---|
| Headlight does not turn on. |
|
|
| Headlight flickers or is dim. |
|
|
| Headlight burned out quickly. |
|
|
8. Specifications
| Feature | Detail |
|---|---|
| Model Number | CP1C2190US |
| Compatibility | Club Car Precedent Gas & Electric (2004-UP) |
| Replaces OEM # | 102524801, 1025248-01 |
| Bulb Type | LED |
| Operating Voltage | 12V (Requires reducer for 36V/48V systems) |
| Material | Plastic |
| Special Features | Waterproof |
| Item Weight | 2.54 kg |
| Parcel Dimensions | 45.72 x 28.57 x 22.86 cm |
9. Warranty and Support
For any installation issues or product inquiries, please contact Blogole customer support. Refer to your purchase documentation for specific warranty details.
It is recommended to retain your proof of purchase for warranty claims.
Ask a question about this manual
Ask about setup, troubleshooting, compatibility, parts, safety, or missing instructions. Manuals+ will review the question and use this page’s manual context to help answer it.