1. Introduction
This manual provides instructions for the assembly, operation, and maintenance of your Giantex Laundry Hamper. This unit is designed to offer an organized and efficient solution for laundry sorting and storage, featuring three removable pull-out bags and a convenient top storage shelf.

Image 1.1: The Giantex Laundry Hamper in a bathroom, showcasing its design with a rustic brown top shelf, black metal frame, and three black laundry bags. One bag is partially pulled out, revealing its contents.
2. Safety Information
- Read all instructions carefully before assembly and use.
- Keep all small parts and packaging materials away from children and pets to prevent choking hazards.
- Ensure all connections are secure before placing items on the shelf or in the bags.
- Do not overload the bags or the top shelf. Refer to specifications for weight limits (if available, otherwise general caution).
- Place the hamper on a flat, stable surface to prevent tipping. Use adjustable foot pads to ensure stability.
- Avoid exposing the unit to excessive moisture or direct sunlight for prolonged periods to maintain material integrity.
3. Package Contents
Verify that all components are present before beginning assembly:
- 1 x Laundry Hamper Frame (Metal, P2 Engineered Wood)
- 1 x Large Laundry Bag (10.5 Gallon capacity)
- 2 x Small Laundry Bags (5 Gallon capacity each)
- 1 x User Guide (This document)
- Assembly Hardware (screws, wrench, etc. - implied by "Hassle-free to assemble")
4. Setup and Assembly
Assembly is straightforward. Follow these general steps:
- Unpack Components: Carefully remove all parts from the packaging and lay them out on a clean, soft surface to prevent scratches.
- Assemble the Metal Frame: Connect the metal tubes according to the provided diagrams (if any were in the original user guide). Ensure all screws are finger-tightened initially.
- Attach the Top Storage Shelf: Secure the P2 engineered wood shelf to the top of the metal frame.
- Insert Laundry Bags: Place the large and small laundry bags into their designated compartments. The bags feature hook and loop fasteners for secure attachment to the frame.
- Adjust Foot Pads: Once the frame is assembled, adjust the foot pads at the bottom to ensure the hamper is level and stable on your floor.
- Final Tightening: Once all parts are in place and the unit is stable, fully tighten all screws with the provided tool.

Image 4.1: Key features for assembly and use, including top lifting handles, pull-out bag design, cut-out handles on bags, and adjustable foot pads for stability.
5. Operating Instructions
The Giantex Laundry Hamper is designed for convenient laundry sorting and storage.
- Sorting Laundry: Utilize the three separate pull-out bags to sort laundry by color, fabric type, or any other preferred method. The large bag (10.5 gallons) and two small bags (5 gallons each) provide ample capacity.
- Accessing Bags: Each bag features a pull-out design and cut-out handles for easy access and removal. Simply pull the bag forward from its compartment.
- Transporting Laundry: The removable liner bags are equipped with handles, allowing for easy transport of dirty laundry to your washing machine.
- Using the Top Shelf: The top shelf provides a convenient surface for placing laundry essentials such as detergent, fabric softener, or folded clean clothes.
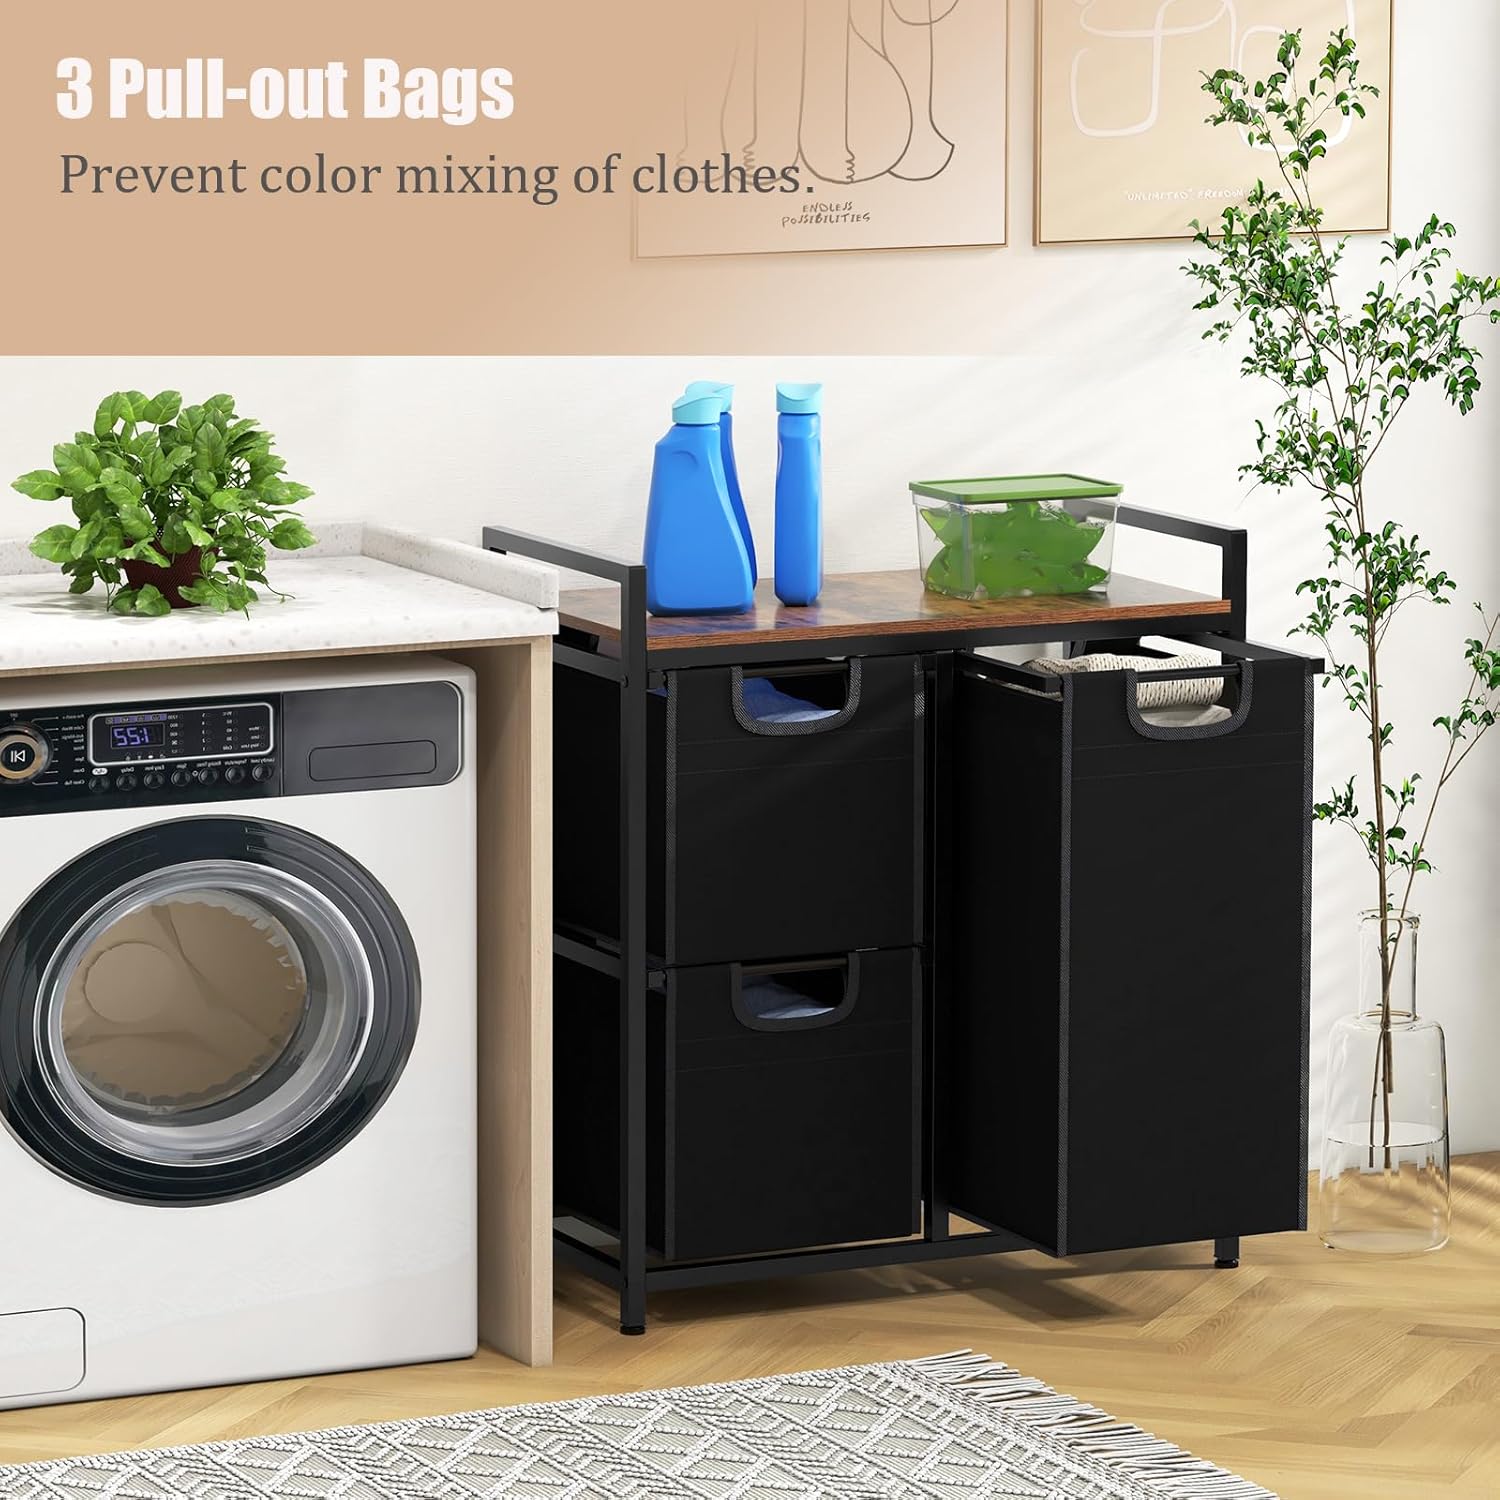
Image 5.1: The laundry hamper next to a washing machine, illustrating how the three pull-out bags can be used for efficient laundry sorting.

Image 5.2: Detail of the removable liner bags, highlighting their handles for easy transport, hook and loop fasteners for secure attachment, and water-repellent coating for protection.
6. Maintenance
Regular maintenance will ensure the longevity and appearance of your laundry hamper.
- Cleaning the Frame and Shelf: The P2 engineered wood shelf has a waterproof surface, making it easy to clean. Wipe the metal frame and shelf with a soft, damp cloth. Avoid abrasive cleaners.
- Cleaning the Laundry Bags: The oxford fabric bags have a water-repellent coating. For minor spills or dirt, wipe with a damp cloth. For more thorough cleaning, the bags can be removed and hand-washed with mild detergent, then air-dried. Do not machine wash or tumble dry.
- Checking Connections: Periodically check all screws and connections to ensure they remain tight and secure.

Image 6.1: Visual representation of maintenance features, including the easy-to-clean shelf, the supportive bottom panel design of the bags, and the reinforced metal pipes for durability.
7. Troubleshooting
| Problem | Possible Cause | Solution |
|---|---|---|
| Hamper feels unstable or wobbly. | Uneven floor surface or loose connections. | Adjust the foot pads at the bottom of the frame until the unit is level. Tighten all assembly screws. |
| Laundry bags do not slide smoothly. | Bags are overloaded or misaligned. | Reduce the load in the bags. Ensure bags are correctly seated in their compartments and the hook and loop fasteners are properly aligned. |
| Bags appear to sag. | Bottom panel not properly inserted or bag is overloaded. | Ensure the bottom panel is fully inserted into the base of each bag for support. Avoid overloading bags beyond their capacity. |
8. Specifications
| Feature | Detail |
|---|---|
| Model Number | GX10178CF-ZJ |
| Overall Dimensions (L x W x H) | 26" x 13" x 28.5" |
| Large Bag Size (L x W x H) | 12" x 10" x 19.5" |
| Large Bag Capacity | 10.5 Gallons |
| Small Bag Size (L x W x H) | 12" x 10" x 9" |
| Small Bag Capacity | 5 Gallons (each) |
| Net Weight | 15.5 lbs |
| Material | Metal, P2 Engineered Wood, Oxford Fabric |
| Color | Rustic Brown & Black |
| Number of Compartments | 3 |

Image 8.1: Detailed specifications and dimensions of the laundry hamper and its bags.
9. Warranty and Support
For warranty information or technical support, please refer to the official Giantex website or contact their customer service directly. Keep your purchase receipt for any warranty claims.
Manufacturer: Giantex
Website: Visit the Giantex Store on Amazon


