Introduction
This manual provides detailed instructions for the setup, operation, maintenance, and troubleshooting of your Verbatim USB-C Pro Docking Station, Model 32174. This versatile 15-in-1 hub is designed to expand the connectivity of your USB-C enabled laptop or device, offering a wide array of ports and an integrated SSD for enhanced productivity and storage.
Please read this manual thoroughly before using the device to ensure proper functionality and to maximize your user experience.
Product Overview
The Verbatim USB-C Pro Docking Station transforms a single USB-C port on your host device into 15 versatile connections, including video outputs, data transfer ports, network connectivity, audio, and integrated storage. It is compatible with Windows, Mac OS, and Android systems.
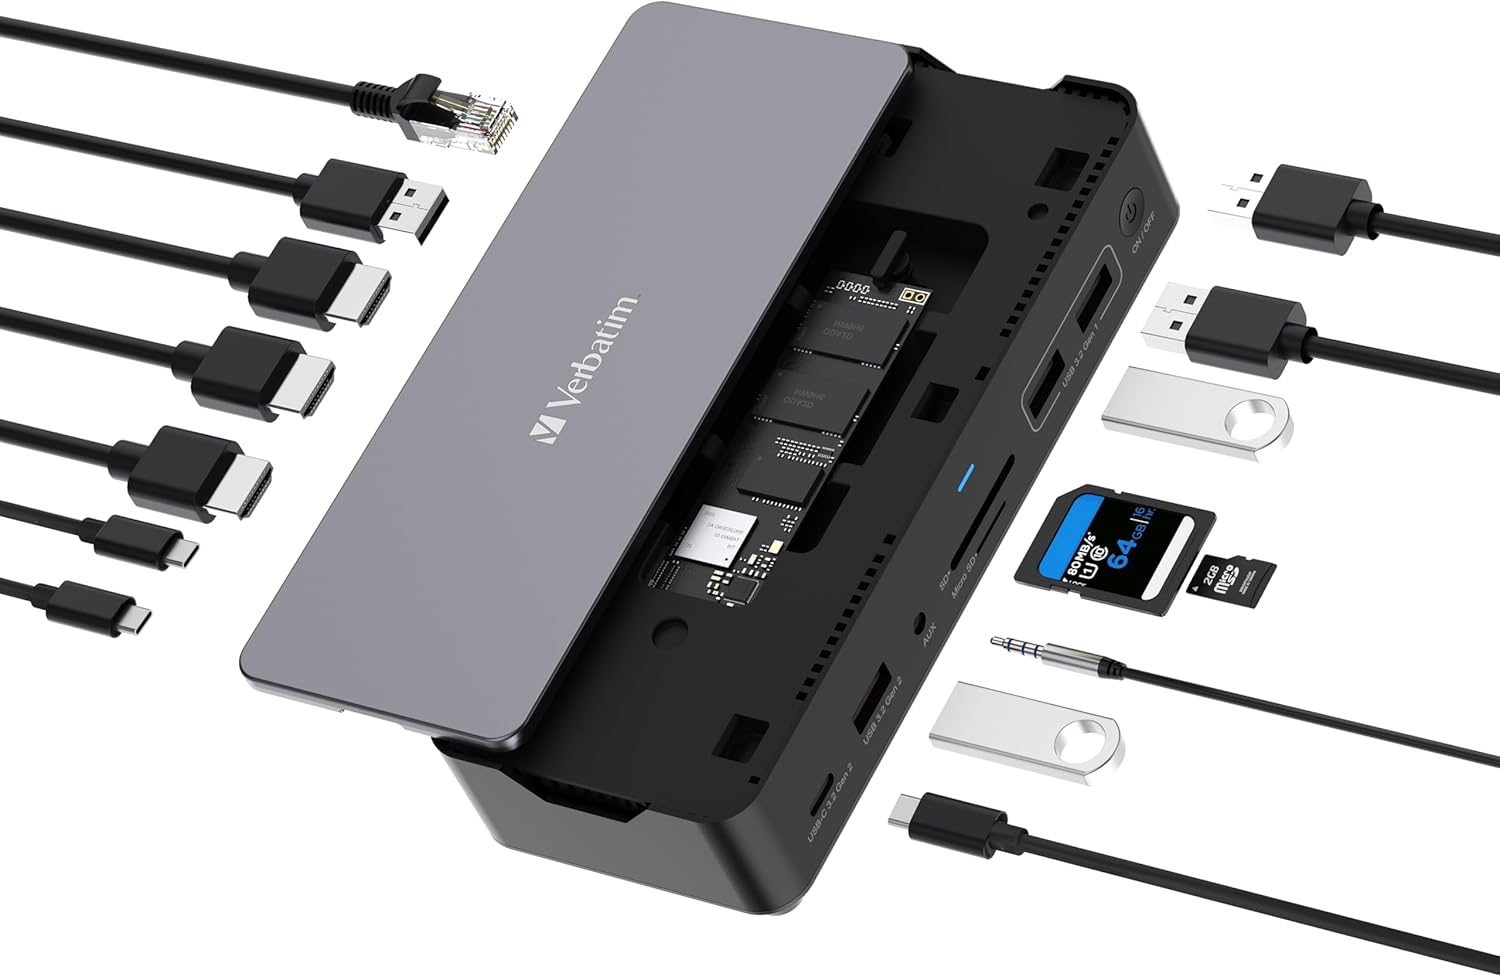
Key Features and Ports:
- Video Outputs: 2 x HDMI (up to 8K Ultra HD), 1 x DisplayPort (up to 8K Ultra HD) for multi-monitor setups.
- Data Transfer: 4 x USB-A ports, 2 x USB-C data ports (up to 10Gbps transfer rate).
- Network: 1 x Ethernet (RJ45) port.
- Card Readers: 1 x SD card reader, 1 x microSD card reader.
- Audio: 1 x AUX port.
- Power Delivery: 1 x USB-C PD port for host charging (up to 100W passthrough).
- Integrated Storage: Vi3000 SSD with 256 GB capacity.
Setup Instructions
Follow these steps to set up your Verbatim USB-C Pro Docking Station.
1. Connecting to Your Host Device
- Locate the USB-C to USB-C cable included in the box.
- Connect one end of the USB-C cable to the 'HOST' USB-C port on the docking station.
- Connect the other end of the USB-C cable to an available USB-C port on your laptop or host device. Ensure your host device's USB-C port supports video output (DisplayPort Alternate Mode) and power delivery for full functionality.
2. Powering the Docking Station
For optimal performance and to provide power to your host device, connect your laptop's original USB-C power adapter to the 'PD 100W' USB-C port on the docking station. This allows up to 100W of power to be passed through to charge your laptop while using the dock.
3. Connecting Peripherals
Once the docking station is connected to your host device and powered, you can connect your peripherals:
- Monitors: Connect external monitors to the HDMI and/or DisplayPort outputs using appropriate cables. The dock supports up to three external displays simultaneously, depending on your host device's capabilities.
- USB Devices: Plug in USB-A and USB-C peripherals such as keyboards, mice, external hard drives, or flash drives into the corresponding USB ports.
- Ethernet: Connect an Ethernet cable to the RJ45 port for a stable wired network connection.
- Audio: Connect headphones or speakers to the 3.5mm AUX port.
- Memory Cards: Insert SD or microSD cards into the dedicated card reader slots.


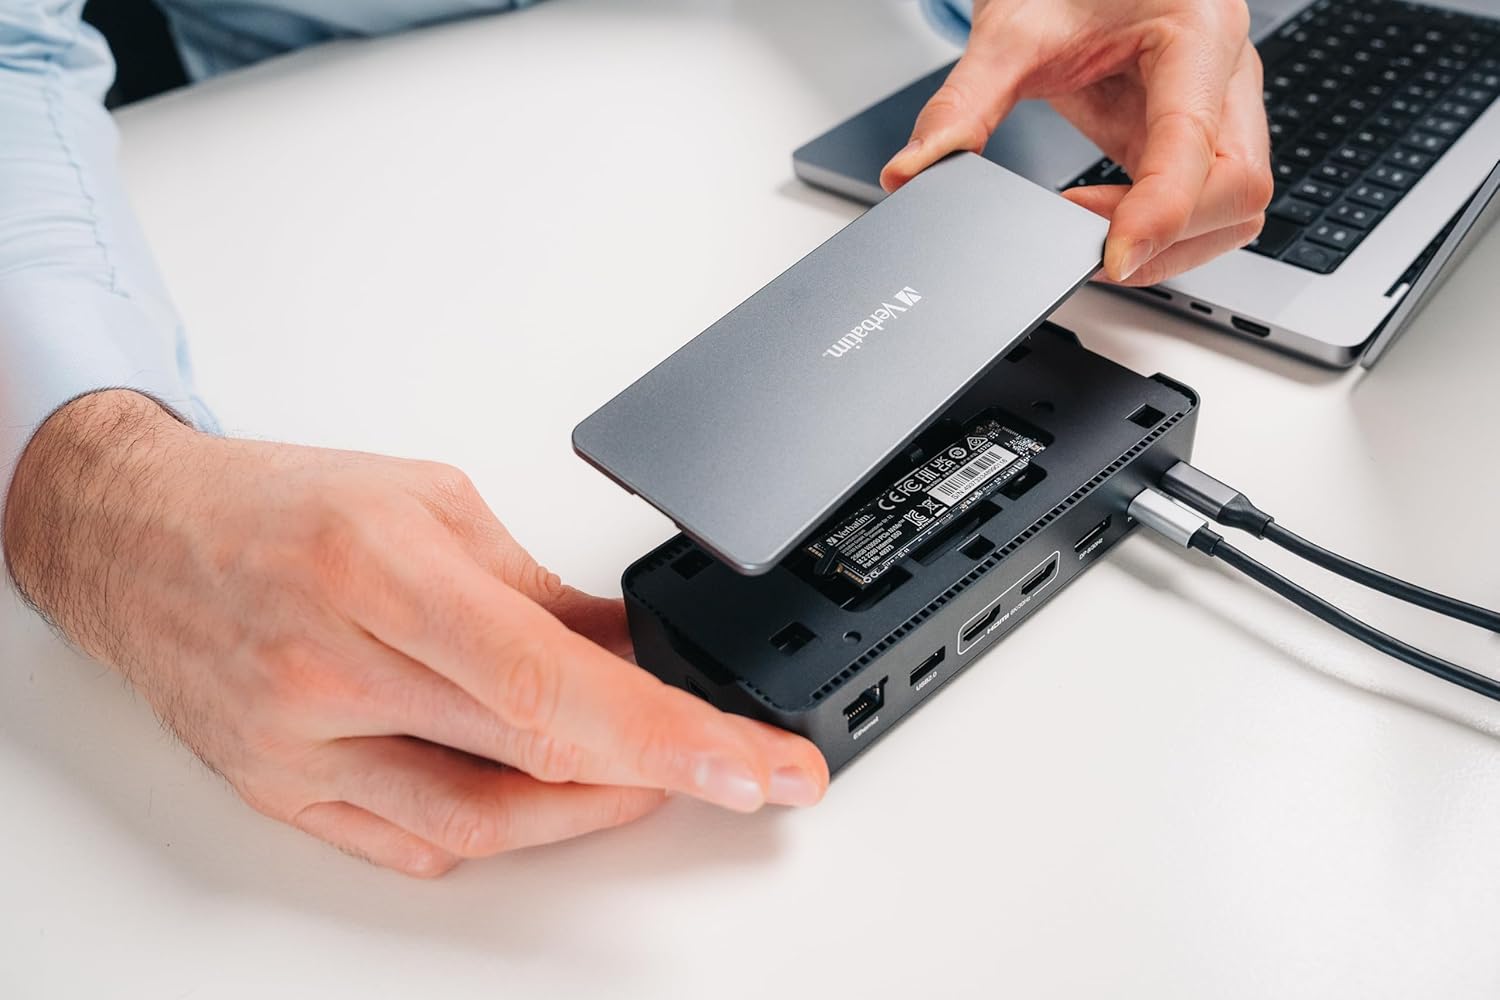
4. Integrated SSD Usage
The docking station includes an integrated Vi3000 SSD with 256 GB of storage. This SSD will appear as an additional drive on your computer once the dock is connected. You can use it for fast data storage and retrieval.
Operating Instructions
Multi-Monitor Configuration
The docking station supports extending or mirroring your display across multiple external monitors. The exact configuration options depend on your operating system (Windows, macOS) and your host device's graphics capabilities.
- Windows: Access Display Settings (right-click on desktop > Display settings) to arrange and configure your monitors.
- macOS: Go to System Settings > Displays to arrange and configure your monitors.
For optimal performance, ensure your display drivers are up to date.


Data Transfer
The USB-A and USB-C data ports support high-speed data transfer up to 10Gbps, allowing for quick file transfers with compatible devices.
Power Delivery
The USB-C PD port allows your laptop to receive up to 100W of charging power from its original power adapter, ensuring your device remains charged while connected to the docking station.
Maintenance
- Keep the docking station in a clean, dry environment, away from direct sunlight and extreme temperatures.
- Avoid exposing the device to water or other liquids.
- Clean the exterior with a soft, dry cloth. Do not use harsh chemicals or abrasive cleaners.
- Ensure proper ventilation around the docking station to prevent overheating.
Troubleshooting
If you encounter issues with your docking station, refer to the following common solutions:
- No Display Output:
- Ensure your host device's USB-C port supports DisplayPort Alternate Mode.
- Check all cable connections (USB-C to host, HDMI/DP to monitor).
- Verify that your monitors are powered on and set to the correct input source.
- Try updating your graphics drivers on your host device.
- No Power Delivery to Laptop:
- Ensure your laptop's original USB-C power adapter is connected to the 'PD 100W' port on the dock.
- Verify that your laptop's USB-C port supports Power Delivery.
- USB Devices Not Recognized:
- Reconnect the USB device.
- Try a different USB port on the docking station.
- Ensure the docking station is properly powered.
- Ethernet Connection Issues:
- Check the Ethernet cable connection to both the dock and your router/modem.
- Verify network settings on your host device.
- Integrated SSD Not Appearing:
- Ensure the docking station is fully connected to your host device.
- On Windows, check Disk Management to see if the drive needs initialization or formatting. On macOS, check Disk Utility.
Specifications
| Brand | Verbatim |
|---|---|
| Model Number | 32174 |
| Product Dimensions | 8.66 x 4.53 x 1.42 inches |
| Item Weight | 15.5 ounces (440 Grams) |
| Color | Black |
| Hardware Interface | USB Type C |
| Operating System Compatibility | Windows 7/8.1/10/11, Mac OS 9/X/macOS, Android |
| Total Ports | 15 (including integrated SSD) |
| Video Output | 2 x HDMI, 1 x DisplayPort (up to 8K Ultra HD) |
| USB Data Ports | 4 x USB-A, 2 x USB-C (up to 10Gbps) |
| Ethernet | 1 x RJ45 Port |
| Card Reader | SD and microSD slots |
| Audio | 1 x 3.5mm AUX Port |
| Power Delivery | Up to 100W passthrough to host |
| Integrated SSD | Vi3000, 256 GB |
Warranty and Support
For warranty information and technical support, please refer to the documentation included with your product packaging or visit the official Verbatim website. Keep your proof of purchase for warranty claims.


