Introduction
The Fenix HM65R-T V2.0 is a high-performance running headlamp designed for trail running and outdoor activities. It features a powerful 1600-lumen white light and a warm white dual beam, offering versatile illumination for various conditions. Built with a lightweight magnesium alloy body, it is durable, USB-C rechargeable, and includes a comfortable, adjustable headband.

Image: The Fenix HM65R-T V2.0 Running Headlamp in Dark Purple, showcasing its compact design and dual light sources.
Setup
What's in the Box
- Fenix HM65R-T V2.0 Headlamp
- Headband
- USB-C Charging Cable
- Spare O-ring
Battery Installation
- Unscrew the tail cap of the headlamp.
- Insert the included Fenix ARB-L18-3400 battery with the anode (+) side facing the headlamp head.
- Screw the tail cap back on securely.
The headlamp is also compatible with two CR123A batteries for alternative power.
Charging
- Locate the USB-C charging port on the headlamp body, usually protected by a rubber boot.
- Open the rubber boot and connect the USB-C charging cable to the port.
- Connect the other end of the cable to a USB power source.
- The battery level indicators will illuminate to show charging status. Charging typically takes approximately 3 hours.
- Once fully charged, disconnect the cable and securely close the rubber boot to maintain water resistance.

Image: The Fenix HM65R-T V2.0 headlamp connected to a USB-C charging cable, illustrating the charging process.
Headband Adjustment
The headlamp features a two-way SPORT fit system fastener for easy adjustment. Simply rotate the dial clockwise to tighten the headband or counter-clockwise to loosen it, ensuring a steady and comfortable fit during use.

Image: A person adjusting the headband of the Fenix HM65R-T V2.0, demonstrating the two-way SPORT fit system.
Operating Instructions
The Fenix HM65R-T V2.0 features dual top switches for simple and accurate operation, with separate controls for the white light and warm white light.
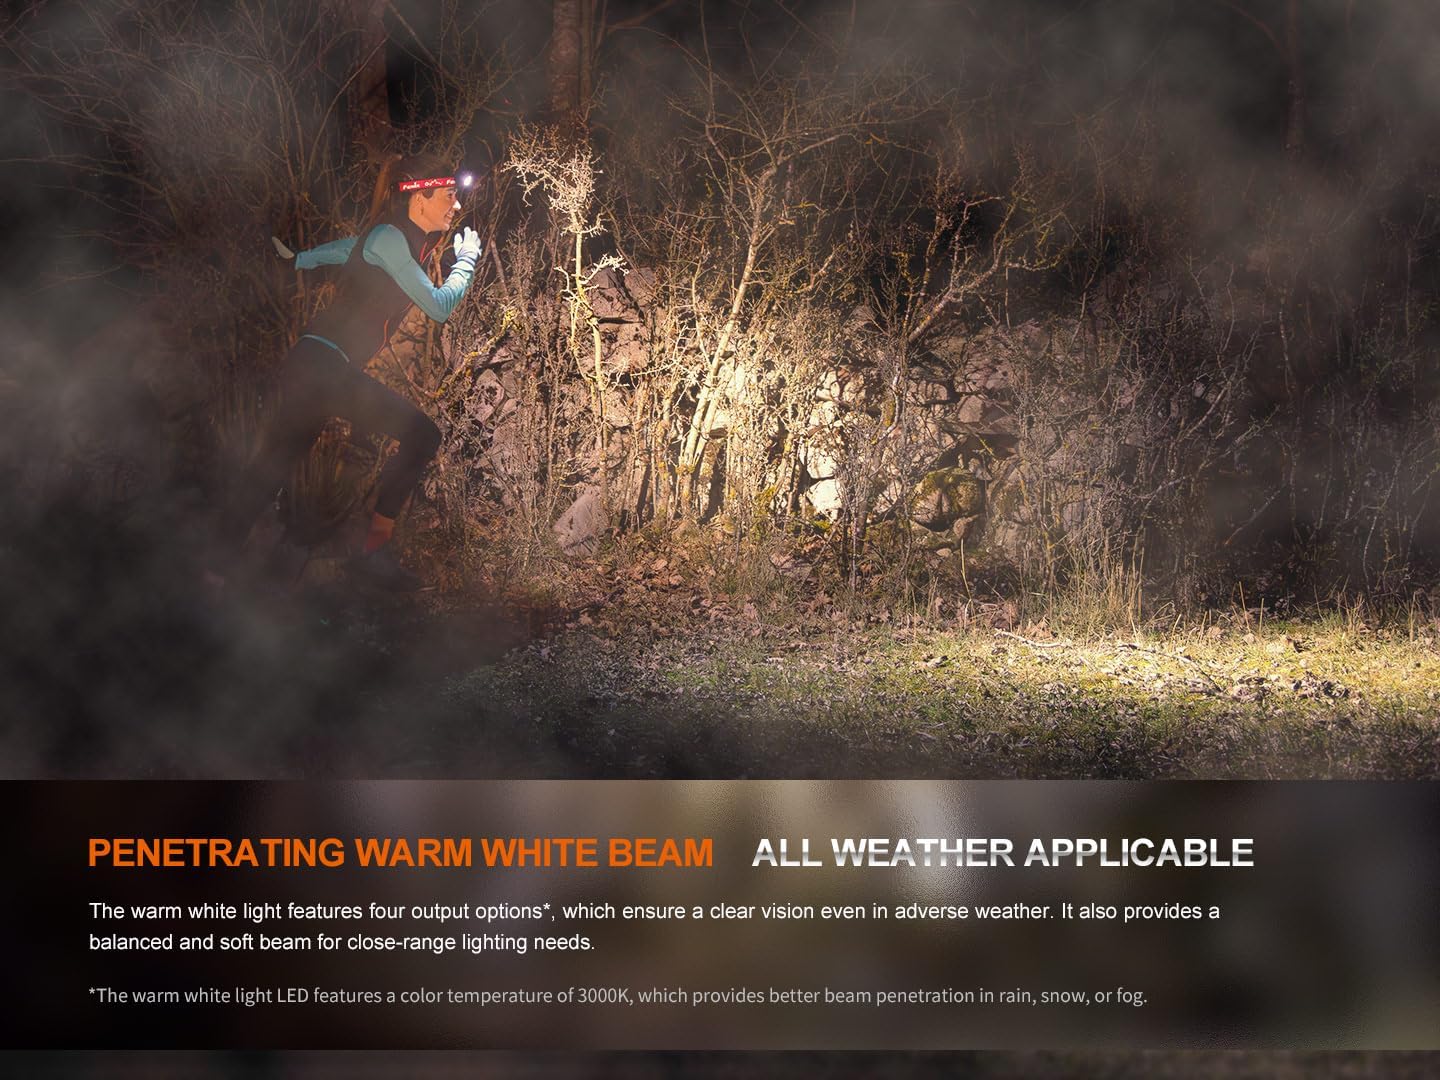
Image: A detailed view of the Fenix HM65R-T V2.0 headlamp, highlighting its dual top switches for independent control of light modes.
Power On/Off
- To Turn On: Press and hold either of the switches for 0.5 seconds.
- To Turn Off: Press and hold either of the switches for 0.5 seconds.
Mode Switching (White Light)
With the white light on, single-click the white light switch to cycle through Low, Medium, and High modes.
Mode Switching (Warm White Light)
With the warm white light on, single-click the warm white light switch to cycle through Eco, Low, Medium, and High modes.
SOS Mode
To activate SOS mode, press and hold the warm white light switch for 1.2 seconds. The headlamp will emit a flashing SOS signal at 5 lumens.
Electronic Lockout Function
- To Lock: With the headlamp off, press and hold both switches simultaneously for 3 seconds. The headlamp will flash 4 times in Eco mode to indicate it is locked.
- To Unlock: Press and hold both switches simultaneously for 3 seconds. The headlamp will flash 4 times in Eco mode and then turn on in Eco mode to indicate it is unlocked.
Battery Level Indication
When the headlamp is off, single-click either switch to activate the battery level indicators located in the middle of the switches. The indicators will show the remaining battery percentage:
- 4 lights on: 100% - 80%
- 3 lights on: 80% - 60%
- 2 lights on: 60% - 40%
- 1 light on: 40% - 20%
- 1 light flashes: 20% - 1%
Official Product Video: HM65R-T V2 Full Review
Video: A comprehensive review of the Fenix HM65R-T V2.0 headlamp, detailing its features, operation, and comparison with previous models. This video provides visual demonstrations of setup, light modes, and adjustment mechanisms.
Maintenance
Cleaning
Regularly clean the headlamp body and lens with a soft, damp cloth. Avoid using abrasive cleaners or solvents that could damage the finish or optical components.
Battery Care
To ensure optimal performance and longevity, store the battery in a cool, dry place. Recharge the battery regularly, even if not in frequent use, to prevent deep discharge. If using CR123A batteries, ensure they are of high quality and from a reputable brand.
O-ring Replacement
Periodically inspect the O-ring for wear and tear. If damaged, replace it with the provided spare O-ring to maintain the headlamp's IP68 waterproof rating.
Troubleshooting
Headlamp Not Turning On
- Check if the battery is correctly installed with the correct polarity.
- Ensure the battery is charged. Refer to the Battery Level Indication section.
- Verify that the headlamp is not in Electronic Lockout mode. Follow the unlocking procedure.
- Clean the battery contacts and the contact points inside the headlamp with a clean cloth.
Dim or Flickering Light
- The battery may be low. Recharge or replace the battery.
- Ensure the battery contacts are clean and free from debris.
- Check for any loose connections or damage to the headlamp.
Charging Issues
- Ensure the USB-C cable is properly connected to both the headlamp and the power source.
- Try a different USB-C cable or power adapter.
- Verify that the charging port is clean and free from obstructions.
Specifications
| Feature | Value |
|---|---|
| Model | HM65R-T V2.0 |
| Brand | Fenix |
| White Brightness (Max) | 1600 Lumens |
| Warm White Brightness (Max) | 800 Lumens |
| Power Source | Battery Powered (1 Lithium Ion battery included, compatible with 2 CR123A) |
| Material | Magnesium Alloy |
| Water Resistance Level | Waterproof (IP68) |
| Impact Resistance | 2 meters |
| Item Weight | 5 ounces (0.31 Pounds) |
| Product Dimensions | 1.37"D x 1.84"W x 3.15"H |
| Special Features | Adjustable Light Modes, Adjustable Strap, Durable, High Lumens, Rechargeable |
| Included Components | Charging Cable, Head Band, Headlamp |
Warranty & Support
Warranty Information
The Fenix HM65R-T V2.0 comes with a Limited Warranty. For specific details regarding the warranty period and coverage, please refer to the warranty card included in your product packaging or visit the official Fenix website.
Customer Support
For any questions, technical assistance, or warranty claims, please contact Fenix customer support through their official website or the contact information provided in your product documentation.


