
1. Introduction
This manual provides detailed instructions for the installation, operation, and maintenance of your Hikvision D1 PRO Car Dash Camera. Please read this manual thoroughly before using the product to ensure proper function and safety.
Package Contents:
- Dashcam
- Connector Cable
- Accessory Package
- 3M Tape
- User Manual (this document)
- Power Cord
2. Safety Information
- Do not operate the dash camera while driving. Adjustments should only be made when the vehicle is safely parked.
- Ensure the dash camera is securely mounted and does not obstruct the driver's view or interfere with vehicle controls.
- Use only the provided power cord and accessories. Using unauthorized accessories may damage the device and void the warranty.
- Avoid exposing the device to extreme temperatures, direct sunlight for prolonged periods, or excessive moisture.
- Do not attempt to disassemble or repair the dash camera yourself. Contact qualified service personnel for assistance.
- Insert and remove the Micro SD card only when the device is powered off to prevent data corruption.
3. Product Overview
The Hikvision D1 PRO Car Dash Camera is designed to record high-definition video of your journeys, providing security and evidence in case of incidents. It features a 2K 1440p HD camera with a wide field of view, G-Sensor for emergency recording, built-in Wi-Fi for smartphone connectivity, and voice recognition capabilities.

Figure 3.1: Front view of the Hikvision D1 PRO Car Dash Camera, showing the lens and brand logo.

Figure 3.2: The dash camera highlighting key features such as HD recording, built-in Wi-Fi, 360-degree rotation, up to 256GB storage, large aperture, and parking monitoring.
Key Features:
- 2K 1440p HD Resolution: Captures clear video with a 102° horizontal and 122° diagonal wide-angle view.
- Built-in G-Sensor: Automatically detects collisions or sudden movements and locks emergency video footage.
- Night Vision: Enhanced low-light performance with 3D denoising for clear night recordings.
- Built-in Wi-Fi: Connects to a smartphone app for live view, video playback, and settings configuration.
- Voice Recognition: Supports commands like "Take Picture," "Open Recording," "Turn Off Recording," and "Lock The Video."
- Loop Recording: Continuously records, overwriting the oldest files when the storage card is full.
- Microphone & Speaker: Integrated for audio acquisition and output.
- Adjustable Rotation: Offers 330° rotation for flexible viewing angles.
4. Setup
4.1 Micro SD Card Installation
The dash camera supports Micro SD cards from 16GB to 256GB. For optimal performance, use high-endurance Micro SD cards from reputable brands. Recommended cards include Samsung EVO Plus microSDXC UHS-1 A2 V30, HP (MicroSDXC mx310), WDD256G1P0C, Kingston (SDCS2/256GBIN), and Transcend (TS256USD350V).
- Ensure the dash camera is powered off.
- Locate the Micro SD card slot on the device.
- Insert the Micro SD card into the slot until it clicks into place.
- To remove, gently push the card until it springs out.
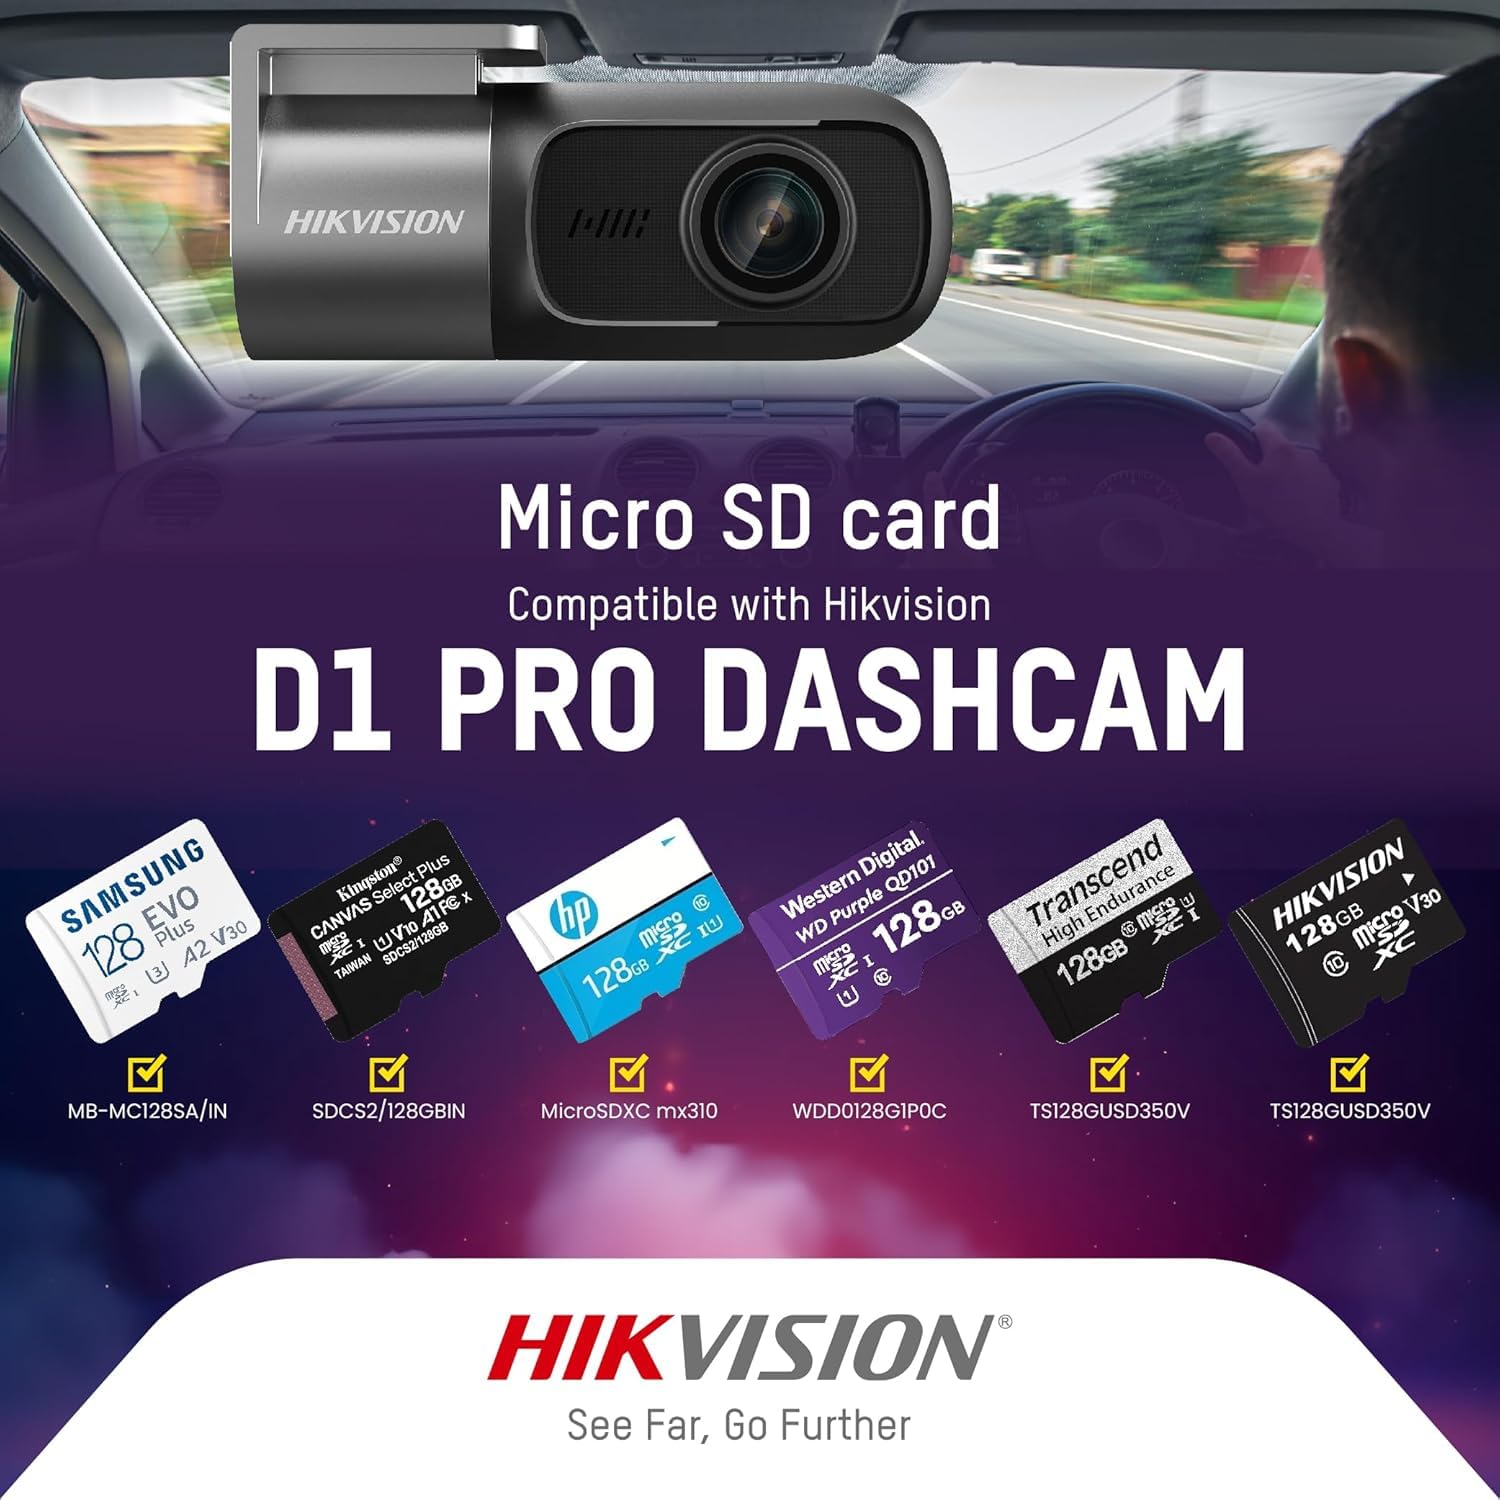
Figure 4.1: Various compatible Micro SD cards for the Hikvision D1 PRO Dashcam, including Samsung, Kingston, HP, Western Digital, and Transcend brands.
4.2 Mounting the Dash Camera
Use the provided 3M tape to securely mount the dash camera on your vehicle's windshield. Choose a location that does not obstruct your view of the road or interfere with airbags.
- Clean the chosen area on the windshield thoroughly.
- Attach the 3M tape to the dash camera mount.
- Press the mount firmly onto the windshield for at least 30 seconds.
- Adjust the camera angle as needed. The camera offers 330° rotation for optimal positioning.

Figure 4.2: The dash camera illustrating its 330-degree rotation feature, allowing adjustment for interior or exterior views.
4.3 Power Connection
Connect the dash camera to your vehicle's power source using the provided power cord. Route the cable neatly to avoid interference with driving.
- Plug one end of the power cord into the dash camera's power input port.
- Plug the other end into your vehicle's 12V power outlet (cigarette lighter socket).
- The dash camera will power on automatically when the vehicle starts.
5. Operating Instructions
5.1 Basic Recording
Once powered on, the dash camera will automatically begin recording. It utilizes loop recording, meaning it continuously records video in segments. When the Micro SD card is full, the oldest unprotected files will be overwritten by new recordings.

Figure 5.1: Illustration of the loop recording function, showing how new recordings overwrite the oldest files when the SD card is full, while keeping protected recordings.
5.2 G-Sensor Functionality
The built-in G-Sensor detects sudden impacts or vibrations (e.g., during a collision). When triggered, it automatically saves and locks the current video segment, preventing it from being overwritten by loop recording. These emergency videos are stored in a separate folder on the Micro SD card.
5.3 Wi-Fi and Mobile App Connection
The dash camera features built-in Wi-Fi, allowing you to connect it to your smartphone via a dedicated mobile application. This enables real-time video viewing, playback, and parameter configuration.
- Download the Hikvision Car Dash Camera app from your smartphone's app store.
- Power on the dash camera.
- On your smartphone, go to Wi-Fi settings and connect to the dash camera's Wi-Fi hotspot (SSID usually starts with "HIKVISION-").
- Open the Hikvision app. You should now be able to access live view, playback recorded videos, and adjust settings.

Figure 5.2: The dash camera wirelessly connected to a smartphone, displaying the app interface for photo, playback, and settings.

Figure 5.3: The mobile app interface showing video playback from the dash camera, with options for download and timeline navigation.

Figure 5.4: The dash camera and smartphone displaying the in-app control interface, allowing live view, record playback, and parameter configuration.
5.4 Voice Recognition
The dash camera supports specific voice commands for hands-free operation:
- "Take Picture"
- "Open Recording"
- "Turn Off Recording"
- "Lock The Video"
Speak commands clearly and at a normal volume for best recognition.
5.5 Night Vision
The dash camera is equipped with night vision technology and 3D denoising, which helps in capturing clear video footage even in low-light conditions or during night driving.
6. Maintenance
- Cleaning: Use a soft, dry cloth to clean the camera lens and body. Do not use abrasive cleaners or solvents.
- SD Card Care: Regularly format the Micro SD card (e.g., once a month) using the dash camera's settings to maintain optimal performance and prevent data corruption. Back up any important footage before formatting.
- Firmware Updates: Check the Hikvision website or mobile app periodically for firmware updates to ensure your dash camera has the latest features and bug fixes.
7. Troubleshooting
- Camera not powering on: Ensure the power cord is securely connected to both the dash camera and the vehicle's 12V outlet. Check if the vehicle's 12V outlet is functioning.
- Recording issues: Ensure a compatible Micro SD card is inserted correctly and has sufficient free space. Format the SD card if issues persist.
- Wi-Fi connection problems: Make sure the dash camera's Wi-Fi is enabled. Restart both the dash camera and your smartphone. Ensure you are within range of the dash camera's Wi-Fi signal.
- Voice commands not recognized: Speak clearly and ensure there is minimal background noise. Check the app settings to confirm voice recognition is enabled.
- Poor video quality: Clean the camera lens. Ensure the windshield area in front of the camera is clean. Check app settings for resolution configuration.
8. Specifications
| Feature | Specification |
|---|---|
| Model Number | AE-DC4018-D1PRO |
| Video Capture Resolution | 1440p (2K HD) |
| Field Of View | 102 Degrees (Horizontal), 122 Degrees (Diagonal) |
| Connectivity Technology | Wi-Fi |
| Special Feature | G-Sensor, Night Vision, Voice Recognition |
| Storage Support | Micro SD Card (16GB-256GB) |
| Mounting Type | Adhesive Mount |
| Item Weight | 200 g |
| Product Dimensions | 4 x 8 x 4 cm |
| Manufacturer | Hangzhou HIKVISION Digital Technology Co. Ltd. |
| Country of Origin | China |
9. Warranty and Support
For warranty information and technical support, please refer to the official Hikvision website or contact their customer service directly. Keep your purchase receipt as proof of purchase for warranty claims.
Official Hikvision Website: www.hikvision.com