
Walfront WALFRONTx2zgaqi6mt
Walfront AN8008 True RMS Digital Multimeter User Manual
Model: WALFRONTx2zgaqi6mt
1. Introduction
The Walfront AN8008 True RMS Digital Multimeter is a versatile and reliable tool designed for safely and accurately troubleshooting a variety of automotive and household electrical problems. Featuring a large 9999-count display, it provides precise and easy-to-read results, enabling efficient completion of tasks. This manual provides detailed instructions for its operation, maintenance, and safety.
2. Safety Information
Always observe basic safety precautions when using this multimeter to avoid personal injury or damage to the meter or equipment under test. Read the following safety information carefully before use.
- Do not exceed the maximum voltage rating specified for any function.
- Use caution when working with voltages above 30V AC RMS, 42V peak, or 60V DC. These voltages pose a shock hazard.
- Always disconnect the test leads from the circuit before changing functions.
- Ensure the meter is in the correct function and range for the measurement.
- Inspect test leads for damaged insulation or exposed metal before use. Replace if damaged.
- Do not operate the meter if it appears damaged or if the case is open.
- Remove the batteries if the meter is not used for a long period.
3. Package Contents
Verify that all items listed below are present and in good condition upon opening the package:
- 1 x Walfront AN8008 Digital Multimeter (Batteries NOT included)
- 1 set x Test Probes and Cables
- 1 x Storage Bag
- 1 x User Manual (this document)

Figure 3.1: The Walfront AN8008 Multimeter shown with its complete set of accessories, including test leads, storage bag, and additional probe tips.
4. Product Overview
The Walfront AN8008 Multimeter features a compact design with a clear LCD display and a rotary switch for function selection. It is equipped with input jacks for test leads and various buttons for additional functions.

Figure 4.1: Front view of the Walfront AN8008 Digital Multimeter, highlighting the display, rotary switch, and input terminals.

Figure 4.2: Angled view of the multimeter, showing its ergonomic design and button layout.
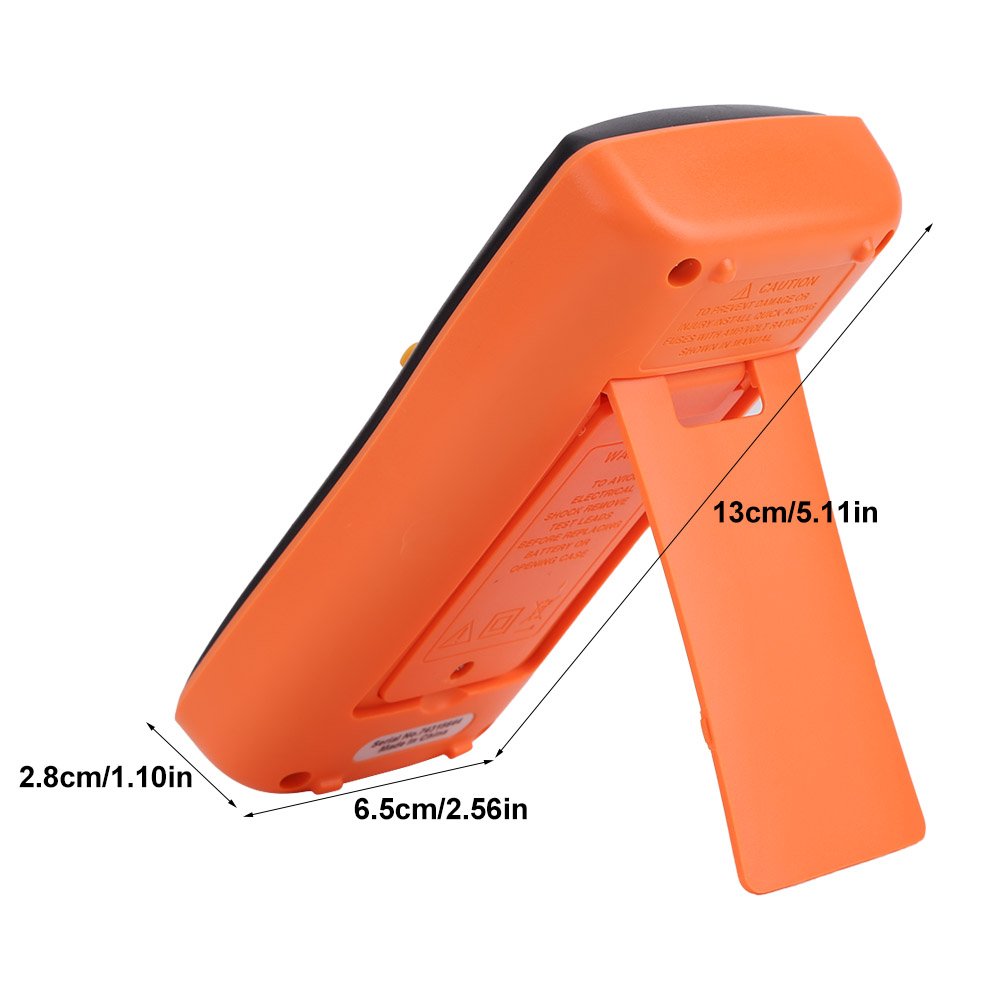
Figure 4.3: Side view of the multimeter, illustrating its compact dimensions (2.8cm/1.10in thickness, 6.5cm/2.56in width, and 13cm/5.11in height with kickstand).
5. Setup
5.1 Battery Installation
The multimeter requires two 1.5V AAA batteries (not included) for operation. To install or replace batteries:
- Ensure the multimeter is turned OFF and disconnect all test leads.
- Locate the battery compartment cover on the back of the unit.
- Use a screwdriver to open the battery compartment.
- Insert two AAA batteries, observing the correct polarity (+/-) as indicated inside the compartment.
- Replace the battery compartment cover and secure it with the screw.
5.2 Connecting Test Leads
Proper connection of test leads is crucial for accurate and safe measurements.
- Insert the black test lead into the 'COM' (Common) input jack.
- Insert the red test lead into the 'VΩHz' input jack for voltage, resistance, frequency, and diode measurements.
- For current measurements (mA/A), insert the red test lead into the 'A mA' input jack. For microampere measurements (uA), insert the red test lead into the 'uA' input jack.
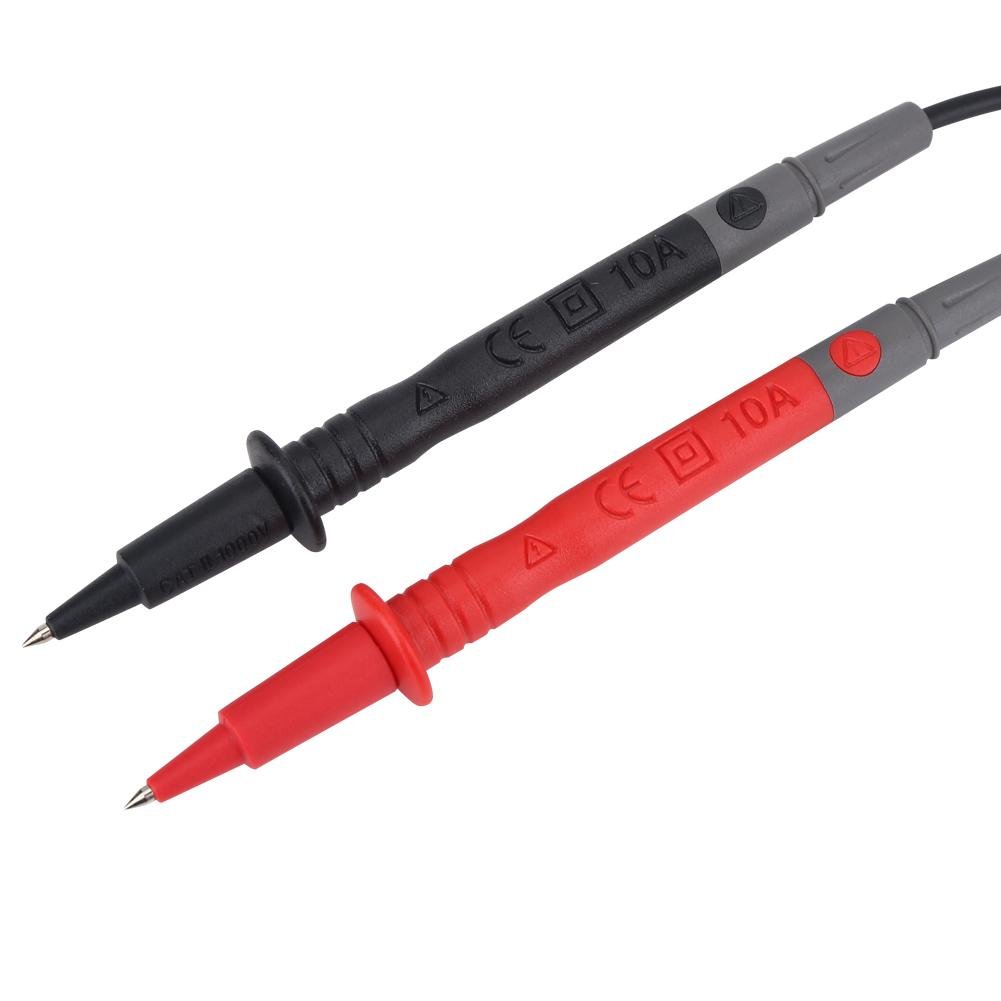
Figure 5.1: The red and black test probes, essential for making electrical measurements.

Figure 5.2: Detailed view of the test lead connections, showing the robust design of the leads.
6. Operating Instructions
6.1 Basic Operation
To power on the multimeter, rotate the central dial from 'OFF' to the desired measurement function. The meter supports auto-ranging, simplifying measurements by automatically selecting the appropriate range.
6.2 Measurement Functions
The AN8008 multimeter offers a wide range of measurement capabilities:
- DC Voltage (V): Measures direct current voltage. Ranges from 9.999mV to 999.9V.
- AC Voltage (V): Measures alternating current voltage. Ranges from 9.999mV to 750.0V (40Hz-1kHz).
- DC Current (mA & A): Measures direct current in milliamperes and amperes. Ranges from 99.99mA to 9.999A.
- DC Current (uA): Measures direct current in microamperes. Ranges from 99.99uA to 999.9uA.
- AC Current (mA & A): Measures alternating current in milliamperes and amperes. Ranges from 99.99mA to 9.999A (40Hz-1kHz).
- AC Current (uA): Measures alternating current in microamperes. Ranges from 99.99uA to 999.9uA.
- Resistance (Ω): Measures electrical resistance. Ranges from 99.99Ω to 9.999MΩ.
- Duty Cycle (%): Measures the ratio of pulse width to period. Range: 1%~99%.
- Diode Test: Checks the functionality of diodes.
- Continuity Test: Checks for electrical continuity with an audible buzzer.
- WAVES Output: Generates square wave signals at various frequencies (50Hz to 5000Hz).

Figure 6.1: A user demonstrating the use of the Walfront AN8008 Multimeter for continuity testing on a circuit board.
7. Maintenance
Proper maintenance ensures the longevity and accuracy of your multimeter.
- Cleaning: Wipe the case with a damp cloth and mild detergent. Do not use abrasives or solvents.
- Battery Replacement: Replace batteries when the low battery indicator appears on the display. Refer to Section 5.1 for instructions.
- Storage: Store the multimeter in a cool, dry place away from direct sunlight and extreme temperatures. Remove batteries if storing for extended periods.
8. Troubleshooting
If you encounter issues with your multimeter, refer to the table below for common problems and solutions.
| Problem | Possible Cause | Solution |
|---|---|---|
| No display or dim display | Dead or low batteries; Incorrect battery polarity | Replace batteries; Check battery orientation |
| Incorrect readings | Incorrect function/range selected; Loose test leads; Damaged test leads | Select correct function/range; Reconnect leads firmly; Replace damaged leads |
| Continuity buzzer not working | Circuit resistance too high; Function not selected | Ensure resistance is below threshold; Select continuity function |
| Meter does not turn on | Batteries not installed; Power switch issue | Install batteries; Ensure rotary switch is fully engaged |
9. Specifications
Detailed technical specifications for the Walfront AN8008 True RMS Digital Multimeter:
| Function | Range | Resolution | Accuracy |
|---|---|---|---|
| DC Voltage (V) | 9.999mV - 999.9V | 0.001mV - 0.1V | ±(0.5%+3) |
| AC Voltage (V) | 9.999mV - 750.0V | 0.001mV - 0.1V | ±(1.0%+3) (40Hz-1kHz) |
| DC Current (mA&A) | 99.99mA - 9.999A | 0.01mA - 0.001A | ±(1.0%+3) |
| DC Current (uA) | 99.99uA - 999.9uA | 0.01uA - 0.1uA | ±(0.8%+3) |
| AC Current (mA&A) | 99.99mA - 9.999A | 0.01mA - 0.001A | ±(1.2%+3) (40Hz-1kHz) |
| AC Current (uA) | 99.99uA - 999.9uA | 0.01uA - 0.1uA | ±(1.0%+3) |
| Resistance (Ω) | 99.99Ω - 9.999MΩ | 0.01Ω - 0.001MΩ | ±(1.0%+3) to ±(1.5%+3) |
| Duty Cycle | 1%~99% | 0.1% | ±(0.1%+2) |
| Display (LCD) | 9999 Counts | ||
| Ranging | Auto/Manual | ||
| Update Rate | 3 Times/Second | ||
| True RMS | Yes | ||
| Back Light | Yes | ||
| Data Hold | Yes | ||
| Low Battery Indication | Yes | ||
| Auto Power Off | Yes | ||
| Battery Type | 1.5V AAA Batteries * 2 (NOT included) | ||
| Operating Temperature | 0~40°C | ||
| Storage Temperature | -20°C~60°C | ||
| Material | ABS | ||
| Item Model Number | WALFRONTx2zgaqi6mt | ||
| ASIN | B0CVBN9WJX | ||
10. Warranty and Support
Information regarding specific warranty terms for the Walfront AN8008 True RMS Digital Multimeter is not provided in this manual. For warranty claims, technical support, or service inquiries, please contact the manufacturer or your point of purchase directly. Keep your purchase receipt as proof of purchase.
Ask a question about this manual
Ask about setup, troubleshooting, compatibility, parts, safety, or missing instructions. Manuals+ will review the question and use this page’s manual context to help answer it.