1. Introduction
The Aika AK-690 is a digital rechargeable pocket hearing aid designed to enhance auditory experiences. It features 16 channels for clear sound processing, active noise reduction technology, and a long-lasting battery. This manual provides essential information for the proper setup, operation, maintenance, and troubleshooting of your device.
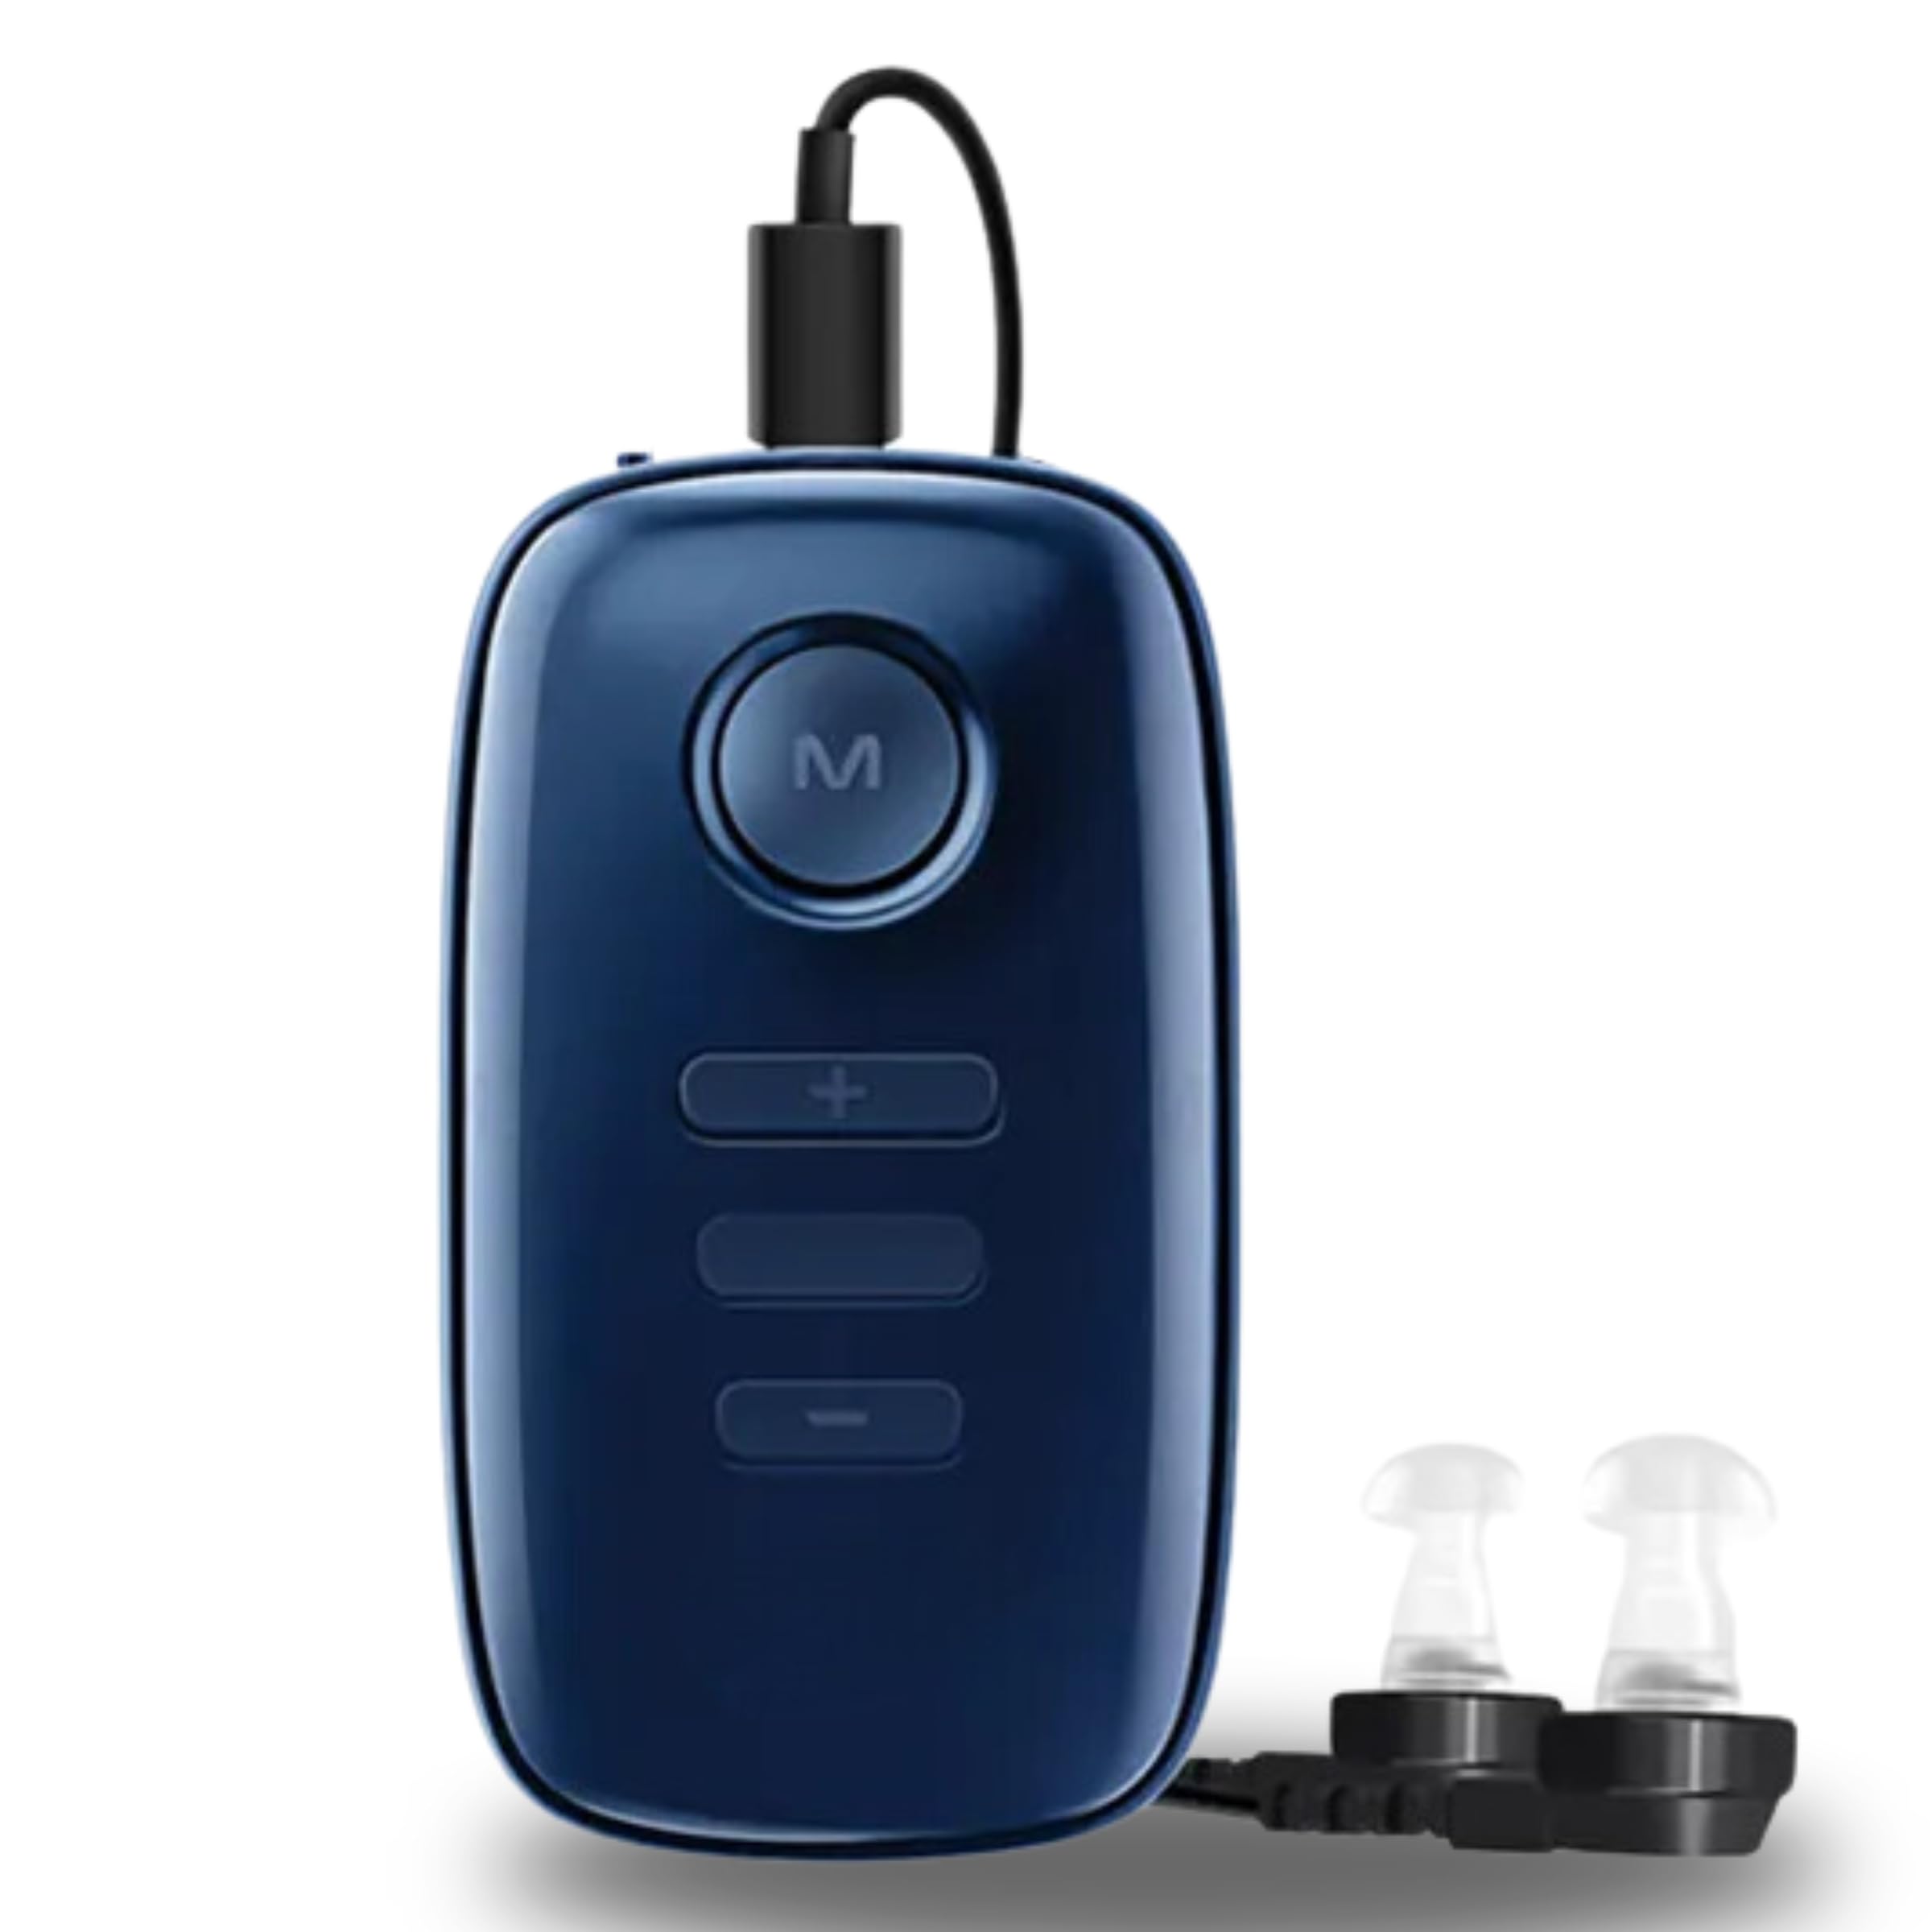
Figure 1: Front view of the Aika AK-690 Hearing Aid.
2. Product Components and Structure
Familiarize yourself with the different parts of your Aika AK-690 hearing aid to ensure correct usage.

Figure 2: Product Structure and Components.
- Receiver Cable: Connects the main unit to the receiver and eartip.
- Audio Port & Charging Port: Used for connecting the receiver cable and for charging the device.
- Power Button: Controls the device's power on/off state.
- Mode Button (M): Cycles through different listening modes.
- Indicator Light: Displays device status, such as charging or power on.
- Volume + Button: Increases the sound amplification level.
- Volume - Button: Decreases the sound amplification level.
- Eartips: Soft silicone tips that fit into the ear canal. Available in various sizes for comfort.
- Receiver: The part that delivers amplified sound into the ear canal.
3. Setup
3.1 Initial Charging
Before first use, fully charge the hearing aid. Connect the charging cable to the Audio & Charging Port on the device and plug the other end into a suitable USB power adapter. The indicator light will show charging status. A full charge takes approximately 3 hours and provides up to 120 hours of playtime.
3.2 Attaching Eartips and Receiver
Select an eartip size that fits comfortably and securely in your ear canal. Attach the chosen eartip to the receiver. Then, connect the receiver cable to the Audio Port of the main unit.

Figure 3: Hearing aid with eartips.
3.3 Powering On/Off
Press and hold the Power button for a few seconds to turn the device on or off. The indicator light will illuminate when the device is powered on.
4. Operating Instructions
4.1 Wearing the Device
Place the main unit in your pocket or clip it to your clothing. Gently insert the eartip into your ear canal until it feels secure and comfortable. Ensure the receiver cable is not twisted or pulled.

Figure 4: Proper wearing of the pocket hearing aid.
4.2 Adjusting Volume
Use the Volume + button to increase the sound level and the Volume - button to decrease it. Adjust the volume to a comfortable listening level, avoiding excessively loud settings that could cause discomfort or damage to hearing.
4.3 Changing Modes
Press the Mode (M) button to cycle through the available listening modes. Each mode is optimized for different acoustic environments.

Figure 5: Four modes for different scene requirements.
5. Modes of Operation
The Aika AK-690 offers four distinct listening modes:
- Normal Mode: General amplification suitable for quiet environments.
- Indoor Mode: Optimized for indoor settings, reducing common background noises like household appliances.
- Meeting Mode: Enhances speech clarity in group conversations or meetings, minimizing ambient chatter.
- Outdoor Mode: Designed for open-air environments, reducing wind noise and other outdoor distractions.
6. Charging
To charge your device, connect the provided USB charging cable to the charging port. The indicator light will show the charging status. A full charge takes approximately 3 hours. The device offers up to 120 hours of continuous use on a single charge.
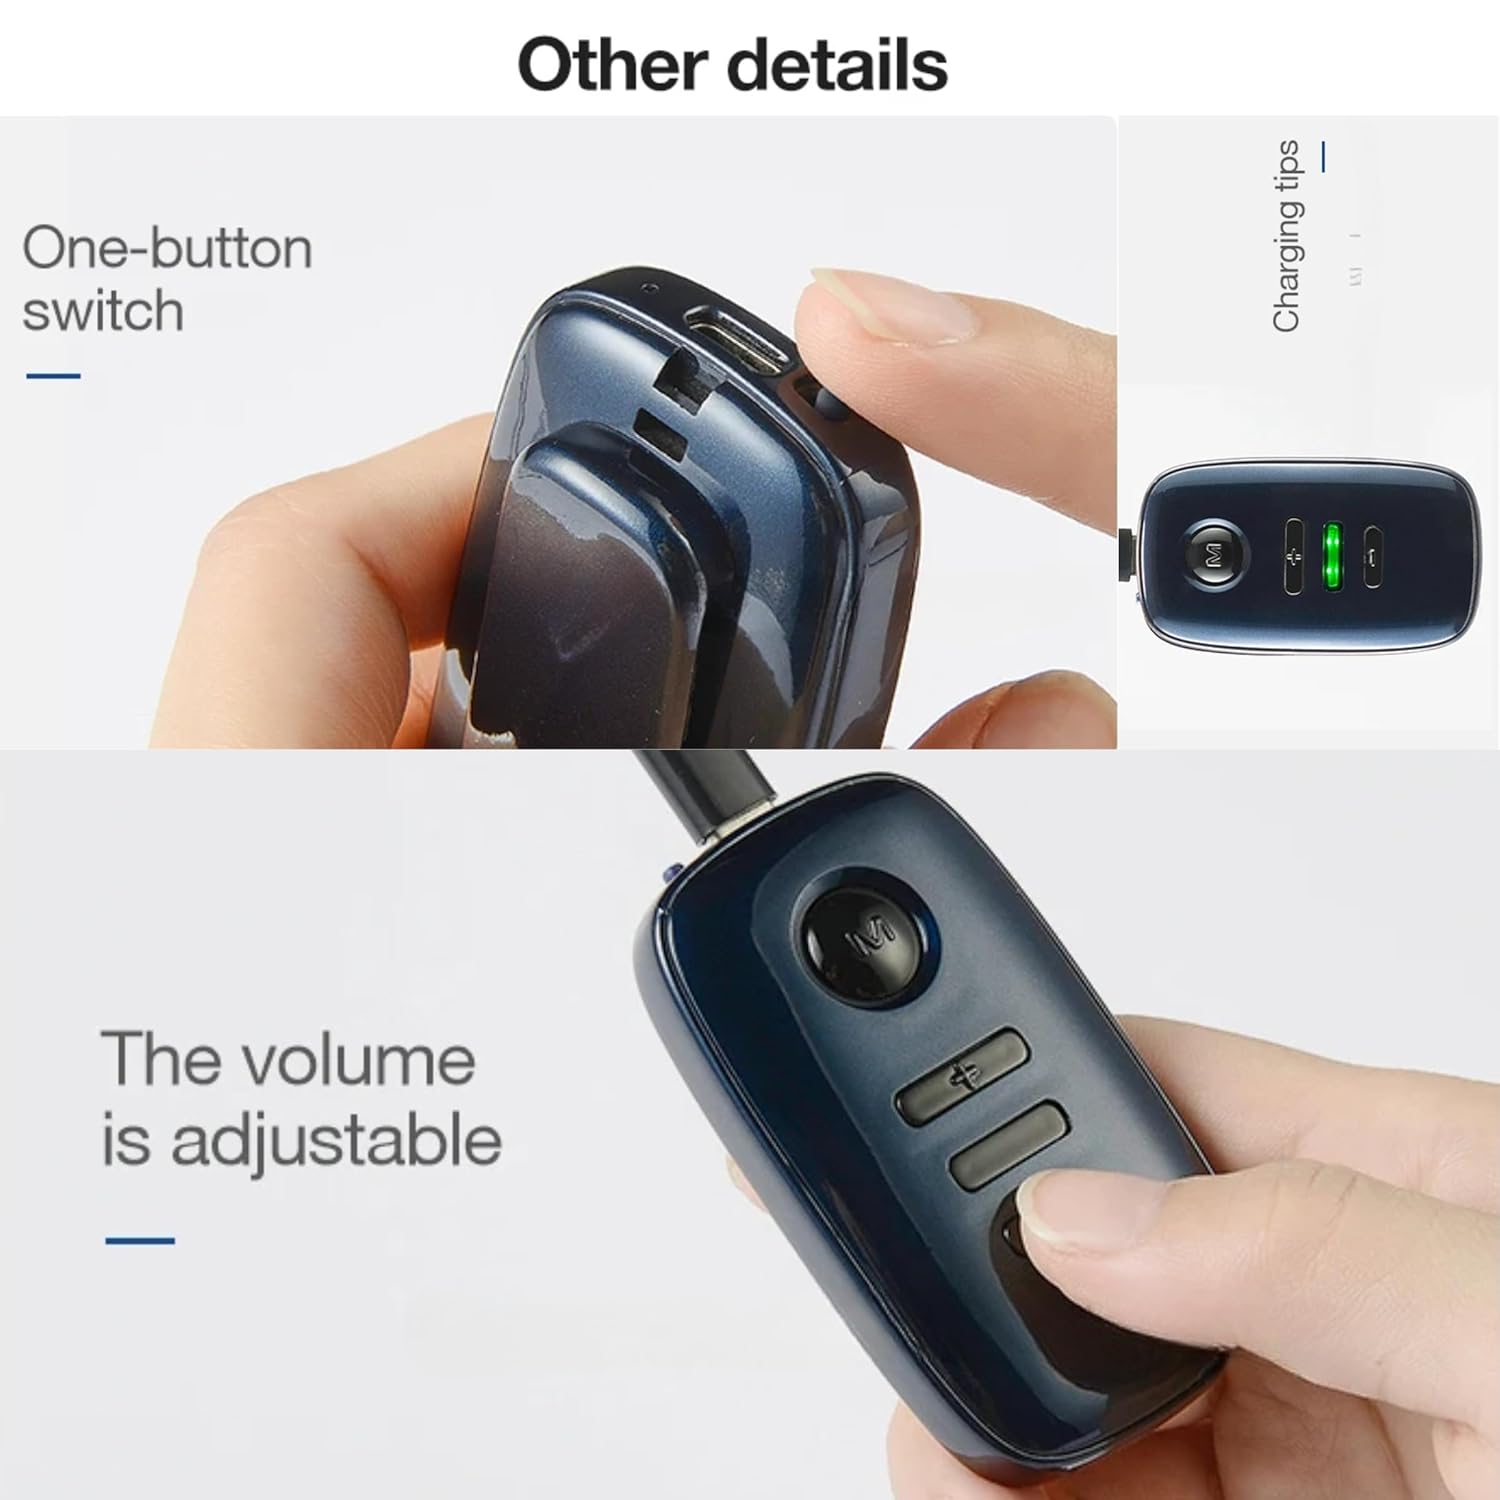
Figure 6: Charging port and indicator lights.
7. Maintenance and Care
- Cleaning: Regularly clean the eartips and the main unit with a soft, dry cloth. Do not use water or cleaning solutions directly on the device.
- Storage: When not in use, store the hearing aid in a cool, dry place, away from direct sunlight and extreme temperatures.
- Battery Care: To prolong battery life, avoid fully discharging the device frequently. Charge it regularly, even if not used daily.
- Avoid Moisture: Protect the device from water, humidity, and sweat.
8. Troubleshooting
| Problem | Possible Cause | Solution |
|---|---|---|
| No sound or weak sound | Low battery; Volume too low; Eartip blocked; Device off. | Charge the device; Increase volume; Clean eartip; Turn device on. |
| Whistling or feedback sound | Eartip not properly sealed in ear; Volume too high; Eartip too small. | Re-insert eartip for a snug fit; Lower volume; Try a larger eartip. |
| Sound is distorted | Low battery; Eartip blocked; Device malfunction. | Charge the device; Clean eartip; Contact customer support if problem persists. |
9. Specifications
| Feature | Detail |
|---|---|
| Model Number | AK-690 |
| Channels | 16 |
| Frequency Range | 450Hz to 3000Hz |
| OSPL90 Max | ≤ 129dB +3dB |
| OSPL90 HFA Avg | 120dB±4dB |
| FOG50HFA Avg | 50dB±5dB |
| Total Harmonic Distortion | ≤ 10% |
| Playtime | Up to 120 hours |
| Recharge Time | Approximately 3 hours |
| Item Weight | 7 ounces |
| Product Dimensions | 1.97 x 1.97 x 1.97 inches |
| Special Features | Lightweight, Long Lasting Battery, Rechargeable, Soft Ear Buds |
| Control Type | Button Control |
10. Safety Information
- Consult a medical professional before using any hearing aid if you have sudden hearing loss, ear discharge, or pain.
- Do not expose the device to extreme temperatures, direct sunlight, or moisture.
- Keep out of reach of children and pets. Small parts can be a choking hazard.
- Avoid dropping the device or subjecting it to strong impacts.
- Do not attempt to open or repair the device yourself. This will void the warranty and may cause damage.
11. Warranty and Support
For warranty information or technical support, please refer to the documentation included with your purchase or contact the seller/manufacturer directly. Ensure you have your product model number (AK-690) and purchase details available when seeking support.


