1. Introduction
This manual provides comprehensive instructions for the installation, operation, and maintenance of the Hanwha ARN-810S-2TB Network Video Recorder (NVR). This NVR is designed to support up to 8 channels with 8MP camera resolution, featuring H.265, H.264, and MJPEG codec support, and a 60Mbps network camera recording capability. It includes an integrated 2TB HDD and supports a maximum of 6TB.

Figure 1.1: Front view of the Hanwha ARN-810S-2TB Network Video Recorder. The device is a compact black rectangular unit with a USB port and indicator lights on the front panel.
2. Safety Information
Please read all safety instructions carefully before operating the device. Failure to comply with these instructions may result in electric shock, fire, or damage to the product.
- Ensure the power supply voltage is within the specified range.
- Do not expose the NVR to rain or moisture.
- Avoid placing the NVR in direct sunlight or near heat sources.
- Do not block ventilation openings.
- Only use accessories specified by the manufacturer.
- Refer all servicing to qualified service personnel.
3. What's in the Box
Upon opening the package, verify that all components are present and in good condition:
- Hanwha ARN-810S-2TB NVR Unit
- Power Adapter
- USB Mouse
- Quick Start Guide
- Screws for HDD installation (if applicable)
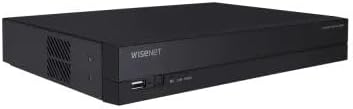
Figure 3.1: Side view of the Hanwha ARN-810S-2TB NVR, showing the ventilation grilles and overall compact design.
4. Setup and Installation
4.1 Physical Installation
- Placement: Choose a stable, flat surface in a well-ventilated area, away from direct sunlight, heat sources, and moisture. Ensure adequate space around the NVR for airflow.
- HDD Installation (if upgrading/replacing):
The ARN-810S-2TB comes with a 2TB HDD pre-installed. If you need to install or replace an HDD (up to 6TB maximum), refer to the detailed instructions in the full user manual for opening the casing and securing the drive.

Figure 4.1: Technical drawing illustrating the dimensions of the Hanwha ARN-810S NVR. The dimensions are approximately 8.21 inches (208.7 mm) in length, 11.81 inches (300 mm) in width, and 1.85 inches (47 mm) in height.
4.2 Connecting Peripherals
- Connect Monitor: Connect an HDMI cable from the NVR's HDMI output port to your monitor.
- Connect Mouse: Plug the USB mouse into one of the USB ports on the NVR.
- Network Connection:
- WAN Port (1Gbps): Connect an Ethernet cable from your router/network switch to the NVR's WAN port for internet access and remote viewing.
- PoE LAN Ports (8 x 10/100Mbps): Connect your PoE-enabled IP cameras directly to these ports. The NVR will provide power and data connectivity.

Figure 4.2: A standard Ethernet cable connector, used for network connections to the NVR's WAN and PoE LAN ports.
- Power Connection: Connect the provided power adapter to the NVR's power input and then plug it into a power outlet. The NVR will power on automatically.
4.3 Initial Configuration
Upon first boot, the NVR will guide you through a setup wizard. Follow the on-screen prompts to:
- Set up administrator password.
- Configure date and time settings.
- Scan and add connected IP cameras (Plug & Play feature).
- Configure network settings (DHCP or Static IP).
- Initialize the hard disk drive for recording.
5. Operating the NVR
5.1 Live View
After initial setup, the NVR will display the live feed from connected cameras. You can switch between single-camera view, multi-camera grid view (e.g., 4-channel, 8-channel), and sequence view.

Figure 5.1: Example of a multi-camera live view display, showing feeds from four different cameras simultaneously on a tablet interface. The NVR's local monitor output will provide a similar display.
5.2 Recording Management
The NVR supports continuous, scheduled, motion-detection, and alarm-triggered recording. Access the "Record" menu to configure recording schedules and parameters for each camera.
- Continuous Recording: Records 24/7.
- Scheduled Recording: Records during specified time periods.
- Motion Detection Recording: Records only when motion is detected in the camera's view.
5.3 Playback and Backup
To review recorded footage, navigate to the "Playback" menu. You can search by date, time, and event type. Footage can be backed up to a USB drive connected to the NVR's USB port.
5.4 Network Access and Remote Viewing
The NVR can be accessed remotely via a web browser or a dedicated mobile application. Ensure the NVR is connected to the internet and port forwarding is configured on your router if necessary. Refer to the full user manual for detailed network configuration steps.
6. Maintenance
6.1 Firmware Updates
Regularly check for and install firmware updates from the Hanwha official website to ensure optimal performance, security, and access to new features. Firmware updates can typically be performed via USB or network.
6.2 Hard Disk Drive (HDD) Management
The NVR's HDD will automatically overwrite the oldest footage when it becomes full. You can configure overwrite settings and monitor HDD health from the NVR's system settings.
6.3 Cleaning
Use a soft, dry cloth to clean the exterior of the NVR. Do not use liquid cleaners or aerosol sprays. Ensure ventilation openings are free from dust and debris.
7. Troubleshooting
| Problem | Possible Cause | Solution |
|---|---|---|
| No video output on monitor. | Loose HDMI cable, incorrect monitor input, NVR not powered on. | Check HDMI connection, select correct monitor input, ensure NVR is powered. |
| Cameras not displaying. | Loose PoE connection, camera not powered, IP address conflict, camera not added. | Check PoE cables, verify camera power, ensure unique IP addresses, add cameras via setup wizard. |
| Cannot access NVR remotely. | Network configuration issues, port forwarding not set up, NVR not connected to internet. | Verify network cable, check router settings for port forwarding, ensure NVR has internet access. |
| No recording. | HDD not initialized, recording schedule not set, HDD full. | Initialize HDD, configure recording schedule, check HDD status. |
8. Specifications
- Model: ARN-810S
- Channels: Up to 8CH
- Max Resolution: 8MP per channel
- Video Codec: H.265, H.264, MJPEG
- Network Camera Recording Bandwidth: 60Mbps
- PoE Ports: 8 x PoE (LAN, 10/100Mbps)
- WAN Port: 1 x RJ-45 (1Gbps)
- Included HDD: 2TB
- Max HDD Capacity: 6TB
- Local Monitor Output: HDMI
- Dimensions (L x W x H): 8.21 x 11.81 x 1.85 inches (208.7 x 300 x 47 mm)
- Item Weight: 2.31 pounds
- Connectivity Technology: HDMI
- ARB Support: Yes
9. Warranty and Support
9.1 Warranty Information
This Hanwha ARN-810S-2TB NVR comes with a 3-year warranty upon purchase. Please retain your proof of purchase for warranty claims.
9.2 Technical Support
For technical assistance, troubleshooting beyond this manual, or warranty inquiries, please contact Hanwha customer support. Visit the official Hanwha website for contact details and additional resources.
Note: Specific contact information may vary by region. Always refer to the manufacturer's official website for the most current support details.


