
1. Introduction
This manual provides essential information for the safe and efficient use of your Philips 32E1N3100LA monitor. Please read these instructions carefully before operating the device and retain them for future reference.
The Philips 32E1N3100LA is a 32-inch Full HD (1920x1080) monitor featuring a VA panel, 75Hz refresh rate, and 1ms MPRT response time, designed for a clear and smooth visual experience. It includes built-in speakers and supports Adaptive Sync technology.

Front view of the Philips 32E1N3100LA monitor.
2. Safety Information
Always follow these basic safety precautions when using your monitor:
- Do not expose the monitor to rain or moisture.
- Do not open the monitor casing. There are no user-serviceable parts inside.
- Ensure proper ventilation around the monitor.
- Use only the power adapter supplied with the monitor.
- Keep the monitor away from direct sunlight and heat sources.
- Refer to the official "Safety Information (PDF)" document for comprehensive safety guidelines.
For detailed safety instructions, please consult the official safety document: Safety Information (PDF)
3. Setup
3.1 Unpacking
Carefully remove all components from the packaging. Ensure all items listed in the packing list are present and undamaged.
3.2 Assembling the Stand
- Place the monitor face down on a soft, clean surface to prevent scratches.
- Attach the stand neck to the monitor using the provided screws.
- Secure the base to the stand neck.

Rear view of the monitor with the stand assembly.
3.3 Connecting Cables
Connect the necessary cables to the monitor's rear ports:
- Power Cable: Connect the power cable to the monitor's power input and then to a grounded electrical outlet.
- Video Cable: Connect an HDMI cable from your computer's video output to the monitor's HDMI input. Alternatively, use a D-Sub (VGA) cable if your system supports it.

Rear ports of the monitor for power and video connections.
3.4 Cable Management
Utilize the integrated cable management feature on the stand to keep your workspace tidy.
Cable management feature on the monitor stand.
4. Operating the Monitor
4.1 Power On/Off
Press the power button, usually located on the back or bottom edge of the monitor, to turn it on or off. The power LED will indicate the monitor's status.
4.2 On-Screen Display (OSD) Menu
The monitor features a micro joystick control, typically located on the rear right side, for navigating the OSD menu. This allows you to adjust various settings.
4.2.1 Picture Settings
- Brightness/Contrast: Adjust these settings to optimize image visibility.
- Color Temperature: Select predefined color modes or customize RGB levels.
- LowBlue Mode: Reduces harmful blue light emissions for eye comfort during prolonged use.
- Flicker-free Technology: Minimizes screen flickering to reduce eye strain.

LowBlue Mode and Flicker-free technology for eye comfort.
4.2.2 Audio Settings
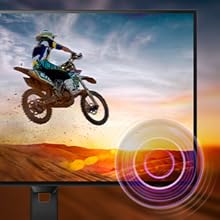
Adjust the volume of the built-in speakers through the OSD menu. An audio output jack is also available for connecting external headphones or speakers.

Monitor with built-in speakers.
4.3 Adaptive Sync (FreeSync)
This monitor supports Adaptive Sync technology, which synchronizes the display's refresh rate with your graphics card's frame rate. This helps eliminate screen tearing and stuttering for smoother gameplay and video playback. Ensure your graphics card supports FreeSync and that the feature is enabled in your graphics card settings and the monitor's OSD.

Adaptive Sync technology for smooth visuals.
5. Maintenance
5.1 Cleaning the Screen
Gently wipe the screen with a soft, lint-free cloth. For stubborn marks, lightly dampen the cloth with a screen cleaner specifically designed for monitors. Do not spray cleaner directly onto the screen.
5.2 Cleaning the Casing
Use a soft, dry cloth to wipe the monitor casing. Avoid using abrasive cleaners or solvents.
5.3 General Care
- Avoid placing heavy objects on the monitor or its cables.
- Do not block ventilation openings.
- Unplug the monitor from the power outlet during lightning storms or when unused for extended periods.
6. Troubleshooting
If you encounter issues with your monitor, refer to the following common problems and solutions:
| Problem | Possible Solution |
|---|---|
| No power | Ensure the power cable is securely connected to the monitor and a working electrical outlet. Check the power adapter. |
| No image on screen | Verify the video cable (HDMI/D-Sub) is correctly connected to both the monitor and your computer. Ensure the correct input source is selected in the OSD menu. |
| Image is blurry or distorted | Adjust the resolution settings on your computer to match the monitor's native resolution (1920x1080). Check video cable quality and connection. |
| No sound from speakers | Check the volume settings in the OSD menu and on your computer. Ensure the audio source is correctly configured. |
| Adaptive Sync not working | Confirm your graphics card supports FreeSync and that it is enabled in both your graphics card control panel and the monitor's OSD settings. |
7. Specifications
| Feature | Detail |
|---|---|
| Model Number | 32E1N3100LA/00 |
| Screen Size | 32 Inches |
| Panel Type | VA Panel |
| Resolution | FHD 1080p (1920 x 1080) |
| Aspect Ratio | 16:9 |
| Refresh Rate | 75 Hz |
| Response Time | 1 Millisecond (MPRT) |
| Contrast Ratio | 3000:1 |
| Brightness | 300 cd/m² |
| Connectivity | 1x HDMI 1.4, 1x D-Sub (VGA) |
| Audio | Built-in Speakers, Audio Out |
| Adaptive Sync | FreeSync |
| Power Consumption | 30.5 Watts |
| Dimensions (DxWxH) | 25P x 72l x 52H cm |
| Weight | 7 Kilograms |
| VESA Mount | Yes (Wall Mount Type) |
8. Warranty and Support
8.1 Warranty Information
This Philips monitor comes with a limited warranty. For specific terms, conditions, and duration of your warranty, please refer to the documentation included with your product or visit the official Philips support website.
8.2 Customer Support
For technical assistance, troubleshooting beyond this manual, or warranty claims, please contact Philips customer support. You can find contact information and additional resources on the official Philips website.
Additional detailed instructions are available in the official user manual: Instructions for Use (PDF)


