
MOUMON MOUMON High Gloss Dresser (5 Drawers)
MOUMON High Gloss Dresser with Lights Instruction Manual
Model: MOUMON High Gloss Dresser (5 Drawers)
Brand: MOUMON
Product Overview
This manual provides detailed instructions for the assembly, operation, and maintenance of your MOUMON High Gloss Dresser with Lights. This modern 5-drawer dresser features a high-gloss black finish, elegant curved edges, and integrated warm white LED lighting at the base, designed to enhance your bedroom or living space with both functionality and aesthetic appeal.

Figure 1: Front view of the MOUMON High Gloss Dresser with integrated lighting, showcasing its design in a typical room setup.
Safety Information
Please read all safety warnings and instructions carefully before assembly and use. Failure to follow these instructions may result in injury or damage to the product.
- Always assemble the dresser on a soft, clean surface to prevent scratches to the high-gloss finish.
- Ensure all screws and fasteners are securely tightened before use. Do not overtighten, as this may damage the material.
- This product is heavy. Assembly requires two people to prevent injury and ensure proper handling of components.
- Do not allow children to climb on or play with the dresser. For enhanced safety, consider anchoring the dresser to a wall using appropriate anti-tip hardware (not included, but highly recommended).
- Keep electrical components (LED lights and power adapter) away from water or excessive moisture.
Package Contents
Verify all parts are present and undamaged before beginning assembly. If any parts are missing or damaged, please contact MOUMON customer support for assistance.
| Part | Description | Quantity |
|---|---|---|
| Side Panels | Left and Right main body panels of the dresser | 2 |
| Top Panel | The top surface of the dresser | 1 |
| Bottom Panel | Base panel with housing for LED lights | 1 |
| Drawer Fronts | High gloss faces for each drawer | 5 |
| Drawer Sides/Backs | Components forming the structure of each drawer box | 10 sides, 5 backs |
| Drawer Bottoms | Thin panels for the base of each drawer | 5 |
| Metal Slides | Runners for smooth drawer operation | 10 |
| LED Light Strip | Pre-installed LED lighting unit | 1 |
| Power Adapter | Power supply for the LED lights | 1 |
| Hardware Pack | Assorted screws, dowels, cam locks, etc. | 1 |
Assembly Instructions
This dresser requires two people for assembly due to its size and weight. Follow these steps carefully. Each part is labeled to assist with identification.
- Step 1: Prepare the Workspace
Clear a spacious area and lay down a soft cloth or carpet to protect the dresser components from scratches. Unpack all parts and verify against the package contents list provided above. - Step 2: Assemble the Main Frame
Attach the side panels to the bottom panel using the provided screws and dowels. Ensure the grooves for the back panel (if applicable) are facing the correct direction. Secure the top panel to the side panels, ensuring all connections are firm but do not overtighten. - Step 3: Install Drawer Slides
Attach the metal drawer slides to the inner sides of the main frame and to the side panels of each drawer box. Pay close attention to the orientation of the slides to ensure smooth operation once assembled. - Step 4: Assemble Drawers
For each of the five drawers, connect the drawer sides and back to the drawer front. Slide the thin drawer bottom into the designated grooves. Secure all connections. Be careful not to overtighten screws on drawer components, as the material can be delicate. - Step 5: Insert Drawers
Carefully align the assembled drawers with the installed slides on the main frame and push them in until they click into place. Test each drawer for smooth opening and closing. - Step 6: Connect LED Lights
The LED light strip is pre-installed at the base of the dresser. Connect the power adapter to the light strip's connector and then plug it into a standard wall outlet. There is an inline switch on the cord to turn the lights on/off. - Step 7: Final Check
Ensure all screws are tightened and the dresser is stable. Gently test each drawer for smooth operation. For added stability and safety, consider securing the dresser to a wall.
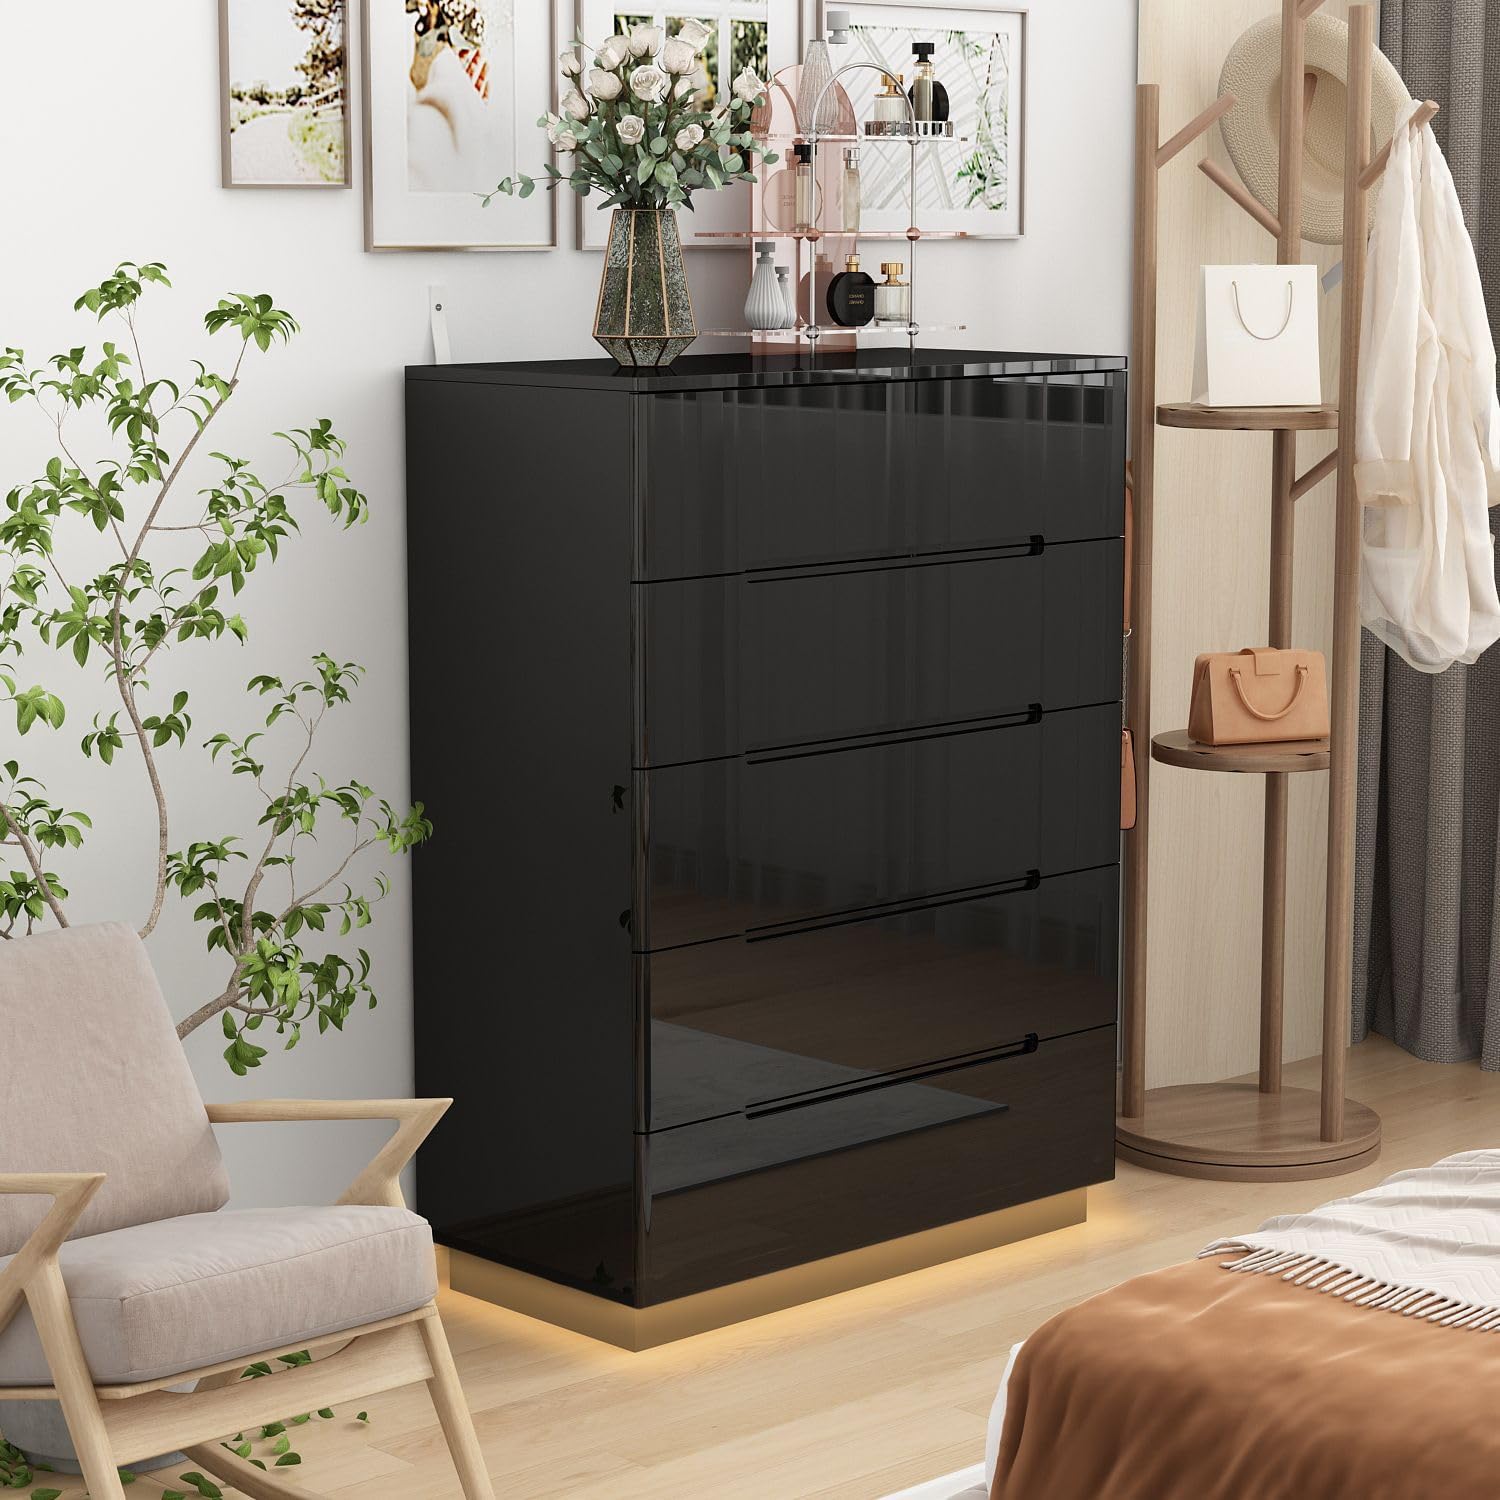
Figure 2: Overall dimensions of the dresser (31.5"W x 15.7"D x 42.6"H) and individual drawer dimensions (approx. 11.7"D).

Figure 3: View of an open drawer, demonstrating the interior storage capacity suitable for various personal items.
Operating Instructions
Using the Drawers
The dresser features 5 spacious drawers equipped with metal slides for smooth and quiet operation. To open a drawer, gently pull the top edge of the drawer front. To close, push the drawer firmly until it is fully seated within the frame. Avoid overloading drawers to ensure the longevity of the slides and drawer bottoms.
Activating the LED Lights
The warm white LED lights are integrated into the base of the dresser, providing an ambient glow. To activate the lights, locate the inline switch on the power cord connected to the LED strip. Flip the switch to the "ON" position to illuminate the lights and to the "OFF" position to turn them off.

Figure 4: Close-up view of the dresser's base, highlighting the illuminated warm white LED lights.
Maintenance
- Cleaning: Wipe the high-gloss surfaces with a dry, soft, lint-free cloth. For stubborn marks or smudges, a slightly damp cloth followed immediately by a dry cloth can be used. Avoid abrasive cleaners, harsh chemicals, or rough sponges, as these can damage the finish.
- Drawer Slides: Periodically check the metal drawer slides for smooth operation. If they become stiff or noisy, a small amount of silicone-based lubricant can be applied to the tracks.
- Fasteners: Over time, screws and fasteners may loosen due to regular use. Periodically check and gently tighten any loose connections to maintain the dresser's stability and structural integrity.
- LED Lights: The LED lights are designed for long life and minimal maintenance. If they cease to function, first check the power connection and the inline switch. Ensure the power adapter is securely plugged into both the light strip and the wall outlet.
Troubleshooting
| Problem | Possible Cause | Solution |
|---|---|---|
| Drawers do not slide smoothly or get stuck | Misaligned slides, overtightened screws, overloaded drawer, debris in tracks | Check slide alignment and re-adjust if necessary. Loosen screws slightly if overtightened. Reduce drawer contents. Clean tracks of any dust or debris. |
| Dresser wobbles or feels unstable | Loose fasteners, uneven floor surface | Tighten all assembly screws. Place shims under the dresser legs if the floor is uneven. Consider installing anti-tip wall anchoring hardware for added stability. |
| LED lights are not working | Power adapter unplugged, inline switch is off, faulty connection | Ensure the power adapter is securely plugged into both the light strip and a working wall outlet. Check that the inline switch is in the "ON" position. Verify all light connections are secure. |
| Scratches or marks on high-gloss surface | Abrasive cleaning materials, sharp objects placed on surface | Use only soft cloths for cleaning. Avoid placing sharp or rough objects directly on the surface. Use coasters or protective mats for decorative items. |
Specifications
- Brand: MOUMON
- Model Name: Dresser
- Product Dimensions (Overall): 31.5"W x 15.7"D x 42.6"H
- Number of Drawers: 5
- Drawer Depth: Approximately 11.7 inches
- Color: Black
- Material: High Gloss finish
- Special Feature: Integrated LED Lights (Warm White)
- Mounting Type: Floor Mount
- Assembly Required: Yes (2-person assembly recommended)
- Item Weight: 89 Pounds
- Care Instructions: Wipe with Dry Cloth
Warranty and Support
For warranty information or technical support regarding your MOUMON High Gloss Dresser, please contact MOUMON customer service. Refer to your purchase documentation for specific warranty terms and contact details.
You can also visit the official MOUMON Store on Amazon for more information and product updates: MOUMON Official Store
Ask a question about this manual
Ask about setup, troubleshooting, compatibility, parts, safety, or missing instructions. Manuals+ will review the question and use this page’s manual context to help answer it.