1. Introduction
This manual provides instructions for the installation, operation, and maintenance of your Real HD Speco 8 Channel PoE IP Camera System. This system includes an 8-channel 4K H.265 Network Video Recorder (NVR) and six 4MP Wired IP PoE Dome Weatherproof Cameras (O4VT2). The NVR comes with a pre-installed 2TB surveillance hard drive.

Image 1.1: Overview of the Real HD Speco 8 Channel IP Camera System, showing the NVR unit and six dome cameras.
2. Package Contents
Verify that all items are present in your package:
- 1 x 8-Channel 4K H.265 NVR (N8NRM) with 2TB Hard Drive
- 6 x 4MP Wired IP PoE Dome Weatherproof Cameras (O4VT2)
- Power Adapter for NVR
- USB Mouse
- Quick Start Guide
Note: Ethernet cables for connecting cameras to the NVR are not included and must be purchased separately.
3. Setup
3.1 NVR Connection
- Connect the NVR to a monitor using an HDMI or VGA cable.
- Connect the included USB mouse to a USB port on the NVR.
- Connect the NVR to your network router using an Ethernet cable.
- Connect the power adapter to the NVR and plug it into a power outlet. The NVR will power on automatically.

Image 3.1: Front panel of the NVR, showing USB and indicator lights.
3.2 Camera Installation
The O4VT2 cameras are Power over Ethernet (PoE) compatible, simplifying installation.
- Mount each dome camera in the desired location. Ensure the mounting surface is secure.
- Connect an Ethernet cable from each camera directly to a PoE port on the NVR. The cameras will receive both power and data through this single cable.
- Once connected, the NVR will automatically detect and configure the cameras. This is a plug-and-play process.

Image 3.2: Close-up view of an O4VT2 dome camera, highlighting its design.
3.3 Initial Configuration and Remote Access
To access your system remotely, download the official mobile application (details typically found in the NVR's on-screen interface or quick start guide).
- On the NVR's monitor, navigate to the network settings to ensure it has an active internet connection.
- Open the mobile application on your smartphone or tablet.
- Scan the QR code displayed on the NVR's screen (usually found in the network or device management section of the NVR menu) to add your device to the app.
- Follow the on-screen prompts in the app to complete the setup for live viewing and playback.

Image 3.3: Illustration of remote access capabilities across various devices.
4. Operating the System
4.1 Live View and Playback
Once the cameras are connected and configured, you can view live feeds and recorded footage:
- Local Monitoring: Use the NVR's connected monitor and mouse to navigate the interface for live views of all cameras and to access recorded video.
- Remote Monitoring: Use the mobile application to view live feeds and playback recorded events from any location with an internet connection.

Image 4.1: NVR display interface showing multiple camera feeds and recording timeline.
4.2 Recording Features
The NVR supports various recording modes and features:
- Continuous Recording: Records 24/7 to the 2TB hard drive.
- Motion Detection Recording: Records only when motion is detected, conserving storage space.
- Scheduled Recording: Set specific times for recording.
- H.265 Video Compression: Utilizes advanced compression technology to optimize storage efficiency while maintaining video quality.

Image 4.2: Example of 4MP day and night vision capabilities.
4.3 Motion Detection and Alerts
Configure motion detection zones and sensitivity through the NVR interface or mobile app. When motion is detected, the system can trigger various alerts:
- Email Notifications: Receive alerts via email.
- Push Notifications: Get instant alerts on your mobile device.
- Buzzer: The NVR can emit an audible alarm.
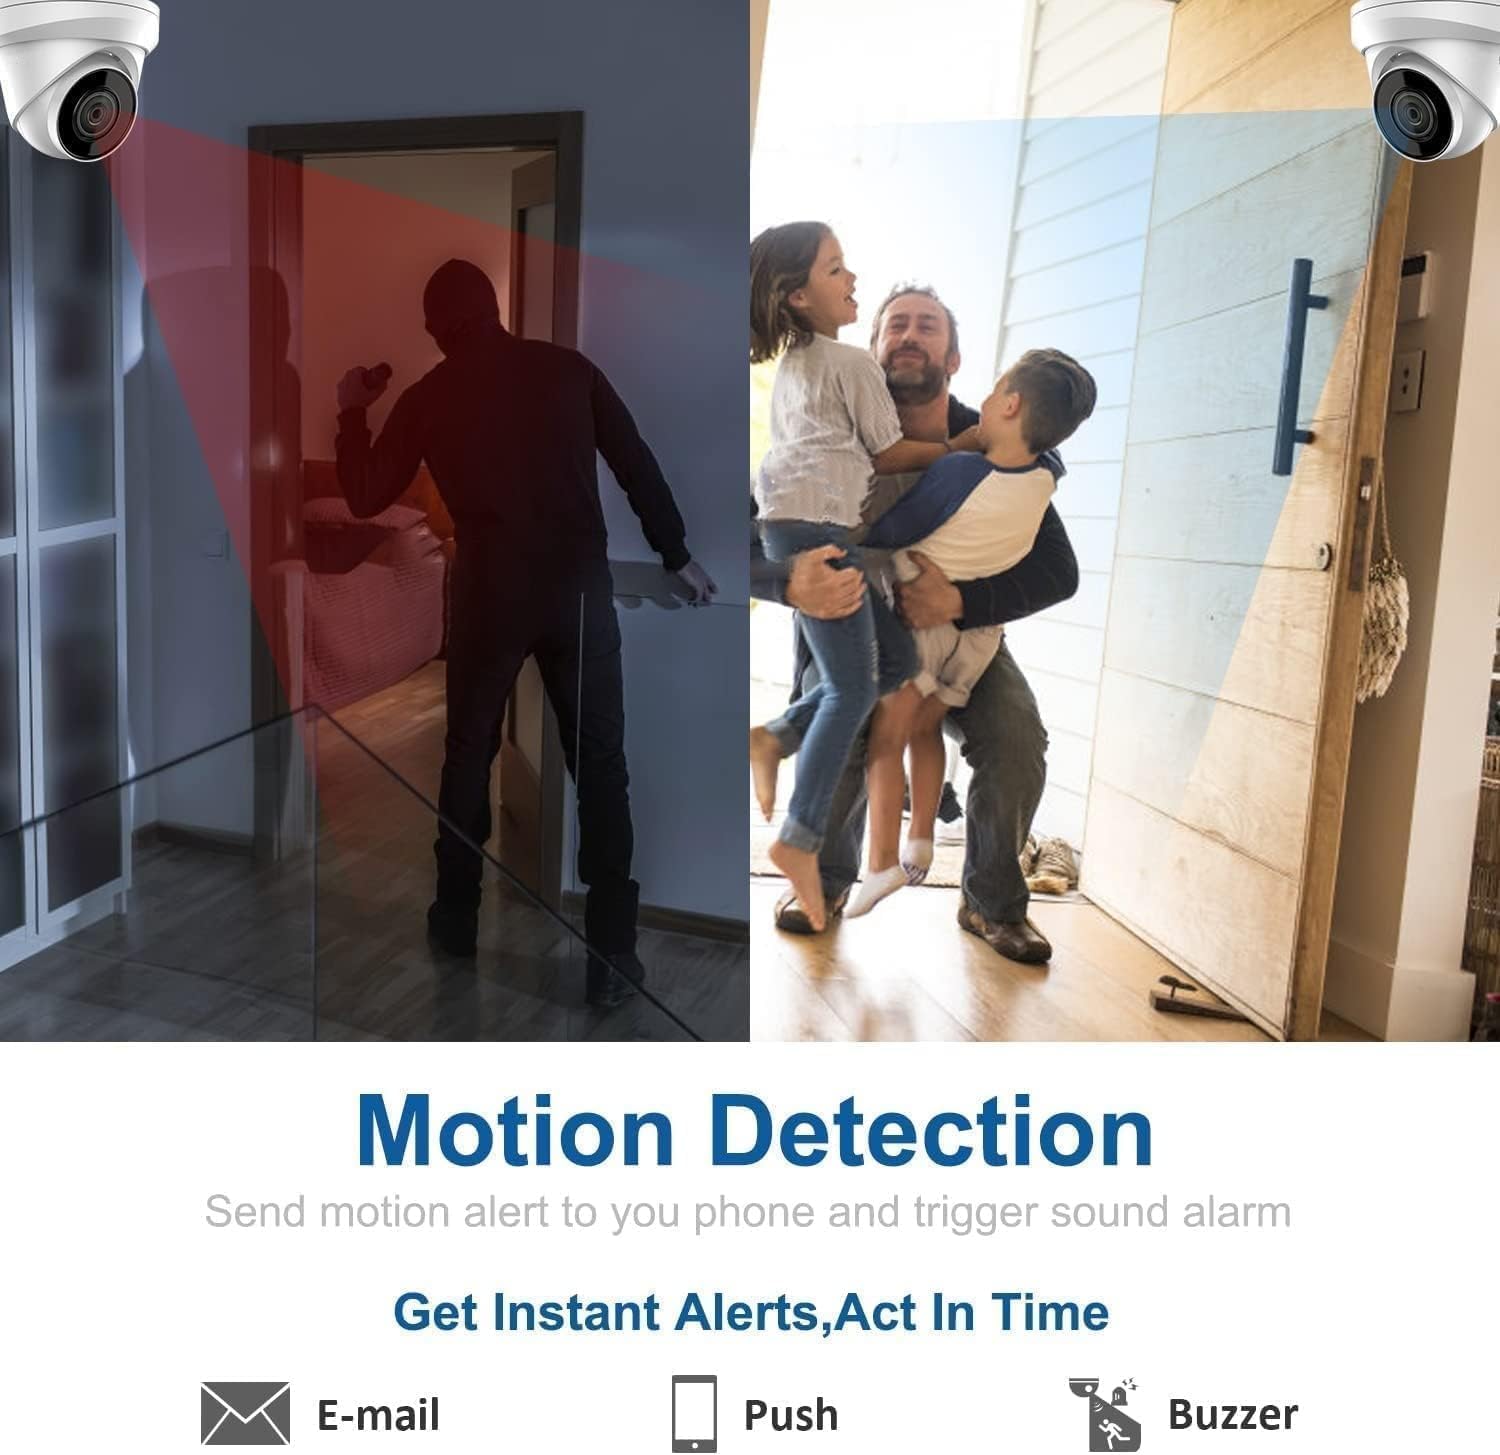
Image 4.3: Visual representation of motion detection triggering various alert types.
4.4 Audio Recording
Each O4VT2 camera is equipped with a built-in microphone for audio recording. This feature can be enabled or disabled in the NVR's camera settings.
5. Maintenance
5.1 Hard Drive Management
The 2TB hard drive will automatically overwrite the oldest footage when full. Regularly back up important recordings to an external storage device if needed. The NVR's menu provides options for hard drive health checks and formatting.
5.2 Camera Cleaning
Periodically clean the camera lenses with a soft, damp cloth to ensure clear image quality. Avoid abrasive cleaners. For outdoor cameras, remove any accumulated dirt, dust, or spiderwebs.
5.3 Firmware Updates
Check the manufacturer's website or the NVR's system settings periodically for available firmware updates. Keeping your system updated ensures optimal performance and security.
6. Troubleshooting
- No Video Display:
- Ensure the NVR is powered on and the monitor is correctly connected and set to the correct input source.
- Check all camera Ethernet cable connections to the NVR's PoE ports.
- No Remote Access:
- Verify the NVR has an active internet connection (check network status in NVR settings).
- Ensure your mobile device has an internet connection.
- Confirm the QR code was scanned correctly and the device is added to the app.
- Recording Issues:
- Check the hard drive status in the NVR settings. Ensure it is initialized and healthy.
- Verify recording schedules and motion detection settings are configured correctly.
- Poor Image Quality:
- Clean camera lenses.
- Ensure cameras are securely mounted and not obstructed.
For further assistance, refer to the manufacturer's support resources or contact customer service.
7. Specifications
| Feature | Specification |
|---|---|
| Brand | Real HD |
| NVR Model | N8NRM |
| Camera Model | O4VT2 |
| Number of Channels | 8 |
| Video Capture Resolution | 4MP (Cameras), 4K (NVR Recording) |
| Video Compression | H.265 |
| Memory Storage Capacity | 2 TB (Pre-installed HDD) |
| Connectivity Technology | Wired (PoE) |
| Special Features | Audio Recording, Night Vision, Weatherproof (IP67) |
| Night Vision Range | 100 Feet |
| Operating Temperature (Cameras) | -30 °C to 60 °C (-22 °F to 140 °F) |
| Power Source | Corded Electric |
| Product Dimensions (NVR) | 20 x 20 x 20 inches (approximate) |
| Item Weight | 35 pounds (total system approximate) |
8. Warranty and Support
For warranty information and technical support, please refer to the documentation included with your product or visit the official Real HD website. Keep your purchase receipt for warranty claims.
Manufacturer: Real HD
Date First Available: February 2, 2024


