
GIGABYTE Z790 AORUS PRO X WIFI7
Contents
GIGABYTE Z790 AORUS PRO X WIFI7 Motherboard User Manual
Model: Z790 AORUS PRO X WIFI7
1. Introduction
This manual provides comprehensive instructions for the installation, operation, and maintenance of your GIGABYTE Z790 AORUS PRO X WIFI7 Motherboard. Designed for the next generation of Intel Core processors, this motherboard offers leading performance in DDR5 memory, upgraded DIY innovation, and an all-new BIOS, built to unleash next-gen power. Please read this manual thoroughly before beginning installation to ensure proper setup and optimal performance.
2. Product Overview
The GIGABYTE Z790 AORUS PRO X WIFI7 is an ATX motherboard engineered for high-performance computing. It supports Intel's 14th and 13th generation processors via the LGA 1700 socket, providing a robust foundation for gaming, content creation, and demanding applications.
Key Features:
- Intel LGA 1700 Socket: Compatible with 14th and 13th generation Intel Core processors.
- Dual Channel DDR5: Features 4 DIMM slots with XMP 3.0 memory module support for enhanced memory performance.
- Commanding Power Design: Utilizes a Digital Twin 18+1+2 Phases VRM Solution for stable power delivery.
- Cutting-Edge Thermal Design: Equipped with VRM Thermal Armor Advanced and M.2 Thermal Guard to maintain optimal temperatures.
- Ultra-Fast Storage: Includes 5 M.2 slots, with one supporting PCIe 5.0 x4 for rapid data transfer speeds.
- Advanced Connectivity: Features Wi-Fi 7 and 5GbE LAN for high-speed wireless and wired networking.
- DIY-Friendly Innovations: Incorporates Q-Flash Plus and EZ-Latch Plus for simplified installation and maintenance.
Product Visuals:
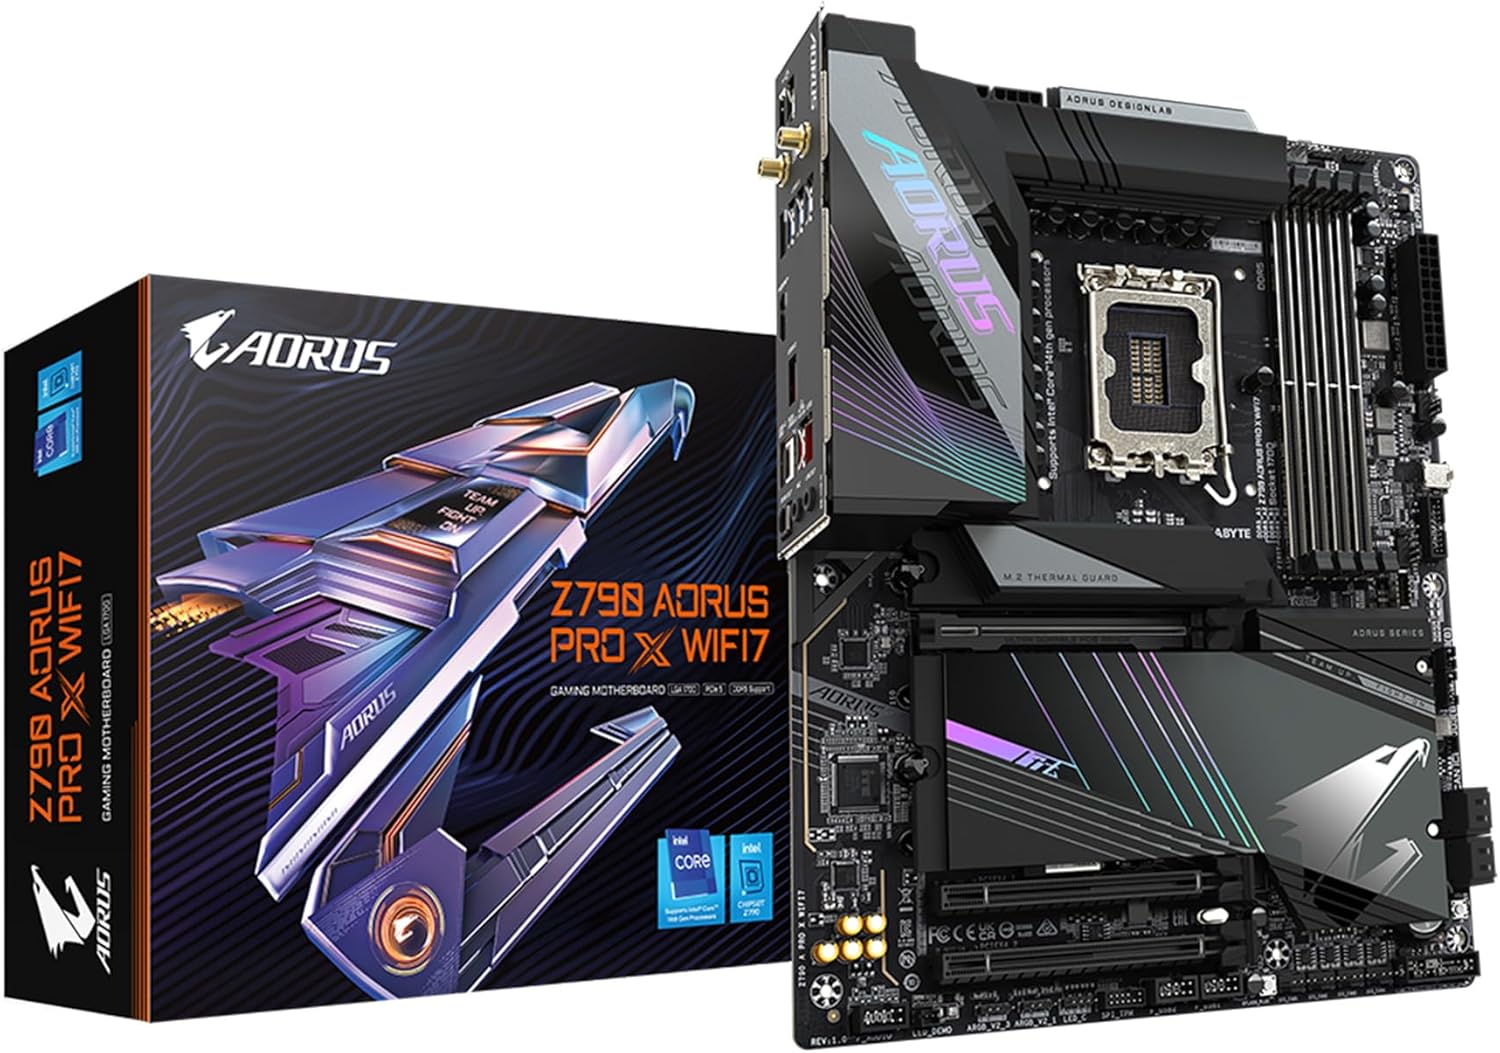
The GIGABYTE Z790 AORUS PRO X WIFI7 Motherboard shown with its retail packaging.

A top-down view highlighting the motherboard's layout, including the CPU socket, DIMM slots, and M.2 heatsinks.

Detailed view of the rear I/O panel, showcasing various USB ports, LAN, Wi-Fi antenna connectors, and audio jacks.

An illustration of the M.2 EZ-Latch Click mechanism, simplifying M.2 SSD installation without screws.
Official Product Video:
Official trailer for the AORUS Z790 X Motherboards, showcasing key features and design elements.
3. Setup
Before beginning installation, ensure you have a static-free environment and all necessary components. Refer to the detailed installation guide included with your motherboard for specific steps and safety precautions.
3.1 Component Installation Order:
- CPU Installation: Carefully align and place the Intel LGA 1700 processor into the socket. Close the retention arm.
- CPU Cooler Installation: Mount your chosen CPU cooler according to its manufacturer's instructions.
- Memory (RAM) Installation: Insert DDR5 memory modules into the DIMM slots. Ensure they are fully seated by pressing down until the clips lock. For dual-channel configuration, refer to the motherboard manual for correct slot pairing.
- M.2 SSD Installation: Install M.2 solid-state drives into the M.2 slots. Utilize the EZ-Latch Click mechanism for screwless installation where available. Apply the M.2 Thermal Guard heatsinks.
- Graphics Card (GPU) Installation: Insert your PCIe 5.0 graphics card into the primary PCIe x16 slot. Ensure it clicks into place.
- Power Supply Connections: Connect the 24-pin ATX power connector and the 8-pin (or 4+4-pin) CPU power connector from your power supply to the motherboard. Connect power to other components as needed.
- Storage Drive Connections: Connect SATA drives to the SATA ports using SATA data cables.
- Front Panel Connections: Connect the case's front panel headers (power button, reset button, USB ports, audio jacks) to the corresponding pins on the motherboard.
- Wi-Fi Antenna: Attach the included Wi-Fi antenna to the connectors on the rear I/O panel for optimal wireless performance.
3.2 Initial Boot and BIOS Setup:
After all components are installed and connected, power on your system. Access the BIOS/UEFI setup by pressing the designated key (usually DEL or F2) during startup. Configure boot order, enable XMP for memory, and adjust any other necessary settings. Save and exit the BIOS to proceed with operating system installation.
4. Operating Your Motherboard
Once the operating system is installed, your GIGABYTE Z790 AORUS PRO X WIFI7 Motherboard will function as the central hub for your PC. Ensure all necessary drivers are installed for optimal performance and stability. Drivers can be found on the GIGABYTE official website.
4.1 Driver Installation:
- Install chipset drivers first.
- Install LAN and Wi-Fi drivers for network connectivity.
- Install audio drivers.
- Install any other peripheral drivers as needed.
4.2 Software Utilities:
GIGABYTE provides various software utilities to enhance your experience, including:
- GIGABYTE Control Center (GCC): A unified software platform to control various GIGABYTE features, including RGB Fusion 2.0 for customizable lighting, Smart Fan 6 for fan control, and system monitoring.
- BIOS Update Utility: For updating the motherboard's firmware.
5. Maintenance
Regular maintenance helps ensure the longevity and stable performance of your motherboard and PC system.
5.1 Dust Removal:
- Periodically clean dust from inside your PC case, especially around the motherboard, CPU cooler, and GPU. Use compressed air or a soft brush.
- Ensure proper airflow within the case by managing cables and ensuring fans are unobstructed.
5.2 Driver and BIOS Updates:
- Keep your motherboard drivers and BIOS updated to the latest versions available on the GIGABYTE website. Updates often include performance improvements, bug fixes, and compatibility enhancements.
- Exercise caution when updating BIOS; follow GIGABYTE's instructions precisely to avoid system instability.
5.3 Component Checks:
- Occasionally check all cable connections (power, SATA, front panel) to ensure they are secure.
- Monitor system temperatures using GIGABYTE Control Center or other monitoring software to ensure components are operating within safe thermal limits.
6. Troubleshooting
This section provides solutions to common issues you might encounter with your motherboard.
6.1 No Power / No Boot:
- Check Power Connections: Ensure the 24-pin ATX and 8-pin CPU power connectors are firmly seated. Verify the power supply is switched on and connected to a working outlet.
- Clear CMOS: If the system does not boot or displays unusual behavior, try clearing the CMOS. Refer to your motherboard manual for the specific jumper or button location.
- Reseat Components: Reseat RAM modules, graphics card, and other expansion cards to ensure they are properly installed.
- Test with Minimal Components: Disconnect all non-essential components (e.g., extra storage drives, peripherals) and attempt to boot with only the CPU, one RAM stick, and the graphics card.
6.2 System Instability / Crashes:
- Check Temperatures: Overheating can cause instability. Use monitoring software to check CPU, GPU, and motherboard temperatures. Ensure adequate cooling.
- Update Drivers: Outdated or corrupted drivers can lead to system issues. Update all drivers, especially chipset, graphics, and network drivers.
- Memory Test: Run a memory diagnostic tool (e.g., Windows Memory Diagnostic, MemTest86) to check for faulty RAM modules.
- BIOS Settings: Reset BIOS to default settings if you have made recent changes that might be causing instability.
6.3 Network Connectivity Issues:
- Check Cables: For wired connections, ensure the Ethernet cable is securely plugged into both the motherboard's LAN port and the router/modem.
- Antenna Connection: For Wi-Fi, ensure the Wi-Fi antenna is securely attached to the rear I/O panel.
- Driver Reinstallation: Reinstall the latest LAN and Wi-Fi drivers from the GIGABYTE website.
- Router/Modem Restart: Restart your network router and modem.
7. Specifications
| Category | Specification |
|---|---|
| Brand | GIGABYTE |
| Model Name | Z790 AORUS PRO X WIFI7 |
| CPU Socket | LGA 1700 |
| Compatible Processors | Intel Core 14th Gen / Intel 13th Gen Core / Intel 12th Gen Core / Intel Pentium series / Intel Celeron series |
| Chipset Type | Intel Z790 |
| RAM Memory Technology | DDR5 |
| Memory Slots | 4 x DIMM slots (Dual Channel) |
| Max Memory Capacity | 128 GB |
| Memory Speed | Up to 5600MHz (XMP support for higher speeds) |
| PCIe Slots | 1 x PCIe 5.0 x16, 1 x PCIe 3.0 x4, 1 x PCIe 3.0 x1 |
| M.2 Slots | 5 x M.2 slots (1 x PCIe 5.0 x4, 4 x PCIe 4.0 x4) |
| SATA Ports | 6 x SATA 6Gb/s ports |
| USB Ports (Rear I/O) | USB 3.2 Gen 2x2 Type-C, USB 3.2 Gen 2 Type-A, USB 3.2 Gen 1, USB 2.0 |
| LAN | 5GbE LAN |
| Wireless Connectivity | Wi-Fi 7 |
| Audio | High Definition Audio |
| Form Factor | ATX |
| Dimensions (LxWxH) | 13.27 x 10.94 x 3.31 inches |
| Item Weight | 4.95 pounds |
8. Warranty and Support
For detailed warranty information regarding your GIGABYTE Z790 AORUS PRO X WIFI7 Motherboard, please refer to the warranty card included in your product packaging or visit the official GIGABYTE website. Warranty terms and conditions may vary by region.
For technical support, driver downloads, BIOS updates, and FAQs, please visit the official GIGABYTE support page:
You may also contact GIGABYTE customer service directly through their website for further assistance.
Ask a question about this manual
Ask about setup, troubleshooting, compatibility, parts, safety, or missing instructions. Manuals+ will review the question and use this page’s manual context to help answer it.