Introduction
This manual provides detailed instructions for the safe and effective use of your DEWIN Multifunctional USB Power Meter. This device is designed to measure voltage, current, power, and accumulated energy for various USB and Type-C compatible devices. Please read this manual thoroughly before operation and retain it for future reference.
Product Overview
The DEWIN USB Power Meter is a compact and versatile tool for monitoring the performance of your charging devices and cables. It features a 0.96-inch HD IPS color LCD screen for clear data display and supports both USB-A and Type-C connections.

Figure 1: Front view of the DEWIN USB Power Meter, displaying various electrical parameters on its color LCD screen.

Figure 2: Side view of the DEWIN USB Power Meter, highlighting its compact design and input/output ports.
Specifications
| Feature | Specification |
|---|---|
| Product Name | Multifunctional USB Voltage and Current Meter |
| Material | Polycarbonate |
| Voltage Measurement Range | 4.5V - 36V |
| Current Measurement Range | 0A - 5A |
| Power Measurement Range | 0.00W - 150W |
| Input Interface | USB-A + Type-C (5A High Current) |
| Output Interface | USB-A + Type-C |
| Display Type | 0.96-inch HD IPS Color LCD Screen |
| Self-consumption Current | <0.02A |
| Model Number | KZQZZLLMF-usb-01 |

Figure 3: Visual representation of the product's dimensions and core specifications.
Setup
- Identify Ports: Locate the USB-A input, Type-C input, USB-A output, and Type-C output ports on the device. The input ports are typically marked as "INPUT" and output as "OUTPUT" on the display side.
- Connect Power Source: Plug the USB-A or Type-C input of the power meter into your power source (e.g., wall charger, power bank, computer USB port).
- Connect Device: Plug the device you wish to test or charge (e.g., smartphone, tablet, USB fan) into the corresponding USB-A or Type-C output port of the power meter.
- Power On: The device will typically power on automatically once connected to a power source and display readings.
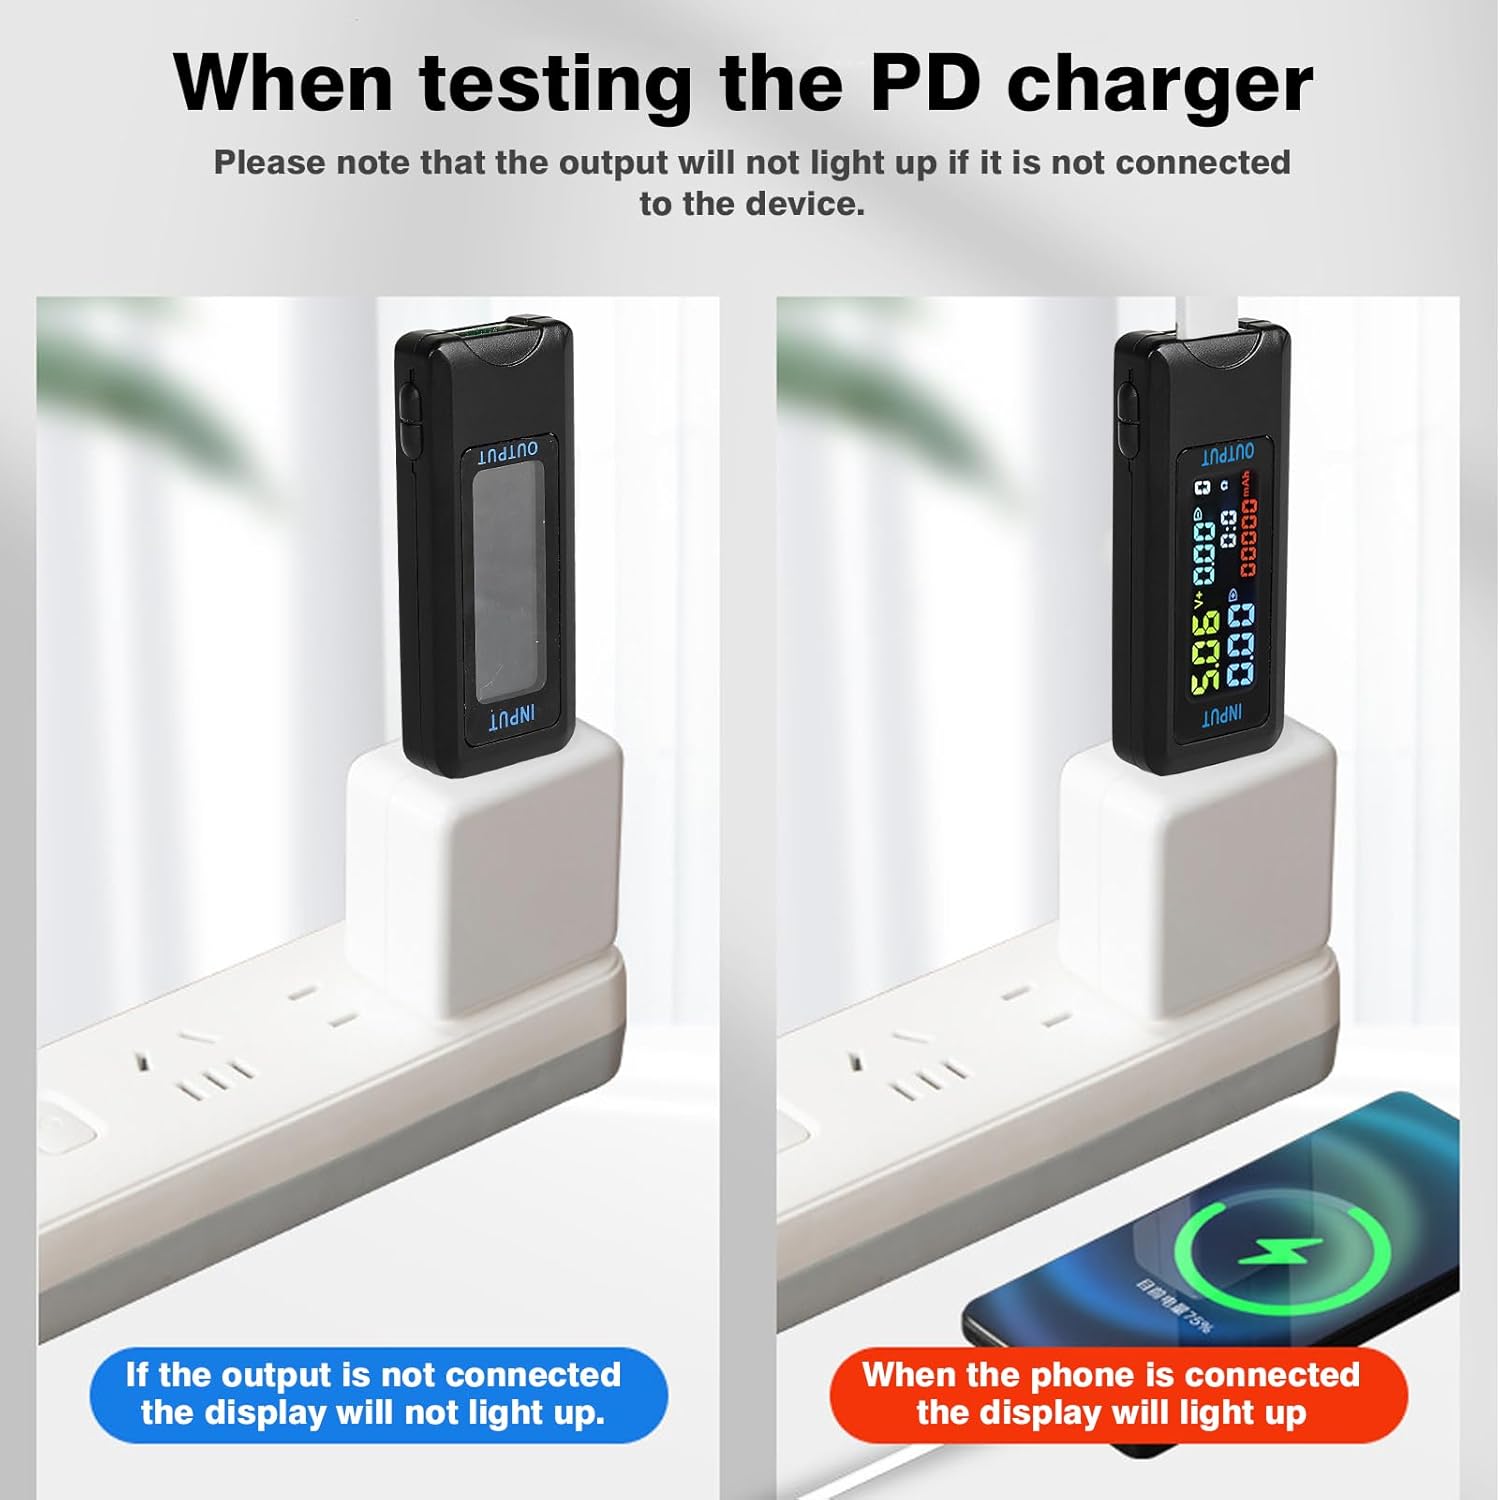
Figure 4: Illustration showing that the display will not light up if the output is not connected to a device, but will illuminate when a phone is connected for charging.
Operating Instructions
The DEWIN USB Power Meter provides real-time data on its 0.96-inch HD IPS color LCD screen. A single interface displays voltage, current, accumulated energy, power, and synchronization time.
Understanding the Display

Figure 5: Detailed breakdown of the information displayed on the meter's screen, including voltage (V), current (A), power (W), capacity (mAh), time (T), and capacity groups (1-9).
- Voltage (V): Displays the current voltage being supplied.
- Current (A): Shows the current flowing through the device.
- Power (W): Indicates the real-time power consumption (Voltage x Current).
- Capacity (mAh): Accumulates the total charge transferred over time.
- Time (T): Tracks the duration of the measurement.
- Capacity Groups (1-9): Allows for storing and recalling up to 9 sets of accumulated capacity data. Refer to the device's physical buttons (if any) for cycling through or resetting these groups.
Connection Scenarios

Figure 6: This diagram shows how to connect the USB Power Meter to various devices and power sources for testing and charging.
The meter can be used to test a wide range of devices, including mobile phones, tablets, power banks, USB fans, USB lights, and various chargers (ordinary USB chargers, Type-C chargers, car chargers).
Protective Features
The integrated electronic switch element ensures safe detection. The output is automatically turned off to protect your device from damage if abnormal conditions are detected. The device can also store data in case of a sudden power outage.

Figure 7: The meter features warning pages that alert the user if measured voltage or current values exceed or fall below predefined thresholds.
Maintenance
- Cleaning: Use a soft, dry cloth to clean the device. Do not use liquid cleaners or solvents.
- Storage: Store the device in a cool, dry place away from direct sunlight and extreme temperatures.
- Handling: Avoid dropping or subjecting the device to strong impacts, as this may damage internal components or the screen.
Troubleshooting
- No Display:
- Ensure the meter is properly connected to a power source (input).
- Ensure a device is connected to the output port and drawing power. The display may not light up if no load is detected.
- Inaccurate Readings:
- Verify that all connections are secure and free from debris.
- Test with a different power source or device to rule out external factors.
- Ensure the device is operating within its specified voltage and current ranges.
- Device Not Charging:
- Check the power meter's display for any error messages or warning indicators (refer to Figure 7).
- Bypass the power meter and connect your device directly to the power source to confirm the power source and device are functional.
- Ensure the cables used are in good condition and support the required current/voltage.
Safety Information
- Do not disassemble or modify the device. Unauthorized modifications can lead to malfunction or electric shock.
- Keep the device away from water, moisture, and high humidity.
- Avoid exposing the device to extreme temperatures or direct heat sources.
- Use the device only within its specified voltage and current ranges to prevent damage to the meter or connected devices.
- This device is intended for informational and testing purposes. Do not use it as a primary protective measure for critical systems.