
1. Introduction
This manual provides essential information for the safe and effective use of your CGOLDENWALL 635nm Red Line Laser Positioning Light. This device is designed to emit a clear, straight red laser line for precise marking and positioning in various applications, including woodworking, stone cutting, and garment cutting. Please read this manual thoroughly before operation and retain it for future reference.
2. Safety Information
WARNING: LASER RADIATION. AVOID DIRECT EYE EXPOSURE.
- Do not stare directly into the laser beam.
- Do not point the laser beam at people or animals.
- Avoid exposing the laser beam to reflective surfaces.
- This product is a Class II laser device. Use with caution.
- Keep out of reach of children.
- Do not attempt to modify or disassemble the laser unit. This can lead to hazardous laser exposure.
- Use only the provided power adapter.
3. Package Contents
Verify that all items are present and undamaged upon opening the package:
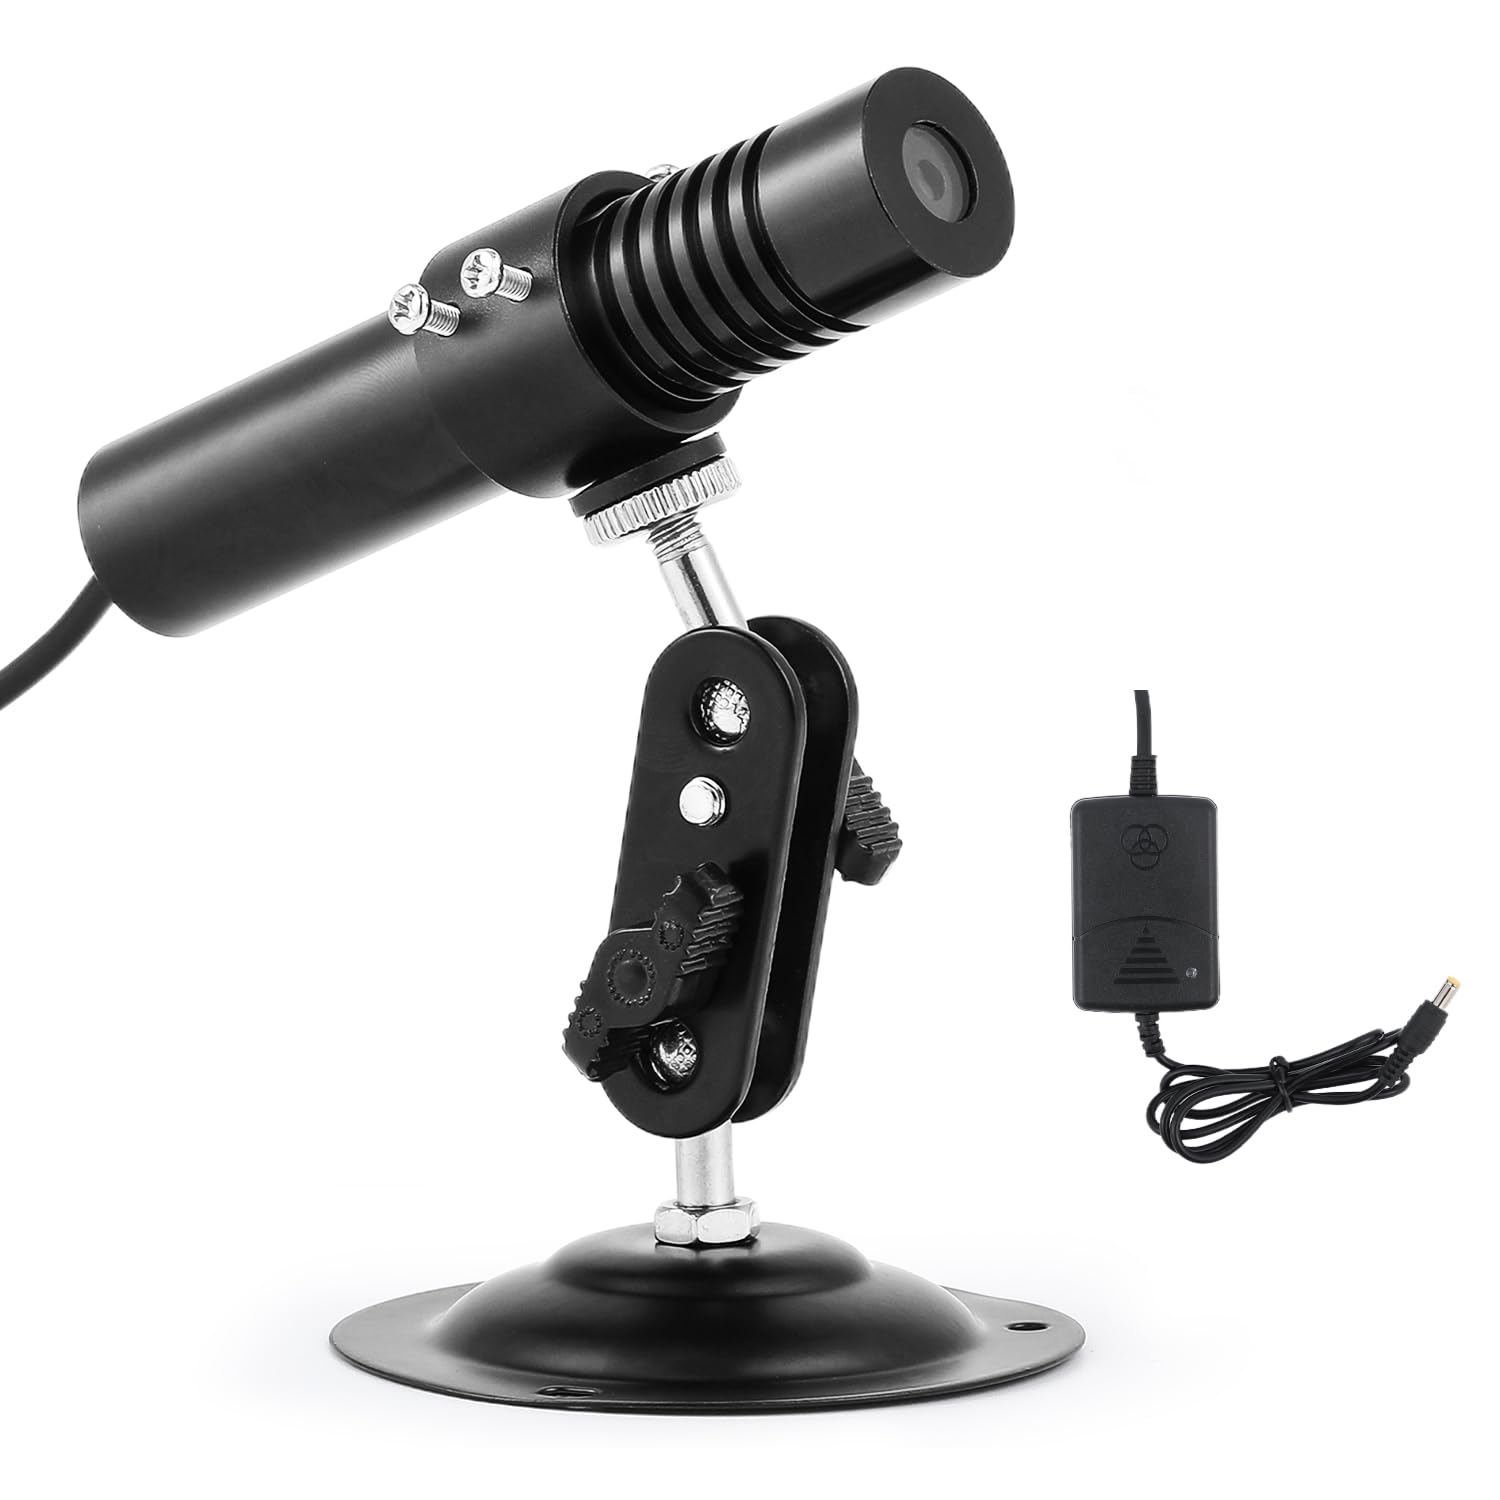
- Laser Positioning Light Unit
- Specialized Power Adapter
- Universal Adjustable Bracket
4. Product Overview
The CGOLDENWALL Laser Positioning Light features a robust design for reliable performance.
- High-Quality Cylindrical Glass Lens: Ensures a bright, clear, and highly precise red line emission. The emission port includes a protective glass window to block dust and fog, facilitating easy cleaning and maintenance.
- 24/7 Continuous Operation: Equipped with high-end laser diodes designed for uninterrupted use, offering a lifespan exceeding 3000 hours and 40% greater operational stability compared to standard products.
- Specialized Stable Power Supply: Includes a dedicated power adapter for laser devices, providing excellent interference resistance, surge current suppression, and a soft-start function for consistent laser performance.


5. Setup
Follow these steps to set up your laser positioning light:
- Assemble the Bracket: Attach the laser unit to the universal adjustable bracket. Secure it firmly using the provided screws.
- Mount the Bracket: The robust bracket can be mounted on any vertical or horizontal surface. Its wide and solid base ensures stability. You may need to secure the base with screws for permanent installations or to prevent movement during operation, especially in environments with vibrations.
- Connect Power: Connect the specialized power adapter to the laser unit's power input. Then, plug the power adapter into a suitable electrical outlet (220V in Italy). Note that the device does not have an on/off switch; it activates automatically upon power connection.
- Adjust Position: The universal bracket allows for full adjustment up/down, left/right, and 360° rotation. Loosen the adjustment knobs, position the laser to project the line as desired, and then tighten the knobs to secure its position.

6. Operating Instructions
Once set up, the laser positioning light is ready for use:
- Power On: Connect the power adapter to an electrical outlet. The laser will immediately emit a red line.
- Positioning: Adjust the laser unit on its bracket to project the red line onto your workpiece or desired area. The laser can be mounted at heights between 0.5 m and 5 m to generate a visible red line of 8–10 m.
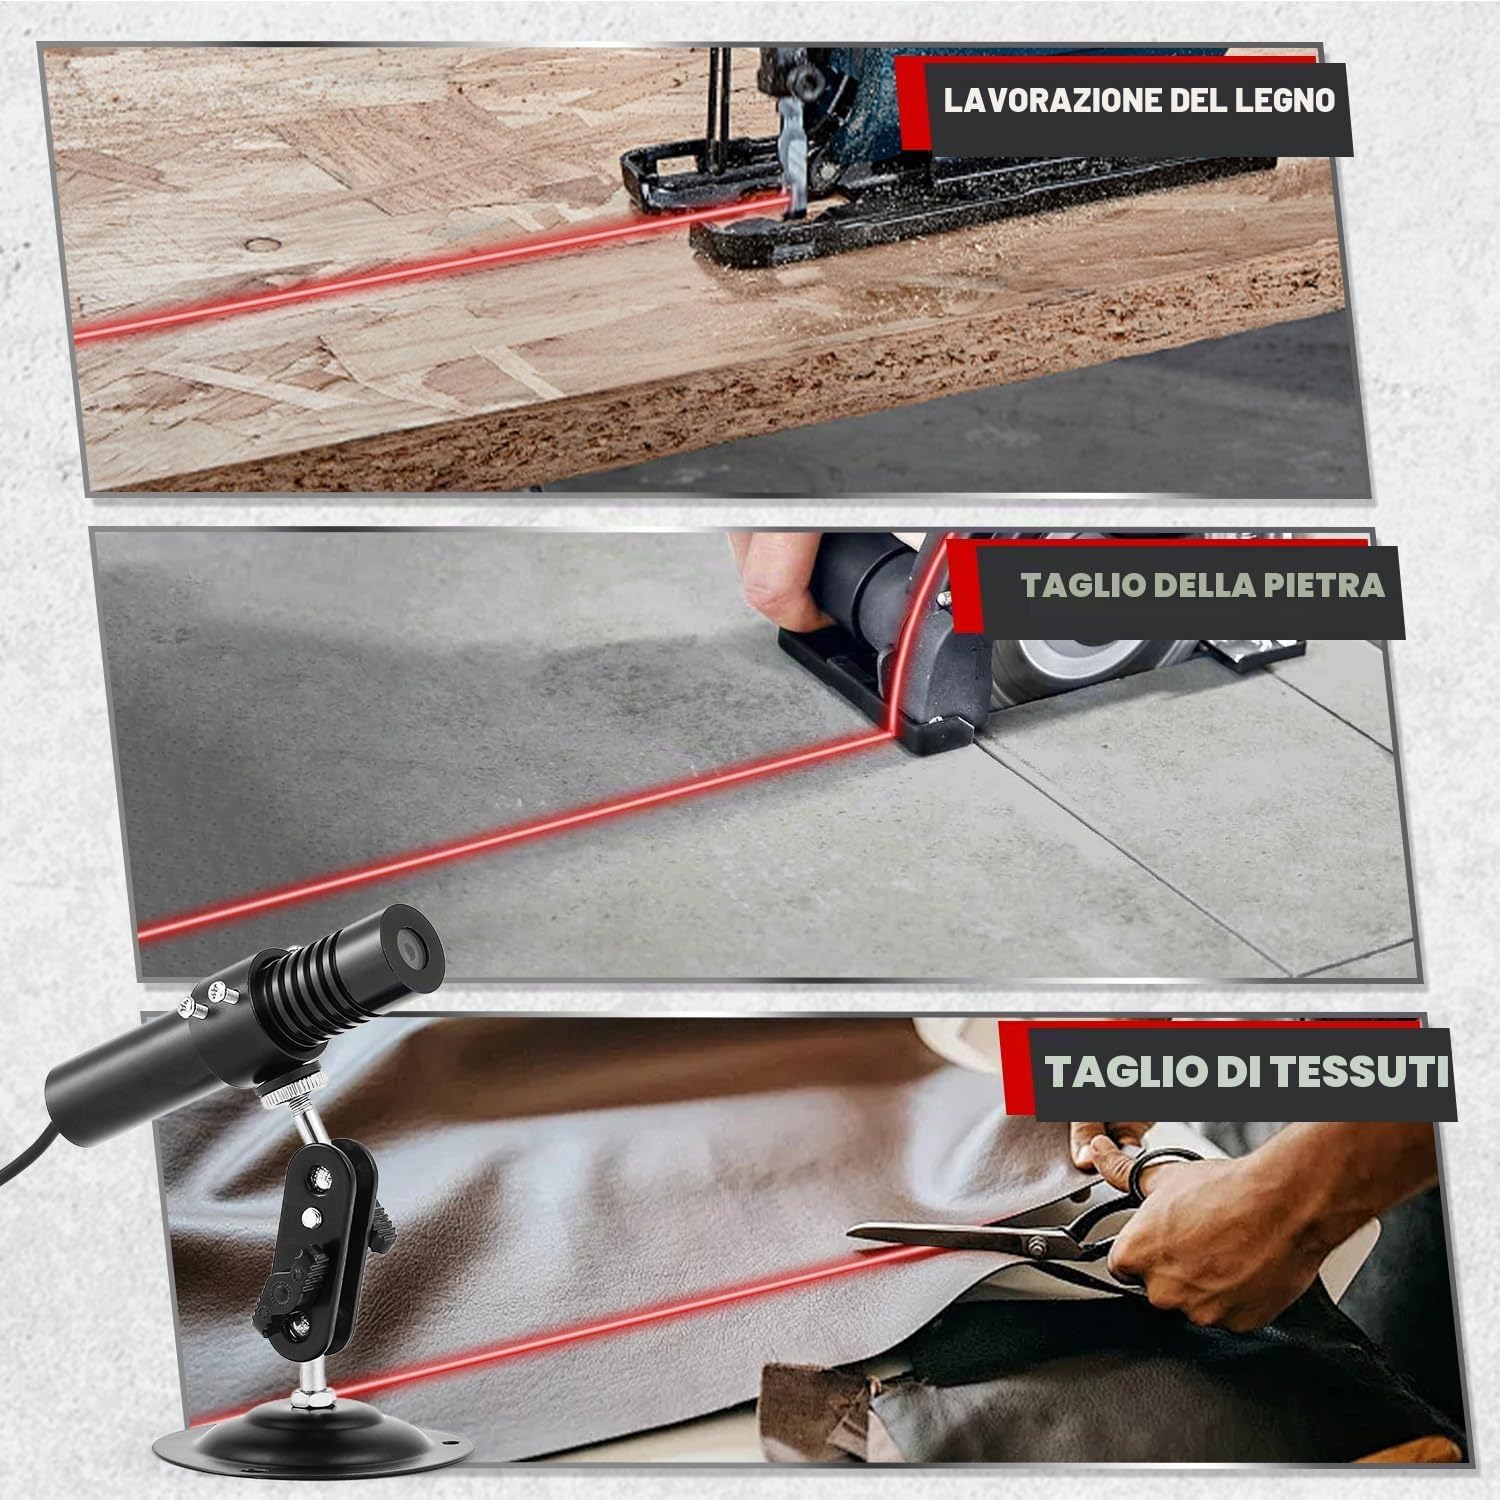
- Applications: This laser is ideal for accurate marking and positioning in various tasks:
- Woodworking: Use for guiding cuts on saws or marking precise lines on wood.
- Stone Cutting: Provides a clear visual guide for cutting stone or tiles.
- Garment Cutting: Assists in achieving straight and accurate cuts on fabrics.
- Visibility: The visibility of the laser line can vary depending on ambient light conditions. In brightly lit environments, the effective range of the visible line may be reduced. For optimal visibility, use in moderately lit or indoor conditions.
- Power Off: Disconnect the power adapter from the electrical outlet to turn off the laser.

7. Maintenance
Proper maintenance ensures the longevity and performance of your laser positioning light:
- Cleaning the Lens: The laser emission port is protected by a glass window. Regularly clean this window with a soft, lint-free cloth to remove dust, debris, or fog that may accumulate and affect laser line clarity. Do not use abrasive cleaners.
- General Cleaning: Wipe the exterior of the laser unit and bracket with a dry or slightly damp cloth. Do not immerse the unit in water or use harsh chemicals.
- Storage: When not in use, store the laser positioning light in a dry, cool place, away from direct sunlight and extreme temperatures.
8. Troubleshooting
| Problem | Possible Cause | Solution |
|---|---|---|
| Laser does not turn on. | No power supply or loose connection. | Ensure the power adapter is securely connected to both the laser unit and a working electrical outlet. |
| Laser line is dim or not visible. | High ambient light conditions; dirty lens. | Move to a less brightly lit area. Clean the protective glass window of the laser emission port. |
| Laser line is unstable or vibrates. | Bracket not securely mounted or tightened. | Ensure the bracket is firmly mounted to a stable surface and all adjustment knobs are tightened. Consider securing the base with screws for permanent setups. |
| Laser line is too thick or inconsistent. | Distance from target; environmental factors. | The line thickness can vary slightly with distance. Ensure the lens is clean. This product does not have adjustable line thickness. |
9. Specifications
| Brand | CGOLDENWALL |
| Model Number | Laser de Positionnement Lumière (XJJ 99) |
| ASIN | B0CTT4KY6Z |
| Material | Glass (Lens), Metal (Body/Bracket) |
| Color | Black |
| Operating Mode | Manual |
| Laser Type | Red Line Laser, Semiconductor Laser |
| Output Wavelength | 635nm |
| Output Power | 10mw |
| Line Length (Visible) | 8-10 m (indoors) |
| Mounting Height Range | 0.5 m - 5 m |
| Spot Diameter | ≤1.5mm at 3m |
| Straightness | ≥1/5000 |
| Power Supply Voltage | DC 2.8-5.2V (via specialized adapter) |
| Continuous Operation | 24/7, >3000 hours lifespan |
| Dimensions (Laser Unit) | Diameter 22mm * Length 110mm |
| Weight | 0.3kg |
| Components Included | Laser Positioning Light, Power Adapter, Universal Bracket |
10. Warranty and Support
CGOLDENWALL products are manufactured to high-quality standards. While specific warranty details are not provided in this manual, please retain your proof of purchase for any warranty claims. For technical support, troubleshooting assistance, or inquiries regarding your product, please contact CGOLDENWALL customer service through the retailer where you purchased the product or refer to the contact information provided on the product packaging or official website.
We are committed to providing reliable products and support to our customers.