
1. Introduction
Thank you for choosing the Orayafid Solar Outdoor 4G Router. This device is designed to provide reliable internet connectivity in remote locations, utilizing solar power and a built-in battery for continuous operation. Its robust, waterproof design makes it ideal for outdoor environments such as RVs, vacation cabins, and remote camera installations. This manual will guide you through the setup, operation, and maintenance of your new router.
2. Product Overview
Key Features
- Versatile Connectivity: Works with AT&T, T-Mobile, and most carriers in the US and Mexico. Supports both built-in vSIM and external Nano SIM cards.
- Solar Powered with Large Battery: Equipped with a 15W solar panel and a built-in 25000mAh rechargeable battery, providing extended operation without external power.
- Waterproof Design: Boasts an IP66 waterproof rating, ensuring durability in various weather conditions, including snow.
- High-Speed Wi-Fi: Transforms 4G LTE signal to 150Mbps Wi-Fi on a 2.4GHz band, supporting up to 8 devices simultaneously with a coverage of 50 meters.
- Reliable Backup System: Features dual backup options (Wired and Cellular) for uninterrupted network access.
Components Included
- Solar panel with integrated 4G router and built-in battery pack
- Mounting bracket and hardware
- User Manual
Product Views

Figure 2.1: Front view of the Orayafid Solar Outdoor 4G Router, demonstrating its compact design and wireless capabilities with a phone displaying internet speed.

Figure 2.2: The industrial-grade solar-energy 4G router, illustrating its ability to connect multiple devices such as cameras, laptops, and phones.
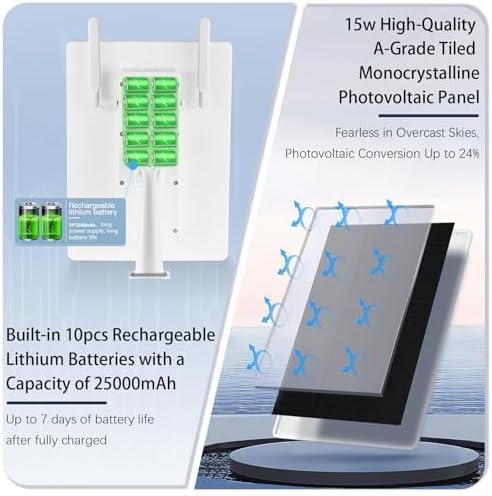
Figure 2.3: Detailed view of the 15W high-quality A-Grade Tiled Monocrystalline Photovoltaic Panel, highlighting its efficient photovoltaic conversion up to 24%.

Figure 2.4: The router demonstrating its professional-grade IP66 waterproof protection, designed to withstand wind and rain.
3. Setup Instructions
3.1 Unboxing and Initial Inspection
Carefully open the product packaging and remove all components. Inspect the router and accessories for any signs of damage. Ensure all listed components are present before proceeding with installation.
Video 3.1: An unboxing video of the L8 Solar Router, showing the contents of the package including the router, mounting bracket, and user manual.
3.2 Mounting the Router
Select a location that receives ample sunlight throughout the day for optimal solar charging. The router should be mounted securely using the provided bracket and hardware.
- Attach the mounting bracket to the back of the solar router using the screws provided.
- Position the router at the desired mounting location. Mark the drill holes for the wall mount.
- Drill pilot holes at the marked spots and insert wall anchors if necessary.
- Secure the mounting bracket to the wall using the appropriate screws.
- Adjust the angle of the solar panel to maximize sun exposure.

Figure 3.1: The solar router securely mounted on a wall, showcasing the adjustable bracket for optimal positioning.
Video 3.2: A demonstration of the router's features and mounting process, including attaching the bracket and adjusting the antennas.
3.3 SIM Card Installation
The router supports both a built-in vSIM (activated by scanning a QR code) and an external Nano SIM card. Choose the method that best suits your needs.
- For Built-in vSIM: Scan the QR code located on the back of the router to activate the built-in SIM card. A complimentary 200MB test data allowance is provided for 15 days.
- For External Nano SIM: Locate the SIM card slot on the back of the router. Insert your Nano SIM card into the slot until it clicks into place. Ensure the router is powered off before inserting or removing the SIM card.
- APN Settings: For some carriers, manual APN settings may be required. If you experience connectivity issues, contact Orayafid customer support through Amazon for specific setup instructions.
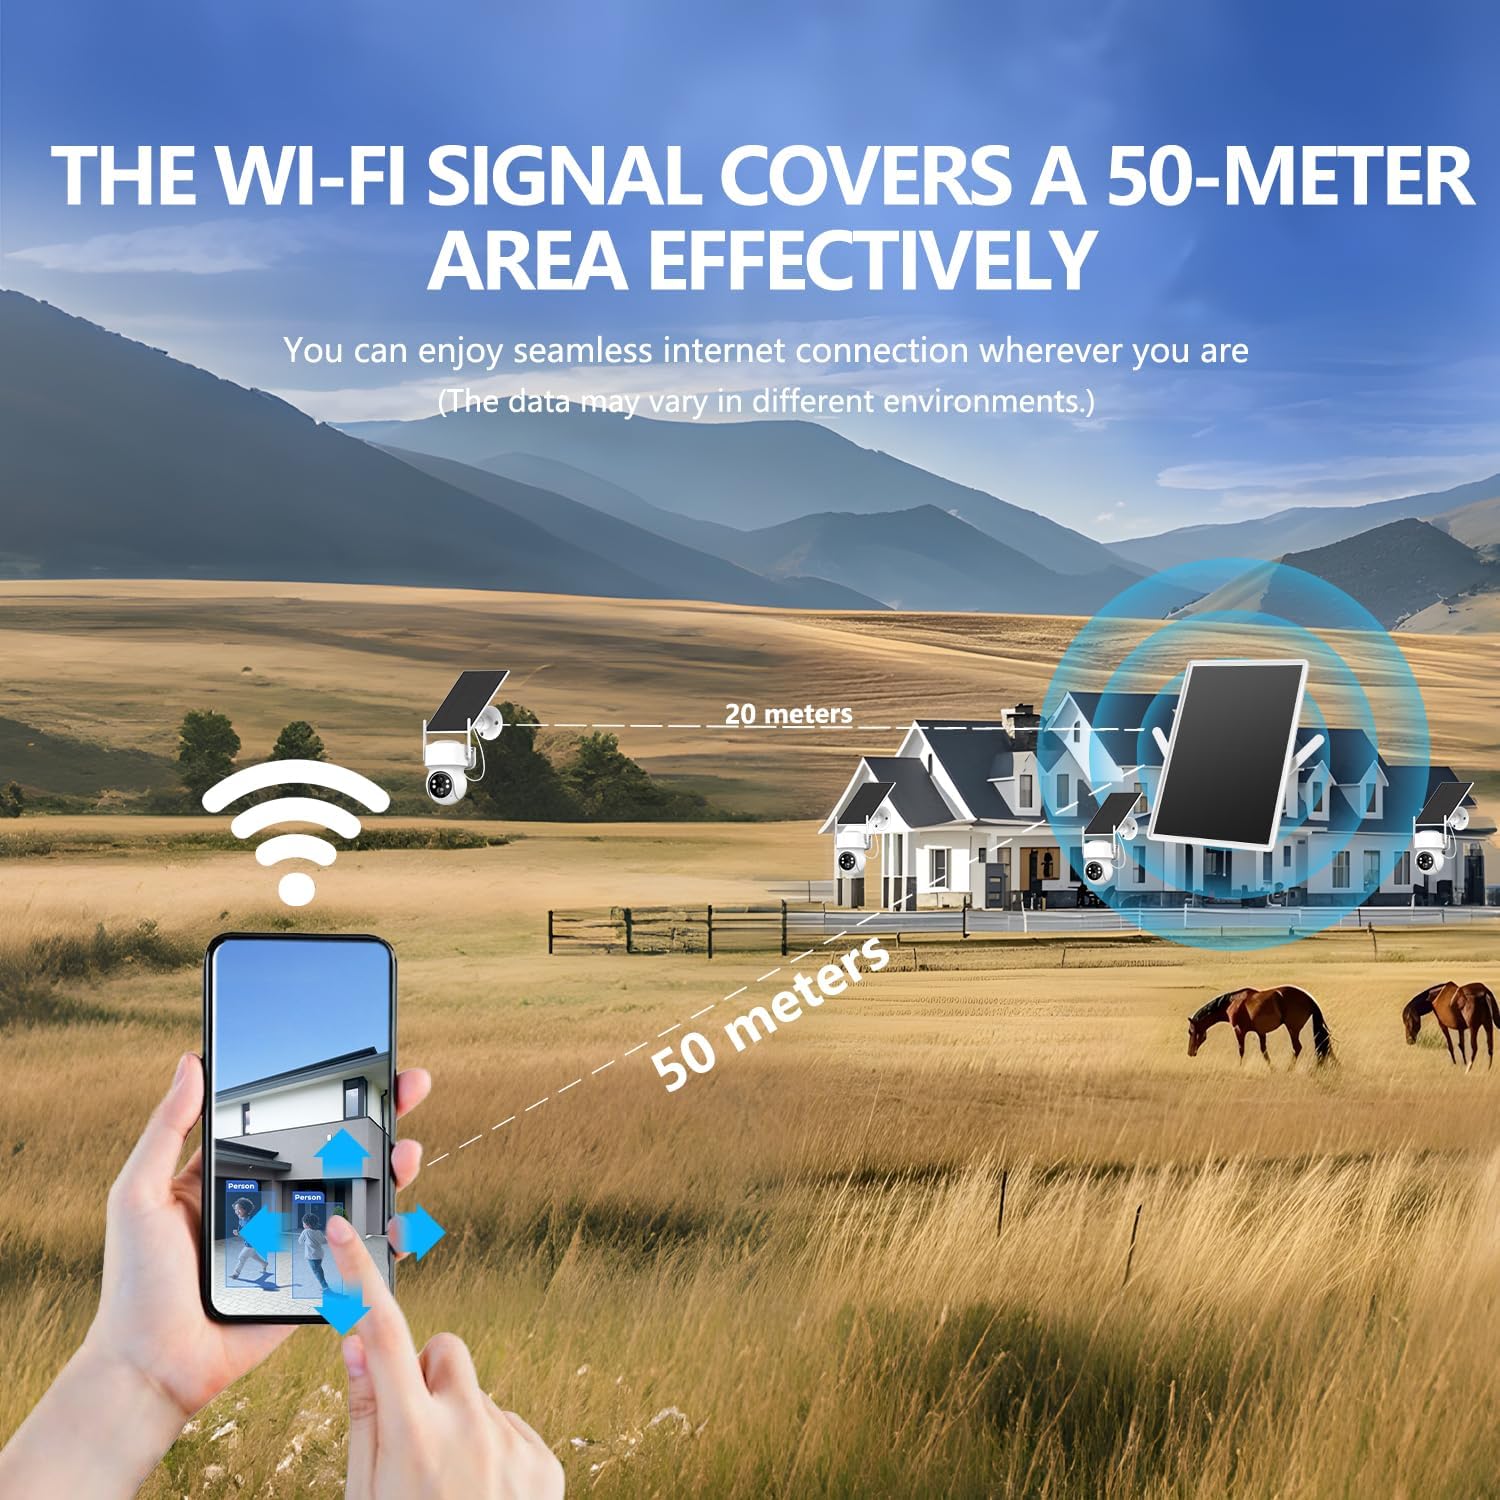
Figure 3.2: Rear view of the router, highlighting the Nano SIM card slot and detachable antennas for signal reception.
3.4 Initial Power On
Once the SIM card is installed and the router is mounted, ensure the solar panel is exposed to sunlight or connect an external 5V power source via the Type-C interface. The router will automatically power on. Observe the LED indicators for status.
4. Operating Instructions
4.1 Connecting Devices
The router broadcasts a 2.4GHz Wi-Fi signal. You can connect up to 8 devices simultaneously.
- On your device (smartphone, laptop, security camera, etc.), search for available Wi-Fi networks.
- Select the network name (SSID) provided on the router's label (e.g., "4G-****").
- Enter the default Wi-Fi password (e.g., "12345678") found on the router's label.
- Once connected, your device should have internet access.

Figure 4.1: Illustration of the router's effective Wi-Fi signal coverage up to 50 meters in open areas, enabling seamless internet connection.
4.2 Web Interface Access
For advanced settings and management, you can access the router's web interface.
- Connect your device to the router's Wi-Fi network.
- Open a web browser and enter the default Web IP address: 192.168.1.1
- Enter the default login credentials: Username: admin, Password: admin.
- From the web interface, you can manage network settings, view data usage, and update firmware.
4.3 Reliable Backup System (Wired and Cellular)
The router offers a dual backup system for continuous connectivity:
- Wired Priority: If a wired broadband connection is available and connected to the RJ45 network port, the router will prioritize this connection for stability.
- Automatic Cellular Transition: If the wired connection fails, the router will seamlessly switch to the 4G LTE cellular network.
- Automatic Wired Restoration: Once the wired connection is restored, the router will automatically switch back to it, ensuring robust and uninterrupted network service.
5. Maintenance
To ensure optimal performance and longevity of your Orayafid Solar Outdoor 4G Router, follow these maintenance guidelines:
- Solar Panel Cleaning: Regularly clean the surface of the solar panel to remove dust, dirt, leaves, or snow. A clean panel ensures maximum sunlight absorption and charging efficiency. Use a soft, damp cloth.
- Antenna Check: Periodically check that the detachable antennas are securely fastened and are not obstructed.
- Firmware Updates: Check the router's web interface periodically for available firmware updates. Keeping the firmware updated ensures the best performance, security, and compatibility.
- Battery Health: While the built-in battery is designed for long life, extreme temperatures can affect its performance. Ensure the router is installed within the recommended operating temperature range (-20°C to 80°C).
- Physical Inspection: Annually inspect the mounting hardware and cables for any signs of wear, corrosion, or damage. Tighten any loose screws.
6. Troubleshooting
If you encounter issues with your Orayafid Solar Outdoor 4G Router, refer to the following common problems and solutions:
- No Internet Connection:
- Ensure the SIM card is correctly inserted and activated.
- Check the APN settings in the web interface; some carriers require manual configuration.
- Verify cellular signal strength. If the signal is weak, try repositioning the router or adjusting antennas.
- If using a wired connection, ensure the Ethernet cable is properly connected and the wired network is active.
- Weak Wi-Fi Signal:
- Ensure there are no major obstructions (thick walls, metal objects) between the router and your devices.
- Keep devices within the 50-meter Wi-Fi coverage range.
- Check for interference from other 2.4GHz devices.
- Battery Not Charging:
- Ensure the solar panel is clean and receives direct sunlight.
- Verify the solar panel is correctly connected to the router.
- If the battery is completely depleted, it may require an initial charge via the Type-C USB port.
- Router Unresponsive / Freezing:
- Perform a soft reset by temporarily disconnecting power (if applicable) or pressing the reset button.
- If issues persist, perform a factory reset by pressing and holding the RESET button for several seconds until the LED indicators change. Note: A factory reset will erase all custom settings.
7. Technical Specifications
| Feature | Specification |
|---|---|
| Model Name | U-L8 |
| Product Dimensions | 9.25 x 1.25 x 12.5 inches |
| Item Weight | 3.98 pounds |
| Batteries | 10 Lithium Ion batteries required (included), 25000mAh total |
| Solar Panel Power | 15W / 5V |
| Photovoltaic Conversion Efficiency | 22% - 24% |
| Wi-Fi Protocol | 802.11n/g/b (2.4GHz) |
| LTE Rate (FDD) | 150M DL / 50M UL Cat4 |
| LTE Rate (TDD) | 130M DL / 35M UL Cat4 |
| SIM Card Slot | Nano SIM card support |
| Network Port | RJ45 network port |
| USB Port | Type-C interface |
| Waterproof Rating | IP66 |
| Operating Temperature | -20°C to 80°C |
| Power Supply | 5V-1A, standby power consumption 1W |
| Compatible Devices | Security Camera, Personal Computer, Printer, Smart Television, Smartphone |
8. Warranty and Support
Orayafid products are manufactured with high-quality materials and undergo rigorous testing. For warranty information and customer support, please refer to the product listing on Amazon or contact the Orayafid Factory store directly through the Amazon platform. Our support team is available to assist with any questions regarding setup, operation, or troubleshooting.
For the most up-to-date information and additional resources, please visit the Orayafid Store on Amazon.