1. Introduction
Thank you for choosing the SDTNOVA PTZ Conference Camera SNC-10XUHP2. This manual provides essential information for the proper installation, operation, and maintenance of your camera. Please read this manual thoroughly before using the product to ensure optimal performance and to prevent damage.
The SDTNOVA SNC-10XUHP2 is a high-definition PTZ (Pan-Tilt-Zoom) camera designed for professional video conferencing, live streaming, and business meetings. It features 10X optical zoom, FHD 1080P 60FPS video output, and multiple connectivity options including USB3.0, HDMI, and IP.
2. Safety Information
- Power Supply: Use only the provided power adapter. Ensure the power voltage is within the specified range.
- Environment: Do not expose the camera to rain, moisture, or extreme temperatures. Avoid placing it in direct sunlight or near heat sources.
- Handling: Handle the camera with care. Avoid dropping or subjecting it to strong vibrations.
- Cleaning: Disconnect power before cleaning. Use a soft, dry cloth. Do not use harsh chemicals or abrasive cleaners.
- Disassembly: Do not attempt to disassemble or modify the camera. Refer all servicing to qualified personnel.
3. Package Contents
Verify that all items are present in the package:
- SDTNOVA PTZ Conference Camera SNC-10XUHP2
- Power Adapter
- Remote Control (batteries not included)
- USB Cable
- User Manual
4. Product Overview
The SDTNOVA SNC-10XUHP2 camera features a robust design with various input/output ports for versatile connectivity.

Figure 4.1: Front view of the SDTNOVA PTZ Conference Camera.
4.1 Rear Panel Connections

Figure 4.2: Detailed view of the camera's rear panel with various ports and a connection diagram illustrating typical setups with a TV/monitor, PC/laptop, and joystick controller.
- TF CARD: Micro SD card slot for local video recording.
- HDMI: High-Definition Multimedia Interface output for video display.
- LINE IN: Audio input.
- NET: RJ45 Ethernet port for IP control and streaming.
- USB3.0: High-speed USB connection for video output to a computer.
- USB2.0: Standard USB connection.
- RS422/RS232: Serial ports for external control (e.g., joystick controller).
- DC 12V: Power input port.
4.2 Remote Control Functions

Figure 4.3: Layout of the remote control for the SDTNOVA PTZ Conference Camera, showing buttons for power, camera selection, preset positions, zoom, focus, pan-tilt control, and AI human tracking activation.
- Power: Turns the camera on/off.
- Camera Select (1-4): Selects the camera if multiple units are connected.
- Preset Position Setting (0-9): Saves and recalls camera positions.
- Zoom +/-: Adjusts the optical zoom level.
- Focus +/- / Auto / Manual: Adjusts focus manually or sets to auto-focus.
- Pan-Tilt Control (Arrows): Moves the camera horizontally (Pan) and vertically (Tilt).
- SET PRESET / CLEAR PRESET: Saves or deletes a preset position.
- BLC ON/OFF / MENU: Backlight compensation on/off, or access camera menu.
- F3: Open AI Human Tracking: Activates the AI human tracking feature.
- F4: Close AI Human Tracking: Deactivates the AI human tracking feature.
5. Setup
5.1 Physical Installation
- Place the camera on a stable, level surface or mount it securely using appropriate mounting hardware (not included).
- Ensure adequate ventilation around the camera.
5.2 Connecting the Camera
- Power Connection: Connect the provided power adapter to the DC 12V port on the camera and then plug it into a power outlet.
- Video Output (USB): Connect the USB3.0 cable from the camera to a USB 3.0 port on your computer. The camera should be recognized automatically as a video device.
- Video Output (HDMI): Connect an HDMI cable from the camera's HDMI port to an HDMI input on a display monitor or video switcher.
- Network Connection (Optional): For IP control and streaming, connect an Ethernet cable from the NET port to your network router or switch.
- Audio Input (Optional): Connect an external audio source to the LINE IN port if needed.
- Control Connection (Optional): For external control, connect an RS232 or RS422 cable to a compatible joystick controller or control system.
6. Operating Instructions
6.1 Basic Camera Control

Figure 6.1: Illustration of the camera's pan (±175°) and tilt (-30° to +90°) ranges, along with its 10X optical zoom capability (focal length f=5.7-57mm, HFOV: 55°-5.5°), and 1920*1080@60fps video resolution.
- Power On: Press the 'Power' button on the remote control.
- Pan/Tilt: Use the arrow buttons on the remote to adjust the camera's horizontal (Pan: ±175°) and vertical (Tilt: -30° to +90°) position.
- Zoom: Use the 'Zoom +/-' buttons to adjust the 10X optical zoom.
- Focus: Use 'Focus +/-' for manual adjustment or press 'AUTO' for automatic focus.
6.2 Preset Positions
- Setting a Preset: Adjust the camera to the desired position (Pan, Tilt, Zoom, Focus). Press 'SET PRESET' followed by a number (0-9) to save the position.
- Recalling a Preset: Press the corresponding number (0-9) on the remote control.
- Clearing a Preset: Press 'CLEAR PRESET' followed by the number of the preset you wish to delete.
6.3 AI Human Tracking
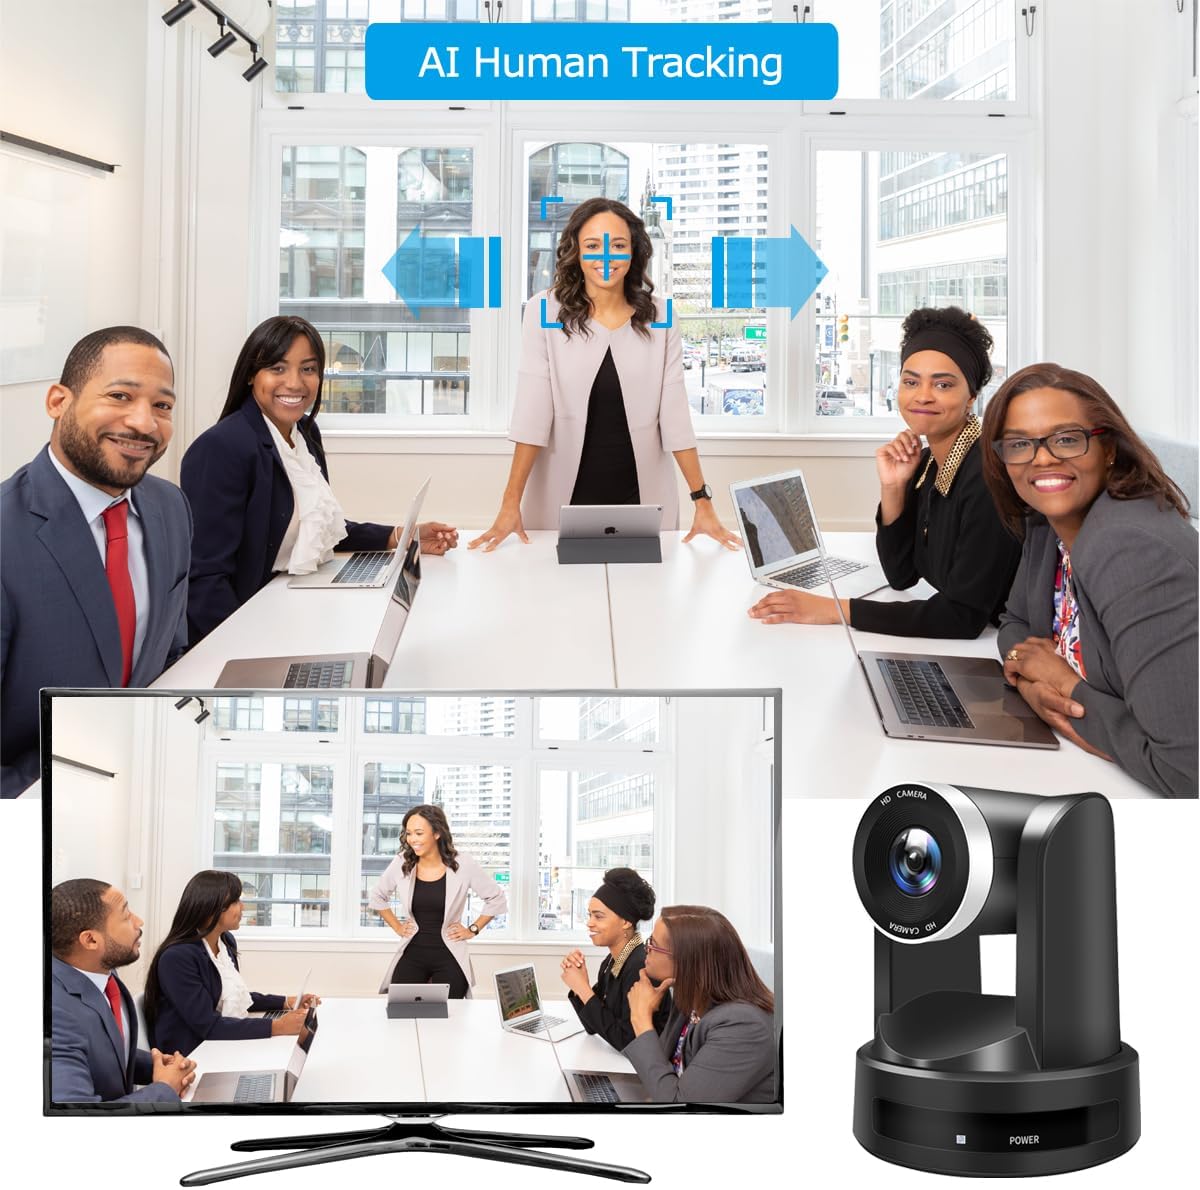
Figure 6.2: The AI Human Tracking feature in action, demonstrating the camera's ability to automatically follow a presenter or speaker within a meeting room setting, ensuring they remain centered in the frame.
- Activate: Press the 'F3' button on the remote control to enable AI Human Tracking. The camera will automatically detect and follow a person in the frame.
- Deactivate: Press the 'F4' button to disable AI Human Tracking.
6.4 Using with Software (e.g., Zoom, OBS)
When connected via USB3.0, the camera will appear as a standard webcam in most video conferencing and streaming applications. Select 'SDTNOVA PTZ Camera' as your video input source within the software settings.

Figure 6.3: Examples of the SDTNOVA PTZ camera's versatile applications, including video conferences, college lectures, church live streaming, and online learning environments.
6.5 TF Card Recording
Insert a Micro SD card into the TF CARD slot. The camera supports local recording to the card. Refer to the on-screen menu (accessed via the remote) for recording options and playback.
7. Maintenance
- Cleaning the Lens: Use a soft, lint-free cloth specifically designed for optical lenses. Do not use abrasive materials.
- Cleaning the Body: Wipe the camera body with a soft, dry cloth. For stubborn dirt, a slightly damp cloth can be used, followed by a dry one.
- Storage: When not in use for extended periods, store the camera in a cool, dry place, away from dust and direct sunlight.
8. Troubleshooting
| Problem | Possible Cause | Solution |
|---|---|---|
| No power | Power adapter not connected or faulty. | Check power connections. Ensure the power outlet is functional. |
| No video output | Incorrect cable connection; incorrect input selected on display; driver issue. | Verify USB/HDMI cable connections. Select the correct input source on your monitor/computer. Reinstall USB drivers if necessary. |
| Remote control not working | Batteries are dead or incorrectly inserted; obstruction between remote and camera. | Replace batteries. Ensure line of sight to the camera's IR receiver. |
| Camera shakes randomly, especially when zoomed in | Potential motor instability or environmental vibration. | Ensure the camera is on a stable surface. Avoid placing it where vibrations are common. If the issue persists, contact customer support. |
| AI Tracking not working | Feature not activated; poor lighting conditions; subject too far or obscured. | Press F3 on the remote to activate. Ensure adequate lighting and clear view of the subject. |
9. Specifications

Figure 9.1: Close-up view of the camera lens, highlighting the 1/2.8" CMOS sensor with 2.07MP and 10X optical zoom capabilities, designed to meet various meeting needs.
| Feature | Detail |
|---|---|
| Model Number | SNC-10XUHP2 |
| Photo Sensor Technology | CMOS (1/2.8" CMOS, 2.07MP Sensor) |
| Video Capture Resolution | 1080p (FHD 1080P 60FPS) |
| Optical Zoom | 10X |
| Focal Length | f=5.7-57mm |
| Horizontal Field of View (HFOV) | 55°-5.5° |
| Maximum Aperture | 1.6 f |
| Pan Range | ±175° |
| Tilt Range | -30° to +90° |
| Connectivity Technology | USB3.0, HDMI, IP (Ethernet), RS232, RS422 |
| Flash Memory Type | Micro SD (for TF Card slot) |
| Video Capture Format | MP4 |
| Special Features | AI Human Auto Tracking, Remote Control |
| Color | Black |
| Package Dimensions | 28.09 x 25.4 x 24.99 cm |
| Item Weight | 2.43 kg |
10. Warranty and Support
SDTNOVA products are designed for reliability and performance. For warranty information, technical support, or service inquiries, please refer to the contact information provided with your purchase or visit the official SDTNOVA website. Please have your model number (SNC-10XUHP2) and purchase details ready when contacting support.


