
1. Important Safety Information
Read all instructions before assembling and using the trampoline. Failure to follow these instructions may result in serious injury. This trampoline is designed for recreational use. Adult supervision is required at all times.
- Ensure the trampoline is placed on a level surface, free from obstructions.
- Only one person should jump at a time to prevent collisions.
- Do not attempt somersaults or other dangerous maneuvers without proper training and supervision.
- Inspect the trampoline regularly for damaged or worn parts. Replace components as needed.
- Keep children away from the trampoline during assembly.
- Do not move the trampoline by pushing it once assembled, as this can damage the frame.
2. Assembly Instructions
The Lyromix 14FT Pumpkin Trampoline features a galvanized steel frame for rust resistance and is designed for straightforward assembly. It is recommended to have at least two adults for assembly.
2.1 Unpacking and Part Identification
Carefully unpack all components and verify against the parts list provided in the packaging. Ensure all 80 springs, the high-strength jumping mat, safety net, curved poles, 4 U-shaped legs, and accessories are present and undamaged.
2.2 Frame Assembly
- Connect the frame sections to form the circular base. Ensure all connections are secure.
- Attach the 4 U-shaped legs to the frame. These legs provide stability and a secure center of gravity.
- Secure the ground stakes to the trampoline legs and into the ground for added stability, especially in windy conditions.
2.3 Jumping Mat and Spring Installation
- Lay the jumping mat evenly across the frame.
- Attach the 80 large springs, connecting the jumping mat to the frame. Use the provided spring tool for easier and safer installation. Ensure even tension by attaching springs opposite each other.
- Verify the 'No Gap Design' where the jumping mat meets the springs, eliminating gaps for maximum safety.

Image: Illustration of the 'No Gap Design' ensuring safety by eliminating space between the jumping mat and springs.
2.4 Safety Net and Pole Installation
- Install the curved safety poles around the perimeter of the trampoline. The curved design provides extra space to prevent injury.
- Attach the 360° all-encompassing safety net to the poles and the trampoline frame. Ensure the net is securely fastened at all points.

Image: Curved safety poles designed to provide additional clearance and prevent contact with the poles during use.

Image: Visual comparison showing the upgraded, thicker trampoline poles for enhanced durability and support.

Image: Illustrates the difference between an undamaged, thickened support pole and a damaged, thin pole, emphasizing the importance of structural integrity.
2.5 Accessory Installation
Install the ladder, basketball hoop, LED lighting, and trampoline sprinkler according to their individual instructions. The basketball set includes a pump for inflation.
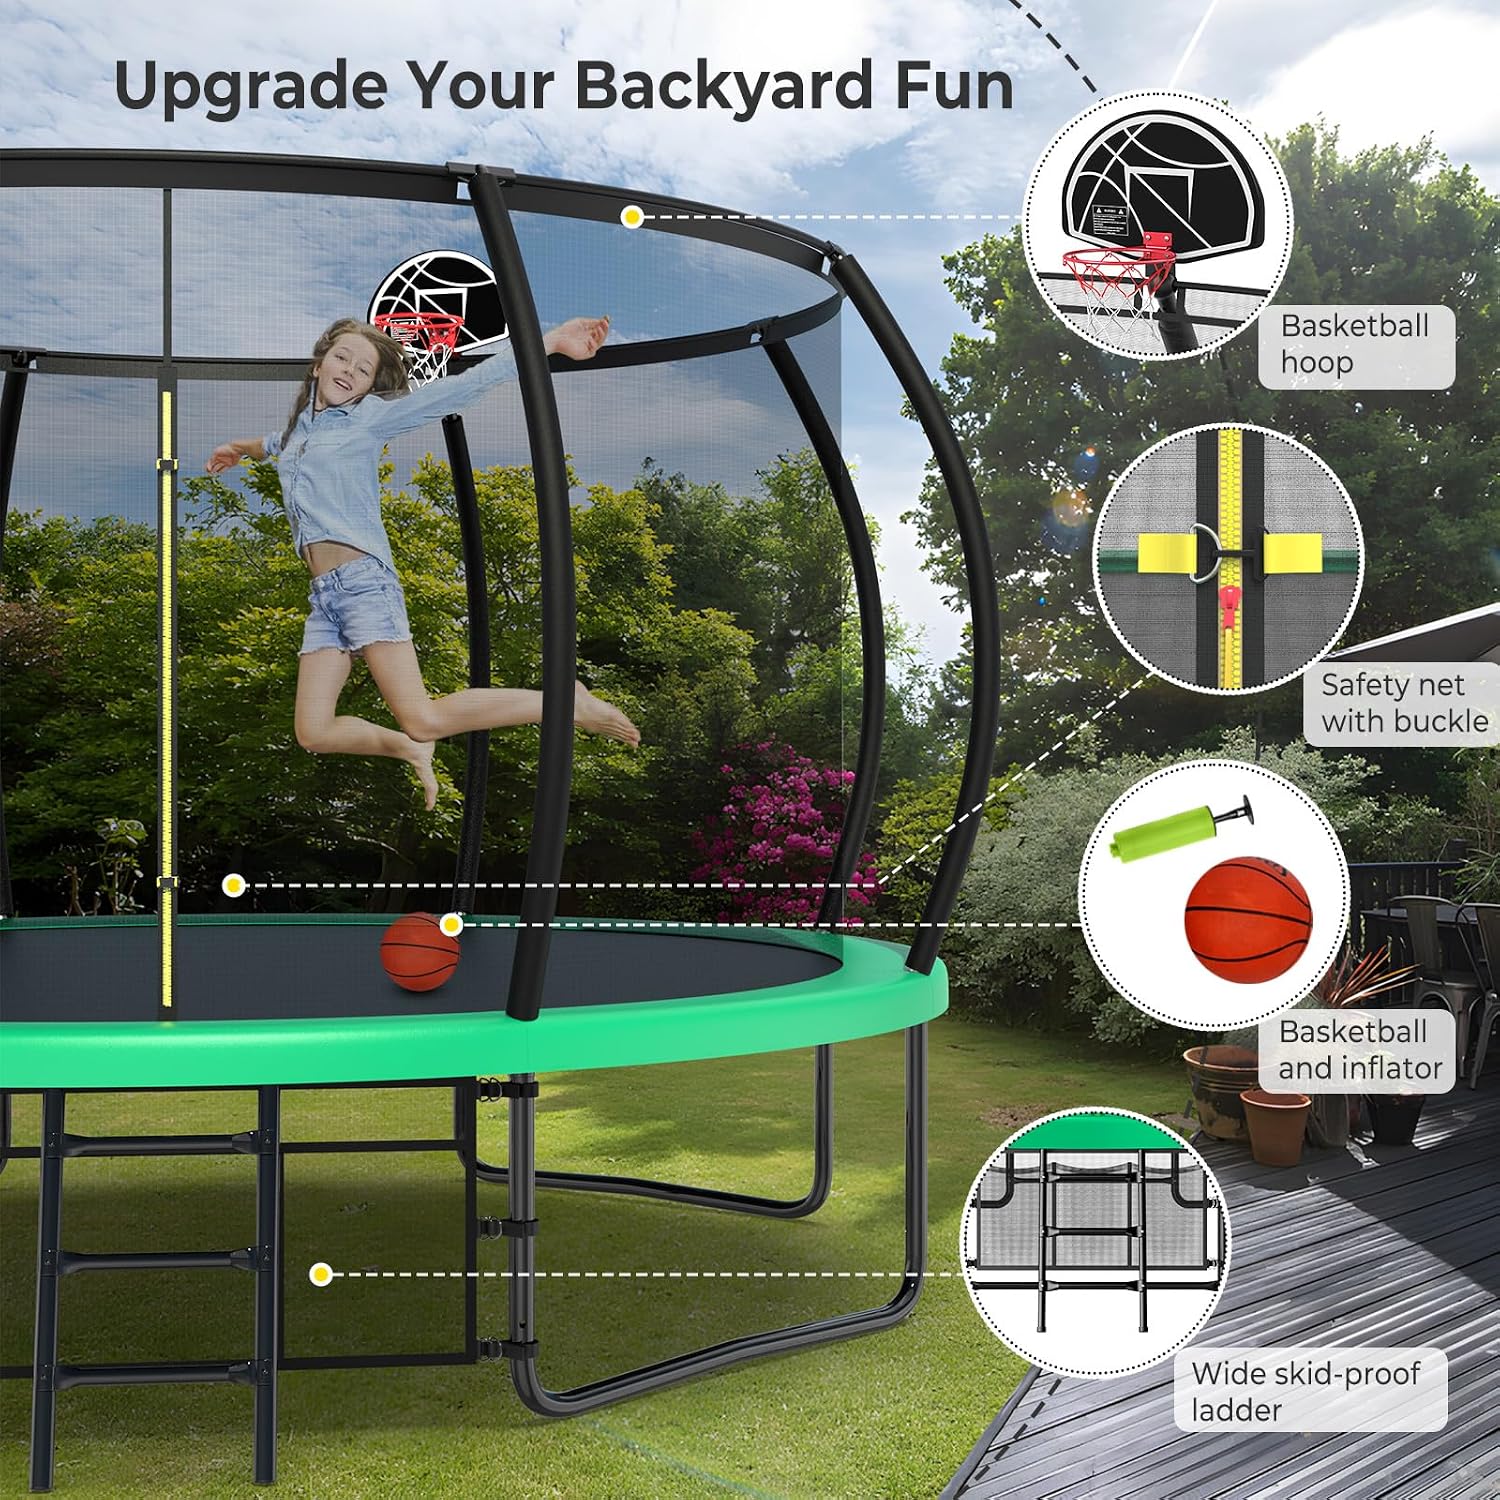
Image: Overview of the trampoline with various accessories including a basketball hoop, safety net buckle, basketball with inflator, and a wide skid-proof ladder.
3. Operating Instructions
Once assembled, the Lyromix 14FT Pumpkin Trampoline provides an expansive and safe jump zone for recreational use.
3.1 General Use
- Always enter and exit the trampoline using the provided ladder.
- Ensure the safety net entrance is securely closed before jumping.
- Jump in the center of the mat for optimal performance and safety.
- Do not wear shoes on the trampoline.
- Remove all sharp objects from pockets before use.
3.2 Using Accessories
- Basketball Hoop: Use the provided basketball and pump. Do not hang on the hoop or net.
- Trampoline Sprinkler: Attach to a garden hose for a refreshing water play experience. Ensure water pressure is appropriate.
- LED Lighting: Install the LED lights as directed to enhance visibility and enjoyment during evening use.

Image: Illustrates the trampoline's capacity and dimensions, highlighting features like 'Injury free-No Foot Inserting' and 'Built To Last'.
4. Maintenance
Regular maintenance ensures the longevity and safety of your Lyromix trampoline.
- Inspection: Periodically check all components for wear, tear, or damage. Pay close attention to the jumping mat, springs, safety net (made from UV-resistant materials and tested to American UV standard of 5000 hours), frame, and padding.
- Cleaning: Clean the jumping mat and frame with mild soap and water. Avoid harsh chemicals.
- Rust Prevention: The galvanized steel frame is designed to resist rust, but regular cleaning and inspection for scratches or chips can help prevent corrosion.
- Weather Protection: In extreme weather conditions (heavy winds, snow), it is advisable to secure the trampoline further with additional stakes or temporarily disassemble the safety net and other removable components.
- Relocation: If relocation is necessary, disassemble the trampoline first. Do not attempt to drag or push the assembled trampoline, as this can cause structural damage.
5. Troubleshooting
This section addresses common issues you might encounter with your trampoline.
- Missing Parts Upon Arrival: If any parts, such as the bouncing pad or net, are missing or damaged upon delivery, immediately contact customer support with your purchase details.
- Frame Buckling: Frame buckling can occur if the trampoline is moved by pushing or dragging it while assembled. Always disassemble the trampoline before moving it to a new location.
- Uneven Jumping Surface: Ensure the trampoline is placed on a completely flat and level surface. Check that all legs are firmly on the ground and that the frame is not twisted.
- Reduced Bounce: Inspect all springs for damage or stretching. Replace any compromised springs. Ensure the jumping mat is free from tears or excessive wear.
- Safety Net Issues: If the safety net is torn or loose, inspect its attachment points and repair or replace as necessary. Ensure the zipper or buckle closure is functioning correctly.
6. Specifications
| Feature | Detail |
|---|---|
| Brand | Lyromix |
| Model Name | Lyromix Pumpkin Trampoline |
| Model Number | trampoline-4 |
| Frame Size | 14 Feet |
| Shape | Round |
| Item Dimensions (L x W x H) | 4.27L x 4.27W x 2.74H Meters |
| Frame Material | Alloy Steel (Galvanized) |
| Jumping Mat Material | Nylon Polyvinyl Chloride (PVC) |
| Number of Springs | 80 |
| Pad Type | Foam Pad |
| Color | Dark Green |
| UPC | 797430186472 |
7. Warranty and Support
Lyromix is committed to ensuring your total satisfaction with our products. This trampoline comes with dedicated after-sales support.
For warranty information, missing parts, or any product-related inquiries, please contact our customer service team. Details for contacting support can typically be found on our official website or through your purchase platform.
Please retain your proof of purchase for warranty claims.