
zozoye 29987-02
Contents
Instruction Manual: Stator for Harley-Davidson Motorcycles
Brand: zozoye | Model: 29987-02, 29987-02A, 29987-02B
Product Overview
This manual provides essential information for the installation, operation, and maintenance of the zozoye Stator, designed as a replacement component for specific Harley-Davidson motorcycle models. The stator is a critical part of your motorcycle's charging system, responsible for generating electrical power to operate the vehicle and recharge the battery.
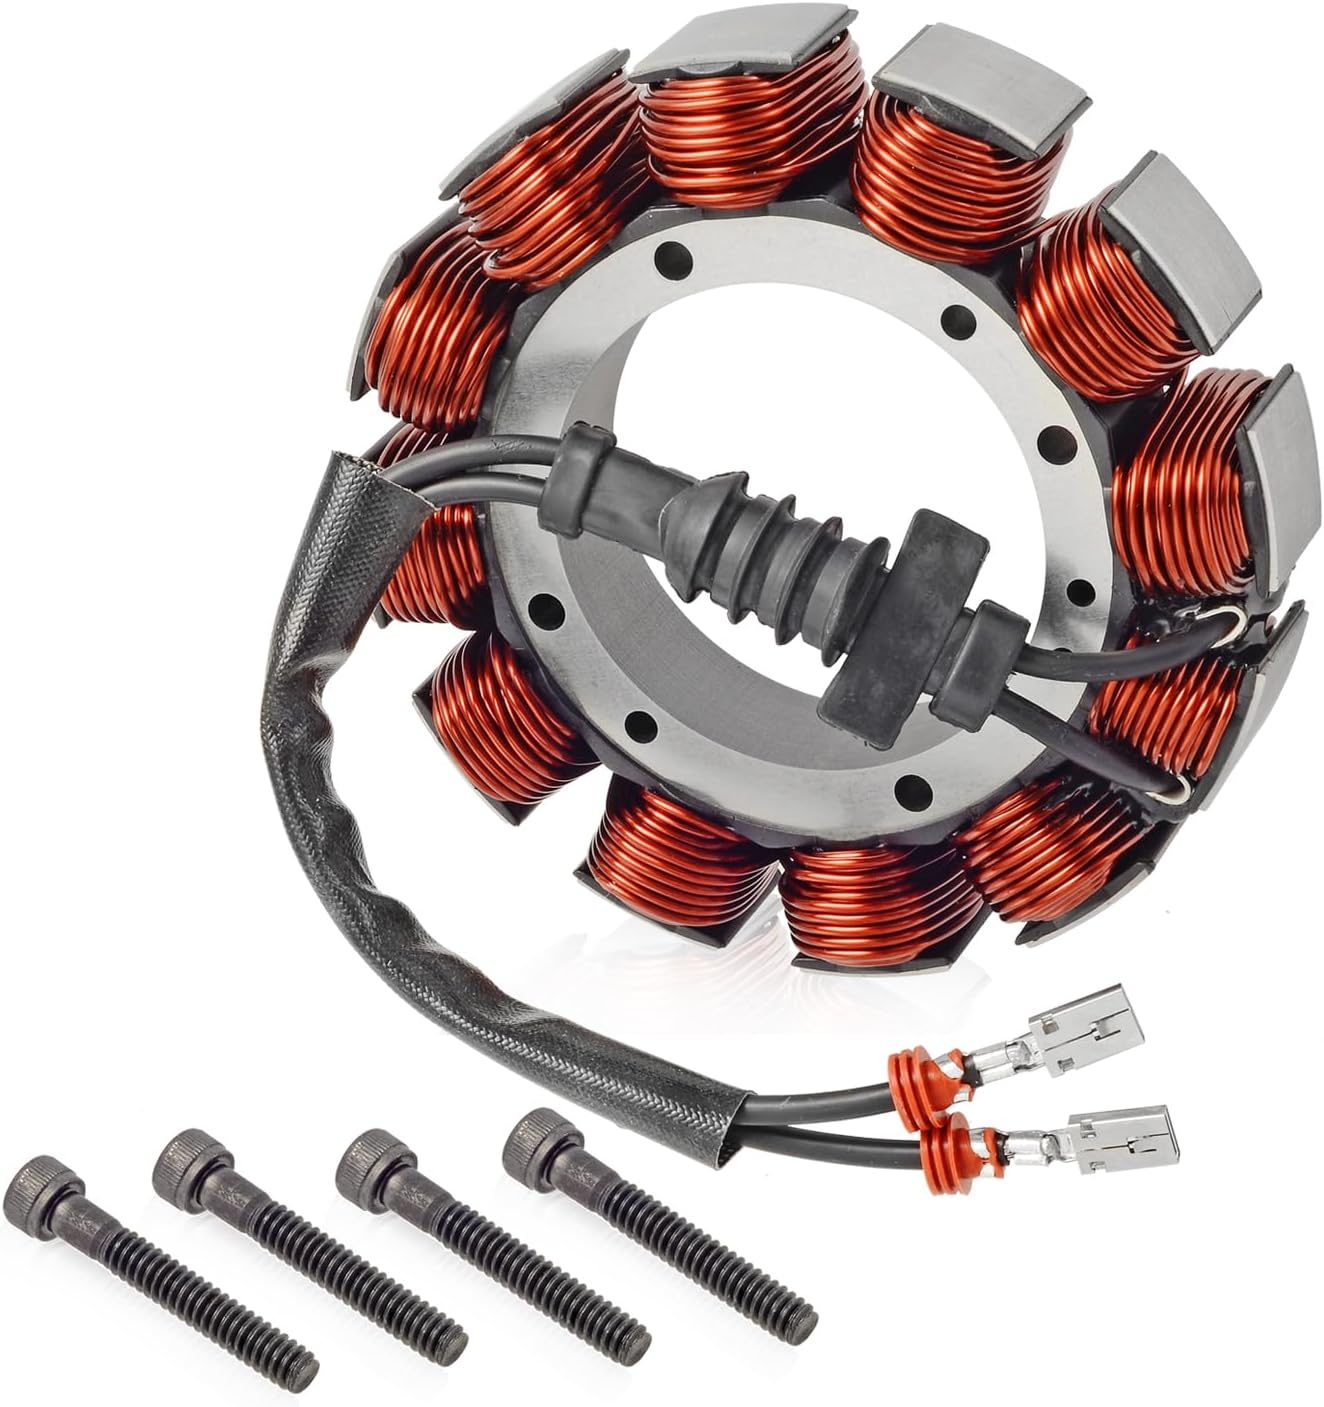
Figure 1: The zozoye Stator unit, featuring its central core, numerous copper windings, and the attached wiring harness with connectors. Four black mounting bolts are also shown, indicating included hardware for installation.

Figure 2: An alternative view of the zozoye Stator, highlighting the robust construction of the windings and the protective sleeve around the wiring. The four accompanying mounting bolts are clearly visible in the foreground.
Compatibility
This stator is compatible with the following Harley-Davidson motorcycle models and years:
- 2002-2005 FLHR 1450 Road King
- 2002-2005 FLHP 1450 Road King
- 2002-2005 FLHT 1450 Electra Glide
- 2002-2005 FLTR 1450 Road Glide
Reference OE/OEM Numbers: 29987-02, 29987-02A, 29987-02B
Specifications
| Brand | zozoye |
| Model Numbers | 29987-02, 29987-02A, 29987-02B |
| Item Weight | 3.57 pounds (approx. 1.62 kg) |
| Package Dimensions | 5.91 x 5.51 x 2.17 inches (approx. 15 x 14 x 5.5 cm) |
| UPC | 733998537530 |
| Included Items | 1 x Stator, Mounting Bolts |
Installation and Setup
Proper installation of the stator is crucial for the correct functioning of your motorcycle's electrical system. It is highly recommended that installation be performed by a qualified motorcycle technician. Incorrect installation can lead to damage to the stator, other electrical components, or the motorcycle itself.
General Installation Steps (Consult Service Manual for Specifics):
- Safety First: Disconnect the motorcycle's battery to prevent accidental electrical shorts. Ensure the engine is cool.
- Access the Stator: Locate and remove the primary cover or outer primary housing to gain access to the stator assembly. This typically involves draining the primary fluid.
- Disconnect Wiring: Carefully disconnect the stator's wiring harness from the voltage regulator and any other connections. Note the routing of the original wiring.
- Remove Old Stator: Unbolt the old stator from its mounting points. Be mindful of any gaskets or O-rings that may need replacement.
- Inspect Components: Before installing the new stator, inspect the rotor (flywheel) for any signs of damage, wear, or debris. Ensure the mounting surface is clean.
- Install New Stator: Position the new zozoye stator and secure it with the provided mounting bolts. Ensure proper torque specifications are met as per your motorcycle's service manual.
- Connect Wiring: Route the new stator's wiring harness correctly and connect it to the voltage regulator and other necessary points. Ensure connections are secure and free from pinch points.
- Reassemble: Reinstall the primary cover with a new gasket, ensuring proper sealing. Refill primary fluid to the correct level.
- Reconnect Battery: Reconnect the motorcycle's battery.
- Test System: Start the motorcycle and check the charging system voltage with a multimeter. The voltage should be within the manufacturer's specified range (typically 13.5V to 14.8V at idle and higher RPMs).
Always refer to your specific motorcycle's service manual for detailed, model-specific instructions, torque specifications, and safety precautions.
Operation
The stator operates as part of the motorcycle's AC (alternating current) generator system. As the engine runs, the crankshaft rotates the rotor (flywheel) which contains magnets. These magnets pass by the stator's copper windings, inducing an alternating current. This AC current is then sent to the voltage regulator/rectifier, which converts it into DC (direct current) and regulates the voltage to a stable level suitable for charging the battery and powering the motorcycle's electrical components (lights, ignition, accessories).
A properly functioning stator ensures that your battery remains charged and that all electrical systems receive adequate power during operation.
Maintenance
The stator itself is a sealed electrical component and generally requires no routine maintenance. However, regular checks of the overall charging system are recommended:
- Battery Health: Ensure your battery is in good condition and properly charged. A weak battery can put extra strain on the charging system.
- Wiring Inspection: Periodically inspect all wiring connected to the stator and voltage regulator for signs of fraying, corrosion, or loose connections.
- Voltage Checks: If you suspect an issue, perform a voltage output test at the battery terminals with the engine running. Consult your service manual for expected voltage ranges.
- Primary Fluid: If your stator operates in primary fluid (wet stator), ensure the fluid is at the correct level and changed according to your motorcycle's maintenance schedule.
Troubleshooting
If you experience issues with your motorcycle's charging system, the stator may be a contributing factor. Here are common symptoms and troubleshooting steps:
- Battery Not Charging / Low Voltage:
- Check battery terminals for corrosion and tightness.
- Test battery voltage with the engine off (should be ~12.6V).
- Test charging voltage with the engine running (should be 13.5V-14.8V). If low, proceed to check regulator and stator.
- Inspect the voltage regulator for signs of overheating or damage.
- Perform an AC output test on the stator leads (disconnected from regulator) using a multimeter. Consult your service manual for expected AC voltage per 1000 RPM.
- Perform a stator resistance test (ohm test) and a ground continuity test. Readings should match service manual specifications.
- Overcharging / High Voltage:
- This is typically an indication of a faulty voltage regulator, not the stator. However, ensure all stator connections are secure.
- Blown Fuses:
- A short circuit within the stator windings can cause fuses to blow. Perform a ground continuity test on the stator leads.
If troubleshooting indicates a faulty stator, replacement is necessary. Always consult a professional technician if you are unsure about diagnostic procedures.
Warranty and Support
zozoye products are designed for quality and reliability. This product comes with a one-year After-Sales service warranty from the date of purchase.
Warranty Coverage: In the event of any quality problems or model mismatch after purchase, the product may be eligible for return or refund as per the warranty terms.
Customer Support: If you have any questions regarding the product, installation, compatibility, or require assistance with a warranty claim, please do not hesitate to contact zozoye customer service. Contact information can typically be found on your purchase receipt or the seller's platform page.
Ask a question about this manual
Ask about setup, troubleshooting, compatibility, parts, safety, or missing instructions. Manuals+ will review the question and use this page’s manual context to help answer it.