1. Safety Information
Please read all safety instructions carefully before using the HOUSMV Portable Electric Nail Drill Machine. Failure to follow these instructions may result in injury or damage to the device.
- Always ensure the drill bit is securely locked in place before operating the device.
- Do not immerse the device or its power cord in water or other liquids.
- Keep the device out of reach of children.
- Avoid touching the rotating bit during operation.
- Do not use the device if it is damaged or malfunctioning.
- Take breaks during use; do not operate the nail drill continuously for more than 20 minutes to prevent overheating.
2. Product Overview
The HOUSMV Portable Electric Nail Drill Machine (Model 202) is a professional-grade e-file designed for various nail care tasks. It features a powerful motor, long-lasting battery, and a compact design for portability.

Image: The HOUSMV Portable Electric Nail Drill Machine, showing the main unit, handpiece, charging cable, and included drill bits and sanding bands.
Key Features:
- High Speed & Efficient Performance: Equipped with an upgraded aluminum alloy motor, capable of up to 40,000 RPM for smooth and efficient operation.
- Low Heat, Noise, and Vibration: Features a unique ventilation system motor bearing for reduced heat, noise, and vibration during use.
- Long-lasting Rechargeable Battery: A large capacity battery provides 8-10 hours of usage on a 3-hour charge.
- Intelligent LCD Display: Clearly shows rotation direction, speed, and remaining battery level.
- Lightweight and Portable Design: Compact and easy to carry, with a belt clip for convenient control during use.
- Integrated Storage Base: Provides space for drill bits and the handpiece, keeping your workspace organized.
- Easy Bit Changing: Twist-lock system simplifies the process of inserting and removing drill bits.
- Forward/Reverse Direction: Supports both rotation directions for left-handed and right-handed users.
- Multi-functional Kit: Includes 7 nail drill bits and 6 sanding bands for various applications.

Image: Diagram highlighting the main components and functions of the control unit, including the battery indicator, LCD screen, rotation direction control, and speed adjustment.
3. Setup
3.1 Initial Charging
Before first use, fully charge the nail drill. Connect the charging cable to the device and a suitable power adapter. The LCD display will indicate the battery level.
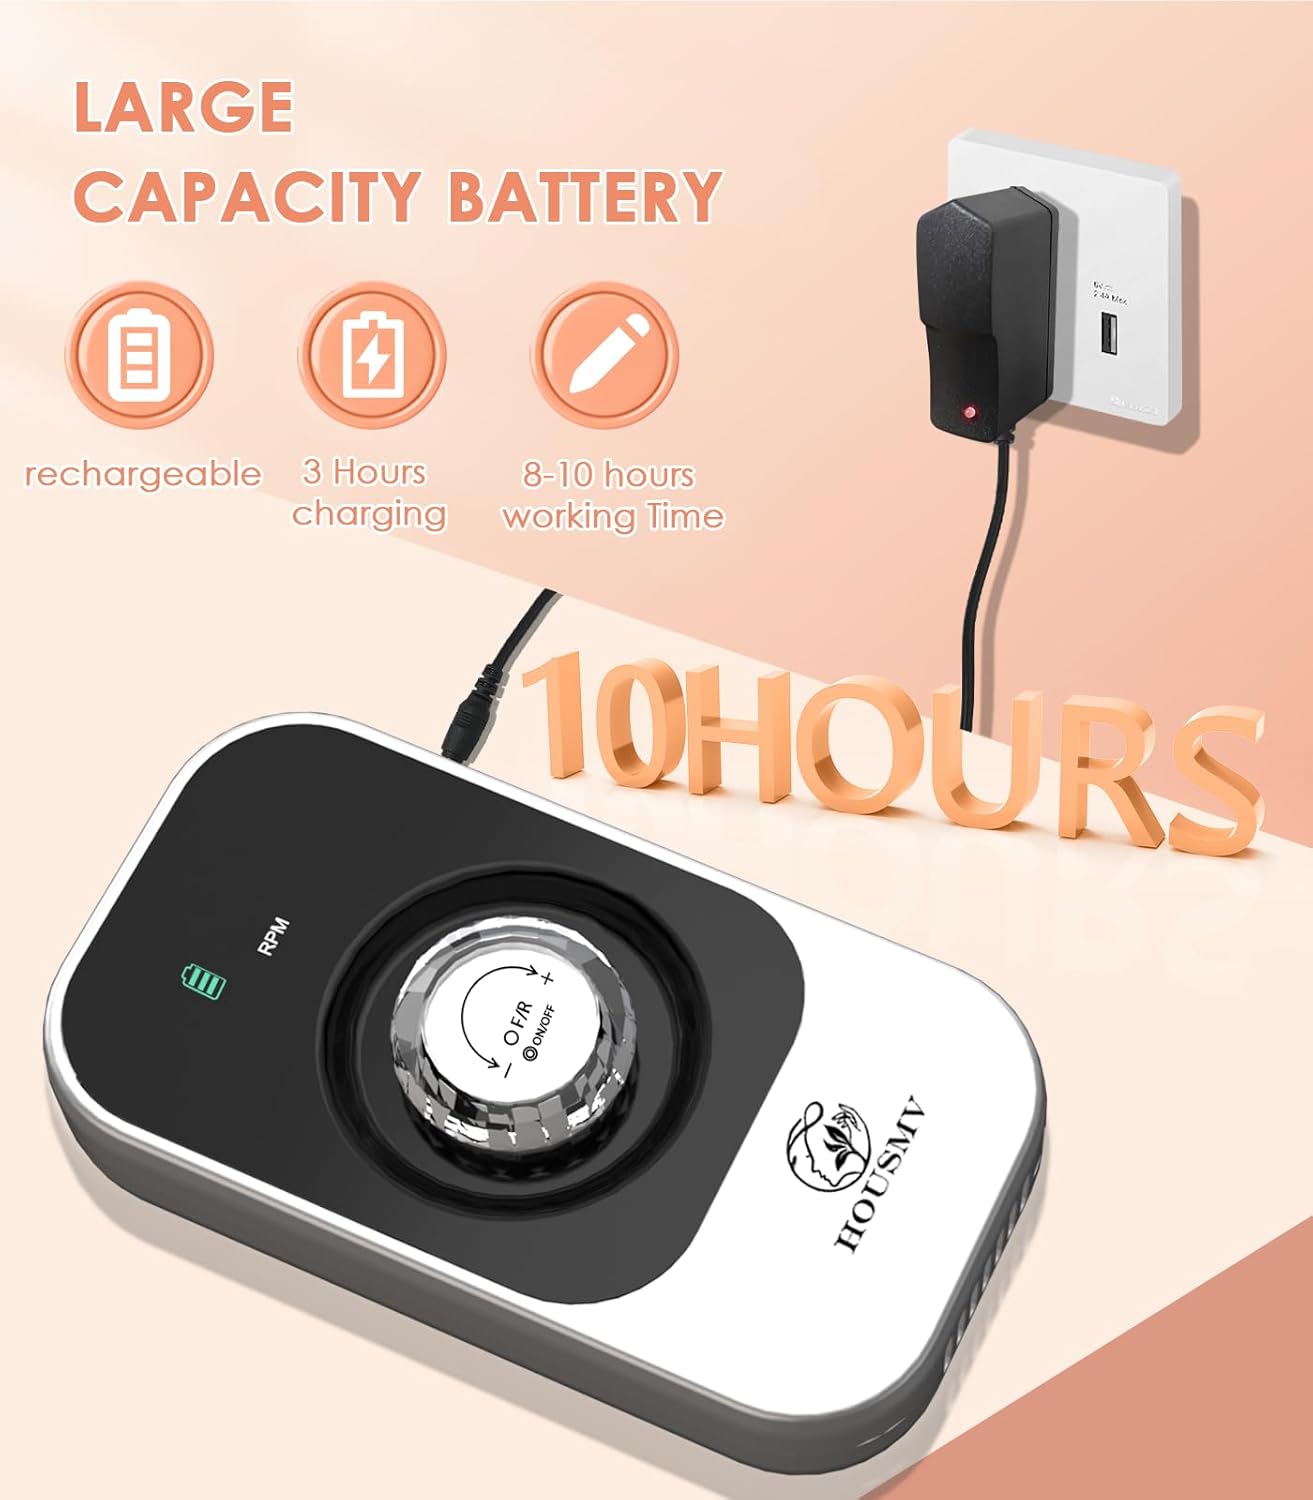
Image: The nail drill unit being charged, illustrating the charging process and battery life.
3.2 Attaching a Drill Bit
The handpiece features a twist-lock system for secure bit attachment.
- Unlock: Twist the chuck handle of the handpiece counter-clockwise (to the left) until it loosens.
- Insert Bit: Insert the desired nail drill bit firmly into the opening.
- Lock: Twist the chuck handle clockwise (to the right) until the bit is securely locked. Ensure the bit is fully seated and cannot be pulled out easily.

Image: Step-by-step guide on how to properly insert and secure a drill bit into the handpiece.
4. Operating Instructions
4.1 Power On/Off and Speed Adjustment
- Power On: Press the power button on the main unit. The LCD display will illuminate.
- Speed Adjustment: Use the rotary knob on the main unit to adjust the rotation speed. The speed (RPM) will be displayed on the LCD screen. Start with a lower speed and gradually increase as needed. Avoid immediately setting to the highest speed to prevent nail damage.
- Power Off: Press the power button again to turn off the device.
4.2 Changing Rotation Direction (F/R)
The device supports both forward (F) and reverse (R) rotation directions, suitable for both left-handed and right-handed users.
- Press the F/R button on the main unit to switch between forward and reverse rotation. The current direction will be indicated on the LCD display.

Image: The LCD display showing battery status, current RPM, and rotation direction (forward or reverse).
4.3 Applications of Drill Bits
The included 7 nail drill bits and 6 sanding bands are designed for various nail care tasks:
- Grinding and Shaping: Use appropriate bits for shaping natural nails, acrylics, or gel extensions.
- Cutting and Carving: For precise work on nail enhancements.
- Polishing: To smooth and buff the nail surface.
- Removing Material: Effective for removing natural acrylic nails, gel polish, dip powder nails, calluses, and cuticles.
- Sanding Bands: Use with the mandrel bit for general surface work and removal.

Image: Visual representation of the various applications for the nail drill, including manicure, pedicure, and removal of different nail enhancements.

Image: Detailed illustration of the various drill bit types included and their specific uses for different nail care tasks.
5. Maintenance
- Cleaning: After each use, gently clean the handpiece and drill bits with a soft brush or cloth to remove dust and debris. Do not use harsh chemicals.
- Storage: Store the device and its accessories in a dry, cool place, away from direct sunlight and moisture. Utilize the provided base for organized storage of the handpiece and bits.
- Bit Care: Regularly inspect drill bits for wear and tear. Replace worn bits to maintain optimal performance and prevent damage to nails.
6. Troubleshooting
Common Issues and Solutions:
- Device Not Turning On / Not Charging:
- Ensure the charging cable is securely connected to both the device and a working power outlet.
- Verify that the power adapter is functioning correctly.
- Allow sufficient time for charging (approximately 3 hours for a full charge).
- Excessive Vibration or Aggressiveness:
- Ensure the drill bit is correctly and securely inserted and locked in the handpiece. A loose bit can cause vibration.
- Check if the drill bit is bent or damaged; replace if necessary.
- Reduce the speed setting. High speeds may feel aggressive, especially for delicate work or sensitive nails.
- Apply gentle pressure. The drill is powerful, and excessive force is not required.
- Reduced Performance / Overheating:
- Clean the handpiece and bits to remove any accumulated dust that might impede performance or heat dissipation.
- Ensure you are taking breaks during prolonged use (do not operate for more than 20 minutes continuously).
- Verify that the ventilation holes on the handpiece are not obstructed.
7. Specifications
| Feature | Specification |
|---|---|
| Model Name | 202 |
| Brand | HOUSMV |
| Material | Aluminum |
| Max Speed | 40,000 RPM |
| Power Source | Battery Powered |
| Voltage | 8.4 Volts |
| Battery Type | 1 A battery (included) |
| Charging Time | Approx. 3 hours |
| Usage Time | 8-10 hours (on full charge) |
| Package Dimensions | 9.06 x 8.27 x 2.6 inches |
| Item Weight | 1.54 Pounds |
| Manufacturer | HOUSMV |