1. Introduction
Thank you for choosing the Keter Darwin 6x4 Garden Shed. This manual provides essential information for the safe assembly, operation, and maintenance of your new garden shed. The Darwin shed is designed with a modern aesthetic, featuring an EVOTECH+ finish that replicates the look and feel of natural wood. It offers a practical storage solution for your garden tools and equipment.
This shed is equipped with a double-leaf door for easy access, two large front windows and a polycarbonate skylight for natural illumination, ventilation holes for continuous airflow, integrated flooring, and a padlock-ready locking mechanism for security.

Image 1.1: The Keter Darwin 6x4 Garden Shed, showcasing its sage green color and wood-effect finish.
2. Safety Information
Warning: This product is heavy (approximately 61 kg) and requires careful assembly. It is recommended for outdoor use only. Do not attempt to lift the product alone. Always consult the assembly instructions provided in the packaging and ensure the structure is stable once assembled.
Ensure the shed is installed on a level surface that allows for adequate water drainage to prevent water accumulation and potential damage. Keep all small parts out of reach of children during assembly.
3. Components and Parts List
Before beginning assembly, verify that all components listed in the packaging's parts list are present and undamaged. Each part is typically numbered for easy identification. If any parts are missing or damaged, please contact Keter customer support.
Key components include:
- Double-wall EVOTECH+ panels (walls, roof)
- Metal reinforcement frame
- Integrated floor panel
- Double-leaf door set with handle and locking mechanism
- Front windows and polycarbonate skylight
- Ventilation grilles
- Fasteners (screws, bolts, etc.)

Image 3.1: Interior view of a Keter Darwin shed, showing potential for shelving and organized storage.
4. Setup and Assembly Instructions
Assembly typically requires two people and can take several hours. Follow the detailed graphical instructions provided in your product packaging. A battery-powered screwdriver is highly recommended for efficient assembly.
4.1 Site Preparation
- Choose a flat, level surface for installation. An uneven base can lead to alignment issues, especially with doors and roof panels.
- Ensure adequate space around the shed for assembly and future access.
- Clear the area of any debris or obstacles.
4.2 Step-by-Step Assembly Overview
- Base Assembly: Position the integrated floor panel on your prepared level surface.
- Wall Panel Installation: Begin attaching the double-wall EVOTECH+ panels to the base, following the numbered sequence in the manual. Ensure panels interlock correctly.
- Frame Reinforcement: Install the metal reinforcement frame elements as indicated to provide structural integrity.
- Door Frame and Doors: Assemble the door frame and attach the double-leaf doors. Pay close attention to the alignment of hinges and the handle mechanism. (Note: Some users have reported needing to slightly enlarge screw holes for the handle or metal parts for a smoother fit. Proceed with caution if this is necessary.)
- Window and Skylight Installation: Insert the front windows and the polycarbonate skylight into their designated slots.
- Roof Assembly: Carefully assemble and attach the roof panels. Ensure all connections are secure to prevent leaks. The roof is designed to withstand snow loads up to 75 Kg/m².
- Ventilation Grilles: Install the ventilation grilles for proper airflow.
- Final Checks: Verify all screws are tightened, and the structure is stable. Test the doors and locking mechanism.

Image 4.1: Two individuals working together to assemble a wall panel of the shed, highlighting the recommended two-person assembly.
5. Operating Instructions
The Keter Darwin 6x4 Garden Shed is designed for general outdoor storage. To operate effectively:
- Door Operation: Open and close the double-leaf doors smoothly. Avoid forcing them if they catch.
- Locking: Utilize the padlock-ready mechanism to secure your belongings. A padlock is not included.
- Ventilation: The integrated ventilation holes ensure continuous airflow. Do not block these openings.
- Storage Capacity: Store items within the shed's internal dimensions (176x113x212H cm). Avoid overloading shelves or leaning heavy objects against the walls.
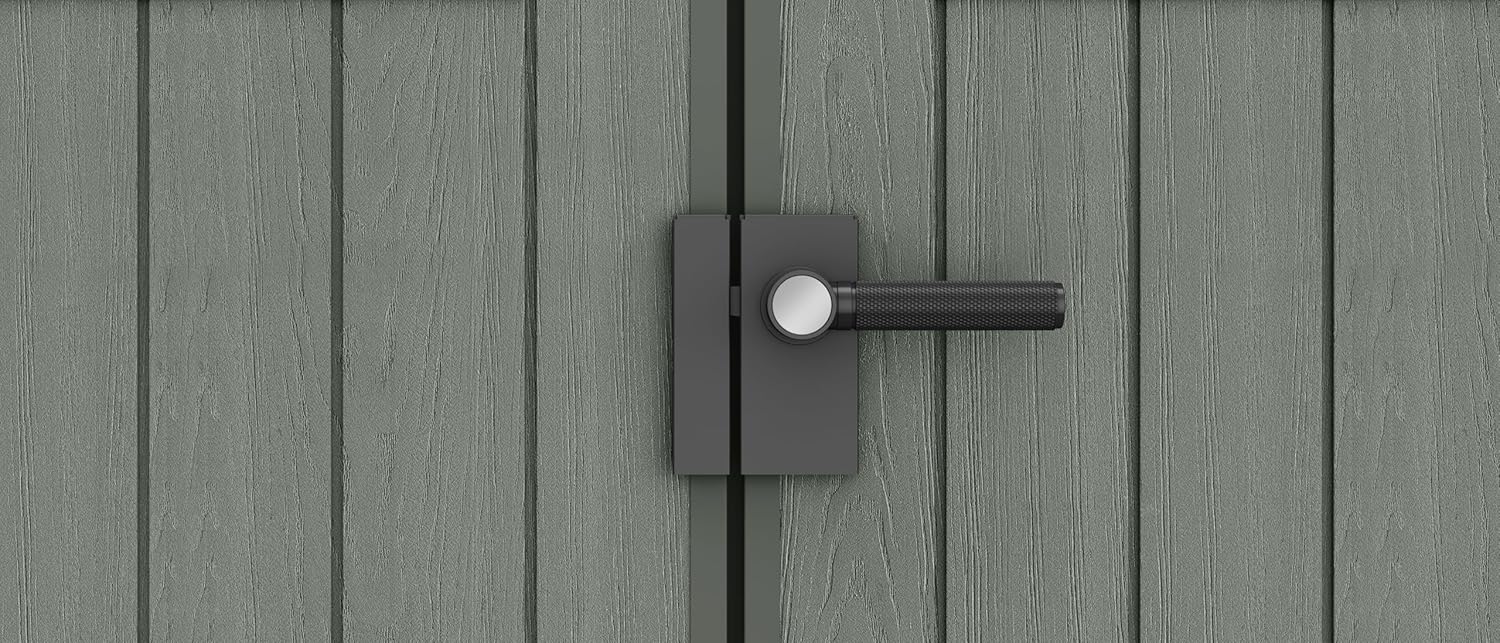
Image 5.1: A close-up of the shed's door handle and locking mechanism, designed for use with a padlock.
6. Maintenance
The Keter Darwin 6x4 Garden Shed is constructed from durable resin with UV protection and is designed to be maintenance-free. However, regular cleaning and occasional checks can prolong its lifespan and appearance.
- Cleaning: Clean the shed periodically with mild soap and water. Avoid abrasive cleaners or harsh chemicals that could damage the EVOTECH+ finish.
- Drainage: Ensure the area around the shed remains clear of debris to allow for proper water drainage.
- Structural Check: Periodically inspect all fasteners and connections to ensure they remain tight and secure.
- Snow Load: While the roof is designed for snow loads up to 75 Kg/m², it is advisable to remove excessive snow accumulation to prevent undue stress.

Image 6.1: Raindrops on the shed's roof, illustrating its weather-resistant properties.
7. Troubleshooting
This section addresses common issues you might encounter with your garden shed.
7.1 Condensation Inside the Shed
Issue: Moisture or condensation forms on the interior walls, especially during cooler weather.
Solution:
- Ensure the ventilation grilles are not blocked.
- Consider adding additional ventilation if the problem persists, especially in humid climates.
- Avoid storing wet items inside the shed without allowing them to dry first.
- Ensure the shed is installed on a well-drained area to prevent ground moisture from entering.
7.2 Doors Not Closing Properly
Issue: Doors rub or do not align correctly when closing.
Solution:
- Verify that the shed is installed on a perfectly level surface. Uneven ground is a common cause of door misalignment.
- Check that all wall panels and the door frame are securely fastened and correctly aligned according to the assembly instructions.
- Inspect hinges for any damage or loose screws and tighten as necessary.
7.3 Water Leakage
Issue: Water is entering the shed.
Solution:
- Inspect the roof panels and skylight for any gaps or improper sealing. Ensure all roof fasteners are tight.
- Check the base of the shed to ensure it is on a level surface and that water is not pooling around the perimeter.
- Examine window seals for any damage.
8. Specifications
| Attribute | Detail |
|---|---|
| Brand | Keter |
| Model Number | K256879 |
| External Dimensions (L x W x H) | 190 x 122 x 221 cm |
| Internal Dimensions (L x W x H) | 176 x 113 x 212 cm |
| Material | Resin (EVOTECH+ finish) |
| Color | Sage Green |
| Weight | 45 kg |
| UV Protection | Yes, UV resistant |
| Snow Load Capacity | Up to 75 Kg/m² |
| Assembly Required | Yes |

Image 8.1: A hand touching the EVOTECH+ wood-effect texture of the shed panel.
9. Warranty and Support
For specific warranty details, please refer to the warranty card included with your product packaging or visit the official Keter website. Keter products are designed for durability and customer satisfaction.
If you encounter any issues not covered in this manual or require further assistance, please contact Keter customer support through their official channels. When contacting support, please have your model number (K256879) and purchase information readily available.


