
JUKI 13111604
JUKI Industrial Overlock Sewing Machine Take-Up Lever Guide Manual
Model: 13111604 | Part Number: 131-11604
Introduction
This manual provides essential information regarding the JUKI Take-Up Lever Guide, part number 131-11604. This genuine JUKI component is designed for specific industrial overlock sewing machine models to ensure proper thread tension and stitch formation. Please read this manual thoroughly before installation and use to ensure safe and effective operation.
Product Overview
The Take-Up Lever Guide (Part # 131-11604, Alternate # 122-81804) is a critical component in the thread path of JUKI industrial overlock sewing machines. It guides the take-up lever, which is responsible for pulling thread from the spool and feeding it to the needle, ensuring consistent stitch quality and preventing thread tangles.
Compatibility: This part is compatible with the following JUKI industrial overlock sewing machine models:
- MO-3614
- MO-3714
- MO-3914
- MO-6714
- MO-6914
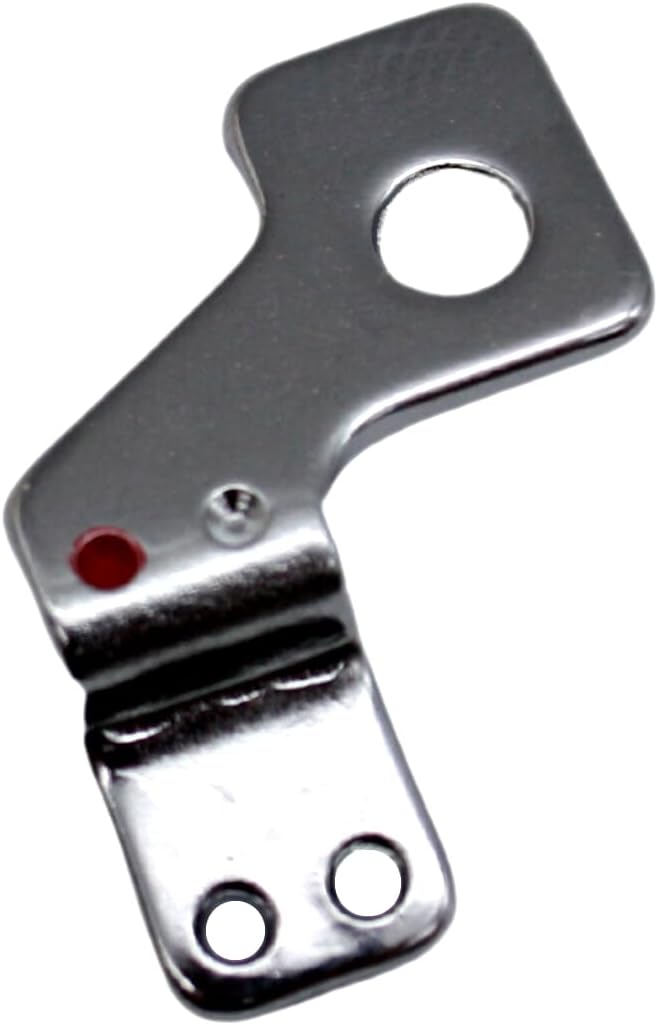
Figure 1: Juki Take-Up Lever Guide, Part # 131-11604. This stainless steel component features a main body with a large circular hole at the top, a smaller hole with a red dot marking on the side, and two smaller circular holes at the bottom for attachment. It is designed to guide the take-up lever on compatible Juki industrial overlock sewing machines.
Installation Instructions
Installation of the Take-Up Lever Guide should be performed by a qualified technician or an experienced user familiar with industrial sewing machine maintenance. Always ensure the machine is powered off and unplugged from its power source before attempting any installation or repair to prevent electrical shock or injury.
- Preparation: Disconnect the sewing machine from its power source. Clear the work area around the take-up lever mechanism to ensure unobstructed access.
- Access: Depending on your specific JUKI model, you may need to remove protective covers or panels to gain access to the take-up lever assembly. Refer to your machine's official service manual for detailed access procedures.
- Removal of Old Part: Carefully identify the existing take-up lever guide. Observe and note its precise orientation and how it is attached. Typically, it is secured by one or more small screws. Use appropriate tools (e.g., a small screwdriver) to loosen and remove these screws, then gently detach the old guide.
- Installation of New Part: Position the new JUKI Take-Up Lever Guide (131-11604) in the exact orientation as the part you removed. Ensure that all mounting holes align perfectly with the corresponding attachment points on the machine frame.
- Secure the Part: Insert and carefully tighten the screws to secure the new guide. Exercise caution not to overtighten, as this can strip threads or damage the part or the machine frame. Verify that the guide is firmly in place and does not wobble.
- Reassembly & Test: Reattach any covers or panels that were removed during the process. Plug in the machine and perform a manual rotation of the handwheel to observe the take-up lever's movement. Ensure it moves freely and correctly through the new guide without obstruction. Finally, perform a test stitch on scrap fabric to verify proper operation and stitch quality.
Operating Principle
The Take-Up Lever Guide ensures the smooth and precise movement of the take-up lever during the sewing cycle. As the needle penetrates the fabric, the take-up lever moves upwards, pulling thread from the spool and creating the necessary slack for stitch formation. As the needle rises, the lever moves downwards, feeding the correct amount of thread to form the stitch and tightening the loop. The guide maintains the lever's alignment and reduces friction, contributing significantly to consistent stitch formation, preventing thread breakage, and avoiding skipped stitches.
Maintenance
To ensure the longevity and optimal performance of your JUKI Take-Up Lever Guide and the overall sewing machine, consider the following maintenance tips:
- Regular Cleaning: Periodically inspect the guide and the surrounding area for lint, dust, or thread fragments that may accumulate during operation. Use a soft brush, lint-free cloth, or compressed air to carefully clean the area around the guide.
- Inspection: Regularly check the guide for any visible signs of wear, bending, cracks, or other damage. A worn or damaged guide can lead to inconsistent thread tension, poor stitch quality, and increased friction.
- Lubrication: While the guide itself may not require direct lubrication, ensuring surrounding moving parts are properly oiled according to your sewing machine's service manual will reduce overall wear and tear on the entire mechanism.
Troubleshooting
If you experience issues related to the take-up lever's function or overall stitch quality, the guide may be a contributing factor. Consider the following common problems and potential causes:
- Inconsistent Stitching/Skipped Stitches: A bent, worn, or misaligned guide can cause the take-up lever to move erratically or not provide proper thread tension, leading to uneven stitches or skipped stitches. Inspect the guide for physical damage or improper installation.
- Thread Breakage: Sharp edges, burrs, or excessive friction on a damaged guide can fray and break the thread as it passes through. Carefully inspect the thread path through the guide for any rough spots.
- Unusual Noise: If the take-up lever is rubbing excessively against a misaligned or damaged guide, it may produce unusual grinding, squeaking, or clicking noises during machine operation.
If any of these issues are observed and can be traced back to the take-up lever guide, replacement of the part is recommended. Always ensure the machine is properly threaded, and tension settings are correctly adjusted before attributing issues solely to hardware components.
Specifications
| Attribute | Detail |
|---|---|
| Part Number | 131-11604 |
| Alternate Part Number | 122-81804 |
| Manufacturer | JUKI |
| Material | Stainless Steel |
| Compatibility | JUKI MO-3614, MO-3714, MO-3914, MO-6714, MO-6914 Overlock Machines |
Warranty and Support
Warranty: The manufacturer states that warranty is "Not applicable" for this specific part. Please refer to the terms and conditions of your purchase from the seller for any specific return, exchange, or limited warranty policies they may offer.
Support: For technical assistance, detailed installation guidance, or further inquiries regarding the function of this part within your JUKI sewing machine, please contact an authorized JUKI service center or your original supplier. Always provide your machine's full model number and the part number (131-11604) when seeking support to ensure accurate assistance.
Ask a question about this manual
Ask about setup, troubleshooting, compatibility, parts, safety, or missing instructions. Manuals+ will review the question and use this page’s manual context to help answer it.