1. Introduction
Thank you for purchasing the Bella Depot 52" Modern Reversible Crystal Ceiling Fan. This manual provides detailed instructions for the safe installation, operation, and maintenance of your new ceiling fan. Please read all instructions carefully before beginning installation and retain this manual for future reference.
2. Safety Information
To reduce the risk of electric shock, fire, or personal injury, always follow these basic safety precautions:
- Read all instructions: Before installing or operating the fan, read all safety information and instructions.
- Electrical safety: Ensure the power is turned off at the circuit breaker or fuse box before beginning installation. All electrical wiring must be performed by a qualified electrician and conform to local and national electrical codes.
- Mounting: The fan must be mounted to a structurally sound ceiling joist or outlet box capable of supporting a minimum of 35 lbs (15.9 kg). Use only outlet boxes marked "Acceptable for Fan Support."
- Blade clearance: Ensure there is at least 7 feet (2.1 meters) of clearance from the floor to the bottom edge of the fan blades. Maintain at least 30 inches (76 cm) from the wall to the blade tips.
- Avoid contact: Do not insert objects into the path of the fan blades while the fan is operating.
- Light bulbs: Use only the type and wattage of light bulbs specified for the fan's light kit.
3. Package Contents
Verify that all components listed below are present in your package. If any parts are missing or damaged, contact Bella Depot customer service.
- Fan Motor Assembly
- Fan Blades (5)
- Blade Brackets
- Downrod and Canopy
- Mounting Bracket
- Light Kit Assembly
- Crystal Pendants and Fixture
- Remote Control with Wall Mount and Batteries
- Hardware Pack (screws, washers, wire nuts)
- Pull Chains
4. Setup and Installation
Follow these steps for proper installation of your ceiling fan. It is recommended to have two people for installation.
4.1 Prepare for Installation
- Turn off power at the main circuit breaker.
- Clear the work area and gather necessary tools (screwdriver, wire strippers, ladder).
4.2 Install Mounting Bracket
- Secure the mounting bracket to the ceiling outlet box using the screws provided. Ensure the bracket is firmly attached to a ceiling joist or a fan-rated outlet box.
4.3 Assemble Downrod and Motor
- Feed the electrical wires from the fan motor through the downrod.
- Insert the downrod into the motor housing and secure it with the provided pin and screw.
- Carefully lift the fan motor assembly and hang it on the mounting bracket hook.
4.4 Wiring Connections
Connect the fan wires to the household wires according to the wiring diagram in your specific instruction sheet. Typically:
- Green/Bare Copper wire (Ground) to Green/Bare Copper wire (Ground)
- White wire (Neutral) to White wire (Neutral)
- Black wire (Live/Hot) to Black wire (Live/Hot)
Use the provided wire nuts and ensure all connections are secure.
4.5 Attach Fan Blades
Attach each fan blade to its blade bracket using the screws provided. Then, attach the blade brackets to the motor housing. Ensure all screws are tightened securely.
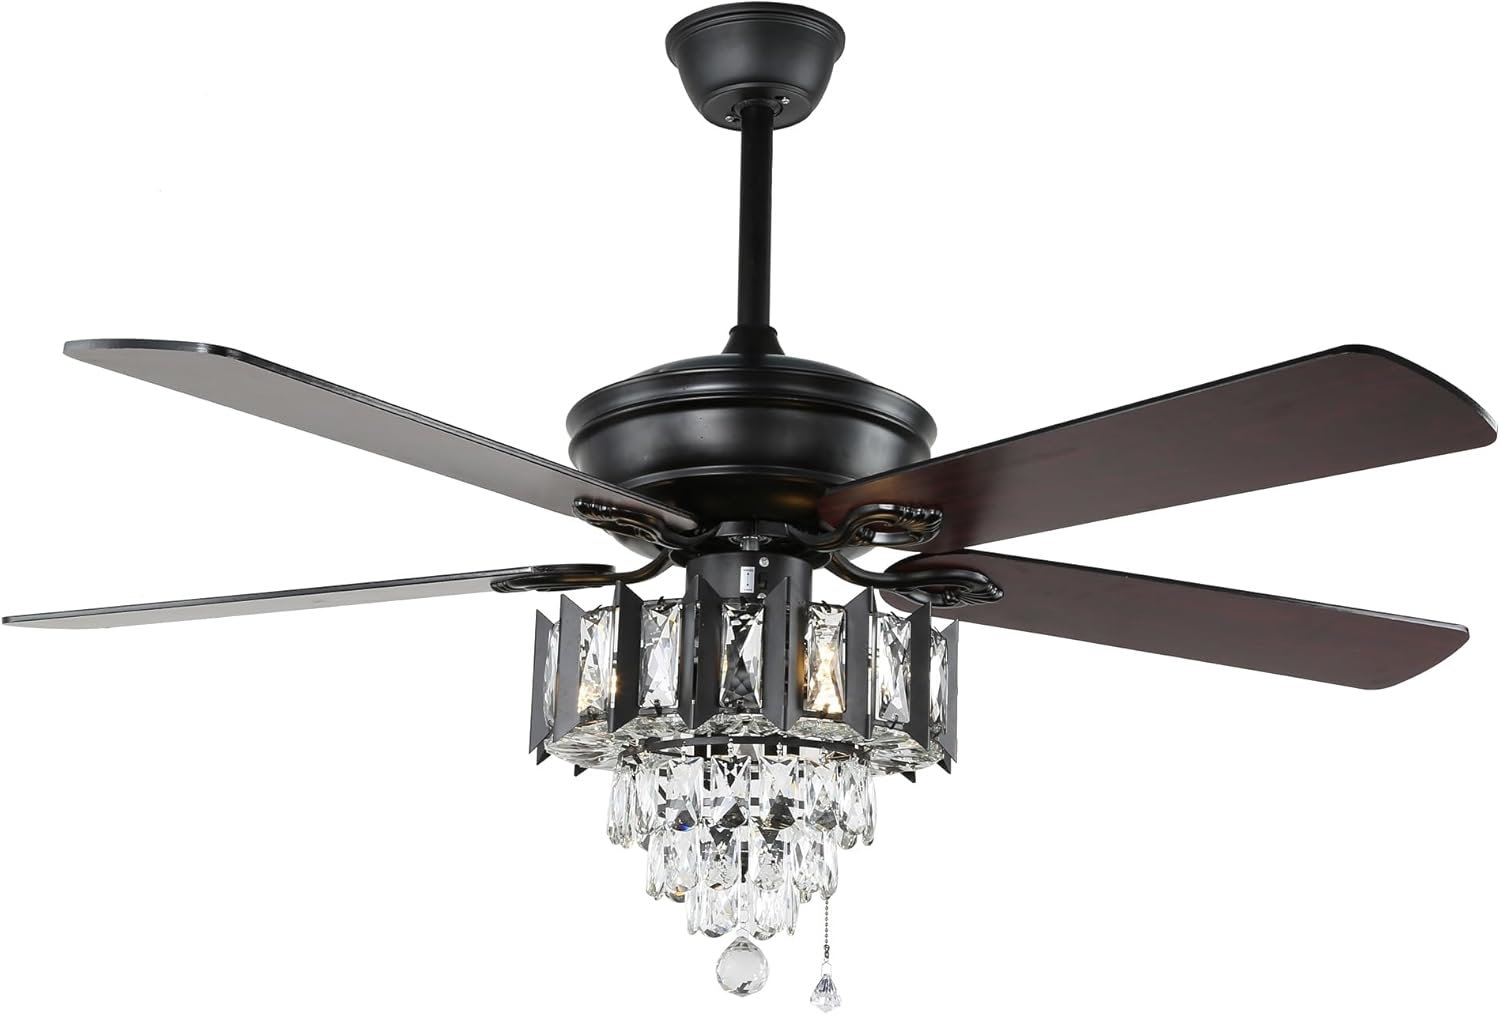
Image: The Bella Depot 52-inch ceiling fan showing its five reversible blades, with one side featuring a dark wood grain finish and the other a solid black finish, attached to the motor housing. This illustrates the blade assembly step.
4.6 Install Light Kit and Crystal Pendants
- Connect the light kit wires to the fan motor wires as instructed.
- Secure the light kit assembly to the bottom of the fan motor.
- Carefully attach the crystal pendants to the light kit fixture. Refer to the specific diagram for crystal placement.
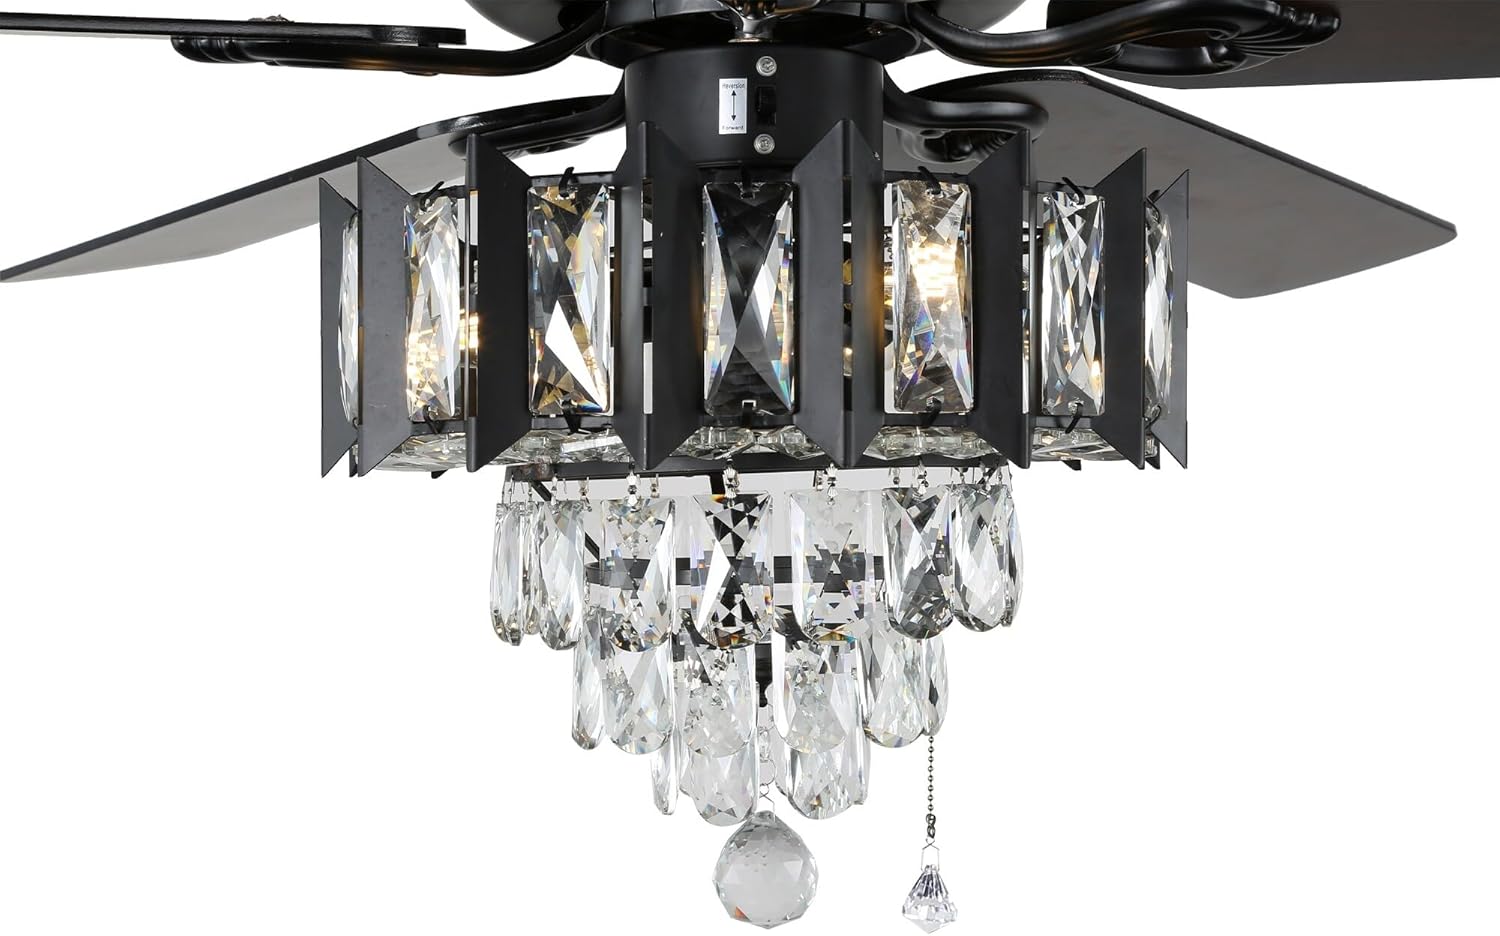
Image: A detailed close-up of the Bella Depot ceiling fan's light kit, highlighting the intricate crystal pendants suspended from a black metal frame. This image is relevant for understanding the crystal attachment process.
4.7 Final Assembly
- Install the canopy over the mounting bracket, securing it with screws.
- Install light bulbs (not included, typically E12 base).
- Restore power at the circuit breaker.
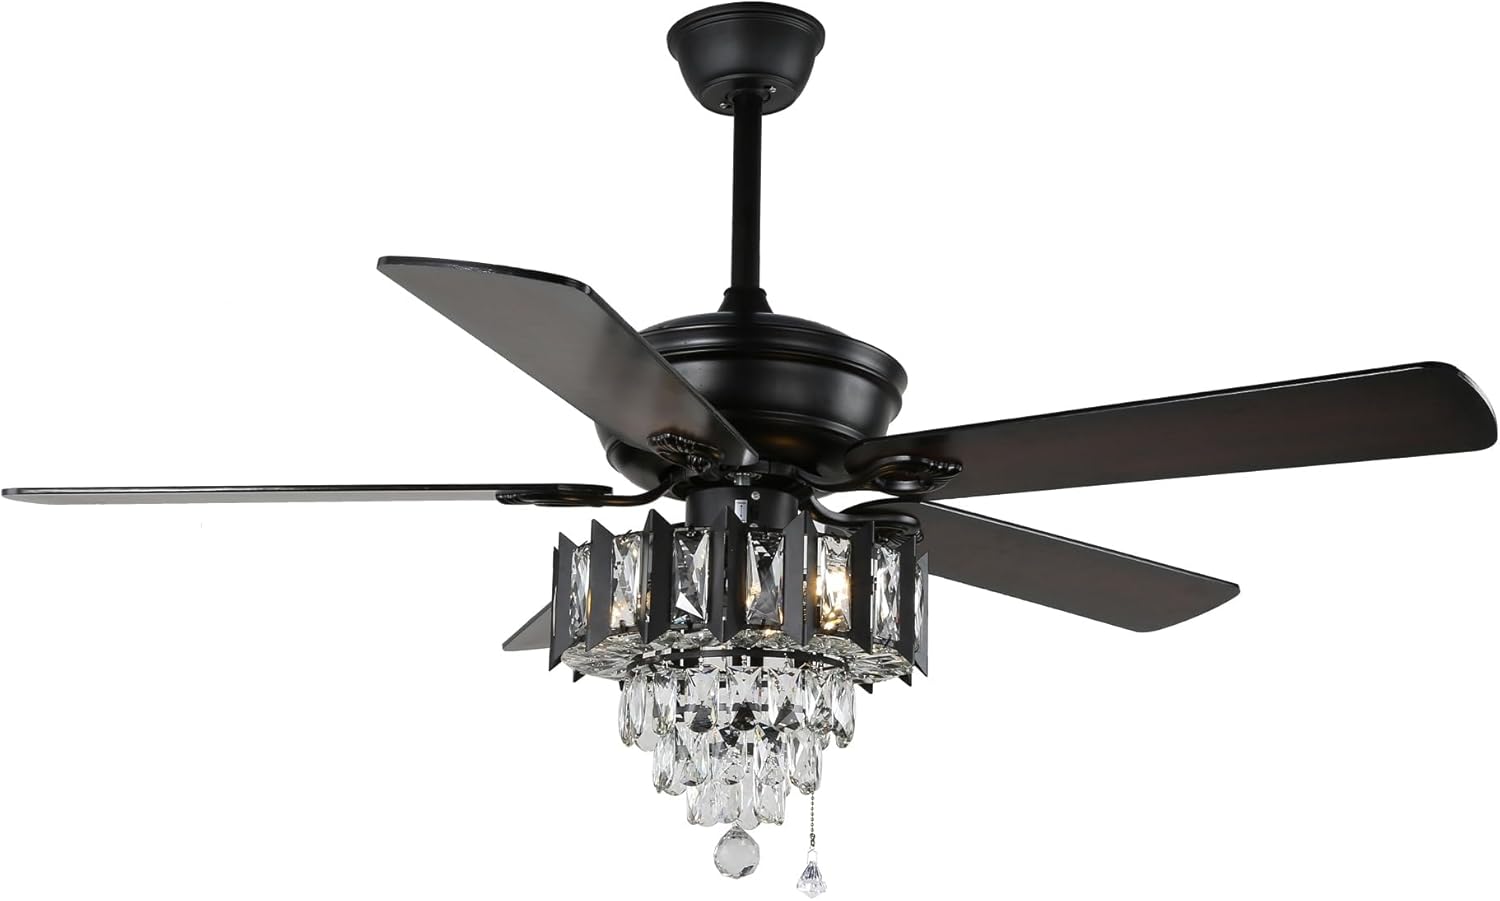
Image: A complete view of the Bella Depot 52-inch Modern Reversible Crystal Ceiling Fan, showcasing its black blades and the integrated crystal light kit, ready for operation.
5. Operating Instructions
Your Bella Depot ceiling fan can be operated using the included remote control or the integrated pull chains.
5.1 Remote Control Operation
The remote control allows convenient operation of the fan and light functions from anywhere in the room.
- Fan ON/OFF: Press the fan button to turn the fan on or off.
- Fan Speed: Use the speed buttons (e.g., 1, 2, 3) to cycle through low, medium, and high fan speeds.
- Light ON/OFF: Press the light button to turn the light kit on or off.
- Light Dimmer: If your fan supports dimmable bulbs, press and hold the light button to adjust brightness.
- Fan Reverse: Press the reverse button to change the direction of the fan blades (see section 5.3).
5.2 Pull Chain Operation
Two pull chains are typically provided for manual control:
- Fan Speed Pull Chain: Pull to cycle through fan speeds (High, Medium, Low, Off).
- Light ON/OFF Pull Chain: Pull to turn the light kit on or off.
5.3 Reversible Motor Function
The reversible motor allows you to change the direction of the fan blades for seasonal comfort.
- Summer Mode (Counter-clockwise): Airflow creates a downward breeze, providing a cooling effect.
- Winter Mode (Clockwise): Airflow creates an upward draft, circulating warm air near the ceiling throughout the room.
To change direction, ensure the fan is off and completely stopped. Locate the reverse switch on the fan motor housing (often near the light kit) and slide it to the desired position. Then, turn the fan back on.
6. Maintenance
Regular maintenance ensures optimal performance and extends the life of your ceiling fan.
6.1 Cleaning
- Fan Blades: Dust the fan blades periodically with a soft, lint-free cloth. Do not use abrasive cleaners, as they may damage the finish.
- Motor Housing: Wipe the motor housing with a soft, damp cloth.
- Crystal Pendants: Gently wipe crystals with a soft, damp cloth. For stubborn spots, a mild glass cleaner can be used sparingly on the crystals, avoiding contact with metal parts.
Always turn off the power to the fan at the circuit breaker before cleaning.
6.2 Light Bulb Replacement
- Turn off power to the fan at the circuit breaker.
- Allow bulbs to cool completely before touching.
- Unscrew the old bulb and replace it with a new bulb of the same type and wattage. Refer to the fan's specifications for bulb requirements (e.g., E12 base).
7. Troubleshooting
If you experience issues with your fan, consult the following troubleshooting guide:
| Problem | Possible Cause | Solution |
|---|---|---|
| Fan does not start | No power to the fan Loose wire connections Remote control battery dead | Check circuit breaker/fuse Verify all wire connections are secure (power off first) Replace remote control battery |
| Light kit does not work | Loose wire connections Bulb faulty or loose Light switch/pull chain off | Check light kit wiring (power off first) Replace bulb or tighten it Ensure light switch/pull chain is in the ON position |
| Fan wobbles | Loose blade screws Unbalanced blades Loose mounting bracket | Tighten all blade screws Use a balancing kit (not included) or ensure blades are installed correctly Tighten mounting bracket screws |
| Noisy operation | Loose screws Motor not seated properly Blades hitting an obstruction | Check and tighten all screws Ensure fan is securely mounted Check for any obstructions in the fan's path |
8. Specifications
Key specifications for the Bella Depot 52" Modern Reversible Crystal Ceiling Fan:
| Feature | Detail |
|---|---|
| Brand | Bella Depot |
| Model | 52" Modern Reversible Crystal Ceiling Fan |
| Light Fixture Form | Ceiling |
| Control Method | Remote Control, Pull Chain |
| Shade Material | Crystal |
| Embellishment | Crystal |
| Mounting Type | Ceiling Mount |
| Fixture Type | Non Removable |
| Unit Count | 1.0 Count |
| ASIN | B0CTBJVZP3 |
| UPC | 682601953635 |
| Date First Available | February 29, 2024 |
9. Warranty and Support
For warranty information or technical support, please contact Bella Depot customer service. Keep your purchase receipt as proof of purchase for any warranty claims.


