1. Introduction
The ORAVIX Tonsil Stone Vacuum 3-in-1 Kit is designed for the efficient and comfortable removal of tonsil stones at home. This user-friendly kit provides a safe and effective solution for maintaining oral hygiene and addressing issues related to tonsil stones. It includes a vacuum suction tool, a flushing tool, and a lighted scoop with interchangeable heads to cater to various needs.
2. Product Overview
The ORAVIX Tonsil Stone Vacuum 3-in-1 Kit comprises several components designed for comprehensive tonsil stone management:
- Vacuum Suction Tool: Features a rubber bulb and curved pipe for gentle suction.
- Flushing Tool: Utilizes the same bulb with a different pipe for irrigating tonsils.
- Lighted Tonsil Stone Scoop: Equipped with an integrated LED light and multiple interchangeable heads for precise removal of visible stones.
- Cleaning Brush: For maintaining hygiene of the tools.
- Extra Batteries: For the lighted scoop.
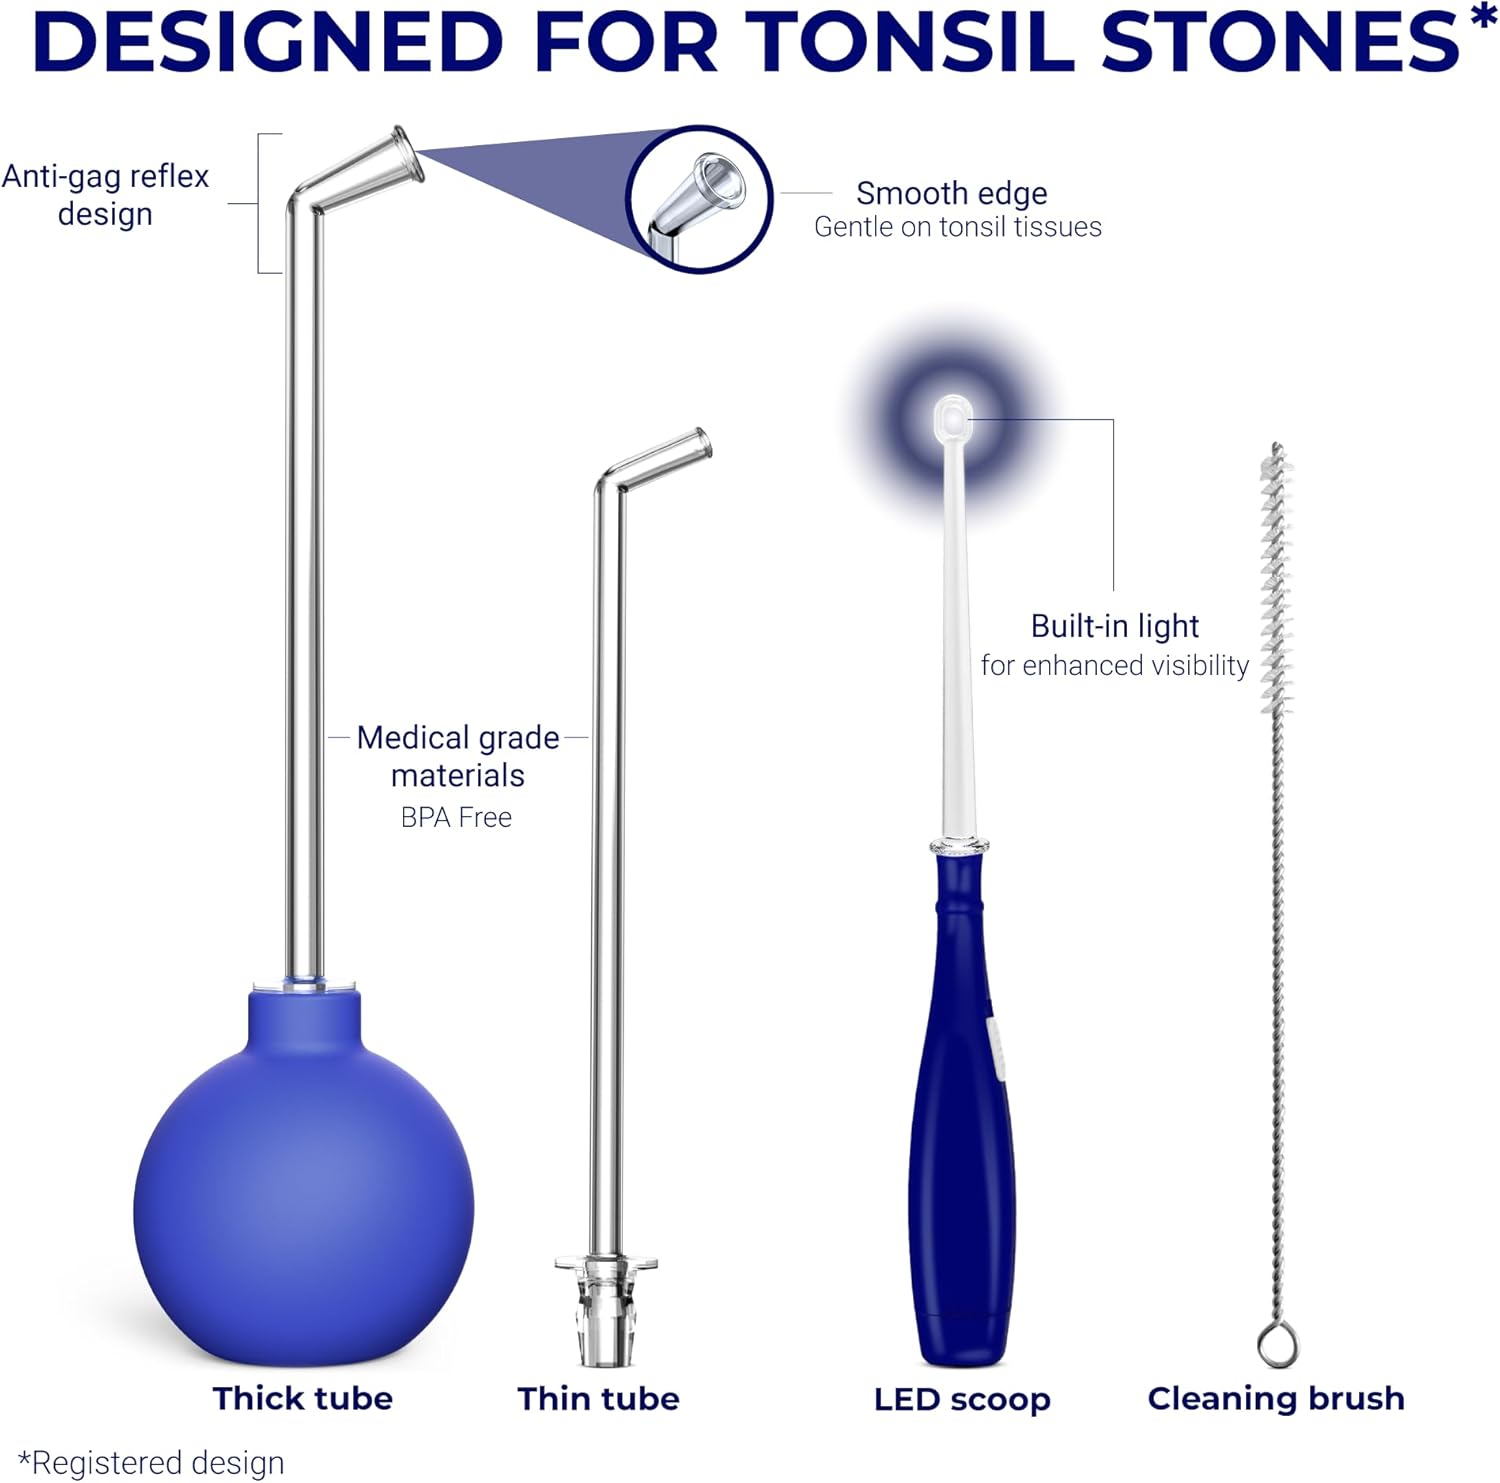
Figure 2.1: Overview of the ORAVIX Tonsil Stone Vacuum 3-in-1 Kit components.

Figure 2.2: The complete ORAVIX Tonsil Stone Kit.
3. Setup
Before first use, ensure all components are clean and sterilized. The kit is designed for easy assembly and use without external power sources or batteries for the vacuum tool.
3.1 Assembling the Vacuum/Flushing Tool
- Select the appropriate clear pipe (thick or thin, depending on the size of the tonsil stone or area to be flushed).
- Firmly attach the selected pipe to the blue rubber bulb. Ensure a secure fit to maintain suction.
3.2 Preparing the Lighted Tonsil Stone Scoop
- Unscrew the base of the blue handle to access the battery compartment.
- Insert the provided batteries, ensuring correct polarity.
- Screw the base back on. Press the button on the handle to activate the LED light.
- Select one of the four interchangeable heads (various loop and scoop designs) and attach it securely to the lighted handle.
4. Operating Instructions
Follow these steps for effective tonsil stone removal and oral hygiene:
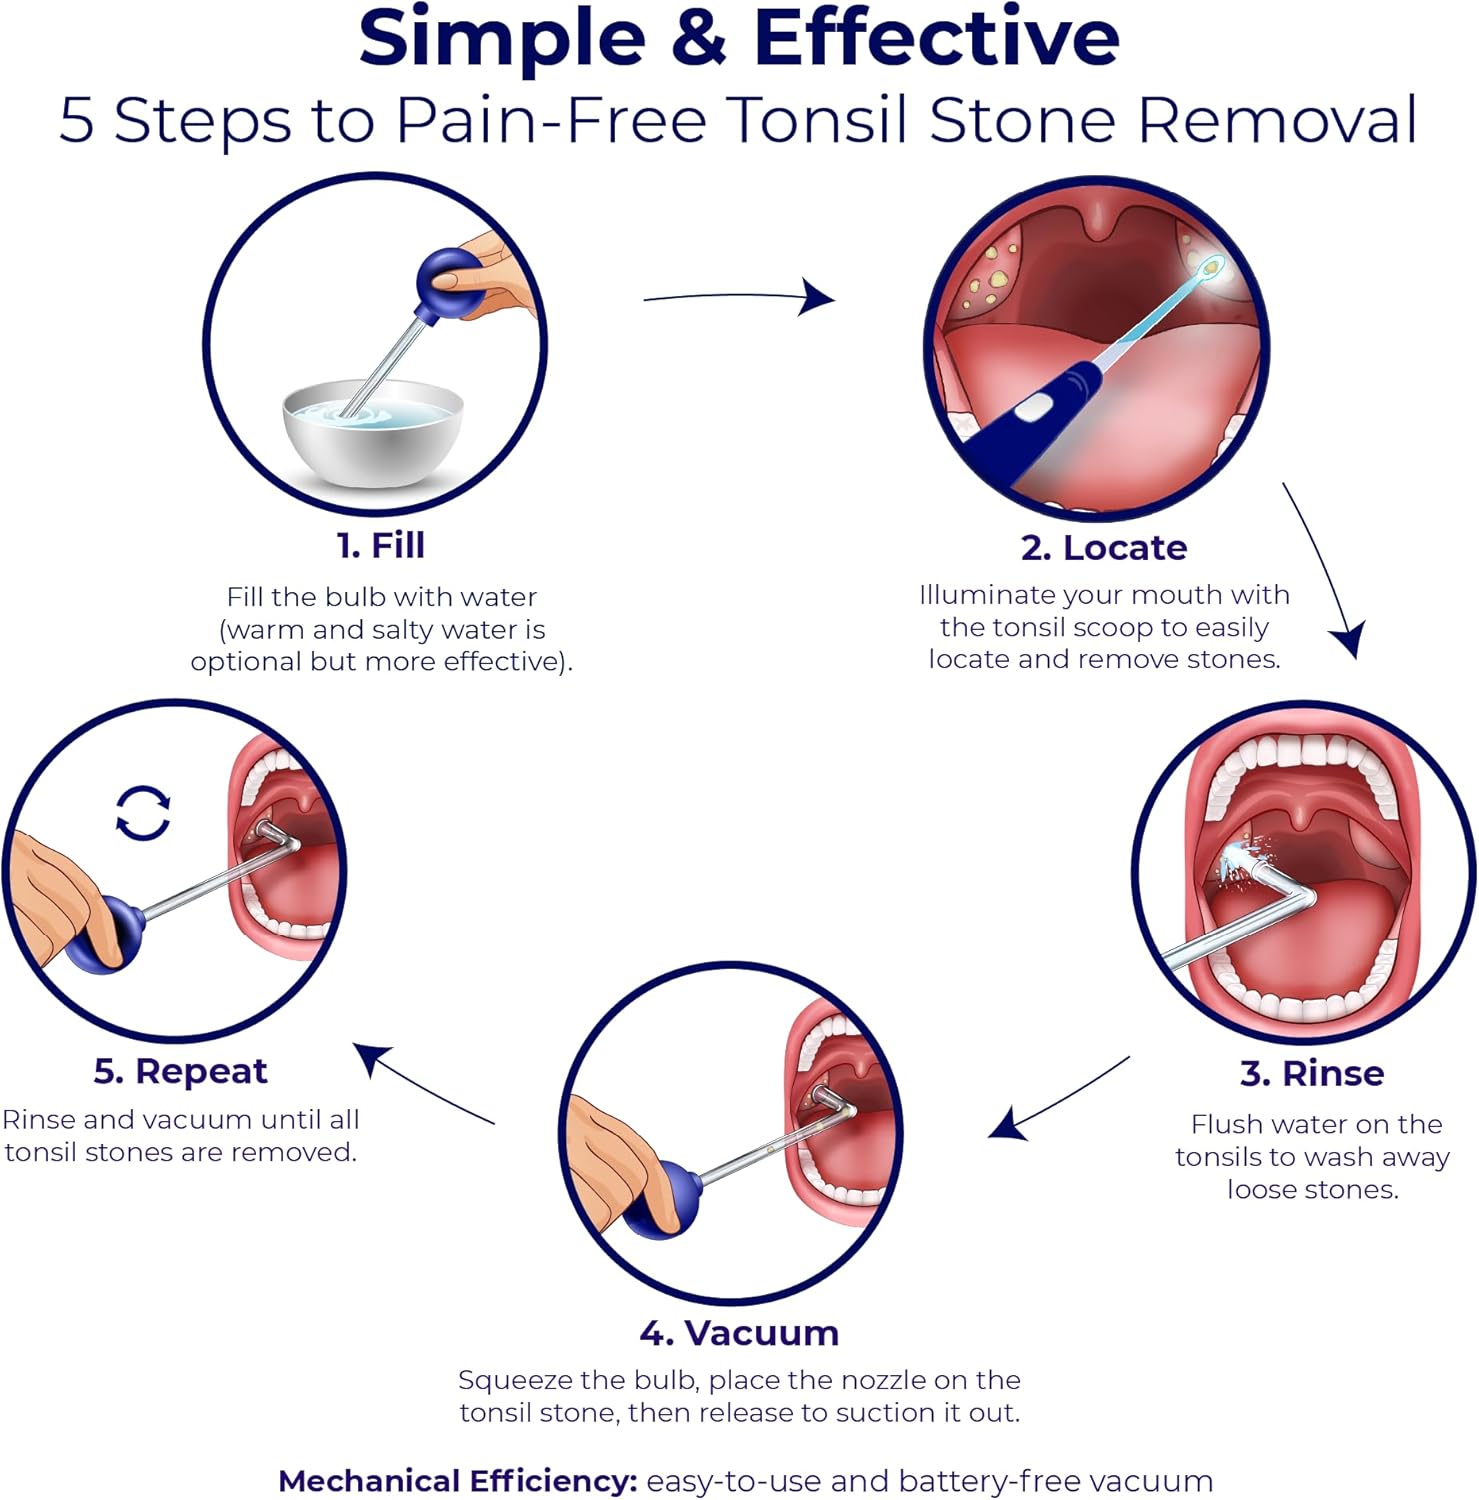
Figure 4.1: Simple & Effective 5 Steps to Pain-Free Tonsil Stone Removal.
4.1 Using the Vacuum Suction Tool
- Fill: Submerge the tip of the pipe into a bowl of warm water (salty water is optional for enhanced effectiveness). Squeeze the rubber bulb to expel air, then release to draw water into the bulb.
- Locate: Use the lighted tonsil stone scoop to illuminate your mouth and identify the tonsil stones.
- Rinse (Optional): Gently flush water onto the tonsils by squeezing the bulb to dislodge loose stones.
- Vacuum: Position the tip of the pipe directly over a tonsil stone. Squeeze the bulb to create a vacuum, then release to suction the stone out.
- Repeat: Rinse the bulb and pipe, then repeat the vacuuming process until all tonsil stones are removed. Avoid using the device more than 3 times on the same spot to prevent irritation.
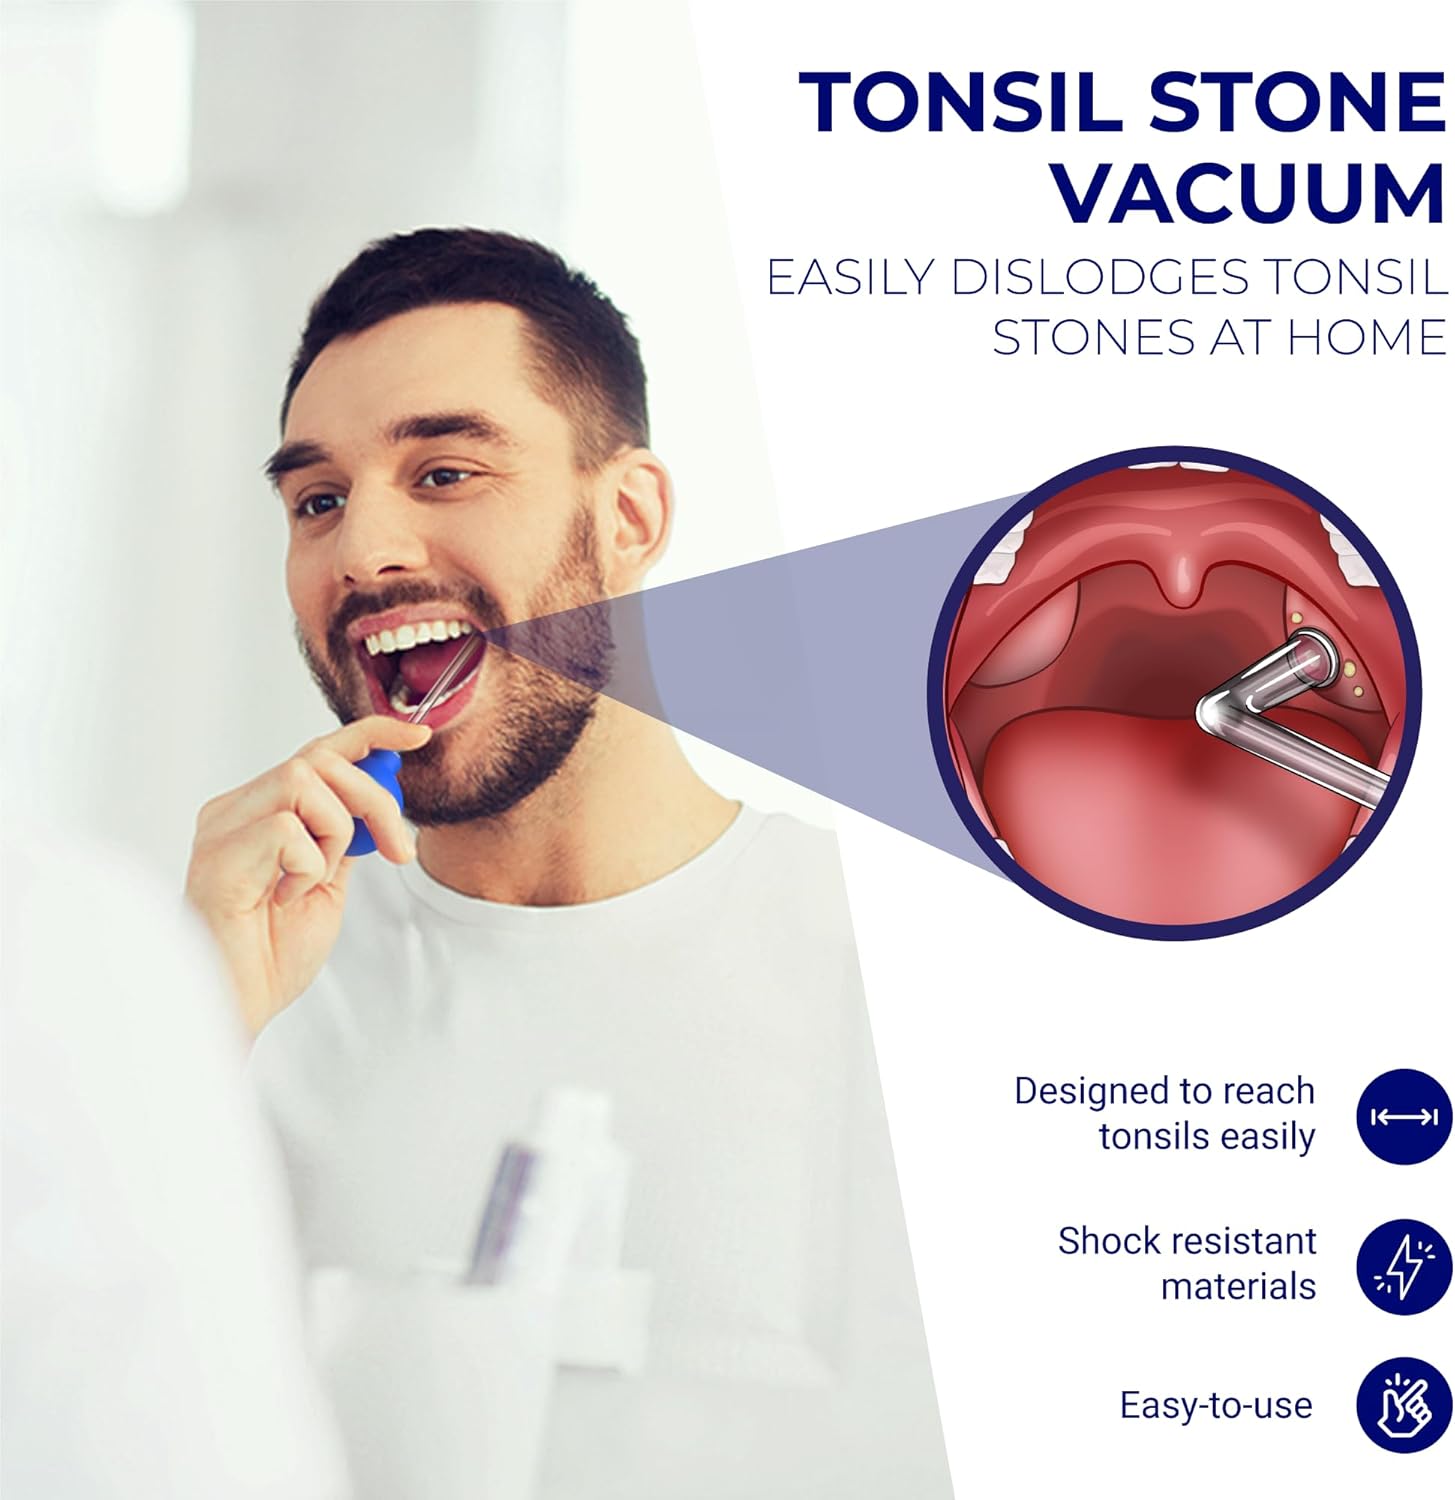
Figure 4.2: Using the Tonsil Stone Vacuum for easy removal.
4.2 Using the Lighted Tonsil Stone Scoop
- Activate Light: Turn on the LED light on the handle for enhanced visibility.
- Position: Gently guide the selected scoop head towards the tonsil stone.
- Dislodge: Carefully and gently dislodge the tonsil stone using the scoop. Avoid excessive force to prevent injury.
- Remove: Once dislodged, the stone can be removed from the mouth.

Figure 4.3: Using the Lighted Tonsil Stone Scoop for precise removal.
5. Maintenance and Cleaning
Proper cleaning and maintenance ensure the longevity and hygiene of your ORAVIX Tonsil Stone Vacuum kit.
- Disassemble: After each use, separate the rubber bulb from the pipe(s) and remove any attached heads from the lighted scoop.
- Rinse: Rinse all components thoroughly under warm running water.
- Clean: Use the provided cleaning brush to clean the inside of the pipes and any intricate parts of the scoop heads. Ensure no debris remains.
- Sterilize (Optional): For enhanced hygiene, components can be sterilized using a mild oral antiseptic solution or by soaking in warm, soapy water. Rinse thoroughly after sterilization.
- Dry: Allow all components to air dry completely before reassembling or storing.
- Storage: Store the kit in a clean, dry place, preferably in its original packaging or a dedicated storage container.
6. Troubleshooting
If you encounter any issues while using your ORAVIX Tonsil Stone Vacuum kit, refer to the following common solutions:
- Weak Suction: Ensure the pipe is firmly attached to the rubber bulb. Check for any cracks or damage in the pipe or bulb that might compromise the seal.
- Difficulty Dislodging Stones: Try using warm salty water for flushing before attempting vacuum removal. For stubborn stones, gently use the lighted scoop to loosen them first.
- Lighted Scoop Not Working: Check if the batteries are inserted correctly and are not depleted. Replace with new batteries if necessary.
- Gag Reflex: If you experience a strong gag reflex, try to relax and breathe deeply through your nose. Start with shorter, gentler attempts and gradually increase duration as you become more comfortable.
- Irritation: Ensure you are using the tools gently and not applying excessive force. If irritation persists, discontinue use and consult a healthcare professional.
7. Specifications
| Feature | Detail |
|---|---|
| Model Number | TSV |
| Package Dimensions | 6.93 x 3.98 x 2.17 inches |
| Item Weight | 5.29 ounces |
| Material | Medical-grade materials, shock-resistant plastic |
| Power Source (Vacuum) | Manual (no batteries required) |
| Power Source (Lighted Scoop) | Batteries (included) |
8. Important Safety Information
- This product is intended for personal use only. Do not share with others to prevent cross-contamination.
- Always clean and sterilize the tools before and after each use.
- Use the tools gently. Avoid applying excessive force or sharp movements that could injure your tonsils or throat.
- If you experience pain, bleeding, or severe discomfort, discontinue use immediately and consult a healthcare professional.
- Keep out of reach of children.
- Statements regarding dietary supplements have not been evaluated by the FDA and are not intended to diagnose, treat, cure, or prevent any disease or health condition.
9. Warranty and Support
For information regarding product warranty, returns, or customer support, please refer to the purchase platform or contact ORAVIX customer service directly. Keep your proof of purchase for any warranty claims.


