1. Introduction
The Xilecam Action Camera X2T is a versatile and user-friendly device designed for capturing high-quality video and photos in various environments. Featuring 1080P 30FPS video recording, a 2-inch LCD screen, and Wi-Fi connectivity, it is suitable for beginners and enthusiasts alike. Its robust design includes deep waterproof capabilities up to 40 meters (131 feet) with the included case, making it ideal for water sports and outdoor adventures. The camera also functions as a Full HD webcam and supports car mode for dash cam use.

Figure 1: Xilecam Action Camera X2T with its waterproof housing and two rechargeable batteries.
2. What's in the Box
Your Xilecam Action Camera X2T package includes the following items:
- Camera Body
- Waterproof Case
- 2 x 1050mAh Rechargeable Batteries
- USB Charging Cable
- Various Multi-Function Accessories (e.g., bracket head, helmet mounts)
- User Manual (Quick Start Guide)
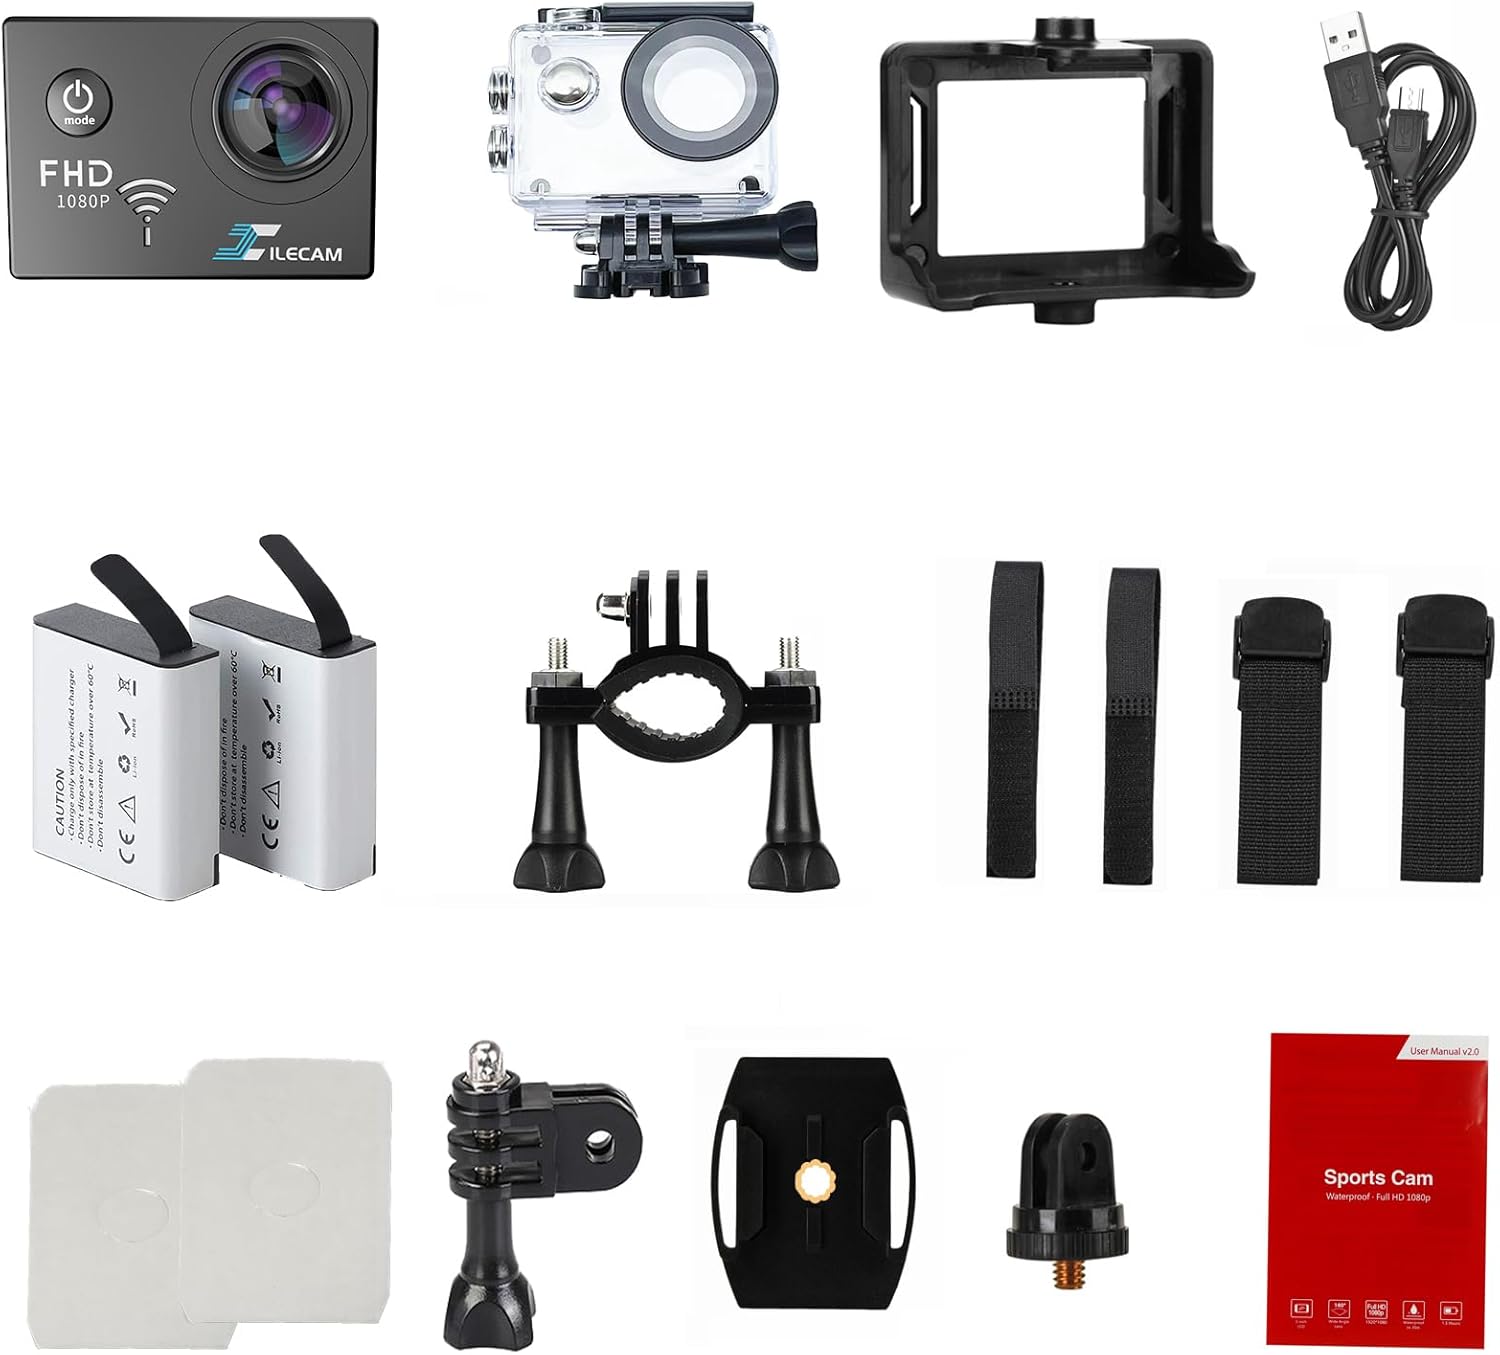
Figure 2: Overview of the Xilecam Action Camera X2T and its comprehensive set of accessories.
3. Initial Setup
3.1. Battery Installation and Charging
- Open the battery compartment cover on the bottom of the camera.
- Insert a fully charged 1050mAh battery, ensuring correct polarity.
- Close the battery compartment cover securely.
- To charge, connect the camera to a USB power source using the provided USB cable. The charging indicator light will illuminate.
3.2. Memory Card Insertion
A Micro SDHC card (8-64GB, Class 10 or higher recommended) is required and not included with the camera. Please purchase one separately.
- Locate the Micro SD card slot on the side of the camera.
- Insert the Micro SD card with the gold contacts facing the back of the camera until it clicks into place.
- To remove, gently press the card until it springs out.
3.3. Powering On/Off
- To power on: Press and hold the Power/Mode button on the top of the camera for a few seconds until the screen illuminates.
- To power off: Press and hold the Power/Mode button again until the screen turns off.
4. Operating the Camera
4.1. Navigating the Interface
The X2T features a 2-inch touchscreen display for easy navigation. Swipe and tap to access different modes and settings.
4.2. Available Modes
Press the 'M' button on the side of the camera to cycle through the main operating modes, or use the touchscreen to select from the following:
- Normal Video: Standard video recording.
- Slow Video: Records video in slow motion.
- Loop Video: Records video in a continuous loop, overwriting older footage.
- Timelapse Video: Captures a series of photos at set intervals and stitches them into a video.
- Normal Photo: Captures single still images.
- Auto Timer Photo: Takes a photo after a set delay.
- Burst Photos: Captures multiple photos in quick succession.
- Timelapse Photo: Captures a series of still images at set intervals.
4.3. Zoom Functionality
While in video or photo mode, use the '+' and '-' icons on the touchscreen to digitally zoom in or out.
5. Wi-Fi Connectivity and App Usage
The Xilecam Action Camera X2T supports Wi-Fi connectivity, allowing you to connect to a smartphone or tablet via a dedicated app for remote control, live view, and file transfer.
- Download the companion app (e.g., "Fun DV" or "WiFi Camera (Viewer)" as mentioned in some reviews) from your device's app store. Refer to the quick start guide for QR codes or specific app names.
- On the camera, press the dedicated Wi-Fi button (often indicated by an arrow or Wi-Fi symbol) to activate Wi-Fi mode. The Wi-Fi icon will appear on the screen.
- On your smartphone/tablet, go to Wi-Fi settings and connect to the camera's Wi-Fi network (e.g., "Fun DV_9fed" or "ActionCam"). The default password is often provided on the camera screen or in the manual.
- Open the app. You can now control the camera, view live footage, and download/manage files directly from your device.
Video 1: Demonstrates connecting the camera to a smartphone app via Wi-Fi for remote control and file management.
Video 2: Shows the process of connecting the camera to a mobile device and accessing its features through the app.
6. Waterproof Operation
The Xilecam Action Camera X2T is designed for underwater use up to 40 meters (131 feet) when enclosed in its dedicated waterproof case. This makes it suitable for swimming, surfing, diving, and other water-based activities.
- Ensure the camera is dry before placing it inside the waterproof case.
- Open the latch on the waterproof case and carefully insert the camera.
- Close the case securely, ensuring the latch is fully engaged and the rubber seal is free of debris.
- Before first use, it is recommended to test the empty waterproof case underwater to ensure no leaks.

Figure 3: The Xilecam Action Camera X2T securely enclosed in its transparent waterproof case.

Figure 4: The camera being used underwater, demonstrating its waterproof capability for capturing marine life.
7. Full HD Webcam Functionality
The X2T can be utilized as a 1080P webcam, providing clear video at 30 frames per second. This feature is useful for video conferencing, online chats, or direct video recording to a computer.
- Connect the camera to your computer using the USB cable.
- The camera should be recognized as a webcam by your computer's operating system.
- Select the camera as your video input device in your preferred video conferencing or recording software.
8. Car Mode (Dash Cam)
The camera includes a car mode feature, allowing it to function as a dash cam for recording your journeys.
- Mount the camera securely in your vehicle using appropriate accessories (not all car mounts may be included).
- Access the camera settings and enable "Car Mode." This typically enables automatic recording when the vehicle starts and stops.
- Ensure a sufficient capacity Micro SD card is inserted for continuous recording.

Figure 5: The Xilecam Action Camera X2T mounted on a car windshield, illustrating its use as a dash cam.
9. Technical Specifications
| Feature | Specification |
|---|---|
| Brand Name | Xilecam |
| Model Number | X200 (X2T variant) |
| Item Weight | 1.59 ounces |
| Product Dimensions | 1 x 2.3 x 1.6 inches |
| Batteries | 2 Lithium Ion batteries required (included) |
| Color | Black |
| Special Features | 1080P, Speakers, Time Lapse, Timer, Car Mode |
| Photo Sensor Technology | CMOS |
| Video Capture Resolution | 1080p |
| Maximum Focal Length | 26 Millimeters |
| Flash Memory Type | Micro SD (8-64GB, not included) |
| Video Capture Format | AVI |
| Supported Audio Format | AAC |
| Screen Size | 2 Inches |
| Connectivity Technology | USB, Wi-Fi |
10. Maintenance
- Cleaning: Use a soft, dry cloth to clean the camera body and screen. For the lens, use a lens cleaning cloth and solution.
- Waterproof Case: After each use in water, rinse the waterproof case with fresh water and allow it to air dry. Inspect the rubber seal for any damage or debris.
- Storage: Store the camera and accessories in a cool, dry place away from direct sunlight and extreme temperatures.
- Battery Care: Store batteries partially charged if not used for extended periods. Avoid fully discharging or overcharging batteries.
11. Troubleshooting
- Camera not turning on: Ensure the battery is fully charged and correctly inserted.
- Cannot record: Check if a Micro SD card is inserted and has sufficient free space. Ensure the card is formatted correctly (FAT32).
- Wi-Fi connection issues: Ensure Wi-Fi is enabled on the camera and your mobile device. Verify the correct network name and password.
- Poor video/photo quality: Check resolution settings. Ensure the lens is clean and free from smudges.
12. Warranty and Support
Specific warranty information and detailed support contacts were not provided in the available product data. Please refer to the documentation included with your product or visit the official Xilecam website for the most up-to-date warranty terms and customer support options.


