1. Introduction
Thank you for choosing the DELTACO GAMING RGB Gaming Chair PCH90. This manual provides detailed instructions for assembly, operation, maintenance, and troubleshooting to ensure you get the most out of your new gaming chair. Please read this manual thoroughly before use and keep it for future reference.
2. Product Overview
The DELTACO GAMING RGB Gaming Chair PCH90 combines ergonomic design with vibrant RGB lighting for an immersive gaming experience. Key features include:
- 332 customizable RGB lighting modes.
- Ergonomic design with high backrest, neck, and lumbar support cushions.
- Adjustable height via hydraulic gas lift.
- Recline function from 90 to 180 degrees.
- 2D adjustable armrests.
- Durable vegan leather upholstery and strong steel frame.
- Stable 5-point star base with smooth-rolling nylon casters.

Figure 1: Front View of the Gaming Chair
This image shows the front view of the pink DELTACO GAMING RGB Gaming Chair PCH90, highlighting its ergonomic design and the vibrant RGB lighting strips along the edges of the backrest and seat.

Figure 2: Chair Construction Details
This image provides a closer look at the chair's construction, highlighting the robust steel frame, comfortable soft foam padding, and the durable vegan leather upholstery.
3. Safety Information
Please observe the following safety precautions to prevent injury or damage to the chair:
- Assembly Required: Ensure all parts are securely fastened before using the chair.
- Weight Capacity: Do not exceed the maximum weight capacity of 120 kg (265 lbs).
- Adjustments: Exercise caution when adjusting the chair's height, recline, and armrests to avoid pinching or injury.
- Stability: Always ensure the chair is on a stable, level surface before sitting or making adjustments.
- Children: Keep children away from the chair during assembly and adjustment.
- Cleaning: Use only recommended cleaning methods and products to avoid damaging the material. Refer to the Maintenance section.
4. Package Contents
Before beginning assembly, verify that all components are present and undamaged. If any parts are missing or damaged, please contact customer support.
- Backrest
- Seat Base
- Armrests (2)
- Star Base
- Casters (5)
- Gas Lift Cylinder
- Gas Lift Cover
- Mechanism Plate
- Lumbar Cushion
- Neck Cushion
- Hardware Kit (screws, washers, Allen key)
- RGB Remote Control
- USB Power Cable
5. Setup and Assembly
Follow these steps carefully for proper assembly. It is recommended to have two people for assembly.
5.1 Attach Casters to Star Base
Insert each of the five casters firmly into the holes at the end of the star base until they click into place.
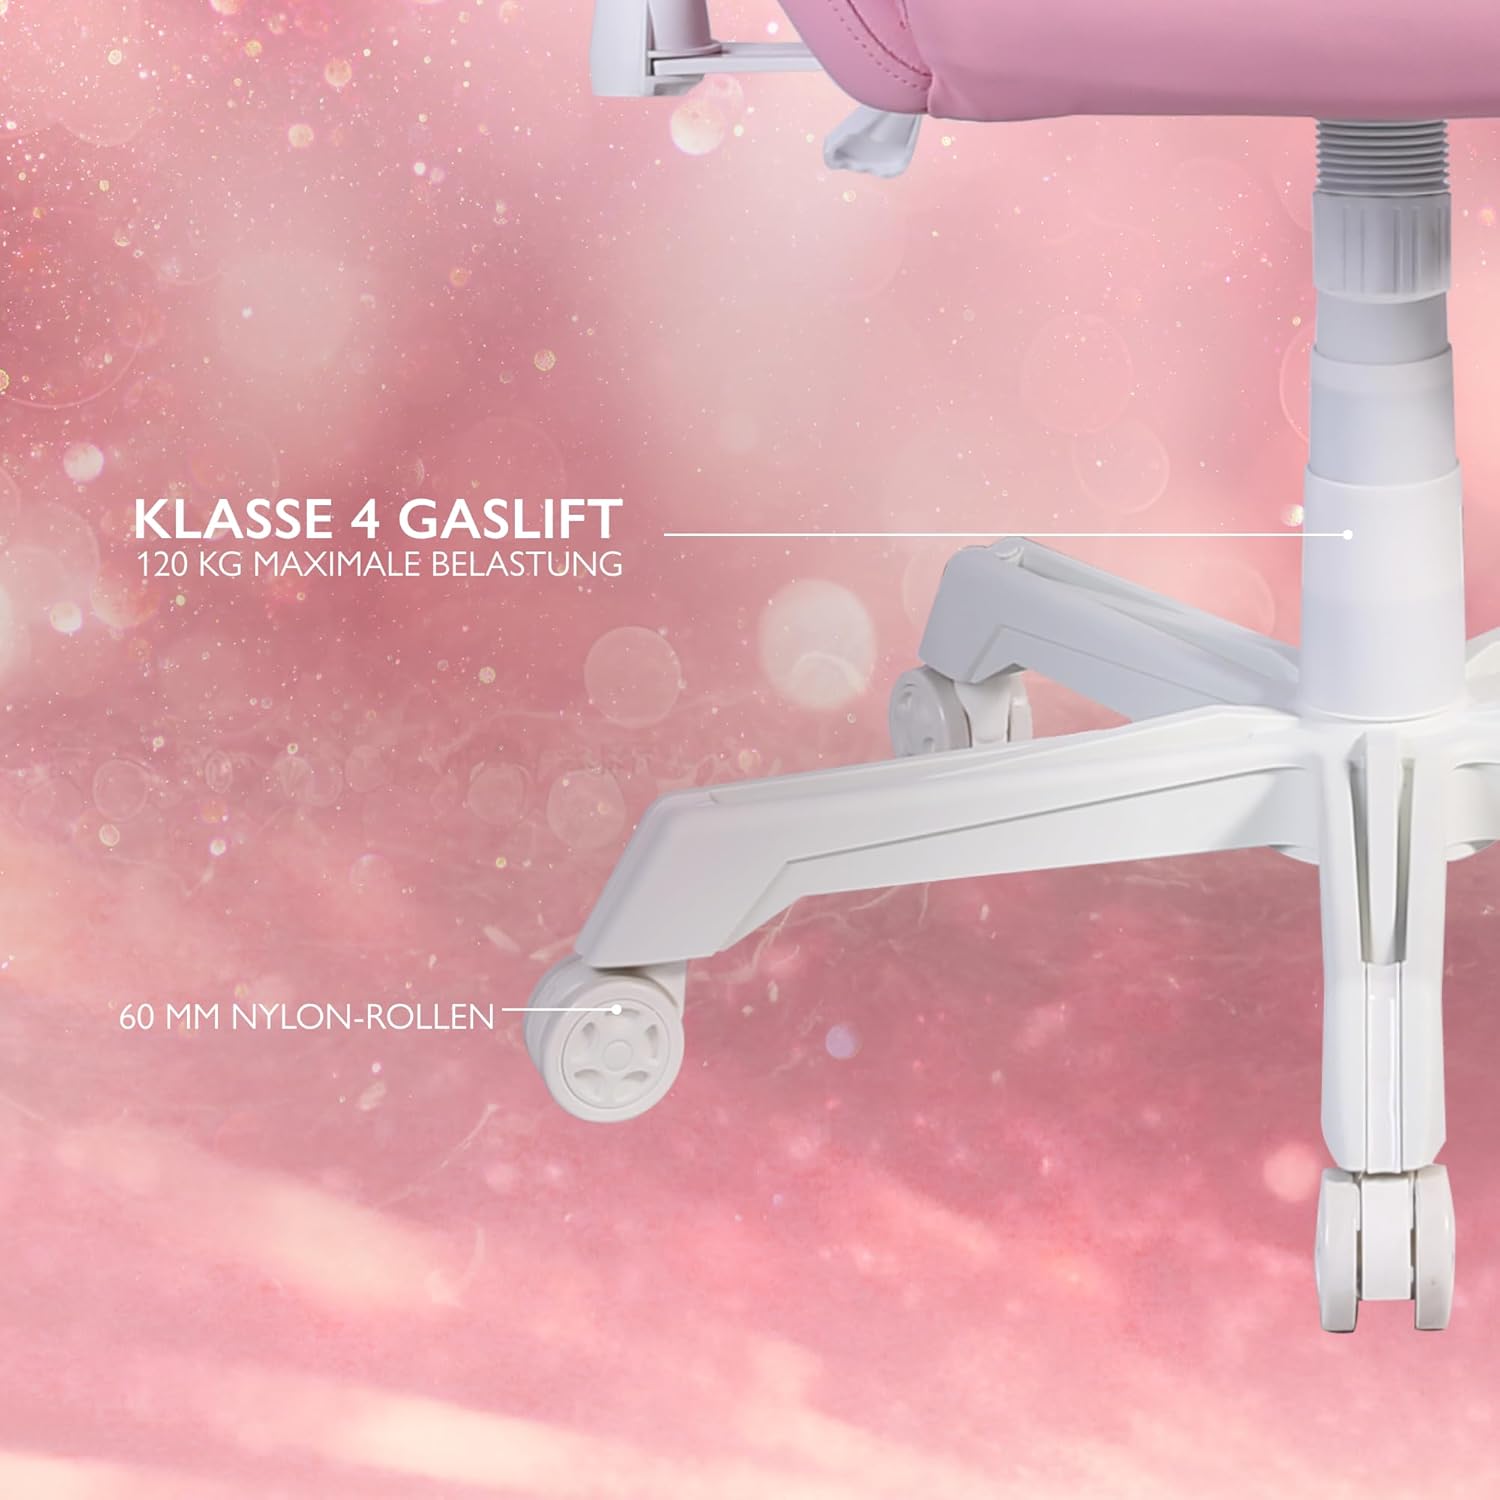
Figure 3: Star Base and Casters
This image highlights the robust 5-point star base with 60mm nylon casters, designed for smooth movement, and indicates the Class 4 gas lift for height adjustment.
5.2 Install Gas Lift
Place the gas lift cylinder into the center hole of the assembled star base. Cover the gas lift with the telescopic plastic cover.
5.3 Attach Mechanism Plate to Seat Base
Align the mechanism plate with the pre-drilled holes on the underside of the seat base. Ensure the front of the mechanism plate faces the front of the seat. Secure with screws and washers from the hardware kit, tightening them with the Allen key.
5.4 Attach Armrests to Seat Base
Attach the armrests to the sides of the seat base using the provided screws. Do not fully tighten yet.

Figure 4: 2D Adjustable Armrests
This image illustrates the 2D adjustable armrests, capable of height and side adjustments for personalized comfort.
5.5 Attach Backrest to Seat Base
Align the backrest with the mounting brackets on the seat base. Secure with screws, then fully tighten the armrest screws and backrest screws.
5.6 Connect Seat to Gas Lift
Carefully place the assembled seat and backrest onto the gas lift cylinder, ensuring it is centered and stable.
5.7 Attach Cushions
Attach the neck cushion to the top of the backrest using its straps. Position the lumbar cushion on the lower backrest as desired.

Figure 5: Neck and Lumbar Support Cushions
This image displays the additional neck and lumbar support cushions, designed to enhance ergonomic comfort during long gaming sessions.
6. Operating Instructions
Familiarize yourself with the chair's adjustable features for optimal comfort.
6.1 Height Adjustment
Pull the lever located on the right side of the seat upwards to adjust the chair height. Release the lever at your desired height. The hydraulic gas lift allows for smooth and precise adjustments.
6.2 Recline Adjustment
Pull the recline lever on the left side of the seat upwards to adjust the backrest angle. Lean back or forward to the desired position (90 to 180 degrees) and release the lever to lock it in place.

Figure 6: Full Recline Functionality
This image shows the gaming chair fully reclined, illustrating its ability to adjust from 90 to 180 degrees for various activities, from intense gaming to relaxation.
6.3 Armrest Adjustment
The 2D armrests can be adjusted for height and pivoted horizontally. Use the buttons or levers on the armrests to make adjustments.
6.4 RGB Lighting Control
The chair features 332 customizable RGB lighting modes. Connect a 5V 2A USB-A power source (e.g., a power bank, not included) to the USB cable located in the practical storage pocket on the side of the chair. Use the included remote control to select lighting modes, colors, and brightness.

Figure 7: RGB Lighting and Remote Control
This image displays the gaming chair alongside its remote control, emphasizing the 332 unique LED modes available for personalized lighting effects.

Figure 8: USB Power Pocket
This image shows the practical storage compartment on the side of the chair, ideal for a power bank to supply power to the RGB lighting via the integrated USB cable.
7. Maintenance and Care
Proper maintenance will extend the life of your gaming chair.
- Cleaning: Wipe the vegan leather surfaces with a soft, damp cloth. For stubborn stains, use a mild soap solution and wipe dry immediately. Avoid harsh chemicals or abrasive cleaners.
- Frame: Regularly check all screws and bolts to ensure they are tight. Re-tighten if necessary.
- Casters: Clean casters periodically to remove dust and debris that may hinder smooth movement.
- Storage: Store the chair in a cool, dry place away from direct sunlight and extreme temperatures.
8. Troubleshooting
If you encounter any issues, refer to the following common problems and solutions:
| Problem | Possible Cause | Solution |
|---|---|---|
| Chair does not adjust height. | Gas lift cylinder malfunction or lever not engaged. | Ensure the height adjustment lever is fully pulled. If the issue persists, the gas lift may need replacement. Contact support. |
| Chair wobbles or is unstable. | Loose screws or uneven floor. | Check and tighten all assembly screws. Ensure the chair is on a flat, level surface. |
| Casters do not roll smoothly. | Debris in casters or damaged casters. | Clean any hair or debris from the caster wheels. If damaged, casters may need replacement. |
| RGB lighting not working. | No power source, low power, or remote control issue. | Ensure a 5V 2A USB-A power source is connected and charged. Check remote control battery. Verify USB cable connection. |
If the problem persists after attempting these solutions, please contact DELTACO GAMING customer support.
9. Specifications
| Feature | Detail |
|---|---|
| Brand | DELTACO GAMING |
| Model Number | PCH90 |
| Color | Pink |
| Material | Vegan Leather, Metal Frame |
| Product Dimensions (L x W x H) | 57 x 68 x 55 cm (22.4 x 26.8 x 21.7 inches) |
| Item Weight | 21 kg (46.3 lbs) |
| Maximum Weight Capacity | 120 kg (265 lbs) |
| Gas Lift Class | Class 4 |
| Caster Size | 60 mm Nylon Casters |
| Armrest Type | 2D Adjustable (Height & Pivot) |
| Recline Angle | 90 - 180 degrees |
| Lighting | RGB with 332 customizable modes |
| Power for RGB | 5V 2A USB-A (external power source not included) |
10. Warranty and Support
For warranty information and customer support, please refer to the product packaging or visit the official DELTACO GAMING website. Keep your proof of purchase for warranty claims.
Contact Information:
- Brand: DELTACO GAMING
- Website: www.deltacogaming.com (Example link, actual link may vary)
- Email: support@deltacogaming.com (Example email, actual email may vary)


