
MASTERFUN JSM9BK
MASTERFUN Automatic Chicken Coop Door
Model: JSM9BK
Brand: MASTERFUN
Introduction
Thank you for choosing the MASTERFUN Automatic Chicken Coop Door. This device is designed to simplify poultry care by providing automated opening and closing of your chicken coop door. It features a durable aluminum construction, a user-friendly interface, and advanced safety mechanisms to protect your flock. Please read this manual thoroughly before installation and operation to ensure proper use and longevity of your product.
Important Safety Information
- Always ensure the installation surface is stable and secure.
- Keep hands and loose clothing clear of the door's path during operation.
- Do not attempt to force the door open or closed manually while it is operating automatically.
- Regularly check the battery compartment for corrosion and ensure batteries are correctly inserted.
- This product is designed for chickens and ducks under 5 kg. Do not use for larger animals.
- Dispose of old batteries responsibly according to local regulations.
Package Contents
Please verify that all components are present before beginning installation:
- 1 x MASTERFUN Automatic Chicken Coop Door unit
- 1 x Screwdriver
- 10 x Mounting Screws
- 1 x User Manual (this document)
Note: 3 x AA alkaline batteries are required for operation and are not included in the package.
Setup and Installation
The MASTERFUN Automatic Chicken Coop Door is designed for easy installation on most chicken coops. Follow these steps:
- Choose Location: Select a flat, vertical surface on your chicken coop where the door will be installed. Ensure there is enough clearance for the door to open and close fully without obstruction.
- Mark Drilling Points: Hold the door unit against the desired installation spot. Use a pencil to mark the positions for the mounting screws.
- Drill Pilot Holes: Using an appropriate drill bit, create pilot holes at the marked positions.
- Mount the Door: Align the door unit with the pilot holes and secure it using the provided screws and screwdriver. Ensure the door is level and firmly attached.
- Install Batteries: Open the battery compartment (refer to the "Battery Installation" section). Insert 3 x AA alkaline batteries, ensuring correct polarity. Close the compartment securely.
- Initial Test: After installation, perform a manual test to ensure the door moves smoothly up and down.

Image: The automatic chicken coop door installed on different types of poultry houses, demonstrating its wide application and ease of integration.
Operating Modes
The MASTERFUN Automatic Chicken Coop Door offers two operating modes: Timer Mode and Manual Mode.
1. Timer Mode
Timer mode allows you to set specific times for the door to open and close automatically each day. This provides convenience and ensures your flock is secured at consistent times.
- Access Settings: On the large LCD screen, locate the "OPEN" and "CLOSE" time settings.
- Set Open Time: Use the control buttons (usually indicated by arrows or specific symbols) to adjust the desired opening time.
- Set Close Time: Similarly, adjust the desired closing time.
- Confirm Settings: Ensure your settings are saved or confirmed according to the on-screen prompts. The door will now operate automatically based on these times.
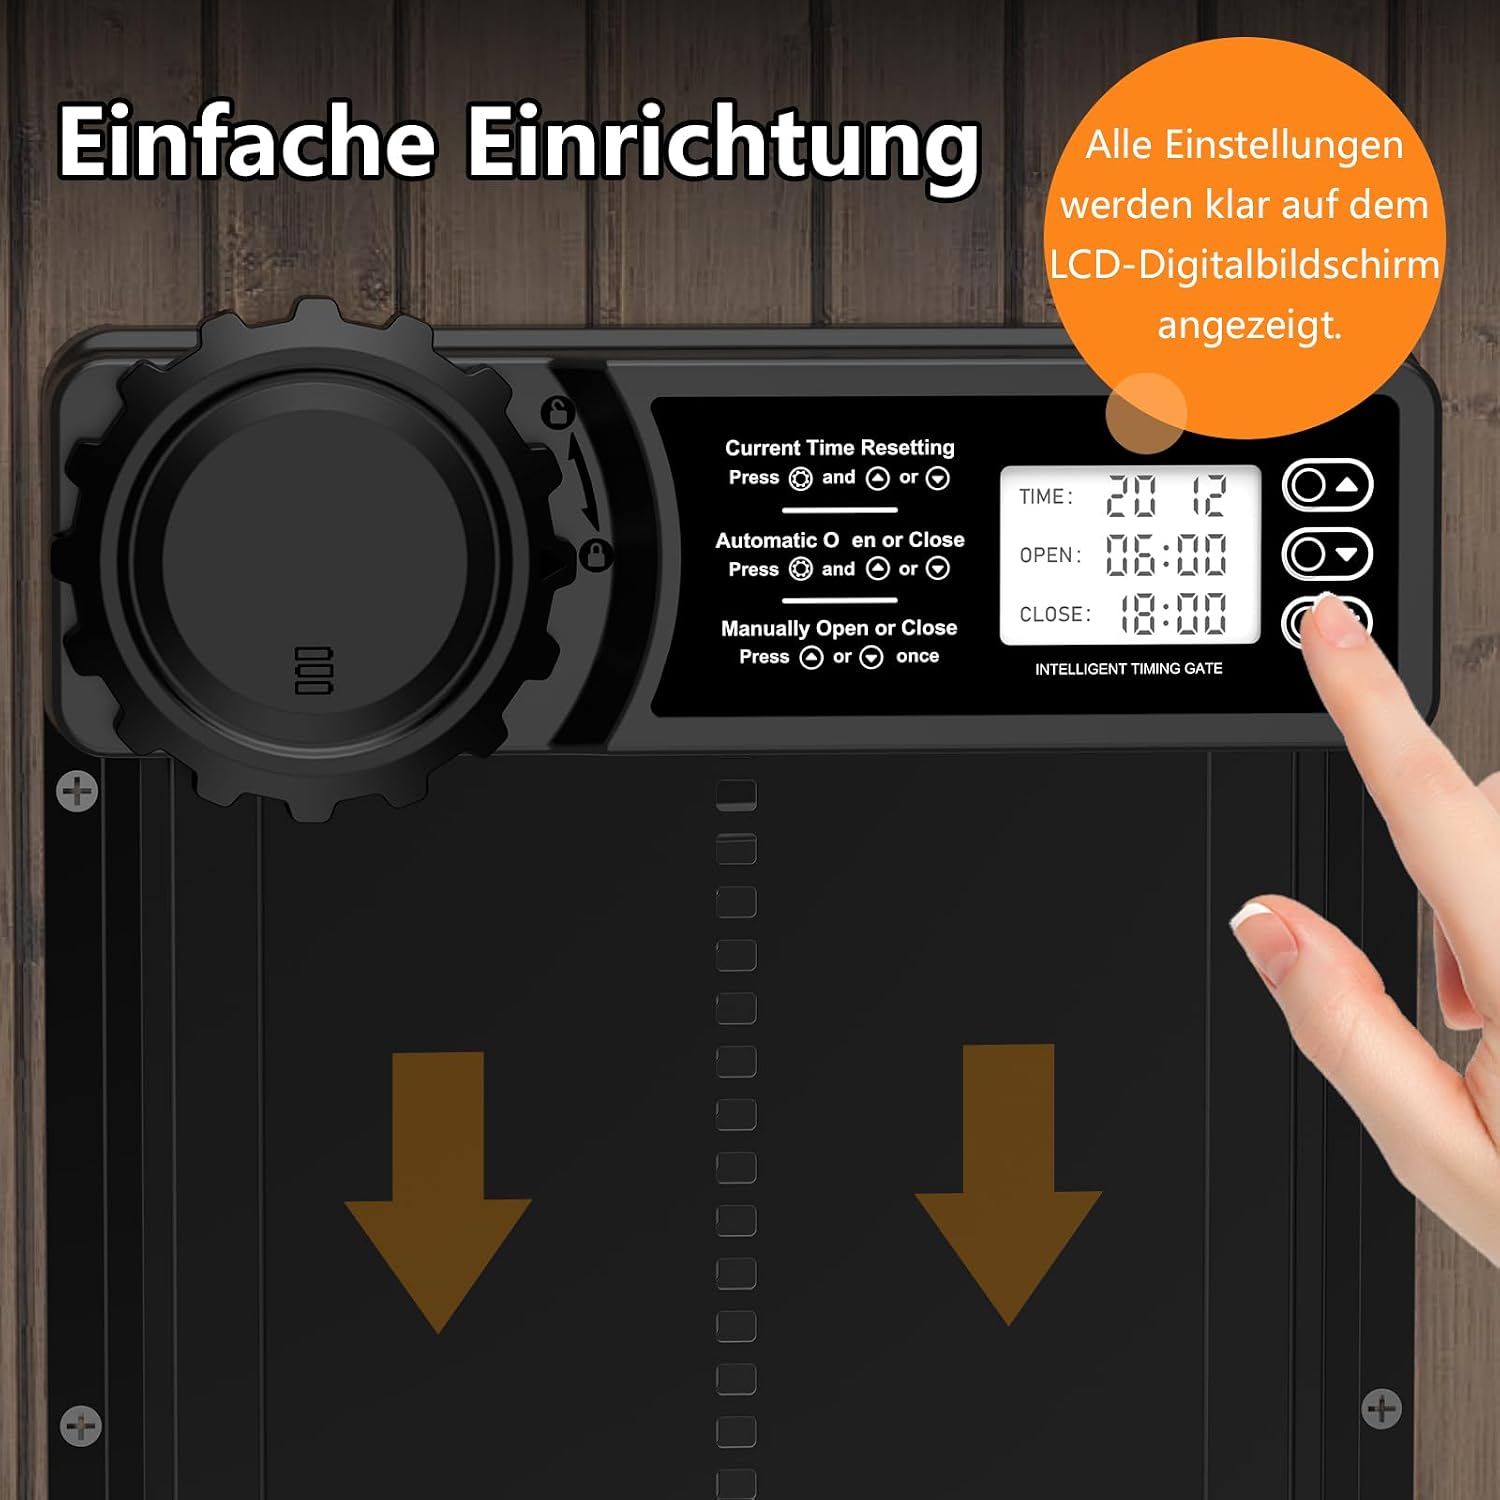
Image: A detailed view of the control panel, highlighting the intuitive LCD screen where users can easily set the current time, and specific open and close times for the door.

Image: Illustration of the automatic door opening at 6:30 AM and closing at 6:30 PM, demonstrating its timed operation for daily poultry management.
2. Manual Mode
Manual mode allows you to open or close the door instantly at any time, overriding the timer settings. This is useful for specific situations or immediate access.
- Manual Open/Close: Press the designated manual open or close button on the control panel. The door will immediately respond to your command.
Anti-Pinch Safety Mechanism
The MASTERFUN Automatic Chicken Coop Door is equipped with an advanced anti-pinch safety feature to protect your chickens from injury during closing. This mechanism operates as follows:
- If the door detects an obstruction (e.g., a chicken) during its closing cycle, it will immediately stop and lift slightly.
- The door will pause for approximately 13 seconds.
- If the obstruction is still present after 13 seconds, the door will retract fully, wait for 10 seconds, and then attempt to close again.
- This cycle repeats until the path is clear, ensuring the safety of your flock.

Image: Visual representation of the anti-pinch feature, showing the door stopping and retracting when a chicken is in its path, then attempting to close again after a delay.
Battery Installation and Replacement
The chicken coop door is powered by 3 x AA alkaline batteries (not included). The battery life is approximately 6 months under normal usage conditions.
- Locate Battery Compartment: The battery compartment is typically located on the back or side of the control unit.
- Open Compartment: Use a screwdriver or your fingers to open the battery compartment cover.
- Insert Batteries: Insert 3 x AA alkaline batteries, paying close attention to the correct positive (+) and negative (-) polarity markings inside the compartment.
- Close Compartment: Securely close the battery compartment cover.
- Battery Replacement: When the battery indicator on the LCD screen shows low power, replace all three batteries simultaneously with new AA alkaline batteries.

Image: An illustration of the battery compartment, clearly showing the placement of three AA alkaline batteries and indicating an approximate 6-month battery life.
Maintenance
Regular maintenance ensures optimal performance and extends the lifespan of your automatic chicken coop door.
- Cleaning: Periodically wipe down the door and control unit with a damp cloth to remove dirt, dust, and debris. Avoid using harsh chemicals or abrasive cleaners.
- Track Inspection: Ensure the door tracks are free from obstructions like feathers, straw, or ice, which could impede smooth operation.
- Battery Check: Check battery levels regularly, especially during colder months, as low temperatures can affect battery performance.
- Screw Tightness: Periodically check all mounting screws to ensure they remain tight and secure.
Troubleshooting
| Problem | Possible Cause | Solution |
|---|---|---|
| Door does not open/close | Low or dead batteries; Obstruction in track; Incorrect timer settings. | Replace batteries; Clear any obstructions; Verify timer settings on the LCD screen. |
| Door stops mid-operation | Obstruction detected by anti-pinch mechanism. | Check for animals or debris in the door's path. The door will attempt to close again after a delay. |
| LCD screen is blank | No power; Batteries incorrectly installed. | Check battery installation and polarity; Replace batteries if necessary. |
| Door is noisy | Dirt or debris in tracks; Loose mounting. | Clean tracks; Ensure mounting screws are tight. |
Specifications
| Model Number | JSM9BK |
| Material | Durable Aluminum Alloy |
| Control Unit Dimensions (W x H x D) | Approx. 24.5 cm x 33 cm x 8.2 cm (from image) |
| Door Opening Dimensions (W x H) | 21 cm x 24.5 cm (from image) |
| Total Height (Door Open) | Approx. 55.5 cm (from image) |
| Weight | 860 grams |
| Power Source | 3 x AA Alkaline Batteries (not included) |
| Battery Life | Approx. 6 months |
| Operating Temperature | -26°C to 60°C |
| Special Features | Timer function, Manual mode, Anti-pinch mechanism, Intuitive LCD interface, Weatherproof, Waterproof, Scratch-resistant |
| Targeted Species | Chickens, Ducks |
| Recommended Animal Weight | Under 5 kg |

Image: A technical drawing illustrating the precise dimensions of the chicken coop door unit and its opening, along with the included installation tools.

Image: This image emphasizes the door's robust construction from aviation-grade aluminum alloy, its weather resistance (from -26°C to 60°C), waterproof and scratch-resistant properties, and its ability to protect against predators like foxes and raccoons.
Warranty and Support
The MASTERFUN Automatic Chicken Coop Door comes with a 2-year warranty from the date of purchase, covering manufacturing defects and material faults under normal use. Please retain your proof of purchase for warranty claims.
For technical support, troubleshooting assistance, or warranty inquiries, please contact MASTERFUN customer service through the retailer where you purchased the product or visit the official MASTERFUN website (if available).
Ask a question about this manual
Ask about setup, troubleshooting, compatibility, parts, safety, or missing instructions. Manuals+ will review the question and use this page’s manual context to help answer it.