1. Product Overview
The Treeligo 12V 10000BTU Mini Split Parking Air Conditioner is designed to provide efficient cooling for various vehicles, including big rigs, semi-trucks, pickups, RVs, vans, and buses. This system operates on a 12-volt DC power supply, offering a low-noise cooling solution for extended periods, even when the vehicle engine is off.

Image 1.1: Treeligo 12V Mini Split Parking Air Conditioner units.
Key Features:
- Energy Efficiency: Designed to operate from engine power or an external battery, reducing fuel consumption.
- Extended Operation: Provides up to 8 hours of cooling on a 480 AH battery in strong mode, or 8 hours on a 200 AH battery in standard or sleeping mode.
- Low Noise Level: Operates at less than 45dB, ensuring a quiet environment.
- 20CC Variable Frequency Compressor: Features a 20CC inverter scroll compressor for safer, quieter, and more energy-efficient operation by monitoring battery conditions and adjusting frequency.
- Diverse Applications: Suitable for trucks, camping vehicles, vans, excavators, passenger cars, agricultural vehicles, engineering vehicles, and ships.
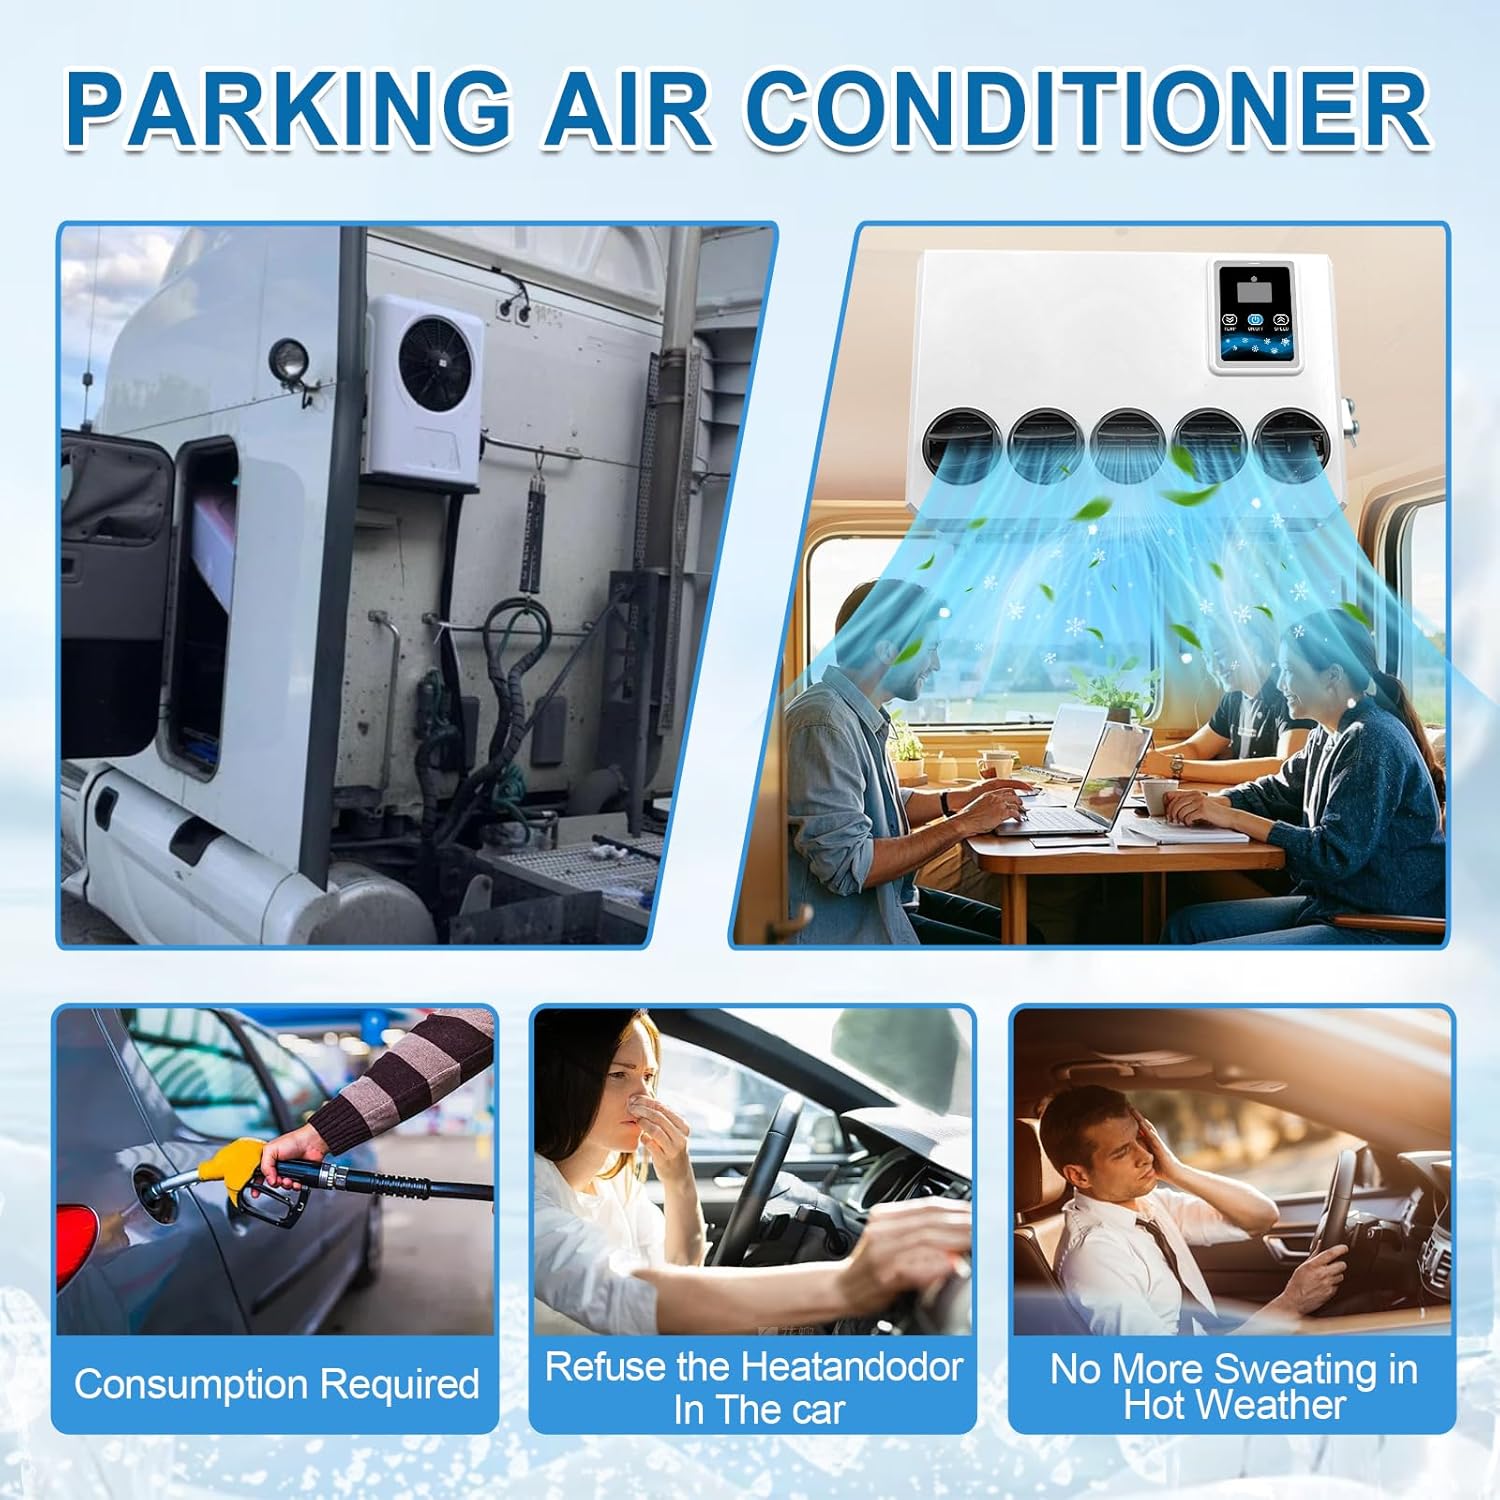
Image 1.2: Diverse applications of the Treeligo 12V Parking Air Conditioner.
2. Safety Information
Please read all safety instructions carefully before installation and operation to prevent injury or damage to the unit.
- Ensure the power supply matches the unit's voltage (12V DC). Incorrect voltage can cause damage.
- Disconnect power before performing any installation, maintenance, or troubleshooting.
- Installation should be performed by qualified personnel to ensure proper wiring and refrigerant handling.
- Do not block air inlets or outlets on either the indoor or outdoor unit.
- Keep the unit away from flammable materials and heat sources.
- Do not attempt to repair the unit yourself. Contact qualified service personnel.
- Ensure proper ventilation during installation and operation.
- The unit contains refrigerant R-134A. Handle with care and dispose of responsibly.
3. Package Contents
Verify that all components are present and undamaged upon unpacking. If any items are missing or damaged, contact customer support immediately.

Image 3.1: Included components in the package.
- Indoor Unit
- Outdoor Unit
- Remote Control
- Screw Accessories (various screws and fasteners)
- Expansion Valve
- Mounting Board
- Adhesive Tape
- Evaporator Drain Pipe
- High Pressure Pipe
- Low Pressure Pipe
- Battery Cable
- Evaporator Cable
- Instruction Manual
4. Specifications

Image 4.1: Dimensions of the indoor and outdoor units.
| Feature | Detail |
|---|---|
| Model | EAC1009.12.W |
| Voltage | 12 Volts DC |
| Rated Power | 960W |
| Cooling Capacity | 3000W (10000 BTU) |
| Noise Level | 45 dB |
| Compressor | 20CC Variable Frequency Scroll Compressor |
| Refrigerant | R-134A (450-500g) |
| Indoor Unit Size | 18 x 14 x 6.5 inches (455 x 335 x 165 mm) |
| Outdoor Unit Size | 19 x 8 x 26 inches (500 x 220 x 670 mm) |
| Item Weight | 57 pounds |
| Special Features | Fast Cooling, Remote Control, Panel Control |

Image 4.2: Outdoor unit parameters and cooling performance.
5. Installation Guide
Proper installation is crucial for the performance and longevity of your air conditioner. It is recommended that installation be performed by a professional.

Image 5.1: Visual guide for installation steps.
Installation Steps:
- Install External Machine: Mount the outdoor unit securely on the exterior of the vehicle, ensuring proper clearance for airflow.
- Install Expansion Valve: Connect the expansion valve to the appropriate lines as per the diagram.
- Install Indoor Unit: Mount the indoor unit inside the vehicle cabin, ensuring it is level and securely fastened.
- Install High & Low Pressure Pipelines: Connect the refrigerant lines (high and low pressure pipes) between the indoor and outdoor units. Ensure connections are tight and leak-free.
- Install Connecting Line, Drain Pipe, and Power Line: Connect the electrical communication lines, the evaporator drain pipe for condensate, and the main power line.
- Vacuum and Add Refrigerant: Evacuate the system to remove air and moisture, then charge with the specified amount of R-134A refrigerant (450-500g). This step requires specialized equipment and expertise.
- Connect the Power Cord to the Battery: Connect the main power cable directly to the vehicle's 12V battery, ensuring correct polarity and a secure connection.
- Turn on the Air Conditioner: Once all connections are secure and the system is charged, power on the unit and test its operation.
6. Operating Instructions
Your Treeligo air conditioner can be controlled via the integrated control panel or the included remote control.
Control Panel:
The control panel on the indoor unit allows direct access to power, mode selection, temperature adjustment, and fan speed settings. Refer to the icons on the panel for specific functions.
Remote Control:
The remote control provides convenient operation from a distance. It typically includes buttons for:
- Power On/Off
- Mode Selection (Sleeping, Standard, Strong)
- Temperature Up/Down
- Fan Speed Adjustment
Operating Modes:
- Sleeping Mode: Optimized for quiet operation and minimal power consumption, ideal for overnight use.
- Standard Mode: Provides balanced cooling performance and energy use for general comfort.
- Strong Mode: Delivers maximum cooling capacity for rapid temperature reduction.

Image 6.1: Low noise operation for a comfortable environment.
7. Maintenance
Regular maintenance ensures optimal performance and extends the lifespan of your air conditioner.
- Clean Air Filters: Periodically clean or replace the air filters in the indoor unit to maintain airflow and cooling efficiency. Dirty filters can restrict airflow and reduce performance.
- Check Drain Pipe: Ensure the evaporator drain pipe is clear of obstructions to allow proper drainage of condensate.
- Inspect Outdoor Unit: Keep the outdoor unit's condenser coils clean and free from debris (leaves, dirt, etc.) to ensure efficient heat dissipation.
- Check Electrical Connections: Periodically inspect all electrical connections for tightness and signs of corrosion.
- Refrigerant Level: If you notice a decrease in cooling performance, have a qualified technician check the refrigerant level.
8. Troubleshooting
Before contacting customer support, refer to the following common issues and solutions:
| Problem | Possible Cause | Solution |
|---|---|---|
| Unit does not turn on | No power supply; Loose battery connection; Blown fuse | Check battery connections; Verify power supply; Inspect and replace fuse if necessary. |
| Insufficient cooling | Dirty air filter; Blocked outdoor unit; Low refrigerant; Incorrect mode setting | Clean air filter; Clear obstructions from outdoor unit; Contact technician for refrigerant check; Select 'Strong' mode. |
| Unusual noise | Loose components; Debris in fan; Unit not level | Check for loose parts; Remove any debris; Ensure unit is mounted level. |
| Water leakage from indoor unit | Blocked drain pipe; Improper installation angle | Clear drain pipe; Ensure proper slope for drainage. |
| Remote control not working | Dead batteries; Obstruction between remote and unit | Replace remote control batteries; Remove obstructions. |
9. Warranty and Support
Treeligo provides swift and prompt service and support within 12 hours for any assistance needed with installation or operation of your air conditioner.
For warranty information, service requests, or technical support, please refer to the contact details provided in your product packaging or visit the official Treeligo website.
You can also visit the Treeligo Store on Amazon for more product information and support resources.


