This manual provides detailed instructions for the assembly, operation, maintenance, and troubleshooting of your Seizeen 6x4.4FT Outdoor Resin Shed. Please read this manual thoroughly before beginning assembly or use to ensure safe and proper installation and functionality. Keep this manual for future reference.
Important Safety Information
Two-Person Assembly: Always assemble with two people to ensure stability and safety during the process.
Handle with Caution: Be cautious when handling heavy components to prevent injury.
Secure Closure: Always use both upper and lower door latches for secure closure to prevent accidental opening and protect contents.
Level Surface: Ensure the installation surface is perfectly level for optimal stability and longevity.
Ventilation: Do not block the louvered vents, as they are crucial for proper airflow and preventing dampness.
Anchoring: For added stability, especially in windy conditions, consider anchoring the shed to the ground (anchoring hardware not included unless specified).
Product Features
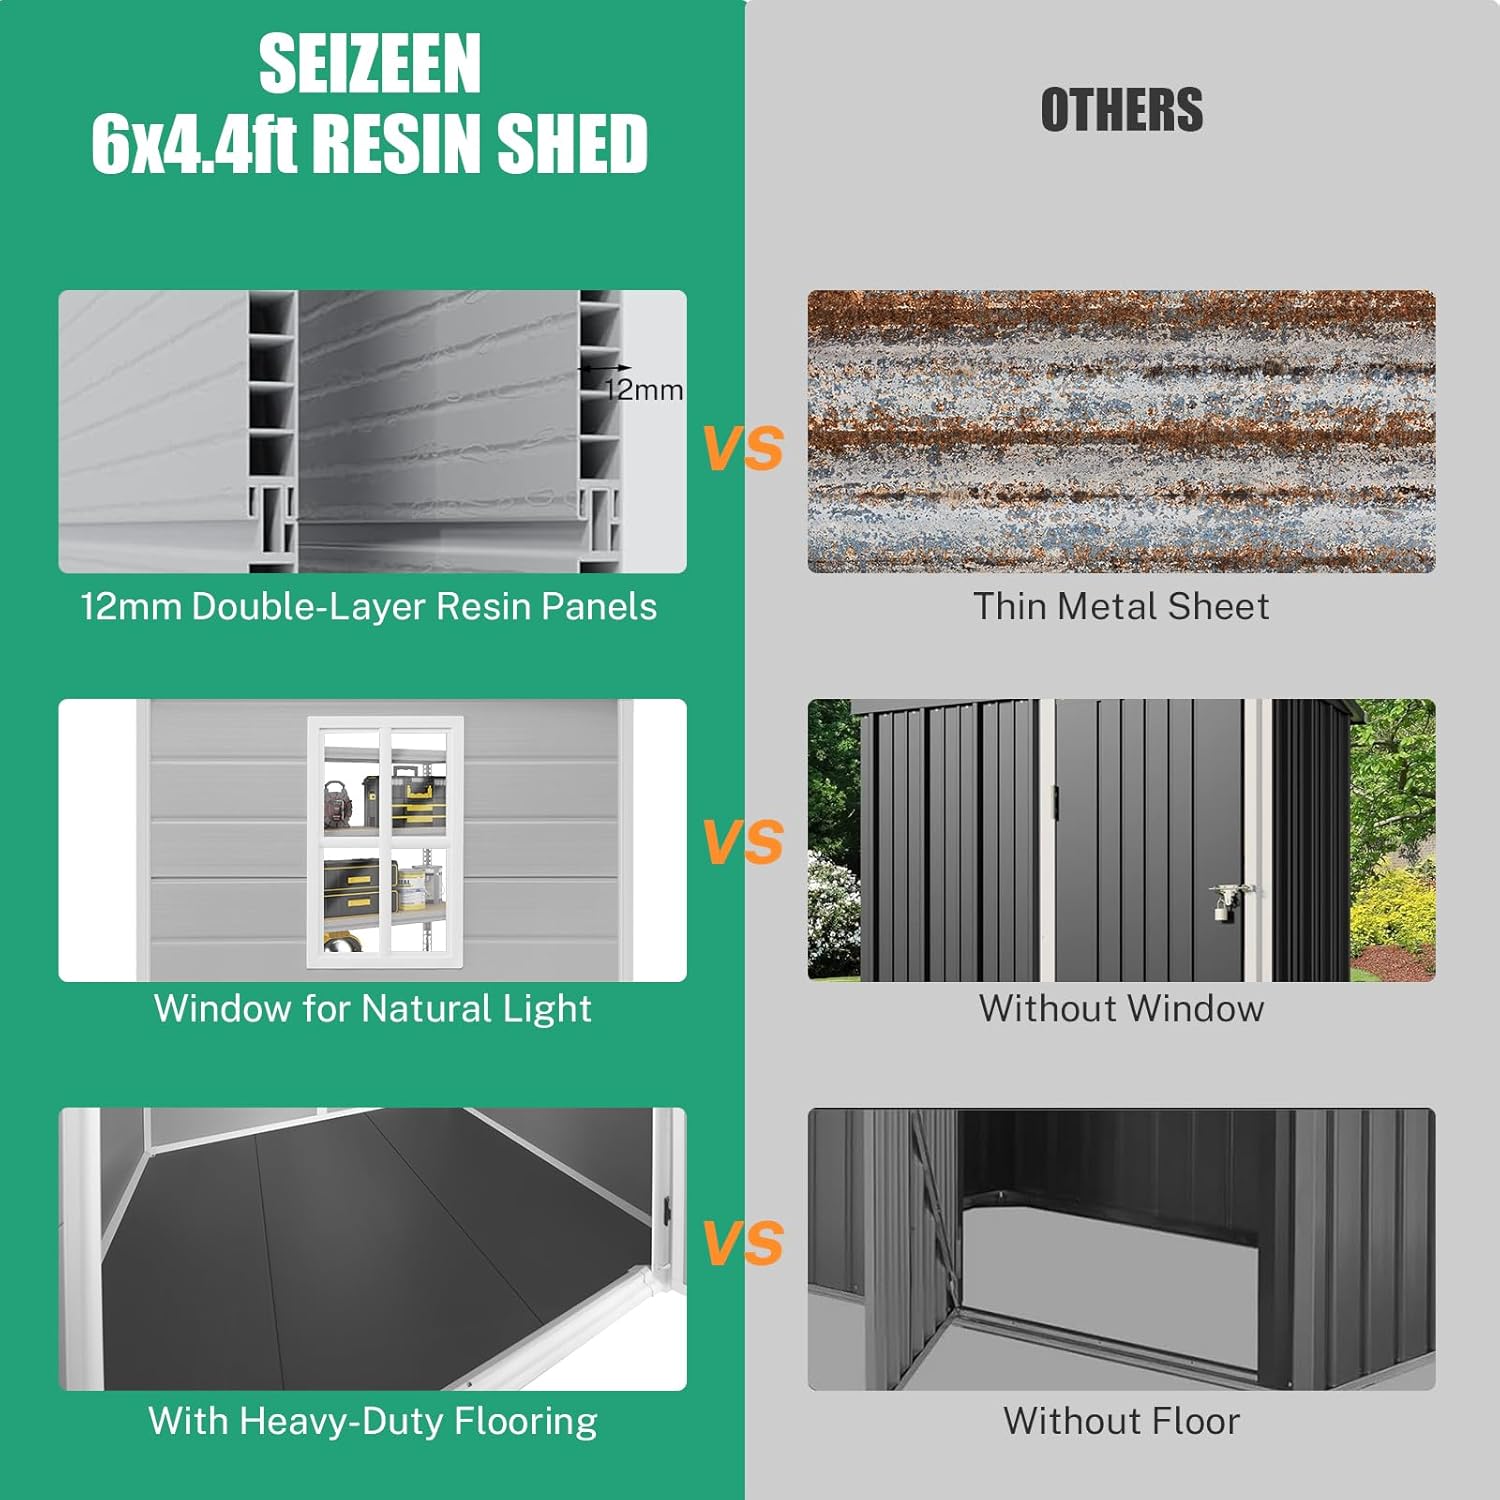
Reinforced Floor: Heavy-duty PVC flooring provides protection against moisture, sand, and dirt, and supports heavy equipment.
Superior Resin Material: Constructed from high-grade thermoplastic synthetic resin for durability, sturdiness, and resistance to deformation or cracking.
All-Weather Protection: Corrosion-resistant, waterproof, and UV resistant properties make the shed suitable for all weather conditions.
Spacious Storage: Offers up to 137.7 cu.ft of storage capacity for garden tools, lawn equipment, bicycles, outdoor toys, and more.
Multi-Use: Can be used as a tool room, pet home, utility room, or garbage chamber.
Lockable Doors: Provides security for stored items, preventing theft and damage.
Light-Permeable Window: Side window allows natural light to illuminate the interior, reducing the need for artificial lighting.
Louvered Vents: Promotes airflow, preventing dampness and heat buildup inside the shed.
Sloped Roof: Facilitates drainage and prevents rainwater accumulation, extending the life of the shed.
Package Contents
Your Seizeen Resin Shed is shipped in two packages and may arrive at different times. Please ensure all components are present before beginning assembly.
Image: The shed packaging, indicating two separate boxes for shipping.
Refer to the detailed parts list included in your product packaging to verify all components.
Setup and Assembly
Assembly of the Seizeen Resin Shed is designed to be straightforward, but it is recommended that two people work together for best results. Product packages contain two pairs of gloves and a detailed step-by-step installation guide.
Assembly Overview
The assembly process involves six main steps:
Assemble the base.
Assemble the side walls.
Assemble the front and back walls.
Install the window.
Assemble the roof.
Install the doors.
Detailed Assembly Steps
Step 1: Assemble the Base
Begin by laying out the floor panels and connecting them. Secure the perimeter with the provided frame pieces and screws. Ensure the base is square by measuring diagonals (AB=CD).
Video: A detailed guide on assembling the shed's base, including connecting floor panels and securing the frame.
Image: Shed dimensions and key assembly tips, including the need for two people and gloves.
Step 2: Assemble the Side Walls
Attach the side wall panels to the base, ensuring they interlock securely. Use the provided connectors to join the panels vertically and horizontally.
Image: An interior view of the shed, demonstrating its spacious storage capacity and potential for organization.
Step 3: Assemble the Front and Back Walls
Continue building the walls by adding the front and back panels. Pay attention to the designated slots for the window and door frames.
Image: A visual comparison highlighting the 12mm double-layer resin panels, window for natural light, and heavy-duty flooring of the Seizeen shed versus thinner alternatives.
Step 4: Install the Window
Carefully insert the window frame into its designated opening. Secure it with the appropriate screws. The window allows natural light into the shed.
Image: Close-up details of the shed's features, including smooth eaves, a secure door lock design, a fixed door latch, and built-in vents for air circulation.
Step 5: Assemble the Roof
Assemble the roof panels according to the instructions, ensuring the vents are correctly positioned. Lift and secure the assembled roof onto the shed structure.
Image: The shed's roof demonstrating its waterproof and UV resistant properties, designed to withstand various weather conditions and facilitate drainage.
Step 6: Install the Doors
Attach the doors to the front frame using the provided hinges. Install the lockable latch mechanism. Ensure both upper and lower latches are used for security.
Image: The fully assembled gray outdoor resin shed with its double doors and side window, situated in a garden setting.
Operating Instructions
Your Seizeen Resin Shed is designed for straightforward operation.
Opening/Closing Doors: To open, disengage the top and bottom latches, then unlatch the main door handle. To close, ensure both doors are aligned, engage the main latch, and then secure the top and bottom latches.
Locking: Use the provided lock and keys with the main door latch for enhanced security.
Ventilation: The built-in louvered vents provide continuous airflow. No manual operation is required for the vents.
Window: The window is fixed and does not open. It is designed to allow natural light into the shed.
Maintenance
The Seizeen Resin Shed is designed for low maintenance. Regular cleaning and occasional checks will ensure its longevity.
Cleaning: Clean the shed periodically with mild soap and water. Avoid abrasive cleaners or harsh chemicals that could damage the resin material.
Drainage: Ensure the area around the shed is clear of debris to allow for proper water drainage from the sloped roof.
Hardware Check: Periodically check all screws, bolts, and latches to ensure they are tight and secure. Tighten as necessary.
UV Protection: While the material is UV resistant, prolonged exposure to extreme sunlight may cause slight fading over many years. This does not affect structural integrity.
Troubleshooting
Problem
Possible Cause
Solution
Doors do not align or close properly.
Shed is not on a level surface; base is not square; hinges are loose.
Ensure the installation surface is perfectly level. Check the base for squareness (AB=CD). Tighten all hinge screws.
Water leakage inside the shed.
Panels not properly interlocked; roof not securely attached; drainage issues.
Verify all wall and roof panels are fully interlocked. Ensure roof is securely fastened. Clear any debris from around the base and roof.
Shed feels unstable.
Base not level or square; insufficient anchoring.
Re-check the levelness and squareness of the base. Consider adding additional anchoring points if in a windy area.
Always assemble with two people. Double-check the parts list against received items. Review the step-by-step installation guide carefully.
Specifications
Brand: Seizeen
Model: RS-64
Color: Gray
Material: Resin, Plastic
Product Dimensions: 52.8"D x 71.3"W x 82.7"H
Item Weight: 128 Pounds
Storage Capacity: 137.7 cu.ft
Base Material: Alloy Steel, Plastic
Top Material Type: Resin; Plastic
Water Resistance Level: Waterproof
Door Style: Double Door
Ultraviolet Light Protection: Yes
Assembly Required: Yes (2 people recommended)
Weight Limit: 500 Pounds (for floor)
Door Width: 48.2 Inches
Door Height: 68.3 Inches
UPC: 727467243763
Warranty and Support
For warranty information or technical support, please refer to the contact details provided with your purchase documentation or visit the official Seizeen website. Please have your model number (RS-64) and purchase date available when contacting support.
You can also visit the Seizeen Store on Amazon for more product information and customer service options.
Ask a question about this manual
Ask about setup, troubleshooting, compatibility, parts, safety, or missing instructions. Manuals+ will review the question and use this page’s manual context to help answer it.