
1. Introduction
Thank you for purchasing the Kaiser Professional 15-inch Speaker System, Model GEM-9520. This manual provides essential information for the safe and efficient operation of your new speaker system. Please read it thoroughly before use and retain it for future reference.
2. Safety Information
- Power Source: Use only the specified power adapter. Ensure the voltage matches your local power supply.
- Water and Moisture: Do not expose the speaker to water, rain, or high humidity. Avoid placing liquid-filled objects on the speaker.
- Ventilation: Ensure adequate ventilation around the speaker. Do not block any ventilation openings.
- Heat: Keep the speaker away from heat sources such as radiators, heat registers, stoves, or other apparatus that produce heat.
- Cleaning: Disconnect the power before cleaning. Use a dry, soft cloth. Do not use liquid cleaners or aerosol cleaners.
- Servicing: Do not attempt to service this product yourself. Refer all servicing to qualified service personnel.
- Placement: Place the speaker on a stable, flat surface or securely mount it on the provided tripod. Avoid placing it in direct sunlight or near strong magnetic fields.
3. Package Contents
Verify that all items are present in the package:
- Kaiser GEM-9520 Professional 15-inch Speaker System
- Wired Microphone
- Speaker Tripod Stand
- Power Cable
- User Manual (this document)

Image: Kaiser GEM-9520 speaker system with included microphone and tripod stand.
4. Product Overview
The Kaiser GEM-9520 is a versatile 15-inch professional speaker system designed for various audio applications. It features multiple input options, LED lighting, and a robust design.
Front Panel
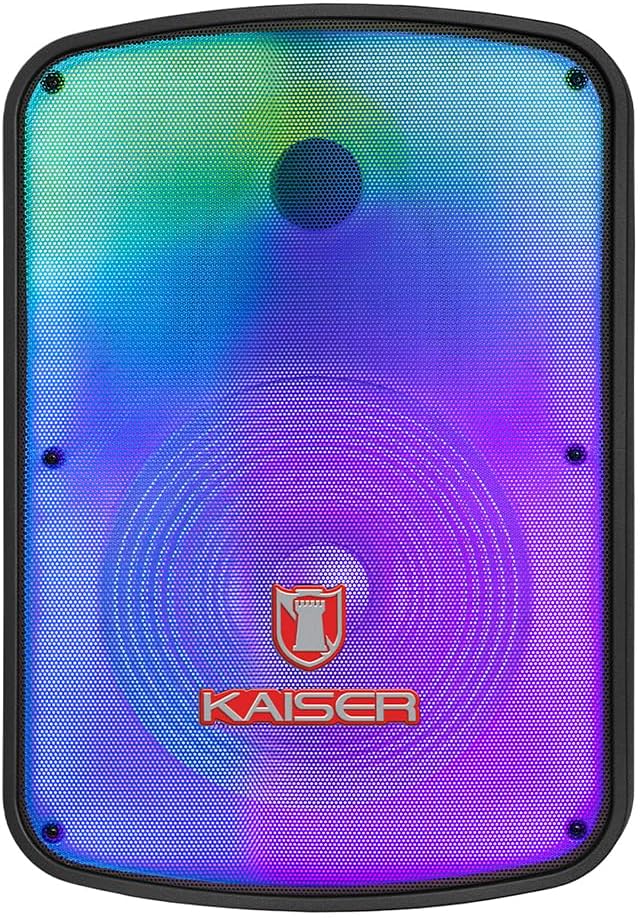
Image: Front view of the Kaiser GEM-9520 speaker, showcasing the 15-inch driver and integrated LED lighting.
Rear Control Panel
The rear panel houses all input/output connections and control knobs.

Image: Rear view of the Kaiser GEM-9520 speaker, displaying the control panel with various inputs and adjustments.

Image: Detailed view of the control panel, showing the display, volume, equalizer, and input ports.
Included Microphone and Tripod

Image: The wired microphone included with the Kaiser GEM-9520 speaker system.
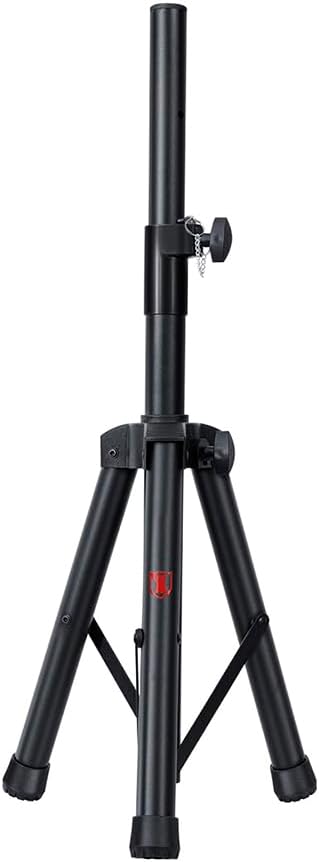
Image: The adjustable tripod stand for mounting the speaker.
5. Setup
5.1 Unpacking and Initial Placement
- Carefully remove all components from the packaging.
- Place the speaker on a flat, stable surface or prepare for tripod mounting.
5.2 Tripod Assembly and Speaker Mounting
- Unfold the tripod legs and extend them to a stable position. Ensure all locking mechanisms are secure.
- Adjust the height of the tripod to your desired level and secure the locking pin and knob.
- Carefully lift the speaker and place its bottom mounting hole onto the tripod pole. Ensure it is seated firmly.

Image: Close-up of the tripod stand, showing its adjustable components.
5.3 Power Connection and Initial Charge
- Connect the provided power cable to the speaker's power input port on the rear panel.
- Plug the other end of the power cable into a suitable electrical outlet.
- For optimal battery life, fully charge the speaker before its first use. The charging time is approximately 3 hours.
6. Operating Instructions
6.1 Power On/Off
Locate the power switch on the rear control panel. Flip it to the 'ON' position to power on the speaker. Flip it to 'OFF' to power off.
6.2 Mode Selection
Press the 'MODE' button on the control panel to cycle through available input modes: Bluetooth, USB, Micro SD, AUX, and FM Radio.
6.3 Volume and Equalizer Controls
- Volume: Rotate the 'VOLUME' knob to adjust the overall output volume.
- Treble (Agudos): Use the 'AGUDOS' knob to adjust the high-frequency response.
- Bass (Bajos): Use the 'BAJOS' knob to adjust the low-frequency response.
6.4 Bluetooth Connection
- Switch the speaker to Bluetooth mode. The display will show 'BLUE' and a pairing indicator will flash.
- On your mobile device (smartphone, tablet, laptop), enable Bluetooth and search for available devices.
- Select 'Kaiser GEM-9520' (or similar name) from the list.
- Once paired, the speaker will emit a confirmation sound, and the Bluetooth indicator will stop flashing.
6.5 USB/Micro SD Playback
- Insert a USB flash drive or Micro SD card (pre-loaded with MP3 audio files) into the respective port.
- The speaker will automatically switch to USB/Micro SD mode and begin playback. If not, press the 'MODE' button.
- Use the playback controls (Play/Pause, Next/Previous Track) on the control panel to manage your music.
6.6 AUX Input
- Connect an external audio device (e.g., MP3 player, computer) to the 'AUX' input port on the speaker using a 3.5mm audio cable.
- Switch the speaker to AUX mode using the 'MODE' button.
- Control playback and volume from your connected device.
6.7 Microphone Usage
- Connect the wired microphone to the 'MIC' input port on the rear panel.
- Adjust the microphone volume using the 'VOL MIC' knob.
- Adjust the echo effect using the 'ECO' knob.

Image: Close-up of the wired microphone, showing its ON/OFF switch.
6.8 Microphone Audio Priority Function
This function automatically lowers the background music volume when the microphone is in use, making the voice clearer and more prominent. To activate/deactivate this function, refer to the specific button or switch on the control panel labeled for 'Mic Priority' or similar.

Image: Diagram illustrating the microphone audio priority function, which lowers music volume when the microphone is active.
6.9 KSR-LINK Function
The KSR-LINK function allows you to wirelessly connect two compatible Kaiser speakers for a stereo sound experience. Refer to the specific instructions for KSR-LINK pairing, usually involving pressing a dedicated button on both speakers simultaneously.
7. Maintenance
- Cleaning: Wipe the speaker's exterior with a soft, dry cloth. Do not use abrasive cleaners, waxes, or solvents.
- Storage: When not in use for extended periods, store the speaker in a cool, dry place, away from direct sunlight and extreme temperatures.
- Battery Care: To prolong battery life, avoid fully discharging the battery frequently. Recharge the speaker regularly, even if not in use.
8. Troubleshooting
| Problem | Possible Cause | Solution |
|---|---|---|
| No power | Power cable not connected; Battery discharged; Power switch off. | Ensure power cable is securely connected and plugged in. Charge the battery. Turn the power switch to 'ON'. |
| No sound | Volume too low; Incorrect input mode; External device not playing. | Increase the master volume. Select the correct input mode. Ensure the connected device is playing and its volume is up. |
| Bluetooth not connecting | Speaker not in pairing mode; Device too far; Previously paired device connected. | Ensure speaker is in Bluetooth pairing mode. Move device closer to speaker. Disconnect from other Bluetooth devices. |
| Microphone not working | Microphone not connected; Microphone volume too low; Microphone switch off. | Ensure microphone is securely plugged in. Increase 'VOL MIC' knob. Turn the microphone's ON/OFF switch to 'ON'. |
| Poor FM radio reception | Weak signal; No external antenna. | Reposition the speaker. Extend any built-in antenna or connect an external one if available. |
9. Specifications
| Feature | Specification |
|---|---|
| Model | GEM-9520 |
| Output Wattage | 25000 Watts (PMPO) |
| Speaker Size | 15 inches |
| Power Source | Battery |
| Battery Life (Average) | 6 Hours |
| Charging Time | 3 Hours |
| Connectivity Technology | AUX, Bluetooth, USB |
| Audio Inputs | Microphone, USB, Micro SD, 3.5 mm, 6.3 mm |
| Special Features | High-resolution audio, LED light, USB port, Microphone Audio Priority, KSR-LINK |
| Mounting Type | Floor Mount (Tripod included) |
| Material | Plastic |
| Product Dimensions (L x W x H) | 45 x 35 x 64 cm |
| Product Weight | 10.85 kg |
10. Warranty and Support
This Kaiser product is covered by a manufacturer's warranty. For specific warranty terms and conditions, please refer to the warranty card included in your product packaging or contact Kaiser customer support. For technical assistance or service inquiries, please visit the official Kaiser website or contact their customer service department.
