1. Introduction
This manual provides essential information for the safe and efficient operation of your GOXAWEE 4800W Wall Slotting Machine. Please read all instructions carefully before use to ensure proper function and to prevent injury or damage.
The GOXAWEE Wall Slotting Machine is a powerful electric tool designed for cutting precise grooves in various masonry materials. It features a 4800W high-purity copper motor, a speed of 6500 RPM, and supports up to five 125mm diamond saw blades for efficient slotting. Key features include infrared laser guidance for precision, multi-dimensional cutting adjustment, and a dual dust removal system for a cleaner working environment.
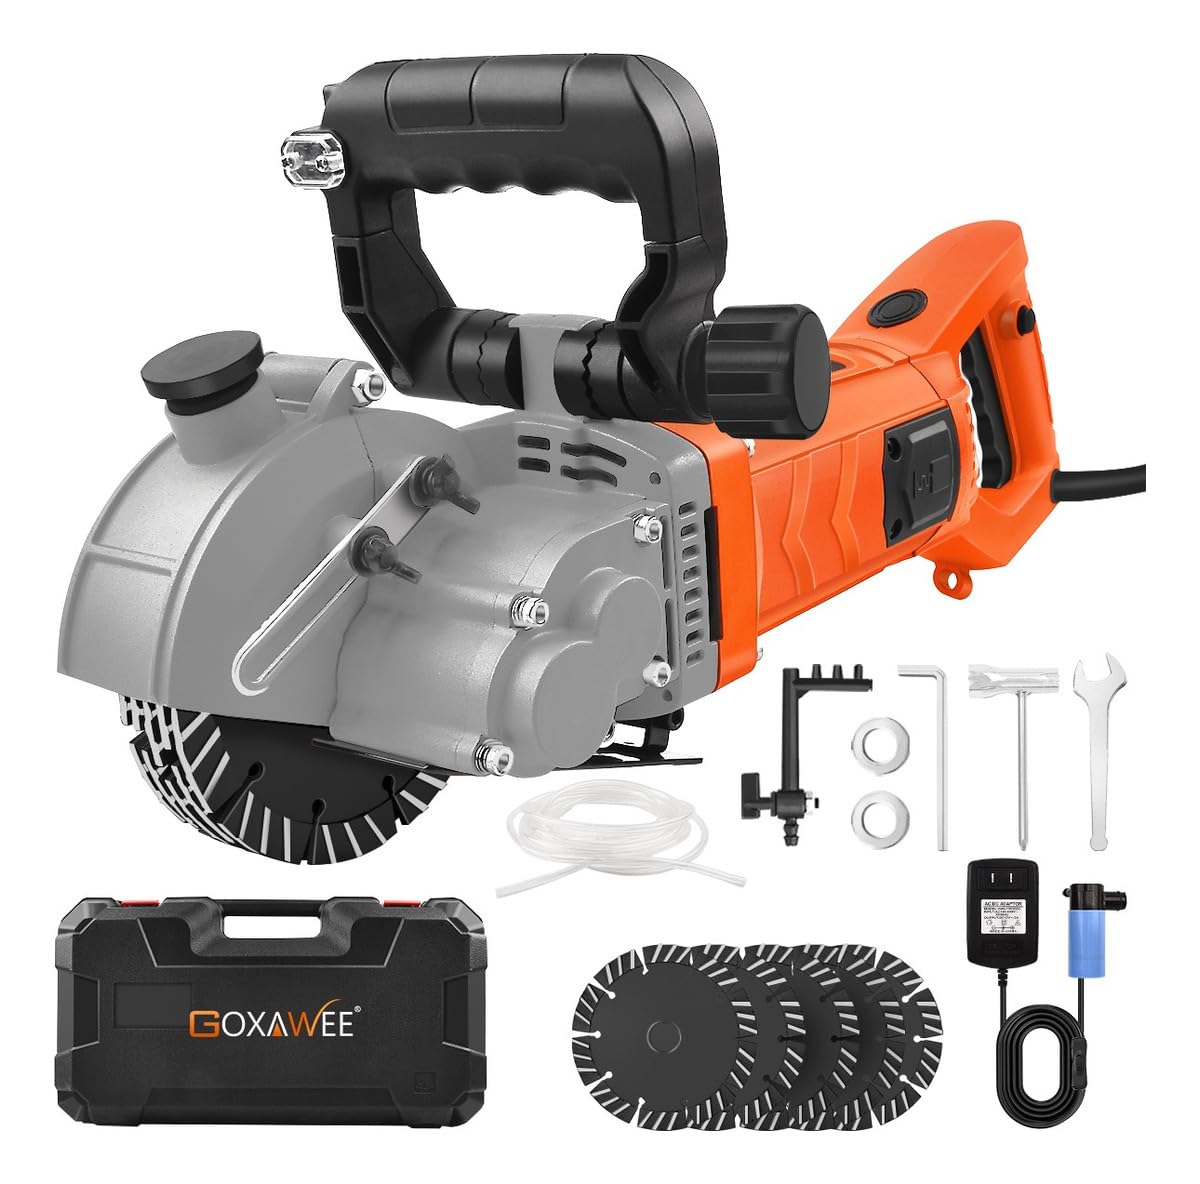
Figure 1.1: The GOXAWEE 4800W Wall Slotting Machine, a powerful electric tool for cutting grooves in masonry.
2. Safety Instructions
WARNING: Always follow basic safety precautions to reduce the risk of fire, electric shock, and personal injury when using power tools.
- Personal Protective Equipment: Always wear safety goggles, hearing protection, dust mask, and heavy-duty gloves.
- Work Area: Keep your work area clean and well-lit. Cluttered or dark areas invite accidents. Ensure the area is free from obstructions and other personnel.
- Electrical Safety: Do not expose power tools to rain or wet conditions. Do not abuse the cord. Keep the cord away from heat, oil, sharp edges, or moving parts. The machine is equipped with leakage protection, short-circuit protection, and overload protection for safer operation.
- Tool Operation: Do not force the tool. Use the correct tool for your application. Ensure the power switch is off before connecting to a power source.
- Blade Installation: Ensure blades are correctly installed and secured. The direction of the arrow on the blade and the machine must be consistent.
- Dust Management: Utilize the dual dust removal system (wet or vacuum) to minimize dust exposure. When slotting vertically, ensure the machine head faces downwards to prevent water from entering the motor, which could cause burns or electrical leakage.
- Maintenance: Disconnect the plug from the power source before making any adjustments, changing accessories, or storing power tools.
3. Product Components
The GOXAWEE Wall Slotting Machine comes with the following components:
- 1 x Wall Slotting Machine
- 5 x 125 mm Saw Blades
- 1 x Water Pipe (460 cm)
- 1 x Water Pump
- 4 x Wrenches
- 1 x Screwdriver
- 2 x Gaskets
- 1 x Storage Box

Figure 3.1: Illustrated packing list showing the wall slotting machine, saw blades, water pipe, pump, wrenches, screwdriver, gaskets, and storage box.
4. Specifications
| Feature | Specification |
|---|---|
| Brand | GOXAWEE |
| Model | G5254 |
| Power | 4800W |
| Speed | 6500 r/min |
| Voltage | 110V / 60Hz |
| Max Cutting Depth | 0-42 mm |
| Max Cutting Width | 0-40 mm |
| Saw Blade Size | 125 mm / 5 in |
| Number of Saw Blades | Up to 5 pieces |
| Net Weight | 10.9 kg |
| Blade Material | Diamond |
| Recommended Surface | Concrete, Marble, Granite, Rock, Light Brick, Red Brick, Steel, Ceramic, Stone, Porcelain |
5. Setup
5.1 Blade Installation
- Ensure the machine is unplugged from the power source.
- Use the provided wrench to loosen the nut securing the blade cover.
- Remove the outer flange and any existing blades.
- Place the desired number of 125mm diamond saw blades onto the spindle, ensuring the arrows on the blades align with the rotation direction arrow on the machine. Use the provided gaskets to maintain proper spacing between blades.
- Reinstall the outer flange and tighten the nut securely with the wrench.

Figure 5.1: Image illustrating the blade assembly and the depth adjustment knob (A) for setting cutting depth (B) and width (C).

Figure 5.2: An internal view highlighting the 4800W high-power motor, emphasizing its robust design for efficient heat dissipation and long service life.
5.2 Water Pump Connection (Wet Cutting)
For wet cutting and dust suppression:
- Connect the water pipe to the water supply port on the machine.
- Connect the other end of the water pipe to the provided water pump.
- Place the water pump into a container of clean water.
- Ensure all connections are secure to prevent leaks.

Figure 5.3: Diagram showing the connection of the water pump to the machine's water supply port for wet cutting operations.
5.3 Vacuum Cleaner Connection (Dry Cutting)
For dry cutting with dust extraction:
- Remove the red cap from the dust extraction port.
- Connect a suitable vacuum cleaner hose to the dust extraction port.
- Ensure the connection is tight to prevent dust leakage.
6. Operating Instructions
6.1 Adjusting Cutting Depth and Width
The machine allows for multi-dimensional cutting adjustments:
- To adjust the cutting depth (0-42 mm), use the adjustment knob (labeled 'A' in Figure 5.1).
- To adjust the cutting width (0-40 mm), you may need to add or remove saw blades and spacers as shown in the blade installation section.
6.2 Using Infrared Laser Guidance
The integrated infrared laser provides precise cutting guidance:
- Activate the laser by pressing the dedicated button (refer to Figure 6.1).
- Align the laser line with your desired cutting path for accurate slotting.
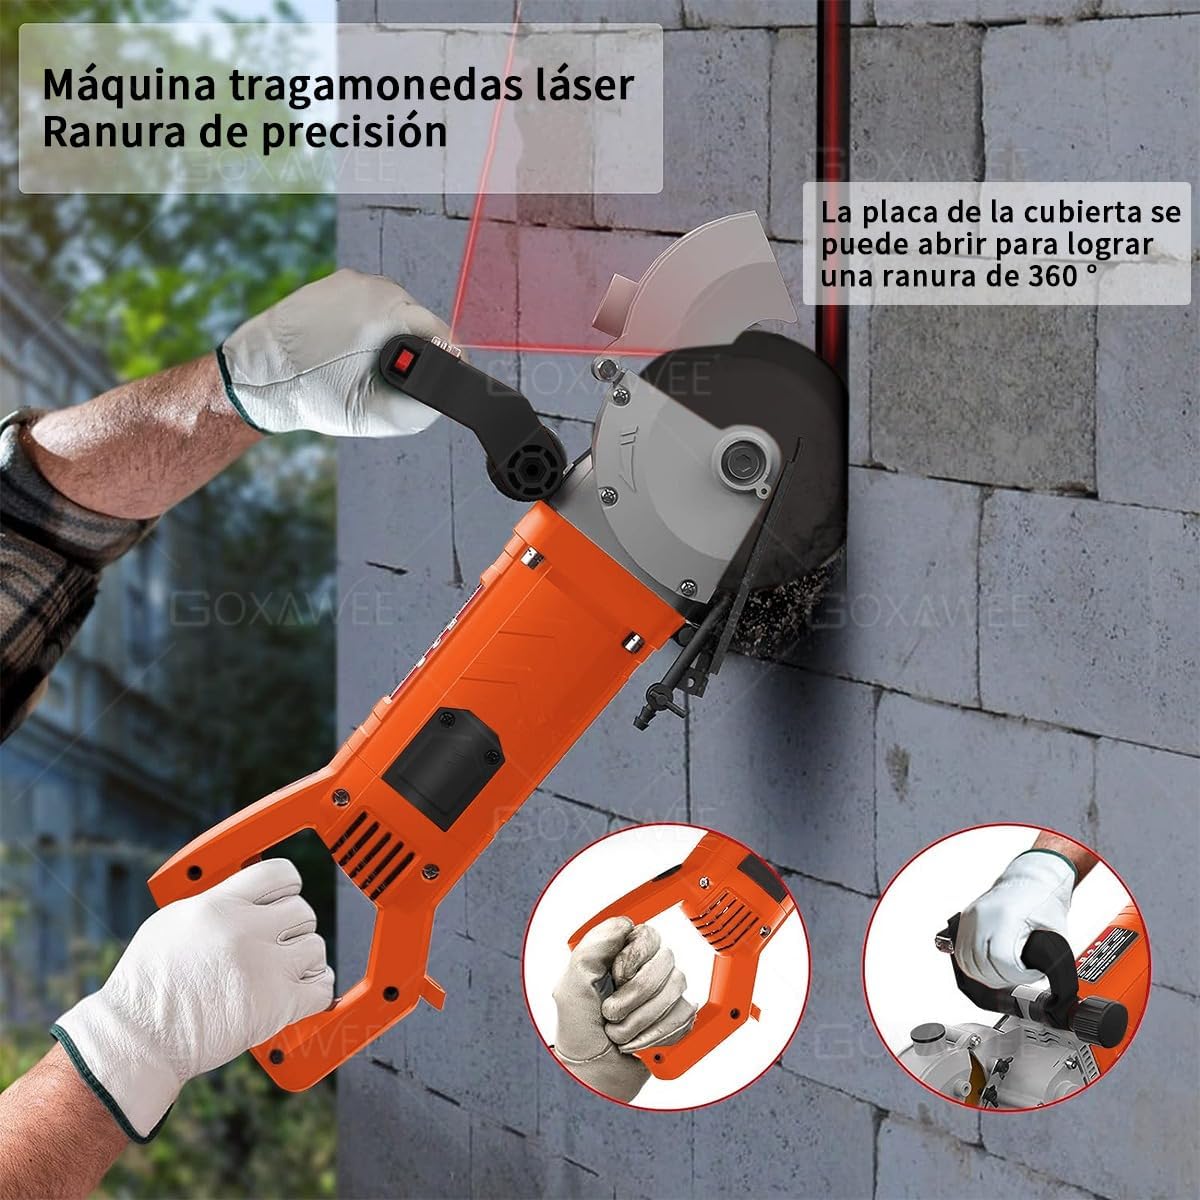
Figure 6.1: The wall slotting machine in use, demonstrating the infrared laser guidance for precise cutting. The image also shows the removable cover for corner slotting.
6.3 Ergonomic Rotating Handle
The machine features two handles for improved control and comfort:
- One handle can be rotated 180 degrees.
- The other handle can be adjusted 90 degrees.
- Adjust the handles to suit your working position and task requirements.

Figure 6.2: Illustration of the machine's ergonomic design with a handle that can rotate 180 degrees and another that adjusts 90 degrees, allowing for various working angles.
6.4 General Operation
- Ensure all safety precautions are followed and PPE is worn.
- Connect the machine to a suitable power source.
- If using wet cutting, ensure the water pump is submerged and activated.
- If using dry cutting, ensure the vacuum cleaner is connected and activated.
- Position the machine on the workpiece, aligning the laser with your cutting line.
- Press the power switch (which includes an automatic safety lock).
- Slowly guide the machine along the cutting path, applying steady pressure.
- After cutting, release the power switch and wait for the blades to stop completely before setting the machine down.

Figure 6.3: Examples of materials suitable for cutting with the GOXAWEE Wall Slotting Machine, including marble floors, red bricks, and concrete walls.
7. Maintenance
- Cleaning: Regularly clean the machine, especially after wet cutting, to prevent residue buildup. Use a damp cloth and mild detergent. Do not use solvents.
- Blade Inspection: Inspect saw blades before each use for wear, damage, or dullness. Replace worn blades promptly to ensure efficient cutting and safety.
- Lubrication: Refer to the product diagram for any specific lubrication points.
- Storage: Store the machine in its storage box in a dry, secure place, out of reach of children.
8. Troubleshooting
| Problem | Possible Cause | Solution |
|---|---|---|
| Machine does not start | No power supply; Safety lock engaged; Overload protection activated. | Check power connection; Ensure safety lock is disengaged; Allow machine to cool down if overloaded. |
| Reduced cutting performance | Dull or damaged blades; Incorrect blade installation; Insufficient power. | Replace blades; Verify blade direction and spacing; Check power source. |
| Excessive dust during operation | Dust removal system not connected or functioning; Dry cutting without vacuum. | Connect water pump or vacuum cleaner; Ensure water flow or vacuum suction is adequate. |
| Water leakage from machine | Loose water pipe connection; Damaged water pipe. | Tighten water pipe connections; Replace damaged water pipe. |
9. Warranty and Support
For warranty information, technical support, or service inquiries, please contact GOXAWEE customer service. Keep your purchase receipt as proof of purchase.
Contact Information: Refer to the product packaging or the official GOXAWEE website for the most up-to-date contact details.

