1. Introduction
This manual provides comprehensive instructions for the installation, operation, and maintenance of your Aero-Flex Snap & Trim Trimmer Head. Designed for compatibility with specific Craftsman and Black + Decker auto-feed string trimmers, this system offers an efficient alternative to traditional string spools.
The Aero-Flex Snap & Trim system simplifies blade replacement and enhances trimming performance with its flexible, durable blades and ground-control glider feature.
2. Safety Information
Always prioritize safety when operating power tools. Read and understand all safety warnings and instructions provided with your string trimmer before installing or using the Aero-Flex Snap & Trim head. Failure to follow these instructions may result in electric shock, fire, and/or serious injury.
- Wear appropriate personal protective equipment (PPE), including eye protection, hearing protection, long pants, and sturdy footwear.
- Ensure the trimmer is turned off and the battery removed (for cordless models) or unplugged (for corded models) before performing any installation, maintenance, or blade changes.
- Keep bystanders, especially children and pets, at a safe distance (at least 50 feet/15 meters) from the operating area.
- Inspect the trimmer head and blades for damage before each use. Replace damaged blades immediately.
- Operate the trimmer only in well-lit conditions and on stable ground.
3. Package Contents
Verify that all items are present in your package:
- Aero-Flex Snap & Trim Trimmer Head
- 16 Flexible Replacement Blades

Figure 3.1: Aero-Flex Snap & Trim Trimmer Head and 16 Blades as packaged.
4. Compatibility
The Aero-Flex Snap & Trim Trimmer Head is specifically designed for use with Craftsman and Black + Decker auto-feed string trimmers. It is not compatible with bump-feed string trimmers.
Compatible Models:
- BLACK & DECKER: BCASK890E1, BEST935, BESTA510, BESTA512, BESTE620, CST1000, CST1100, CST1200, CST2000, GH400, GH500, GH600, GH610, GH900, GH912, LCC140, LCC221, LCC222, LCC2223ZP, LCC340C, LST1018, LST120, LST126, LST136B, LST140, LST140C, LST201, LST220, LST300, LST400, LST420, LST522, LSTE522, LSTE523, LSTE523, MTC220, MTE912, NST1018, NST1024, NST1118, NST1810, NST2018, NST2118, PS76110A, ST6600, ST7000, ST7200, ST7700, ST7701, ST8600, ST9000
- CRAFTSMAN: CMCST900D1, CMCST910M1, CMEST900, CMEST913, CMESTHOS912, CMST915C1

Figure 4.1: The Aero-Flex Snap & Trim system is compatible with Craftsman and Black+Decker auto-feed trimmers.

Figure 4.2: Visual guide for compatible auto-feed trimmer heads versus incompatible bump-feed trimmer heads.
5. Setup and Installation
The Aero-Flex Snap & Trim system is designed for easy, tool-free installation, replacing your trimmer's existing auto-feed spool and spring.
- Prepare Your Trimmer: Ensure your string trimmer is turned off and disconnected from its power source (battery removed or unplugged).
- Remove Existing Head: Carefully remove the existing auto-feed spool and spring from your trimmer head. This typically involves pressing tabs or twisting the cap to access the spool.
- Install Aero-Flex Blades: Insert the flexible Aero-Flex blades into the designated slots on the new trimmer head. Ensure they are securely seated.
- Attach Aero-Flex Head: Snap the Aero-Flex Snap & Trim head directly into place where the original spool and spring were located. No retrofitting is required.
- Verify Installation: Gently tug on the installed head to ensure it is firmly attached and does not wobble.

Figure 5.1: Step-by-step diagram for replacing the auto-feed head with the Aero-Flex Snap & Trim head.

Figure 5.2: Demonstrates the simple process of inserting the flexible blades into the Aero-Flex head.
Video 5.1: Official Aero-Flex video demonstrating the installation of the Snap & Trim head on Craftsman auto-feed trimmers.
6. Operating Instructions
Once the Aero-Flex Snap & Trim head is securely installed, operate your string trimmer according to its manufacturer's instructions. The Aero-Flex system enhances your trimming experience with the following features:
- Efficient Cutting: The aerodynamically designed blades are engineered to cut effectively even at lower speeds, potentially extending battery life and reducing effort.
- Ground-Control Glider: The integrated glider allows the trimmer head to rest on the ground, reducing arm fatigue and helping maintain a consistent cutting height. This feature can also convert your trimmer into a small plot mower.
- Increased Cutting Control: The neon-colored blades provide better visibility of your cutting path, allowing for more precise trimming and edging.

Figure 6.1: Demonstrates the Aero-Flex system in use for trimming along a fence line.

Figure 6.2: The ground-control glider allows the trimmer head to rest on the ground for easier operation.
7. Blade Replacement
Aero-Flex blades are designed for durability but will eventually wear down or break. Replacing them is quick and easy, eliminating the need for spools, springs, or rewinding.
- Power Off: Ensure the trimmer is turned off and disconnected from its power source.
- Remove Worn Blades: Gently pull out the worn or broken blades from their slots on the Aero-Flex head.
- Insert New Blades: Snap new flexible blades into the empty slots. Ensure they are fully seated and secure before resuming operation.
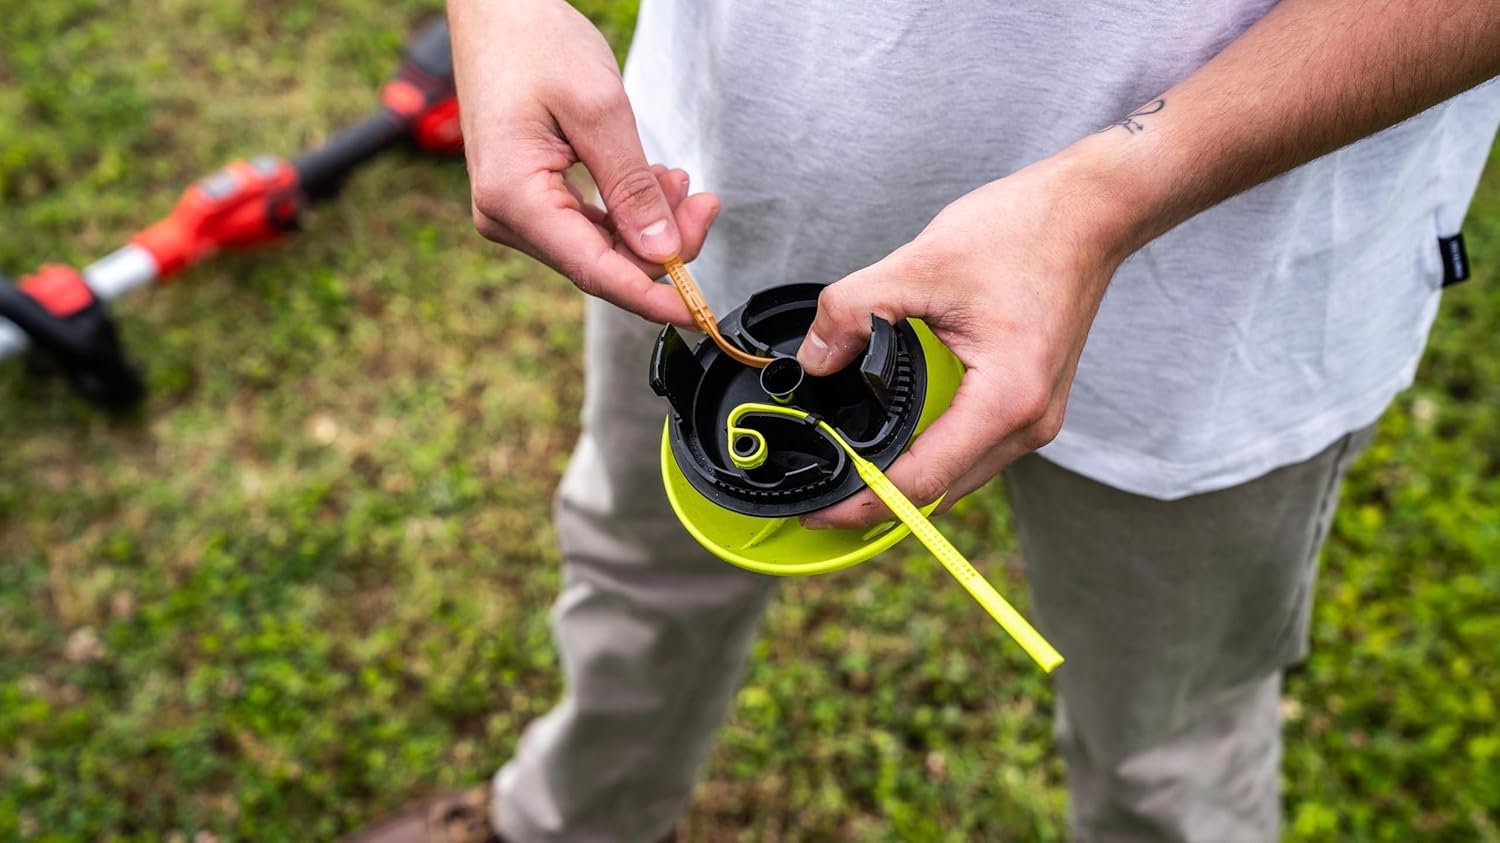
Figure 7.1: Illustrates the simple process of replacing a worn blade with a new one.
8. Maintenance
Regular maintenance ensures optimal performance and extends the life of your Aero-Flex Snap & Trim Trimmer Head.
- Clean After Each Use: Remove grass clippings and debris from the trimmer head and shield. A stiff brush or cloth can be used.
- Inspect Blades: Before each use, check the flexible blades for signs of wear, cracks, or damage. Replace them as needed.
- Storage: Store the trimmer head in a clean, dry place away from direct sunlight and extreme temperatures.
9. Troubleshooting
If you encounter issues with your Aero-Flex Snap & Trim Trimmer Head, consider the following:
- Blades wearing quickly:
- Ensure you are not attempting to cut excessively thick or woody vegetation beyond the trimmer's capacity.
- Avoid contact with hard surfaces like concrete, rocks, or metal fences, which can rapidly degrade blades.
- Verify that the blades are correctly installed and fully seated.
- Reduced cutting efficiency:
- Check if blades are worn and require replacement.
- Ensure your trimmer's battery is fully charged or that it is receiving adequate power.
- Trimmer head not staying attached:
- Re-check the installation steps to ensure the head is properly snapped into place.
- Confirm compatibility with your specific trimmer model.
For further assistance, please contact Aero-Flex customer support.
10. Specifications
| Model Number | STBDB16 |
| Product Dimensions | 5 x 5 x 5 inches |
| Item Weight | 8.4 ounces |
| Manufacturer | Aero-Flex Technologies |
| Compatibility | Craftsman & Black + Decker Auto-Feed String Trimmers |
11. Warranty and Support
For warranty information or technical support regarding your Aero-Flex Snap & Trim Trimmer Head, please contact Aero-Flex Technologies, Inc. directly. Contact details may be available on the product packaging or the official Aero-Flex website.
Manufacturer: Aero-Flex Technologies, Inc.
For additional information, you may visit the Aero-Flex Store on Amazon.