
1. Product Overview
The Veise VE06 Smart Deadbolt is an advanced keyless entry system designed for enhanced home security and convenience. It offers multiple unlocking methods, including app control, passcodes, fobs, physical keys, and a thumb turn. This smart lock integrates seamlessly with smart home ecosystems when paired with a compatible gateway, providing remote access management and real-time monitoring. Its robust design and intelligent features ensure reliable operation and peace of mind.

Figure 1: Veise VE06 Smart Deadbolt, showing the exterior unit, included keys, and the mobile application interface.
2. What's in the Box
Before beginning installation, verify that all components are present and undamaged. The package should contain the following items:
- Exterior Assembly (Keypad Unit)
- Interior Assembly (Thumb Turn Unit)
- Latch & Latch Screws (x2)
- Strike & Strike Screws (x2)
- Mounting Plate & Screws
- IC Cards (x2)
- Backup Keys (x2)
- Reset Tool
- Drive-in Collar
- Installation Instruction Manual
- Programming Quick Setup Guide

Figure 2: Exploded view of the Veise VE06 Smart Deadbolt components, detailing each part included in the box.
3. Installation Guide
The Veise VE06 Smart Deadbolt is designed for easy installation and fits most US standard left-handed and right-handed doors. A screwdriver is typically the only tool required. During installation, it is recommended to keep the door open or ajar and not close the door before the batteries are inserted.
3.1. Pre-Installation Checks (Measure Dimensions)
Ensure your door meets the following specifications for proper installation:
- Hole Diameter: 1-1/2" or 2-1/8" (38mm or 54mm)
- Backset: 2-3/8" or 2-3/4" (60mm or 70mm)
- Door Thickness: 1-3/8" to 2" (35mm-50mm)
- Minimal Distance (between deadbolt and handle): ≥4" (101.6mm)
- Bore Diameter: 1" (25mm)
Ensure the hole in the door frame is drilled a minimum of 1" (25mm) deep for the strike plate.

Figure 3: Door measurement guide for compatibility with the Veise VE06 Smart Deadbolt.
3.2. Installation Steps
- Install the Latch and Strike:
Insert the latch into the door edge. If the backset is 2-3/8" (60mm), proceed directly. If it's 2-3/4" (70mm), extend the length of the latch by rotating the sliver paddle. Secure the latch with screws. Install the strike plate on the door frame, ensuring it aligns with the latch.
- Install the Exterior Assembly:
Keep the torque blade horizontally. Align it with the hole on the latch and go through. Route the cable below the latch. If the hole diameter is 1-1/2" (38mm), remove the spacer from the exterior assembly.
- Install the Mounting Plate:
Attach the mounting plate to the interior side of the door, securing it with screws. Ensure the cable from the exterior assembly passes through the designated opening in the mounting plate.
- Determine Door Handing:
Before attaching the interior assembly, determine if your door is right-handed or left-handed. For a right-handed door, the thumb turn direction should be vertical, and the slide switch on the interior assembly should be set to "R". For a left-handed door, the thumb turn direction should be horizontal, and the slide switch should be set to "L".
- Connect Interior Assembly:
Insert the cable connector to the socket. Push it in firmly until it's fully attached. Ensure the power cord is properly plugged in. Align the axle with the hole in the latch.
- Secure Interior Assembly:
Attach the interior assembly to the mounting plate using the provided screws. Use the correct type of screws (typically the longer, flat-head screws for the main attachment).
- Insert Batteries and Cover:
Insert 4 AA Alkaline batteries into the battery compartment, ensuring correct polarity. Replace the battery cover.
- Reset the Lock:
Press and hold the reset button on the interior assembly (usually located near the battery compartment) until you hear a beep or see an indicator light flash. This resets the lock to factory settings.
- Test the Lock:
Manually test the deadbolt by rotating the thumb turn and using the keypad to ensure it locks and unlocks smoothly. Verify that the latch extends and retracts fully without obstruction.
Video 1: Detailed installation guide for the Veise VE06 Smart Deadbolt, demonstrating each step from unboxing to final testing.
4. Setup and App Control
The Veise VE06 Smart Deadbolt is primarily controlled via a mobile application, offering advanced features and remote management. It is crucial to activate the lock by touching the keypad before pairing with the app.
4.1. Initial App Pairing
- Download the designated mobile application (e.g., DDLock or TT Lock App, as indicated by product materials) from your device's app store.
- Create an account and log in.
- Ensure Bluetooth is enabled on your smartphone.
- In the app, select "Add Lock" and choose "Deadbolt" or the appropriate lock type.
- Follow the on-screen instructions to search for and connect to your VE06 lock. The lock should be in pairing mode after reset.
- Important Note: Do not change the Master Password on the keypad before pairing with the app. The app will generate a master code, which can be changed later.

Figure 4: App control interface for the Veise VE06 Smart Deadbolt.
4.2. Remote Control (Optional)
For remote control functionalities, voice commands with Alexa and Google Home, and real-time access logs, the Veise G2 gateway (sold separately) is required. Pair the gateway with your lock through the app following the gateway's specific instructions.
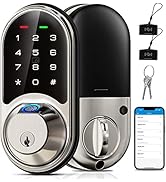
Figure 5: Veise G2 Gateway for remote access and smart home integration.
5. Operating Instructions
5.1. Unlocking the Deadbolt
- Via App: Open the app, select your lock, and tap the unlock icon.
- Via Passcode: Enter your valid passcode on the touchscreen keypad. The keypad features anti-peeping technology, allowing you to enter random digits before or after your actual code to prevent unauthorized viewing.
- Via Fob Card: Present the IC card to the designated sensor area on the keypad.
- Via Physical Key: Insert the backup key into the keyhole and turn to unlock.
- Via Thumb Turn: From the interior, rotate the thumb turn to unlock.

Figure 6: Unlocking the deadbolt using a passcode on the keypad.
5.2. Locking the Deadbolt
- Auto-Lock: The lock can be configured via the app to automatically lock after a set period (5-900 seconds).
- One-Touch Locking: Press and hold the "#" button on the keypad for 2 seconds.
- Via App: Press and hold the lock button in the app for 2 seconds.
- Via Physical Key: Turn the physical key to lock from the exterior.
- Via Thumb Turn: From the interior, rotate the thumb turn to lock.

Figure 7: The smart deadbolt's auto-lock feature provides convenience and security.
5.3. User Management (via App)
The app allows for comprehensive user management, including generating eKeys and various types of passcodes:
- eKeys: Grant temporary or permanent access to others via eKeys sent through the app.
- Timed Passcodes: Create passcodes that are valid only for specific periods.
- One-Time Passcodes: Generate passcodes that can be used only once.
- Recurring Passcodes: Set up passcodes that work on a recurring schedule (e.g., every Monday).
- Custom Passcodes: Create personalized passcodes.

Figure 8: App interface for generating and managing various types of access codes.
6. Maintenance
- Battery Replacement: The lock will provide low battery alerts through the app and potentially an indicator light. Replace all 4 AA Alkaline batteries promptly when alerted to ensure continuous operation.
- Cleaning: Clean the keypad and exterior surfaces with a soft, dry cloth. Avoid abrasive cleaners or solvents that could damage the finish or electronic components.
- Regular Checks: Periodically check that all screws are secure and that the deadbolt operates smoothly without resistance.
7. Troubleshooting
If you encounter issues with your Veise VE06 Smart Deadbolt, refer to the following common solutions:
| Problem | Solution |
|---|---|
| App cannot find or connect to the lock. | Ensure Bluetooth is enabled on your phone. Activate the lock by touching the keypad. If the issue persists, reset the lock to factory settings and attempt pairing again. |
| Master Password not working after app pairing. | After pairing with the app, the master code is managed by the app. The original default master code on the keypad will no longer work. Use the master code generated or set within the app. |
| Lock is unresponsive or not powering on. | Check battery installation and ensure batteries are fresh. Verify that the power cord connection between the exterior and interior assemblies is secure. |
| Deadbolt does not extend/retract smoothly. | Check for any obstructions in the door frame or strike plate. Ensure the latch and strike plate are properly aligned. Verify that the torque blade is correctly aligned with the latch mechanism. |
| Keypad is locked after multiple incorrect entries. | The lock has an anti-cracking feature. It will temporarily lock the keypad for 2 minutes after 5 incorrect entries. Wait for the lockout period to expire before trying again. |
For more detailed troubleshooting, please refer to the dedicated Troubleshooting Guide (PDF) available on the product support page.
8. Specifications
| Feature | Detail |
|---|---|
| Brand | Veise |
| Model | VE06 |
| Lock Type | Keypad Deadbolt |
| Unlocking Methods | APP, Password, Fobs, Key, Thumb turn |
| Material | Aluminum, Zinc |
| Color | Satin Nickel |
| Dimensions (L x W x H) | 6.1 x 2.7 x 1.4 inches |
| Power Source | 4 AA Alkaline batteries (not included) |
| Connectivity | Bluetooth, WiFi (Veise G2 WiFi Gateway Required for WiFi features) |
| Operating Temperature | -31°F to 158°F |
| Waterproof Rating | IP54 |
| Security Features | Auto-lock, One-touch locking, Privacy mode, Low battery alerts, Anti-peeping and anti-hacking touchscreen keypad, AES encryption. |
9. Warranty and Support
The Veise VE06 Smart Deadbolt comes with at least a one-year warranty from the date of purchase. Veise is committed to providing excellent customer service and offers comprehensive support for its products.
- Online Phone Support: Available weekdays from 9 AM to 5 PM PST.
- After-Sales Email Service: Available 24 hours a day.
- Free Replacement: Contact support for product issues or free replacements under warranty.
For assistance, please refer to the contact information provided in your product packaging or on the official Veise website.
Figure 9: Veise offers dedicated US-based customer support.


