1. Introduction
Thank you for choosing the BesLowe Outdoor Wall Lights. This product is designed to provide reliable exterior lighting with the added convenience of a UL certified electrical outlet. Its modern design and durable construction ensure long-lasting performance in various outdoor environments. Please read this manual thoroughly before installation and use to ensure proper operation and safety.
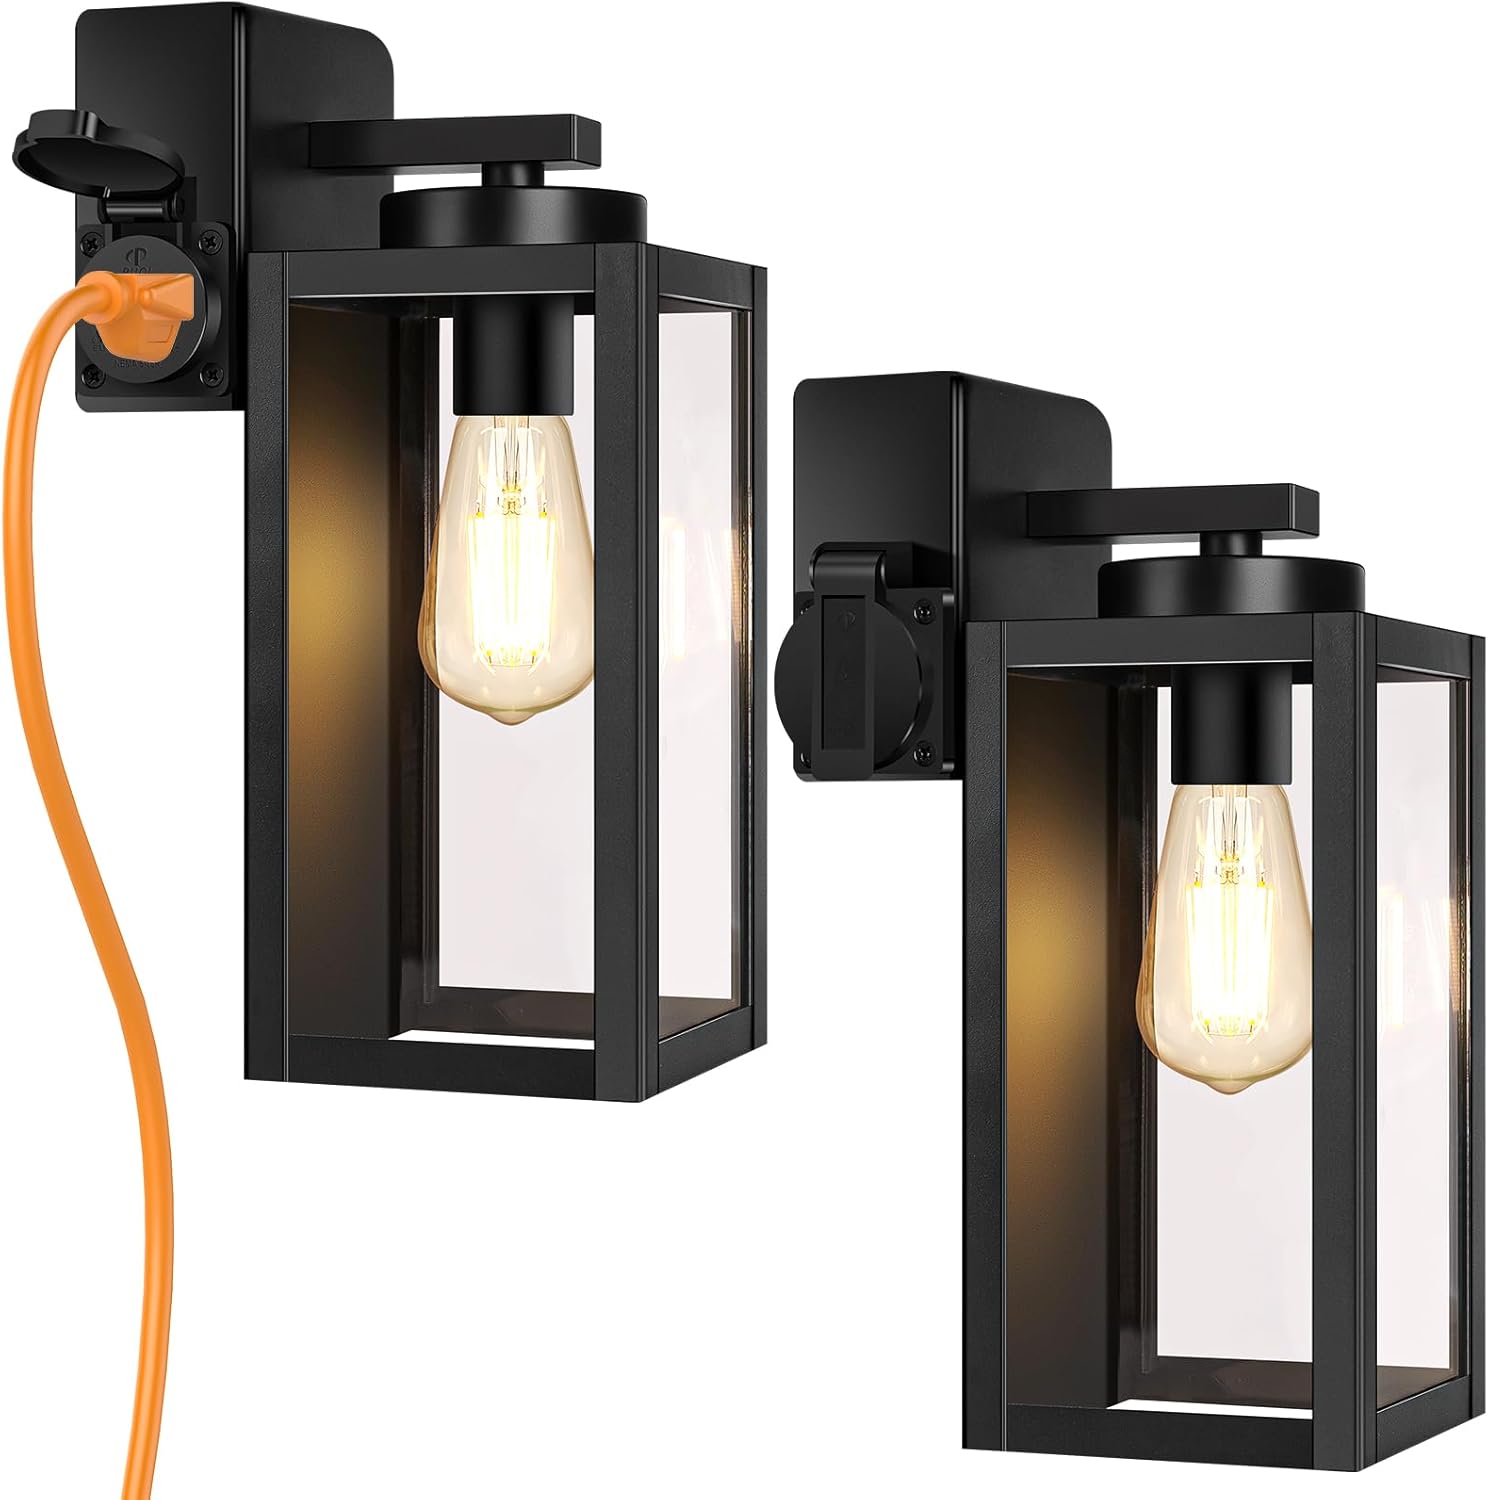
Image 1.1: BesLowe Outdoor Wall Lights with Integrated Outlet.
2. Safety Information
WARNING: To avoid fire, electric shock, or serious personal injury, always turn off power at the main circuit breaker before installing, servicing, or cleaning this fixture. This product must be installed in accordance with the applicable installation code by a person familiar with the construction and operation of the product and the hazards involved.
- Ensure the power supply is disconnected before any installation or maintenance.
- This fixture is designed for 120V electrical systems.
- The integrated outlet is UL certified, rated for a maximum current of 15A and maximum power of 1875W. Do not exceed these ratings.
- Use only E26 base bulbs with a maximum wattage of 100W.
- Consult a qualified electrician if you are unsure about any part of the installation process.
- Keep children away from the installation area.

Image 2.1: UL Certified Outlet Detail.
3. Package Contents
Verify that all components are present before beginning installation:
- Wall Light Fixture (x2)
- Accessories Kit (x2)
- Instruction Manual (x1)
4. Specifications
| Feature | Specification |
|---|---|
| Brand | BesLowe |
| Model Name | B04013GP |
| Color | Black |
| Material | Metal, Glass |
| Product Dimensions (L x W x H) | 4.7" x 4.7" x 12.8" |
| Power Source | Hard-Wired |
| Voltage | 120 Volts |
| Max Bulb Wattage | 100 Watts |
| Bulb Base | E26 |
| Outlet Max Current | 15A |
| Outlet Max Power | 1875W |
| Special Features | Anti-Rust, UL Certified Outlet, Waterproof |
| Water Resistance Level | Waterproof |
| Indoor/Outdoor Usage | Outdoor |
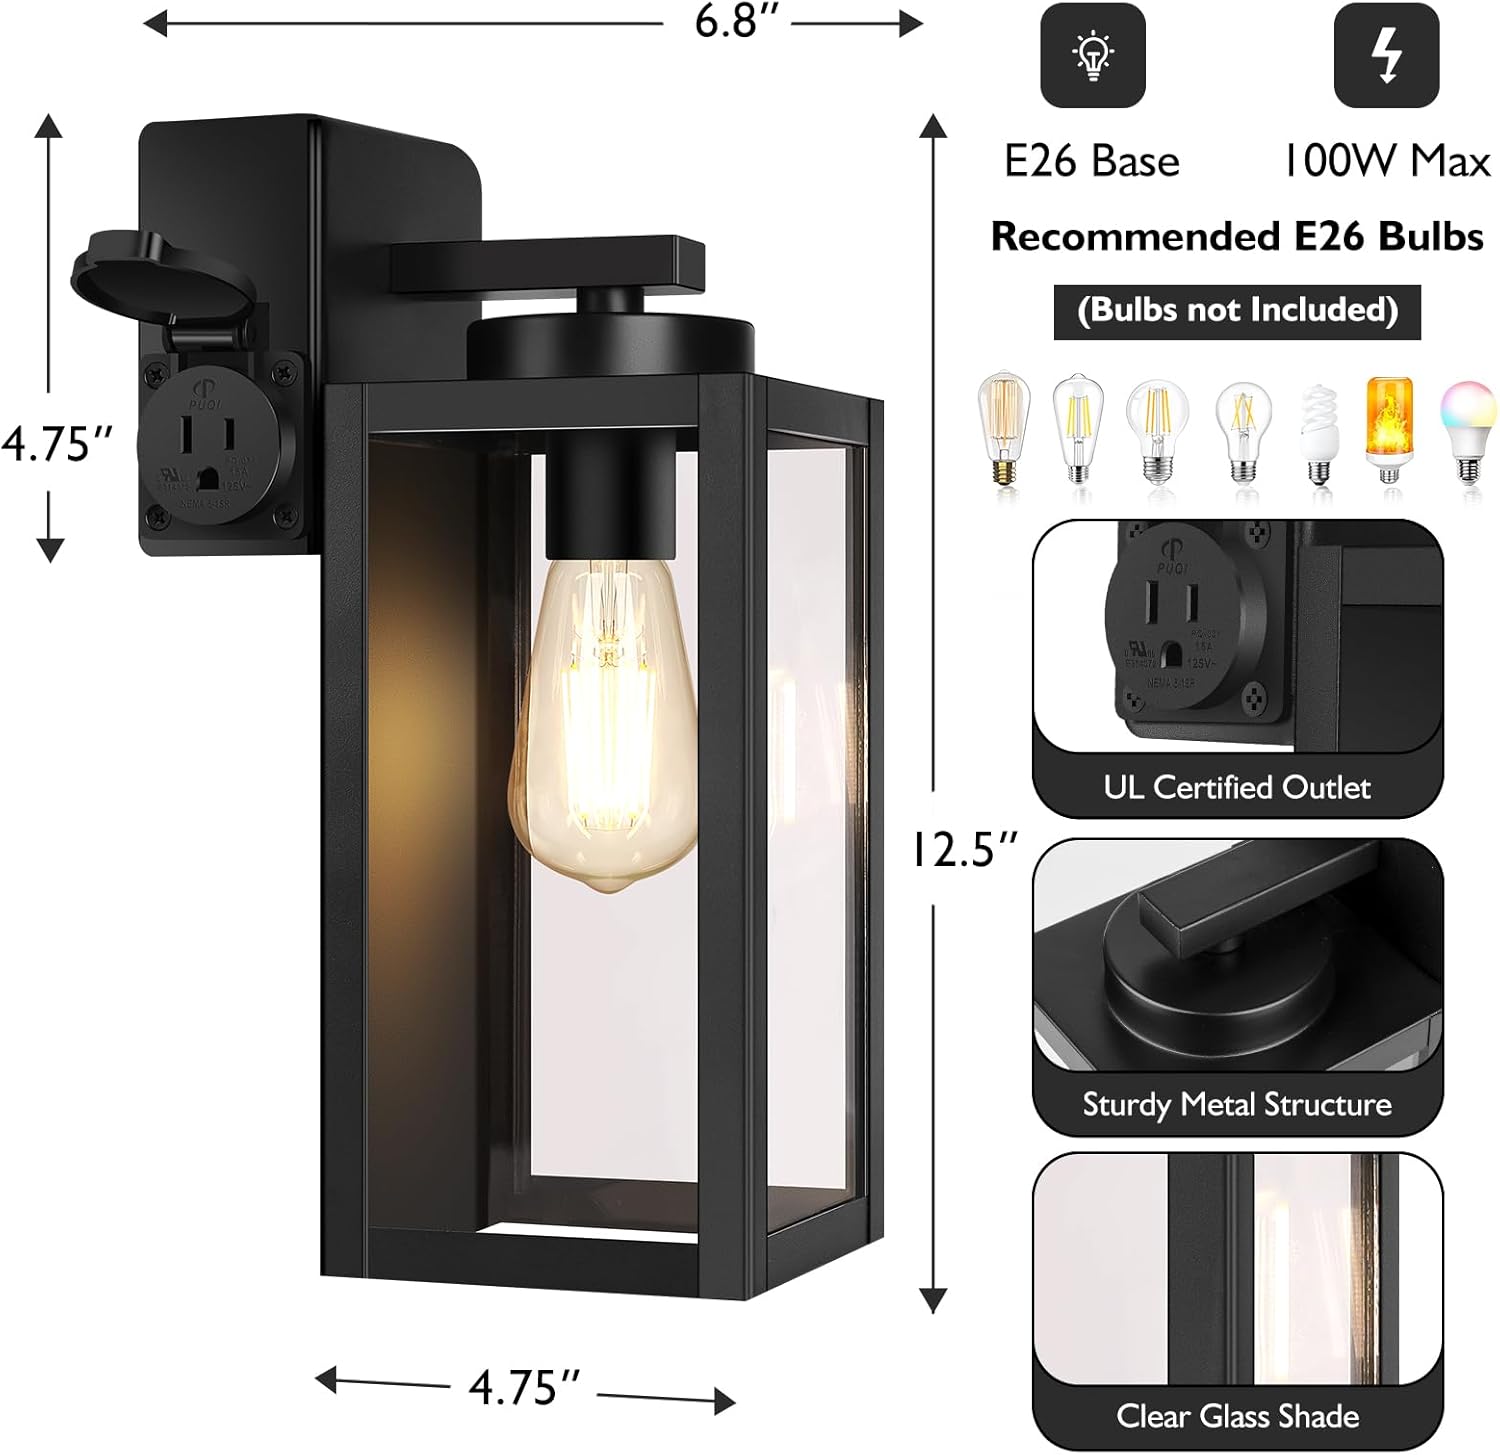
Image 4.1: Product Dimensions and Key Features.
5. Setup and Installation
This fixture is designed for hard-wired wall-mount installation. It is recommended that installation be performed by a qualified electrician.
5.1 Before Installation
- Turn off Power: Locate the main circuit breaker and turn off the power to the junction box where the fixture will be installed.
- Unpack: Carefully remove all contents from the packaging.
- Inspect: Check the fixture for any damage. Do not install if damaged.
5.2 Installation Steps
The accessories kit includes all necessary mounting hardware.
- Attach Mounting Plate: Secure the mounting plate (from the accessories kit) to the junction box using the provided screws. Ensure it is firmly attached.
- Wire Connections: Connect the fixture's wires to your house's electrical wires. Typically, this involves:
- Black (Live) to Black (Live)
- White (Neutral) to White (Neutral)
- Green or Bare Copper (Ground) to Green or Bare Copper (Ground)
- Mount Fixture: Carefully align the fixture with the mounting plate and secure it with the decorative nuts or screws provided.
- Install Bulb: Insert an E26 base bulb (not included) into the socket. Ensure the bulb wattage does not exceed 100W. The open bottom design allows for easy bulb installation and replacement.
- Restore Power: Turn the power back on at the main circuit breaker.

Image 5.1: Fixture Components for Installation.
6. Operating Instructions
6.1 Light Operation
Once installed and powered, the light fixture operates via your existing wall switch. Ensure an E26 bulb (up to 100W) is correctly installed.
6.2 Integrated UL Certified Outlet
The integrated outlet provides convenient power for outdoor devices. To use the outlet:
- Ensure the light fixture is powered on (the light switch must be in the 'ON' position for the outlet to function).
- Open the protective cover of the outlet.
- Plug in your outdoor electrical device.
- Ensure the total power draw does not exceed 1875W (15A).
- Close the protective cover when not in use to maintain weather resistance.

Image 6.1: Versatile Applications of the Integrated Outlet.
7. Maintenance
7.1 Cleaning
To maintain the appearance and performance of your light fixture:
- Ensure power is off before cleaning.
- Wipe the metal and glass surfaces with a soft, damp cloth.
- Avoid using abrasive cleaners or solvents, as these can damage the finish.
7.2 Bulb Replacement
To replace the bulb:
- Ensure power is off and the bulb has cooled completely.
- Access the bulb from the open bottom of the fixture.
- Unscrew the old E26 bulb and screw in a new one. Remember to use an E26 base bulb with a maximum of 100W.
8. Troubleshooting
| Problem | Possible Cause | Solution |
|---|---|---|
| Light does not turn on | No power to fixture Faulty bulb Loose wiring connection | Check circuit breaker Replace bulb Check wiring connections (ensure power is off) |
| Outlet is not providing power | Light switch is off Device exceeds outlet rating Internal wiring issue | Turn the light switch to the 'ON' position Use a device within 15A/1875W limits Consult a qualified electrician |
| Fixture shows signs of rust/corrosion | Extreme weather exposure Damage to protective coating | Clean regularly. If severe, consider replacement or professional repair. The fixture is designed to be anti-rust. |

Image 8.1: Weather Resistance Features.
9. Warranty and Support
This product comes with an extended warranty. For specific warranty details, claims, or technical support, please contact BesLowe customer service through the retailer where the product was purchased or visit the official BesLowe website.