Introduction
This manual provides detailed instructions for the setup, operation, and maintenance of your CHKOSDA 28.5-inch Double Sided Digital Wall Clock. This multifunctional LED clock is designed for clear visibility from various angles, offering time, date, temperature display, along with timer and alarm functionalities. Please read this manual thoroughly before use to ensure proper operation and longevity of your device.
Package Contents

Image: Overview of included components: the digital clock, remote control, USB power adapter, suspension chains, and telescopic rods for mounting.
- 28.5-inch Double Sided Digital Wall Clock
- Remote Control
- USB Power Adapter
- USB Power Cable (10 feet long)
- Suspension Chains (2 sets)
- Telescopic Rods (2 sets)
- Mounting Hardware (screws, anchors)
- Instruction Manual (this document)
Specifications
| Brand | CHKOSDA |
| Model Number | CH3397 |
| Display Type | Digital LED |
| Color | Red (LED display) |
| Product Dimensions | 27.6 inches (W) x 6.5 inches (H) x 1.4 inches (D) |
| Power Source | Corded Electric (USB adapter) |
| Power Cord Length | 10 feet |
| Mounting Type | Ceiling Mount (Suspension Chains, Telescopic Rods) |
| Special Features | Double-sided display, Adjustable Brightness (8 levels + Auto), Alarm (up to 16 sets), Calendar Display, Large Display (5.9in font), Timer (Countdown, Stopwatch), Temperature Display, Setting Backup |
| Backup Battery | 2 CR2032 batteries (for settings memory, not included) |
| Material | Acrylonitrile Butadiene Styrene (ABS), Alloy Steel (frame) |
| Indoor/Outdoor Usage | Indoor |
Setup and Installation
The CHKOSDA Digital Wall Clock is designed for ceiling mounting. Ensure the mounting location is suitable and can support the weight of the clock.
1. Power Connection
- Connect the provided USB power cable to the clock.
- Plug the USB power cable into the USB power adapter.
- Insert the power adapter into a standard electrical outlet. The clock will power on and display the default time.
- Note: The clock requires 2 CR2032 batteries (not included) for memory backup of settings during power outages. Install these batteries in the designated compartment if you wish to retain settings without power.
2. Mounting Options
Two primary mounting methods are provided:
Option A: Suspension Chains
- Identify two secure points on the ceiling where the clock will hang. These points should be spaced appropriately to support the clock evenly.
- Install the provided mounting hardware (screws and anchors) into the ceiling at these points.
- Attach the suspension chains to the installed hardware.
- Carefully attach the clock to the suspension chains using the integrated hanging points on the top of the clock. Ensure it is level and securely fastened.
Option B: Telescopic Rods
- Install the base plates of the telescopic rods onto the ceiling using the provided screws and anchors. Ensure they are aligned and spaced correctly for the clock.
- Attach the telescopic rods to the base plates.
- Adjust the length of the telescopic rods to achieve the desired hanging height.
- Securely attach the clock to the bottom ends of the telescopic rods. Verify stability before releasing the clock.

Image: The double-sided display allows for clear viewing from multiple directions, as shown in a public setting.
Operating Instructions
The clock is operated primarily using the included remote control. Ensure the remote has working batteries (not included, typically AAA). Point the remote directly at the clock for optimal response.
1. Basic Display Modes
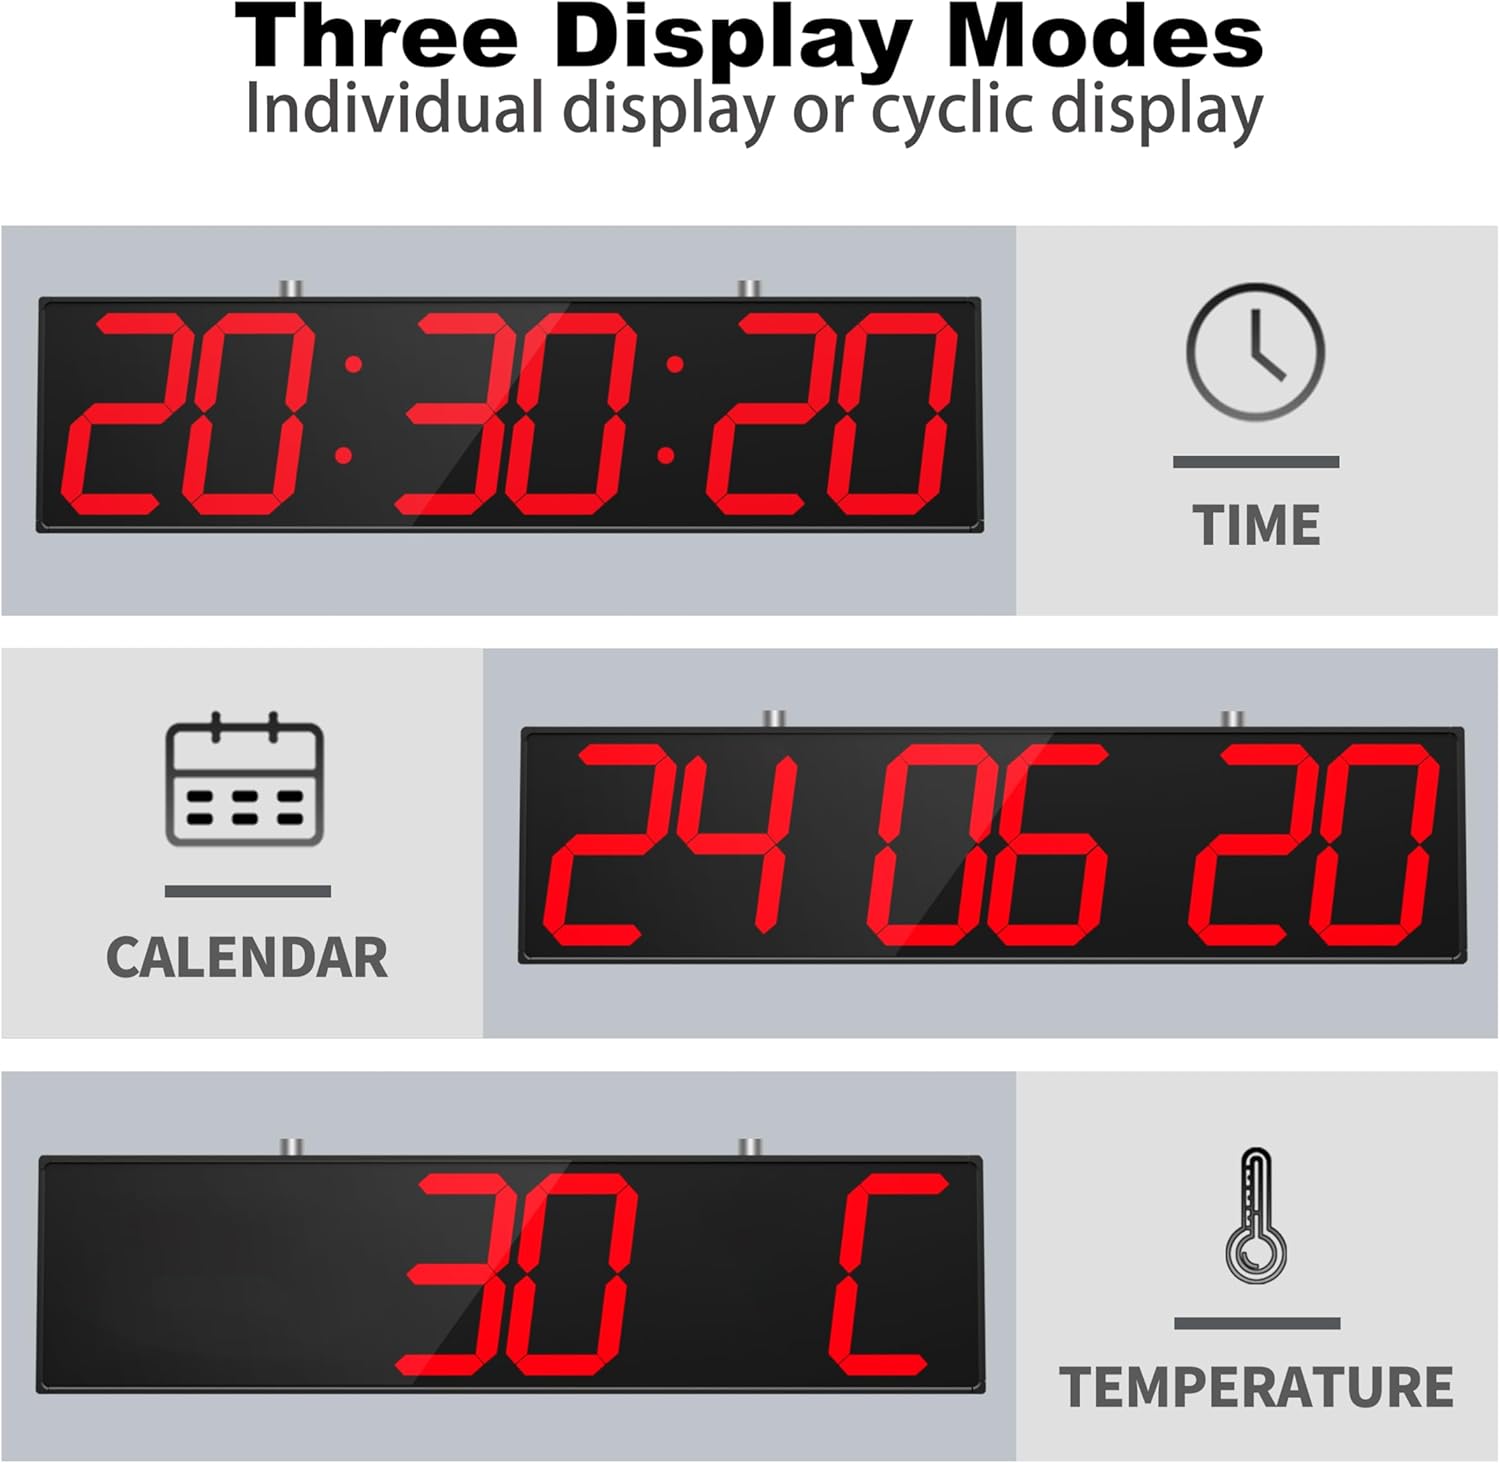
Image: The clock can display time, date, or temperature individually, or cycle through them.
- Time Display: The default mode shows the current time (HH:MM:SS).
- Date Display: Press the "DATE" button on the remote to display the current date (DD MM YY).
- Temperature Display: Press the "TEMP" button on the remote to display the current temperature (in Celsius or Fahrenheit).
- Cyclic Display: The clock can be set to cycle automatically through Time, Date, and Temperature displays at approximately 4-second intervals. Refer to the remote control section for specific button functions.
2. Setting Time and Date
- Press the "SET" button on the remote. The hour digits will start flashing.
- Use the "UP" and "DOWN" arrow buttons to adjust the hour.
- Press "SET" again to move to the minute digits, then adjust with "UP" and "DOWN".
- Continue pressing "SET" to cycle through setting seconds, year, month, and day.
- After setting the day, press "SET" one last time to save and exit the setting mode.
- To switch between 12-hour and 24-hour format, press the "12/24H" button on the remote.
3. Brightness Adjustment

Image: The clock offers both automatic brightness adjustment and 8 manual brightness levels.
- Manual Adjustment: Use the brightness control buttons (often labeled with sun icons or +/-) on the remote to cycle through 8 fixed brightness levels.
- Auto-Sensing Mode: Press the "AUTO" button on the remote to enable automatic brightness adjustment. The clock will then adjust its display brightness based on ambient light conditions.
4. Timer Functions (Countdown/Stopwatch)
- Countdown Timer:
- Press the "COUNTDOWN" button.
- Use the number buttons on the remote to input the desired countdown duration (e.g., HH:MM:SS).
- Press "START/STOP" to begin the countdown. Press again to pause/resume.
- Press "RESET" to clear the countdown.
- Stopwatch:
- Press the "STOPWATCH" button. The display will show 00:00:00.
- Press "START/STOP" to begin the stopwatch. Press again to pause/resume.
- Press "RESET" to clear the stopwatch.
5. Alarm Functions
The clock supports setting up to 16 individual alarms.
- Press the "ALARM" button on the remote.
- Use the "UP" and "DOWN" arrows to select an alarm slot (e.g., A1, A2, etc.).
- Press "SET" to enter the alarm time setting for the selected slot.
- Adjust the hour and minute using "UP" and "DOWN" arrows, pressing "SET" to confirm each.
- After setting the time, you may have options to set alarm duration or recurrence (refer to specific remote button labels if available).
- Press "SET" to save the alarm.
- To enable or disable an alarm, select the alarm slot and press the "ON/OFF" button (if available on remote).
- When an alarm sounds, it will typically last for one minute. Press any button on the remote to silence it.

Image: The clock's versatility makes it suitable for various public and institutional settings.
Maintenance
- Cleaning: Use a soft, dry cloth to gently wipe the display and casing. Avoid abrasive cleaners, solvents, or spraying liquids directly onto the clock.
- Power: Ensure the clock is connected to a stable power source. Disconnect power during electrical storms or if the clock will be unused for extended periods.
- Battery Replacement: If the clock loses its settings after a power outage, the CR2032 backup batteries may need replacement. Carefully open the battery compartment, replace the old batteries with new ones (2 x CR2032), and ensure correct polarity.
- Environment: Keep the clock in an indoor environment, away from direct sunlight, extreme temperatures, and high humidity.
Troubleshooting
| Problem | Possible Cause | Solution |
|---|---|---|
| Clock does not power on. | No power, faulty adapter/cable. | Check power connection, ensure adapter is plugged into a live outlet. Try a different USB port or adapter if available. |
| Display is too dim or too bright. | Brightness setting incorrect, auto-dimmer active. | Use the remote control to adjust brightness manually or toggle the "AUTO" dimmer mode. |
| Clock loses time/settings after power outage. | Backup batteries are dead or missing. | Install or replace the 2 CR2032 backup batteries. Ensure correct polarity. |
| Remote control not working. | Dead batteries, obstruction, out of range. | Replace remote control batteries (AAA). Ensure no obstructions between remote and clock. Point directly at the clock. |
| Temperature display is inaccurate. | Clock placed near heat source/vent. | Relocate the clock away from direct heat sources or air vents for more accurate readings. |
Customer Support
For further assistance or inquiries, please contact CHKOSDA customer support through your purchase platform or visit the official CHKOSDA store page.
CHKOSDA Store: Visit CHKOSDA Store on Amazon