
1. Introduction
This user manual provides detailed instructions for setting up, operating, and maintaining your EasySMX X15 Wireless Controller. Please read this manual thoroughly before use to ensure optimal performance and longevity of your device. The EasySMX X15 is a versatile multi-platform gaming controller compatible with PC, Switch, Android, iOS, and Tesla systems, featuring RGB lighting, Hall Effect joysticks and triggers, and programmable buttons.
2. Package Contents

Image: Contents of the EasySMX X15 Wireless Controller package, including the controller, USB-C cable, wireless receiver, and user manual.
- 1x EasySMX X15 Wireless Controller
- 1x USB Type-C Data Cable
- 1x 2.4GHz Wireless Receiver
- 1x User Manual
3. Product Overview
3.1 Controller Layout

Image: Front view of the EasySMX X15 Wireless Controller, highlighting the joysticks, D-pad, action buttons (A, B, X, Y), function buttons, and RGB lighting zones.
The EasySMX X15 controller features a standard gamepad layout with two analog joysticks, a D-pad, A/B/X/Y action buttons, shoulder buttons (LB, RB), and triggers (LT, RT). It also includes dedicated function buttons for various system controls and two programmable back paddles (M1, M2).
3.2 Key Features
- Dazzling RGB Lighting: Customizable lighting on joysticks and grips with 7 colors and 2 lighting modes.
- Multi-platform Compatibility: Supports PC (Windows), Nintendo Switch, Android, iOS, Tablets, Steam Deck, Raspberry Pi 3B, and Tesla.
- Triple Connection Modes: 2.4GHz wireless (via dongle), Bluetooth, and wired (USB-C).
- Ultra Long-life Battery: Built-in 1000mAh lithium battery providing over 20 hours of continuous use.
- Hall Effect Joysticks & Triggers: Ensures no dead zone, drift-free, no delay, and precise control with contactless electromagnetic induction.
- Two Programmable Buttons (M1, M2): Located on the back for easy customization and complex operation simplification.
- Adjustable Vibration: Dual vibration motors with 3 adjustable levels for immersive feedback.
- Turbo Function: Enables rapid-fire for selected buttons.
- One-Button Wake-Up: Conveniently wake up the controller with a single press.
- Anti-slip Grips: Laser-engraved texture for comfortable and sweat-resistant handling.
4. Charging the Controller

Image: The EasySMX X15 controller connected via its USB-C port for charging, illustrating the internal battery and charging indicators.
The controller is equipped with a 1000mAh rechargeable lithium battery. Before first use, it is recommended to fully charge the controller.
- Connect the supplied USB Type-C data cable to the charging port on the front of the controller.
- Connect the other end of the cable to a USB power source (e.g., PC, USB wall adapter).
- The LED indicators on the controller will show the charging status. A full charge typically takes approximately 3 hours.
- Once fully charged, the indicators will change, and the controller will provide over 20 hours of continuous gameplay.
5. Connection Modes

Image: Visual representation of the three connection modes (2.4G, Bluetooth, Wired) and the compatible devices for each, including PC, Mac, phones, tablets, Switch, Android TV, Steam Deck, Raspberry Pi, and Tesla.
5.1 2.4GHz Wireless Connection (for PC)
- Insert the 2.4GHz wireless receiver into an available USB port on your PC.
- Turn on the controller. It will automatically attempt to connect to the receiver.
- Once connected, the indicator lights on the controller will stabilize, indicating a successful connection.
5.2 Bluetooth Connection (for Switch, Android, iOS, Tablet, Tesla)
- Ensure the controller is powered off.
- Press and hold the Home button (or specific pairing button as per manual) until the indicator lights flash rapidly, indicating pairing mode.
- On your device (Switch, Android, iOS, etc.), go to Bluetooth settings and search for new devices.
- Select "EasySMX X15" (or similar name) from the list of available devices to pair.
- Once paired, the indicator lights on the controller will stabilize.
5.3 Wired Connection (for PC, Android TV Box)
- Connect the USB Type-C data cable to the controller's port.
- Connect the other end of the cable to a USB port on your PC or Android TV Box.
- The controller will automatically switch to wired mode and be recognized by your device.
6. RGB Lighting Control
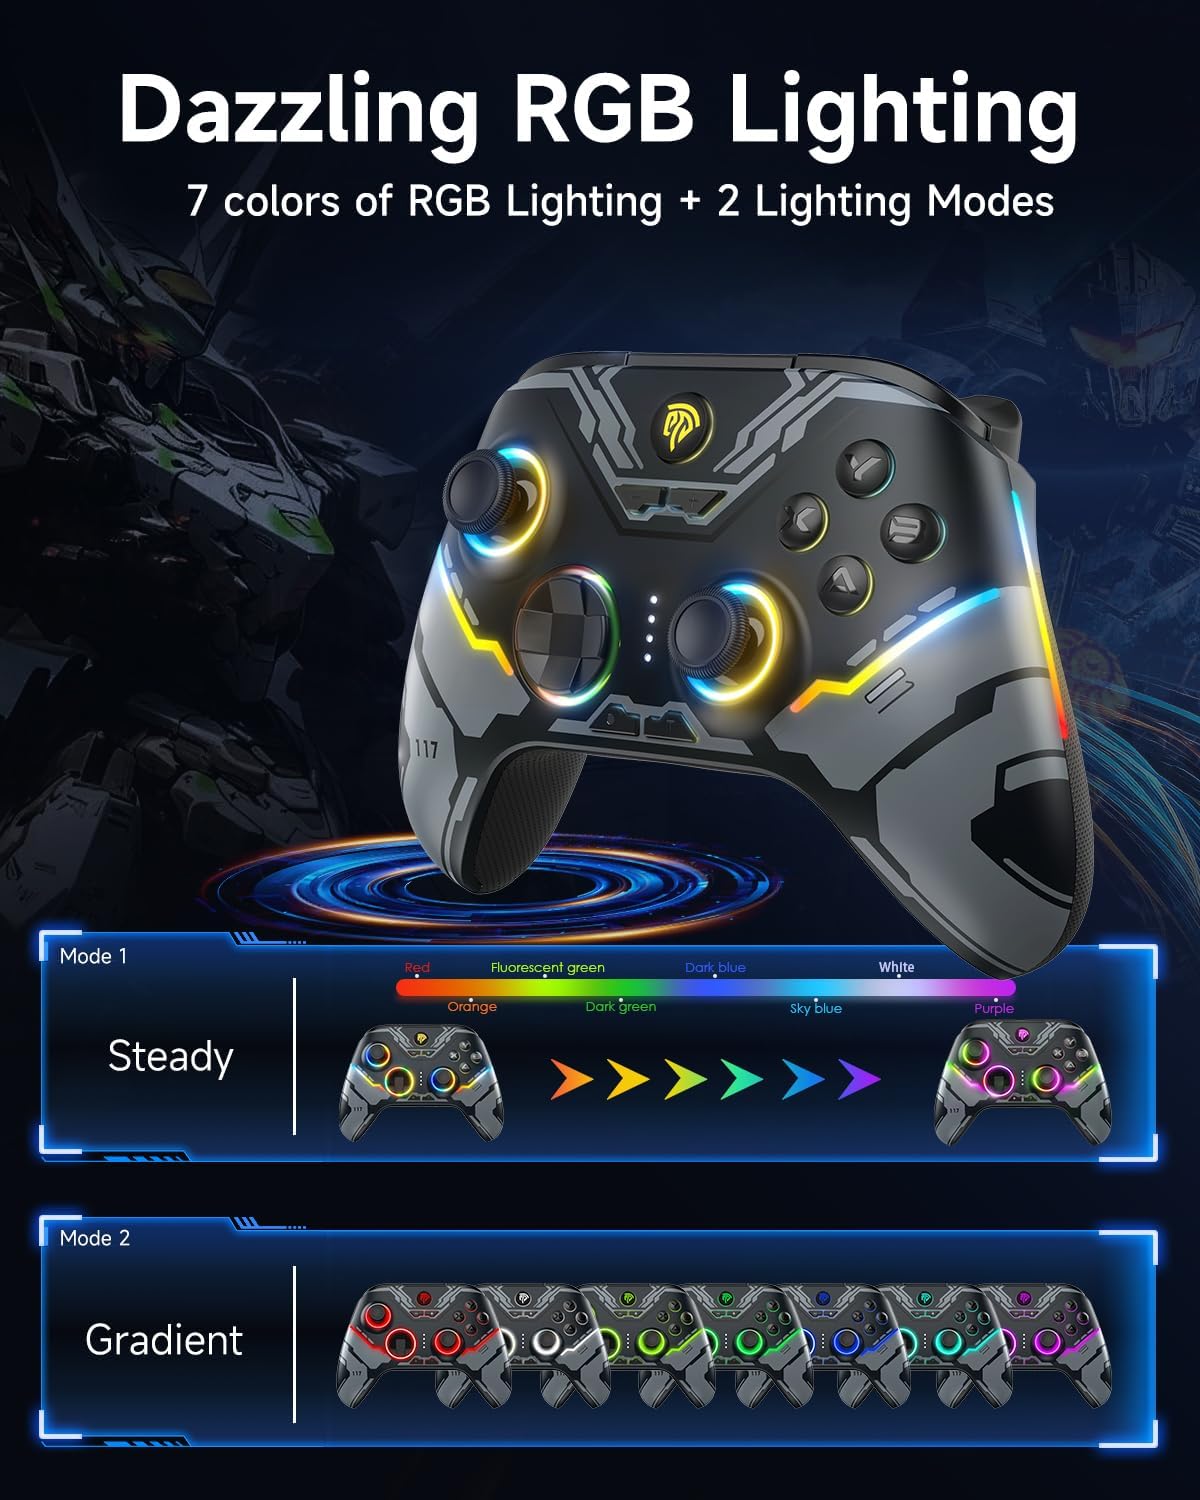
Image: The EasySMX X15 controller displaying its vibrant RGB lighting, illustrating both the steady color mode with 7 distinct colors and the dynamic gradient mode.
The EasySMX X15 controller features dynamic RGB lighting on its joysticks and grips, offering 7 distinct colors and 2 lighting modes (Steady and Gradient).
- To cycle through lighting colors or modes, refer to the specific button combination in your physical user manual. (Typically involves a dedicated light button or a combination with the Home button).
- To turn off the RGB lighting, use the designated button combination.
7. Programmable Buttons (M1, M2)

Image: Rear view of the EasySMX X15 controller, showing the M1 and M2 programmable paddle buttons and an illustration of how they can be mapped to other controller inputs like R3, L3, ABXY, LT, and RT.
The M1 and M2 buttons located on the back of the controller can be programmed to replicate other button inputs, simplifying complex actions during gameplay.
7.1 Programming Instructions:
- Press and hold the Program button (usually a small button near M1/M2 or a combination with another button) until the indicator light flashes.
- Press the M1 or M2 button you wish to program.
- Press the button(s) you want to map to M1/M2 (e.g., A, B, X, Y, LB, RB, LT, RT, L3, R3).
- Press the Program button again to save the setting. The indicator light will stop flashing.
To clear a programmed button, repeat the programming steps but do not press any input button after selecting M1/M2, then press the Program button again.
8. Turbo Function

Image: The EasySMX X15 controller illustrating the Turbo function, showing adjustable rapid-fire rates of 8/s, 16/s, and 21/s.
The Turbo function allows a button to be repeatedly pressed automatically as long as it is held down, providing a rapid-fire effect. This can be useful in games requiring quick, repeated inputs.
8.1 Activating Turbo:
- Press and hold the Turbo button (usually a dedicated button or a combination).
- While holding the Turbo button, press the action button you wish to apply Turbo to (e.g., A, B, X, Y, LB, RB, LT, RT).
- Release both buttons. The selected button now has Turbo enabled.
8.2 Adjusting Turbo Speed:
Some controllers allow adjusting the Turbo speed (e.g., 8/s, 16/s, 21/s). Refer to your physical manual for specific instructions, which often involve holding the Turbo button and moving an analog stick up or down.
8.3 Deactivating Turbo:
- Press and hold the Turbo button.
- While holding the Turbo button, press the action button that has Turbo enabled.
- Release both buttons. Turbo is now deactivated for that button.
- To clear all Turbo settings, press and hold the Turbo button for 5 seconds.
9. Vibration Adjustment

Image: The EasySMX X15 controller highlighting its dual vibration motors and indicating three adjustable vibration levels for enhanced gaming immersion.
The controller features dual vibration motors for immersive haptic feedback. You can adjust the vibration intensity to your preference.
- To adjust vibration intensity, press and hold the Vibration button (or a combination like Turbo + Left Analog Stick Up/Down).
- Cycle through the 3 available levels (High, Medium, Low, Off) until you reach your desired intensity.
10. Hall Effect Joysticks and Triggers

Image: Detailed diagram illustrating the internal mechanism of the Hall Effect Joysticks, emphasizing features like no dead zone, drift-free operation, and no input delay.

Image: Detailed diagram illustrating the internal mechanism of the Hall Effect Triggers, highlighting their accuracy up to 0.1mm, contactless electromagnetic induction, and frictionless, smoother feel.
The EasySMX X15 utilizes advanced Hall Effect technology for both its joysticks and triggers. This technology uses magnetic fields instead of physical contacts, offering several advantages:
- No Dead Zone: Ensures immediate response to even the slightest input.
- Drift-Free: Eliminates the common issue of joystick drift over time.
- No Delay: Provides instantaneous input registration for precise control.
- Increased Durability: Reduces wear and tear compared to traditional potentiometers.
- High Accuracy: Triggers offer precision up to 0.1mm for nuanced control in racing or shooting games.
11. Troubleshooting
| Problem | Possible Cause | Solution |
|---|---|---|
| Controller does not turn on. | Low battery; Power button not pressed correctly. | Charge the controller fully. Press and hold the power button for 3-5 seconds. |
| Cannot connect wirelessly. | Out of range; Interference; Incorrect pairing mode; Dongle not properly inserted. | Ensure controller is within range. Reduce interference. Re-enter pairing mode. Re-insert 2.4GHz dongle or re-pair Bluetooth. |
| Buttons or joysticks unresponsive. | Software glitch; Low battery; Driver issue (PC). | Restart the controller and device. Charge the controller. Update or reinstall controller drivers on PC. |
| Vibration not working. | Vibration turned off or set to low; Game does not support vibration. | Adjust vibration intensity (see Section 9). Check game settings for vibration support. |
| Input lag or delay. | Wireless interference; Distance from receiver/device; Low battery. | Move closer to the device. Ensure no strong wireless interference. Charge the controller. Try wired connection. |
12. Specifications
- Model: EasySMX X15
- Connectivity: 2.4GHz Wireless, Bluetooth, Wired (USB-C)
- Compatibility: PC (Windows), Nintendo Switch, Android, iOS, Tablets, Steam Deck, Raspberry Pi 3B, Tesla
- Battery: 1000mAh Lithium-Polymer
- Charging Time: Approximately 3 hours
- Continuous Use Time: Over 20 hours
- Joysticks & Triggers: Hall Effect
- Programmable Buttons: M1, M2 (on back)
- Vibration: Dual motors, 3 adjustable levels
- Weight: 280 Grams
- Color: Black
13. Maintenance and Care
- Keep the controller away from extreme temperatures, direct sunlight, and humid environments.
- Avoid dropping or subjecting the controller to strong impacts.
- Clean the controller with a soft, dry cloth. Do not use chemical cleaners or abrasive materials.
- When not in use for extended periods, store the controller in a cool, dry place.
- Charge the controller at least once every three months to maintain battery health.
14. Warranty and Support
The EasySMX X15 Wireless Controller comes with a 12-month manufacturer's warranty from the date of purchase. This warranty covers defects in materials and workmanship under normal use.
For technical support, warranty claims, or any questions regarding your EasySMX product, please contact EasySMX customer service through their official website or the retailer where you purchased the product. Please have your purchase receipt and product model number (EasySMX X15) ready when contacting support.
Note: Information regarding spare parts availability and software updates is not available at this time.


